It is almost impossible to take a shower or bath without drops and splashes of water flying in all directions, so the bathroom is often damp and damp. The result is mold and mildew, the cost of treating the bathroom, or even a complete replacement of the finish. But in order to reduce the amount of moisture remaining in the room after hygiene procedures, it is enough to simply install a structure there, which is called a bath screen, partition or protective screen.
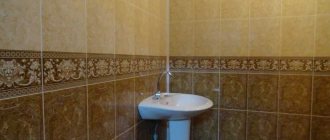
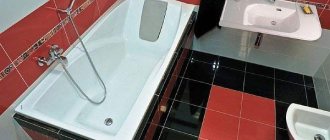
Bathroom screen
Bathroom screen
In modern stores they are sold in a large assortment, that is, choosing a suitable screen will not be difficult at all, but before purchasing it will be useful to find out about the features and characteristics of different products.
Advantages of screens and recommendations for selection
The previously widely used simple curtains are no longer so popular. They were mainly taken because of the low price. This element of protection is a losing option compared to screens.
- The bathroom screen perfectly protects the floor and walls from moisture flying everywhere.
- Does not require special care or frequent cleaning.
- Prevents the appearance of fungus.
- The screens are very convenient: they do not stick to the body during washing, and a draft will not open them.
- Glass and plastic will last longer than oilcloth or rubberized fabric.
- The installation of the structure is quite simple; you can do it without the help of a specialist. This design can be mounted in bathrooms of different layouts. And in order to make the right choice, you should know the features of different screens.
When choosing a screen for your bathroom, first of all you should take the correct measurements.
Possible breakdowns
Even the simplest design is short-lived. Breakdowns can happen at any time. First, you should look at the main types of breakdowns of shower screens. These include:
- door damage (breakage of the mechanism responsible for opening);
- mechanical damage to the section fabric;
- breakdown of related fittings (handle, frame profile, fastening element).
Any of these malfunctions requires immediate elimination. Basically, to solve the problem, the element is replaced.
What to consider when choosing a screen (corner bath or straight)
To select a screen correctly, you need to adhere to some rules. First of all, you need to take measurements, and when choosing, take into account that there is a gap for ventilation between the ceiling and the top of the screen. If the wall partitions are uneven or there are distortions, you should choose screens that have adjustable hinges. The size of the room also matters.
If you are installing a bathroom screen for the first time, it is better to build a single-leaf fixed frame structure - it is absolutely functional, but does not cause much trouble with installation.
For a small bathroom, transparent designs are ideal. If the bathroom is combined, multi-colored screens or with a matte finish are most suitable. But in this case additional lighting will be required.
In spacious rooms it is better to install “accordions” or hinged screens.
The strength and service life of the screen depend on the quality of the fittings (fasteners, rollers, hinges) and proper installation. Here you must follow the instructions, be precise and careful.
Customer Reviews
Models from the manufacturer Iddis have positive reviews in their favor. Consumers like the compactness and appearance. The price-quality ratio is also satisfactory. The only thing is that some users had difficulty assembling the structures.
But many people are satisfied with the models from AM-RM only in size and appearance. The quality lets us down. In many reviews you can read about the presence of manufacturing defects.
Having studied customer reviews, it can be noted that foreign manufacturers, such as Alex Baitler (Germany) or Ideal Standard (Belgium), produce designs that fully meet all requirements. Russian companies (Iddis, Erlit, MetaKam) practically do not lag behind in quality. Chinese models are considered the cheapest, but with proper installation and operation, they can last quite a long time.
How not to buy, but to make it yourself
If you want to make a screen yourself, go for it, it’s not that difficult, it doesn’t require a lot of expense or certain skill.
So, you will need: colorless plastic panels, an aluminum profile of the required size, fasteners, a handle, and sealant. In addition, you will need a hammer drill and attachments for it, a saw or grinder, a stationery knife, a screwdriver, a building level, a pencil, a measuring strip or a tape measure.
First of all, we take measurements of the future screen, taking into account that a gap is needed between the top of the structure and the ceiling for the passage of air. Then we make marks on the material and cut out the details. The edges must be cleaned and the handle secured.
We prepare guides of the required size from the profile.
On the wall partitions we mark the fixation points for the guides; for this we use a building level. We make holes with a puncher, attach the profile to the wall partition using dowels, having previously applied sealant to it.
We fix one of the guides with sealant to the side of the bathtub and let it dry thoroughly.
After a while, we check whether all the elements are securely fixed, then we insert part of the plastic panel into the resulting frame.
We check that it does not wobble and slides freely along the guides.
Additional Information. A screen made by yourself will meet all the characteristics and create coziness in the bathroom.
Any craftsman should know the principles of installing a screen in the bathroom. Only in this case the work will be done at a high level, and the design will delight you for many years.
The screen not only protects walls, floors and furniture from water, but also effectively decorates any interior.
A few words about what I will install
The bath screen was purchased from Leroy Merlin. I’ll give you a table below regarding the range and prices, as I’ve seen a lot of interesting things.
The Chinese partition is called Primo, made of tempered thick frosted glass. In terms of weight, this is exactly glass, since plastic is many times lighter.
Metal rails are attached to the partition, which will bear the load from the partition. Considering that the glass partition weighs a lot, the rail needs to be mounted only on a strong, dense wall.
How to determine which wall is vicious and which is not?
- The wall, which has not been repaired since Soviet times, clearly requires repair;
- If the tiles come off in places, the mounting surface also needs to be strengthened;
- If the sound varies too much in tone when you tap the wall, then the wall may not be strong enough.
If the mounting surface is not properly reinforced, the rail may be torn out with dowels, I don’t even want to talk about what this will lead to.
Installation work
I have listed the main installation steps in the diagram.
When performing installation work, the following materials and tools were used:
- glass partition in the configuration specified by the manufacturer;
- silicone or acrylic sealant;
- dowels (choose the length according to the type of wall);
- masking tape;
- water level;
- screwdriver;
- measuring tool and pencil;
- electric drill with drills for the diameter of the dowels;
- Manufacturer's instructions for installing the partition in case any questions arise.
Well, all that remains is to find out how bathroom screens are installed. Installation work was carried out as follows:
- I unpacked the packaging and laid out the partition and components so that everything was easy to reach;
- I dismantled the side profile that came with the screen and separated the fastening rail;
- I marked the wall near the bathtub for the holes in the rail;
- I drilled holes in the wall to the depth of the dowels;
- I inserted dowel seals into the holes and hammered them in with a rubber mallet;
- I applied a strip of sealant to the reverse side of the rail;
- I attached the rail to the wall and screwed in the dowels;
- I inserted the profile into the rail and tightened the fixing screws;
- I installed glass in the profile, at the bottom of which I put a rubber seal;
- Then the glass was finally leveled and the fixing screws were tightened;
- I put plastic caps painted in the color of the profile over the fixing screws.
Now that you know how to install a corner bath screen,
I will list a number of recommendations for successful installation work:
- When making holes for dowels in the tile, we drill not in the perforation mode, but in the drilling mode;
- Before drilling holes, glue the surface of the tile with masking tape;
- In order to prevent the entry and accumulation of condensate, we fill all gaps with sealant;
- Silicone or acrylic sealant will dry for at least a day, so you can start using the bathtub no earlier than after 48 hours;
- When installing a glass partition, use work gloves with a rubberized working surface;
- If the wall is old, install the holder rail not with 2, but with 4 dowels and use longer dowels;
- Don’t forget that the screen kit includes instructions and look for an explanation there for every question.
What to buy
So, now you know how to install a screen in the bathroom yourself. All that remains is to decide what you can buy in the store today.
In the table I listed the screens that I saw and touched in the Leroy Merlin store.
In accordance with the type of production materials, I will note the following modifications of screens:
- Glass is a visually attractive option, the price of which is higher than the cost of other modifications;
- Plastic is the most common and most practical type to use.
In accordance with the opening method, the screen can be folding, sliding, swinging
. The design of the partition can be framed - the base is metal or plastic; frameless - strength is ensured by the thickness of the glass; combined - combines elements of frame and frameless structures.
How not to buy, but to make it yourself
Before buying a ready-made partition, I was interested in how to make a bath screen with my own hands. It turns out that this is quite possible.
Of course, a homemade screen will not look as great as a purchased product, but to save money, you can try. You can assemble a partition with your own hands from different materials, but I will talk about glass blocks and polycarbonate.
Polycarbonate is good for its light weight, and it is also easy to drill and cut.
In order to do this, you need to assemble a supporting frame, that is, a frame on which the sheet material can be fixed. To assemble the frame, it is advisable to use an aluminum profile; in extreme cases, you can use wooden slats, but they will have to be impregnated with drying oil so as not to rot and painted with moisture-resistant paint.
We apply sealant to the surface to which the polycarbonate will be adjacent so that condensation does not subsequently get into the gaps.
The obvious advantage of polycarbonate is its low price and large selection of colors. As a result, the partition will not cost much and you can choose a color to match the interior decoration.
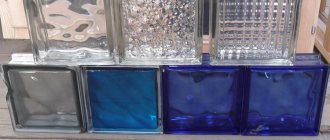
Glass blocks are a classic solution in arranging bathrooms. But, unlike the dull gray Soviet glass blocks, today you can buy almost transparent, carefully made blocks that will be a pleasure to work with, and the finished screen will look great.
The assembly of glass block structures is not much different from brickwork. I recommend using tile adhesive for exterior work as a masonry mortar as it is resistant to humidity and temperature fluctuations.
Choosing a screen design
The designs are very different, there are tinted, transparent, with a pattern, matte, they partially cover the bathtub or completely, while it looks like a shower stall.
Due to the fact that such a product can be made with your own hands, it is very popular among homeowners.
Today it is impossible to imagine a bathroom without this item. A screen can significantly change the look of a room for the better and create a harmonious design. When choosing the color of the screen, the degree of transparency, rely on your taste, and also take into account the color scheme of the bathroom and plumbing fixtures.
You need to work with glass without a frame carefully, because it is heavy and quite fragile, but the result of the work is worth all the effort.
Main features of the product
I think you have tried more than once to take a bath without splashing water around. No matter how hard you try, water splashes on the walls and floor. This is inconvenient and poses a threat to your health. You can solve this issue with the help of bathroom curtains, but often they are not entirely practical for everyday use. Then a screen will come to your aid.
A bathroom partition is practical, convenient and stylish
It has the following advantages:
- protection against splashing water;
- ease of cleaning;
- aesthetics.
The main disadvantage is the price. The cost of a partition is much higher than that of curtains.
But it will serve you for many years. Let's take a closer look at its features.
The screen will perfectly protect against splashing water when you bathe your child.
Screen based on plasterboard
The principle of constructing a plasterboard screen is exactly the same as when working with plastic. First, markings are applied to the bathroom floor. Next, a frame is built from a metal profile or wood. But there is a significant difference: when installing a frame under drywall, you need to take into account that the finishing also has a certain thickness. In particular, if it is planned to finish the screen with tiles, the frame must be “recessed” relative to the surface exactly at the distance that the finishing layer will occupy. If the facing material does not affect the wall thickness, then the projection of the frame onto the floor is plumb.
The second important point: for work in the bathroom, you only need special drywall, protected from moisture. In places where it is most likely to come into contact with water, it should be additionally primed. Drywall sheets are cut in accordance with the height of the screen, minus 2 cm.
The sheets must be secured by moving a centimeter away from the edge of the bathtub and from the floor to prevent swelling of the gypsum sheet. Direct contact with moisture or a wet surface is contraindicated even with special drywall (remember, it is green).
To fasten the sheets, use black self-tapping screws, screwing them in every 15 cm along the upper and lower profile. Pay attention to the size of the screws and the thickness of the profile: damaging the bathtub is not the best option for finishing the work.
After completing the fastening, the base of the screen must be primed entirely and sheathed with any material. This can be ceramic tiles or finishing with moisture-resistant wallpaper, film covering, decorative plaster. The voids near the floor and at the upper edge of the bathtub are filled with polyurethane foam.
To create a screen on a brick base, you need to build a half-brick thick wall under the bathroom. When making initial markings, it is necessary to take into account the thickness of the brick + 2 cm of glue + the thickness of the tiles, deepening the marks accordingly.
The masonry is done with each next brick offset by half (by the way, you can also read about a do-it-yourself brick bath on our website). This will prevent the wall from collapsing. You need to leave a window to access communications. The door is attached to the technological opening using canopies. The wall being built cannot be a support for the bathroom, since the top row of bricks should be 2-3 cm below the edge of the bathroom bowl. Polyurethane foam is poured into the gap, which seals the joint between the bowl and the wall.
To cover a brick base, tiles or plaster are suitable.
The screen under the bathtub can be made as drapery or covering made of fabric and other similar materials. The main thing is to choose quick-drying polyester fiber fabrics.
- Polyester materials work well in damp rooms.
- Fabrics with a membrane structure prevent the formation of fungus, allowing the space under the bath to be ventilated.
- Waterproof nylon materials are ideal for covering the screen.
- A good solution is to cover the frame with artificial leather.
- It is permissible to install panels with any finishing solutions that can withstand dampness.
For a triangular or corner bathtub, it is most convenient to use plastic or plasterboard shielding. Complex shapes ideally accept the front mosaic finish, beautifully emphasizing the contour of the bowl. Installation of curved screens also begins with the construction of the frame and then the trim is adjusted in place, in accordance with the smooth lines and curves of the bathtub.
Features and purpose
Screens for the bathroom, swing or rigid curtains, blinds - these are not all the names of this design. However, despite the wide choice of names, the screen essentially performs one task. During water procedures in the bathroom, drops of water and hygiene products partially fall on all surfaces in the room, including furniture. As a result, the room has a damp microclimate, which is fraught with damage to furniture, as well as the development of fungi and mold that are dangerous to humans, which entails the need for frequent repairs or the purchase of new pieces of furniture.
In addition, a wet floor is a rather dangerous surface on which adults and children can easily slip.
In order to eliminate the risk of such traumatic situations, as well as the formation of excessive moisture and dampness in the bathroom, it will be enough to acquire a special screen that will significantly reduce the level of moisture in the room.
This kind of protective shower screen is offered to consumers in supermarkets in a huge assortment , which guarantees them the purchase of a sliding, hinged or any other screen configuration made from durable and high-quality raw materials, having a variety of colors, and featuring a wide selection of decor for partitions.
Screens, like blinds and curtains, are a very useful attribute of the bathroom, but in comparison with the above analogues they have a number of undeniable advantages.
- the design provides maximum protection for walls, furniture and floors from water splashes: by installing doors instead of curtains, not a single drop of water will get outside;
- the screen does not require any specific care or installation of a curtain spacer;
- Various microorganisms can develop on ordinary curtains - the designs under consideration completely eliminate this problem;
- a wide selection of different models and shapes allows you to choose a design made of glass or polycarbonate, with or without a frame, due to which the design will be in perfect harmony with the overall interior of the bathroom;
- based on numerous customer reviews, the operation of screens is several times more comfortable, since standard curtains are often glued to the body and folded like an accordion when wet, and swing open from a draft;
- the raw materials from which the structures are made have a high level of durability;
- Any home owner can install the purchased products with his own hands.
Based on the above positive features of this product, having studied the types and models presented on the market, you can make the right choice.
Popular models
Product from the brand “Erlit”
Manufacturers that are in good demand are Erlit, Aquanet, AM-RM, MetaKam, Kolpa-san, Iddis, Alex Baitler, Ideal Standard, Primo, Mezzo. Their range includes various types of shower enclosures and screens, having different parameters and configurations.
Erlit products have a reliable and compact design. Due to the unique two-profile fastening system, they can be easily fixed even on uneven wall surfaces.
Screens from the manufacturer Aquanet are made in various shapes (triangular, semicircular and rectangular). This allows you to choose the right design, taking into account the dimensions of the bathroom.
AM-RM models are presented in different size categories. They often come complete with an acrylic tray. They have several door opening options. The advantage is the presence of a smooth opening mechanism.
MetaKam shower structures differ in their fittings. The frame is made of aluminum and coated with white paint. The glass sheet has various patterns. Fences are produced in semicircular and square shapes.
Ideal Standard designs are practical and compact. Glass sheets with a special Ideal Clean coating are used for the screen. Models with sliding, hinged and folding doors are available.
Varieties of design
Protective screens for showers and bathtubs are divided into frameless, framed and combined.
Depending on the method of connecting the panels to each other, partitions are:
- Stationary. Such curtains are fixed motionless and protect only that part of the bathtub where the shower stand is installed.
- Foldable. They consist of narrow sections that fold like an accordion. A convenient option for a corner or curved bathtub.
- Swing. The design is similar to doors; they consist of 1-2 leaves suspended on hinges. An inconvenient option for cramped bathrooms - it requires a lot of space to open freely.
- Sliding. The blades move along the guides, opening or closing the opening. For better sliding, roller systems are used. Versatile and compact option. Suitable for limited space.
Types of screens by folding type
There are three types of screens.
- Swinging doors are similar in design to regular doors, so they are more suitable for spacious rooms, as well as where corner baths are installed. Most models are made of glass or polycarbonate.
More suitable for corner baths. It is preferable to install in large rooms.
- Sliding ones are the most preferred option. This screen consists of canvases moving along guides. Suitable materials for it are plastic, glass. Suitable for any room, even small, and bathtubs can be either semicircular or straight.
Suitable for all types of baths, easy to use, do not take up much space.
- “Accordion” - ideal for bathrooms with oval or round bathtubs. It should be borne in mind that in a small room it will take up the available free space. The big disadvantage of such a screen is that the fastening at the joints quickly wears out and becomes deformed.
Plastic screen. MDF sheathing
A screen made of MDF or plastic lining will be the simplest option, which will allow you to immediately obtain a clean surface. The MDF screen is easy to disassemble, and the plastic casing is the most economical - if any part is damaged, it can be replaced.
Plastic for shielding the space is attached to a frame, for the formation of which a wooden beam 40 by 40 mm or a metal profile is used. A moisture-resistant primer is required for wood.
- MDF and plastic panels are cut in advance. To work with plastic, it is convenient to use a cutter or a construction knife. The surface of the screen is made up of panels, and where there should be a technological hole, a slot is made into which a grille or door is inserted.
In the finished plastic screen, it is also necessary to cut ventilation slots (on the side where there is no “window”). The recommended slot width is 3 by 5 cm. The ventilation hole is covered with a plastic grill.
Important! When installing a blind screen, make sure that all communications to which the screen will block access are in good condition.
Material of manufacture
The main materials for production are glass and plastic. Each of these materials has both disadvantages and advantages. Comparing glass and plastic, we can say that glass, although it has a high price, is much stronger than plastic. Another disadvantage of plastic is its short-lived aesthetics. Over time, it fades and loses its appearance, unlike glass.
Plastic screens are more affordable, but will last less. When choosing glass, you should not save money; it is better to choose a high-quality, expensive screen. Cheap glass tends to break, which is very traumatic. More expensive models are made of safety glass and are very reliable.
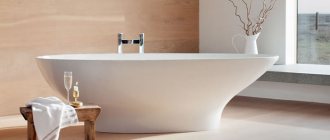
Glass screen
Glass is the most popular material for bathroom screens. It is easy to clean, so caring for it is a pleasure. You just need to wipe it with a damp cloth from time to time.
You can build interesting decorative partitions from glass. You can order a design to be applied to it or paint it yourself with special paints.
Tempered glass has high strength. It is almost impossible to break it. Therefore, this type of glass is most often used in interior design.
Conclusion
A glass bath screen, sliding or stationary, is the best option from both an aesthetic and practical point of view. However, you should consider the budget and design of the room. If you plan to do the work yourself, order glass production or contact a specialist so that he can give the material the required dimensions. Plastic is much easier to work with.
A partition made of such dense materials reliably protects the room from splashes of water. You can choose a product of any design, structure, shape, color and material. A wide range of products allows you to purchase a ready-made screen or all the necessary elements for self-production.
Step-by-step installation instructions
When choosing a screen for your bathroom, first of all you should take the correct measurements. Assess the size and shape of your bathroom and choose the most suitable option.
It is very important to install the screen correctly
Different types of structures have their own installation rules.
Assembly diagram
Sliding glass door installation
Prepare all the tools you will need for the job. The structure includes: profiles, rails, glass sections, fittings, gaskets, elements for protection against moisture.
Let's start installation:
- Attach the profile that secures the screen.
- Make markings for the rails.
Measure the dimensions clearly so that there are no gaps
- Drill the marked places and insert the dowels.
- Attach the profile with sealant applied to it.
- Attach the glass.
- Reinforce the seals in place of the gap left.
- Apply sealant to the voids.
It is better to entrust the installation of a glass door to a specialist
Installation of a plastic frame screen
You will need the same tools as in the previous instructions.
Procedure:
- Assemble the screen and attach all the necessary elements to it.
- Connect the door to the top of the frame and then to the bottom.
- Make holes for fastening.
- Attach vertical guides to the frame.
- Apply sealant to all joints between the screen and the wall.
- Put up a screen.
Be careful when assembling and unpacking to avoid damaging the screen
Step-by-step instructions for making it yourself
Decide on the size of the homemade partition and take measurements, then proceed to action:
- Cut the required size from the plastic profile.
- Make holes on the pre-made markings.
- Attach the profile using self-tapping screws.
- We fasten the lower and then the upper profile using sealant.
- Choose a place for the handle and secure it.
- Check opening and closing.
- The screen is ready.
As you understand, a bathroom partition is very convenient and practical.
There are many options for such bathroom protection on the modern market.
You can choose it from any material with an interesting design and install it yourself. If you are looking for a cheaper option, make the product yourself, following the manufacturing rules specified in this article.
Self-installation
Installation of a shower screen
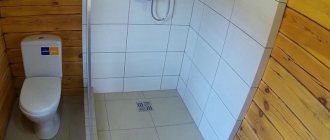
A shower screen is often installed at the installation stage of the pallet. For convenience, it is better to select a ready-made set of tray and fence - a shower enclosure.
Installation begins with preparing the site for the future structure. Since the main difference between a shower corner and a cabin is the absence of a rear fence (in this case, this role is played by the walls of the room), the first stage will be waterproofing the wall.
The second stage is the installation of the pallet. The drain elements are assembled and fixed to the sewer pipe. The location of the drain depends on the position of the pan. When installing the bottom, experts advise installing it with a slight slope towards the drain. This will ensure good drainage of water. The seams between the pallet and the wall are sealed using silicone mastic.
Installation of the screen begins with mounting the profile to the wall and to the edge of the pallet. Holes in the wall are pre-marked and made. Vertical profiles are screwed into the finished holes. Fixed sections of the screen are installed in them. Afterwards the fences are fixed.
The final step is to seal the seams in the fixed parts using silicone sealant.
A properly installed shower screen with your own hands will have a long service life.
Tips for use and care
Maintenance of such structures does not require specific skills or special care products. However, regular adherence to simple operating rules will allow you to preserve the original appearance of the product for a long time, and will also extend its service life. First of all, you should leave the adjustable flaps open after each use so that excess moisture does not accumulate inside. Glass structures can be treated with any composition, and it is better to wash polycarbonate with gentle household chemicals, otherwise there is a risk of damaging the surface.
All elements of the sliding design system must be lubricated from time to time. Drops of water may accumulate on the seals in the end parts, which can lead to the formation of mold - in such situations it is recommended to replace the components.
Following simple recommendations will allow the screen to become a decoration in the bathroom, which will additionally provide a high level of comfort during hygiene procedures.
To learn how to properly install a screen on a bathtub, watch the following video.
How to care for a homemade screen
To clean plastic, choose non-aggressive means: caustic chemicals and abrasive particles will damage the plastic surface, it will become scratched and cloudy. Polycarbonate sashes must be wiped dry after each shower - dried drops of water leave whitish marks on it that are difficult to remove.
A glass screen requires less maintenance. To clean it, use the same products as for the mirror.
Don’t forget about the hinges, rollers and rubber seals: they need to be cleaned and lubricated periodically.