Where are retro wiring parts produced?
As mentioned above, installing such wiring requires a number of different elements.
The fittings for installation, as well as the wires themselves, will have to be ordered from Italy. You can buy products from any manufacturer, but domestic users most often choose Gl Gambarelli or Fontini. These same manufacturers manufacture junction boxes, rollers and all types of switches.
The design of these elements is in an antique style. The main material used for production is porcelain. Without exception, all parts meet the most stringent fire safety requirements, so in this regard you can be absolutely calm.
This degree of quality and safety makes the devices quite expensive, so the entire open wiring project can require a significant financial investment. A fair question arises: is it possible to save money somehow?
Connecting the wire to the socket
The first thing that comes to mind is to contact a Chinese supplier for the same product. There is one on the market - this is the company Salvador. All its products are manufactured in China, but nevertheless comply with European standards. Because of this, its cost is approximately the same, so you won’t be able to save that much.
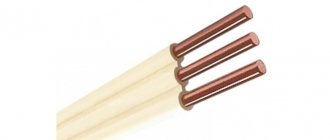
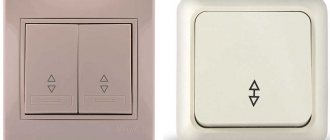
Wires, as a rule, are chosen according to the color of the top layer, and here only the taste of the buyer is important. For some, it will be enough to install a not very expensive single-color cable, for example, brown. Another will prefer the standard combination of white and black, which will be much more expensive. You also need to understand that retro sockets and switches for open wiring must match the color scheme of the cable, which can affect the budget.
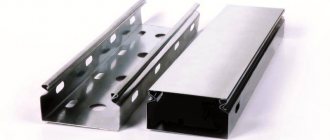
Most often, to save money, they do a mixed type of wiring. That is, some of the wires are beautifully located on the walls and create an antique interior, and some are hidden in wall partitions, special boxes, etc. Instead of the usual corrugated pipe, which is often used for laying wires, it is better to purchase a special cable channel that will match the color of the wall surface.
Experts recommend hiding ordinary wires that go from the input panel to the power supply of the groups under the casing or in boxes. It is better to run expensive decorative wire from junction boxes to wall structures to sockets and lighting equipment.
In most cases, this is enough to maintain the antique style. If you do exactly this, you can save about a third of the length of the wire, and, accordingly, a certain number of insulators and rollers, which will help save money.
The main thing is that the wires on the wall and cables remain visible, then the wiring can safely be called open.
To connect wire strands for open wiring, two standard and time-tested methods are used:
The first method is the simplest. You just need to strip the insulation of the two ends of the wire being connected and insulate the twist. If during the operation you use flux and do not spare the solder, then such a connection will last well for many years.
The second method involves the presence of special devices - terminal blocks. As in the first case, you first need to remove the insulating layer from the wires, and then connect them using this device. This method is used not only for connecting external wiring wires, but also “antique” and VVG cables.
How to make electrical wiring in retro style with your own hands
First, let's take a closer look at the main methods of purchasing components.
1. The simplest, but at the same time the most expensive financially, is to buy everything in a specialized store. Today, several companies offer antique electrical wiring in a variety of models and shades.
It is worth noting the products of Villaris, Salvador, Fontini, Bironi, Gusev. Essentially, these are modern cable products that have PVC insulation and are packaged on the outside in a non-flammable silk stocking, as well as modern sockets and switches, designed in the style of yesteryear.
When drawing up an estimate, you should focus on the following prices:
- 5 - 15 thousand rubles for a hundred-meter cable bay;
- 20 - 50 rubles for each roller - insulator;
- 600 - 3600 rubles for each switch or socket;
- 550 - 1800 rubles per unit of substrates, corner and rotary insulators.
With such wiring, “Loft” style lamps and Edison lamps will look natural.
The advantages include electrical safety and compliance with modern requirements, simplified installation compared to hidden wiring, and the ability to change routes during operation. In addition, there is a wide choice of both ebonite and porcelain with copper styling.
The disadvantages will be noticeable to anyone who understands the topic. Although, if such wiring is initially positioned as “similar to the real thing,” then there is nothing wrong with using modern products.
2. If you don’t like compromises and you need to maintain the style of the times of the birth of household electricity, your path lies in specialized forums. There they will help you assemble a completely authentic set of copper-rubber-fabric wires, porcelain insulators, ebonite or copper substrates, switches, sockets and sockets.
The cost of retro wiring in a wooden house will not be cheap, because you need to pay for the search and restoration of components from the beginning of the last century.
The main positive point is complete authenticity. No one can blame you for using a modern “antique stamp.” Only true retro without compromises. In addition, “twisted pair” on ceramic insulators is quickly installed and relatively safe.
The negative aspects of such an installation are obvious: although highly original, such wiring does not fit into modern ideas about the safety of electrical installations, because grounding was not yet provided for in those days, and the cross-section of the old wires is clearly not designed for modern power.
In addition, fifty-year-old copper wire has most likely already suffered from oxidation, the rubber insulation has dried out in places, and antique sockets and switches were made using phenol-formaldehyde resin, which emits an unpleasant and harmful odor when heated.
By the way, distribution boxes began to be used relatively recently, but in the old days, wires were woven together, wrapped around rollers and hidden under the outer insulation fabric.
3. If you are limited in funds, but have free time, you can independently find everything you need for installation. To do this, you need to patiently look for missing elements in the ruins of old houses, wash, restore, and possibly solder contacts.
It is useful to visit rural stores in remote areas, where you can still find porcelain insulators, ebonite junction boxes, and even switches with sockets.
Sockets and switches from the beginning of the last century, retro-style electrical wiring, and photos of vintage cars and mechanisms will help you immerse yourself in the past.
4. The last option is more suitable for designers. Its essence is to lay a dummy overhead wiring parallel to the existing hidden one.
As we noticed, the symbol of retro wiring is 2 wires twisted together in a silk braid and placed on a roller - an insulator. This is used to create an ambience.
Insulators are screwed onto the wall, any piece of wire suitable in length and appearance is installed on them, the free ends of which are attached to existing sockets and switches by any available means.
To enhance the effect, you can resort to “patination” by spraying the socket with an appropriate coating from an aerosol can.
Comments:
Victor
To me, this is dubious beauty. I don't see anything beautiful about open wires. Moreover, it is not always possible to firmly fix an open socket on the wall. Because dowels that will be drilled are not designed for the daily kinetic load from sticking/pulling out a plug
Electronic
Belarusian socket in a brass case - really pleased


