What does twisted pair and Wi-Fi have to do with it?
Dear reader, I have a free blog here - so if everything is not interesting, immediately scroll through the Contents to the sections of the article that interest you. I'll start from afar. In a galaxy far, far away...
The fact is that the central element of a home Wi-Fi network is now a router. A modern router usually has wired connections:
- From the router to the provider's network - the same cable from the entrance. There is regular Ethernet and telephone under ADSL - all these wires are called “twisted pair”. The first occurs more often, the second less and less often.
- From a router to a computer or laptop - sometimes the connection is made not via Wi-Fi, but via wire. Likewise, computers without an adapter can be connected to the Internet, and seasoned players say the ping will be better.
So in a home network there is nowhere without a twisted pair cable.
LAN network cable crimping diagram
There are only two ways in which you can crimp a LAN network cable. Usually direct crimping is used.
This method is ideal for connecting a TV, computer or laptop to the router via cable. At home, the wire must be crimped according to the diagram provided below. This method is called direct, and it is the simplest and most common in the absence of special tools.
The network cable for connection must be included with the equipment, so you do not have to buy it additionally. There are two types of crimp available for this option: T568A and T568B.
Connection diagram No. 1
The second method (Scheme 2) is called cross or cross. This cable can be used to connect several computers at home via a wire without a router.
Connection diagram No. 2
Important! If you have no experience working with wires, then it is advisable to call a specialist to your home. When he arrives for a call, the master will take the crimper with him and easily cope with the task.
Problem
One of the most common reasons for the loss of Internet at home is a cable problem. There are many options:
- A wire has frayed somewhere in the corner connections - it happens that someone shuffled it or kicked it.
- The connection in the connector is broken - the wire there is open, so it may break. Sometimes the connection just drops. And over time, the crimp “dries out,” so you still have to improve the connection.
The bottom line is that when replacing a wire or repairing a connector, you still have to somehow reattach those same connectors. But this procedure is called crimping. And you can do this completely at home yourself (I’m telling you as a seasoned admin, and it wasn’t in times like these that you were cutting the cable). But you need a little theory - this is not electrical wiring. So first, a little theory, and then let's move on to practice.
twisted pair
In the last section, we found out that twisted pair is a wire used for network connections in computer technology. Especially used at home to connect to the Internet.
It got its name from the building. Inside there are copper wires in a sheath, twisted in pairs. Twisting is done with a certain step depending on the number of such pairs. The whole point of such twisting is mutual cancellation of interference to improve the quality of the signal in the working network (after all, this wire also carries electricity, although not 220V, and reliability here is needed at a high level, but this is a topic for standards).
There are several types of twisted pair... Even many. The main classification is by device, not the main one - by protection. When installing at home, you will usually be dealing with a category 5 cable (if you want, look for it yourself, that’s not what the article is about).
In terms of protection, there is also nothing difficult - there is with protection, there is without protection. Protection does not mean from falling stools, but from the same interference that creates interference. This is usually not required at home, but you never know what you can get your hands on. The section is larger for the fact that you will have to open the cable during crimping, and you need to be prepared for anything) So a little anatomy for the system administrator and the home enthusiast to surf VKontakte.
So, there are pairs of wires inside - usually 2 or 4. The wire can be protected - we are talking about foil or braid. In this case, protection can be either for the whole wire or separately for each pair. There are a lot of subtleties, it’s better to open it right away and look locally. In home cable there is usually nothing like this - one braid, and there are pairs in it at once.
Twisted pair markings:
- UTP – regular, without protection, for home. If you need to restore a piece of your house and go to the store, just look for something like UTP5 - it will do just fine.
- FTP - with foil, also sometimes used indoors.
- SFTP – metal braid, used outdoors.
- STP – protection on each pair. When the wire is on the street near power lines (I hope you didn’t get caught there).
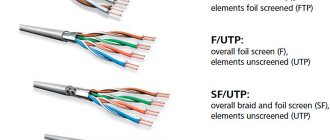
In total, the different options are arranged in the following figure:
An additional bonus is that there are multi-core and single-core cables. Stranded ones are used at home - the wire comes out flexible, just for active movements. It is better to use a single-core wire for industrial installation - up to the socket, the wire does not bend, but the signal transmission is much better.
I don’t even want to mention flammable and non-flammable, round and flat here - after all, this is not a system administrator’s textbook, but simply helping those in need at home. So if you have questions, run to the comments.
Wire selection and standards
In the last section I mentioned the categories of twisted pair, here we will consider this point in a little more detail. After all, the anatomy and transmission speed on the cord also depend on the category.
I recommended that you take category 5, but category 6 (CAT5, CAT6) is also suitable. All options are shown in the following table:
It will be important to choose a cable for the required speed. And this also depends on the number of wires inside. It usually happens like this:
- 2 pairs (4 wires) – up to 100 Mbps
- 4 pairs (8 wires) – from 100 Mbit/s
Typically, ISP technology limits you to 100 Mbps internet speed. But soon this threshold will be passed. What do I mean - usually there will be exactly 2 pairs on the Internet cable, but on home cables (from the router to the computer) there are already 4 pairs.
4 pairs, or 8 wires
Twisted Pair Categories
In addition to different types, it is also divided into categories with alphanumeric markings. There are 10 of them in total, and the higher the number, the higher the reliability and throughput.
- UTP Cat.1 – two cores without twisting or shielding. Outdated, not used.
- UTP Cat.2 – 4 cores. Outdated due to low bandwidth.
- UTP Cat.3 – 8 cores, twisted in pairs. Provides throughput up to 100 Mbit/s. The maximum line length is 100 m. Nowadays it is mainly used for laying telephone lines.
- UTP Cat.4 – 8 cores. Bandwidth – up to 16 Mbit/s. Outdated, not used.
- UTP Cat.5 – 4 twists. Maximum speed is up to 100 Mbit/s when using 2 pairs and up to 1 Gbit/s when using 4.
- UTP Cat.5E is an improved “version” of the previous category. A thinner and cheaper cable, but no less reliable. The most popular at the moment.
- UTP Cat.6E – 4 twists without screen. Bandwidth – up to 10 Gbit/s on a line up to 55 m long. The second most popular category.
- UTP Cat.6A – 4 twists, S/FTP or F/FTP. The capacity is the same, but the permissible length is increased to 100 m.
- UTP Cat.7 is an analogue of the previous category with a modified frequency band.
- UTP Cat.7A – 4 twists, S/FTP or F/FTP. Maximum speed is 40 Gbit/s over a line up to 50 m and 100 Gbit/s over a line up to 15 m.
Category 8 is also currently being developed, but it has not yet been put into mass use.
Crimping theory
And now we are approaching the crimping procedure. But there is still something to clarify, the final frontier.
You have all seen the connector at the end of a twisted pair cable, which also goes into the network connector of a network card or router. This plug has a special marking. The one that is mainly used now in the home local network is RG-45. A little about the connector design and connection.
- The twisted pair is installed in the connector socket.
- The twisted pair wires are routed through special grooves in the connector.
- The contact mechanism of the connector is knives. In store condition, they are separated, providing a path for the cable wires.
- When crimping, apply pressure to the knives, and they cut through the sheath and ensure tight contact with the wire cores.
- On the other hand, the contacts of the knives remain open - they provide a connection to the network adapter when connected.
Here is a picture of how the knives work:
And here is the connector in an enlarged view (the same wire tip or “jack”):
This connection is reliable and transmits the signal perfectly. But beginners may not be able to do enough at first - and either there will be no connection, or it will be established at a low speed (this is one of the reasons for the decrease in speed on the network). The best way to fix it is to squeeze it harder again, or re-press it again. In practice, at our university this procedure did not work out for everyone the first time - so everyone starts somewhere.
Does Wi-Fi cause cancer?
According to our statistics, only 7% of users know the correct answer to this question YES NO Reply
Wire, connector and crimper
A reliable connection is essential for safety. This will eliminate the possibility of electrical damage and will not disrupt communications. The connectors are fixed with crimpers. Each connector is designed for its own wire cross-section.
Before starting work, you need to calculate how much wire is needed. The distance between equipment should not be more than 100 meters.
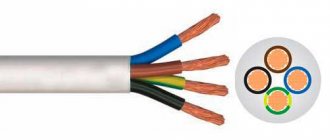
Twisted pair cables have become one of the most common cables. It is qualified by different degrees of protection: grounded copper or aluminum. The number of cores in such a cable can be 8, it is called 4 pairs, or four-core - 2 pairs.
The frequency of data transmission depends on the quality of the cable. This indicator is called CAT. The higher it is, the better the transfer speed.
To work with the cable, a special RG-45 connector is required. During operation, you need to connect the conductors correctly so that the connection is established.
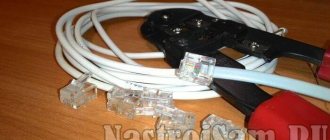
A crimper is a special tool for crimping a network cable. It helps connect two parts of the wire without soldering.
Where is twisted pair cable used and why is crimping needed?
The process involves installing a special connector at the end of the network cable. It is necessary to connect the cable and any device, for example, a computer, telephone, modem. The contacts on the network must be correctly connected to ensure good operating conditions for the devices.
Tools
The main thing when crimping is to make a high-quality cut with knives on the shell. And for this you need to create the right strong pressure on the contacts. Well, we couldn’t do it without creating tools, although we can do without them.
Pros use a special tool - crimping pliers, or crimper. I’ve also seen names like “wire crimpers” or “connector crimpers.” Here, who already has what taste, you will probably hear some other versions.
This thing isn't that expensive. You can find a working copy for less than 1000 rubles. For a one-time repair at home, the thing is useless. But their main feature is their functionality tailored for twisted pair cables:
- Cut the braid exactly to the level of the wires
- Stripping wire insulation down to the core
- Simultaneous crimping of all knives with the required force
- Sometimes there is a socket for crimping and telephone cable (RG-11)
This is what they look like:
No tool
In my life I have seen many crimping methods. But the most interesting of them was teeth, because... a person’s mother-in-law was a dentist... So sometimes you don’t even need a tool at all.
Another handy tool that everyone has is a screwdriver. Moreover, this is perhaps the most popular tool at home. The main thing is not to break anything and push through the contacts efficiently. If the connection is not established during the test, you just need to try again. The working method is difficult, everything constantly slides off - but without fish there is fish.
Another home helper is pliers. But my advice is that it’s better to suffer with a screwdriver. The pliers do not provide strong indentation (especially in the middle), and with great Russian heroic prowess they easily break the connector into small pieces.
Friends! Especially for lovers of something interesting and secret, we have our own closed club “Atlantis”.
- Daily up-to-date earnings schemes.
- Breakdown by level - at level 1 there is a bare public, at level 4 - a highly profitable private.
- For free. You just need to be on time. Only 3000 places for level 1.
Be sure to register, otherwise only 5 guest articles will be visible - LET'S GO.
Crimping diagram - pinout
And now the science itself. It’s one thing to apply pressure, another thing is to correctly insert the wires into the cores (and this is the most important thing in order to correctly crimp a twisted pair), and into both connectors - a random set will not work here. The order is very important. In total, the connector has 8 grooves for 8 cores. If 4-core wires are crimped, some of the grooves are left empty, the main thing is to get it right.
First, let's look at the classic crimping of an 8-core wire. There are 2 ways:
- Direct cable crimping (type B, 568B) is used in 99% of cases. Used to connect peripheral devices to a router/hub/switch.
- Cross crimp (crossover, type A, 568A) - used for direct computer-to-computer connections.
For reference . Now modern adapters understand both of these methods, but the first option of direct crimping remains preferable.
The names of twisted pair crimping circuits are taken from the way the wires are arranged in relation to each other. Look at the images below and you will understand everything. The main thing here is a view of the connectors from below (where there is no leg).
Direct crimp
Use this pinout diagram!
If the pictures are suddenly unavailable for some reason, the arrangement by color is:
1. White-orange 2. Orange 3. White-green 4. Blue 5. White-blue 6. Green 7. White-brown 8. Brown
Cross circuit
Four wires
Another option for 4 cores is the case when there are only 2 pairs. This is how they usually do it:
The whole point of proper pinout is to match the wires on both sides of the cable, without even knowing how the connector on the other side was crimped. An unspoken standard where you don’t have to run to the provider’s shield. The numbers 1-8 in the pictures are sometimes squeezed out on the sockets, this is for those who do not want to confuse the order.
Crimping a twisted pair cable without a tool (crimper)
To crimp a twisted pair cable without a crimper, you will need to use a flat-head screwdriver. Additionally, you will need nippers or scissors.
Procedure for crimping a twisted pair cable with a screwdriver
How to crimp an Internet cable yourself without crimping - procedure:
- Carefully remove the insulation by about 2 cm. A knife is used for this. The operation is quite simple: cut the insulation around the cable and carefully pull it off.
- Straighten all existing wires and separate them from each other by color. It is important that the wires do not intertwine; this will simplify the work and make it possible to carefully connect the plug to them.
- Next, you need to trim the wires and leave about a centimeter. This can be done using wire cutters. If this tool is not at hand, you can use regular scissors.
- After reading the diagram, check whether the wires are aligned correctly. After this, they can be connected to the connector. It should be positioned with a latch away from the master. It is important to place the wires so that they rest against the top of the connector. They should go in completely and rest against the wall.
- Just in case, make sure once again that the twisted pair goes into the connector correctly. After this, you can begin crimping. To do this, you will need a flat-head screwdriver, with which each contact will be pressed into the housing one by one.
Important! In order for the home cable and connector to be connected as firmly as possible, you need to press quite hard on the contacts, but you will have to make sure that the cable is not damaged. The wire should not only be equal to the connector, but extend slightly into the housing.
Pressing in the contacts with a screwdriver
When each contact is securely pressed in, you need to snap the cable clamp for greater reliability. It is pressed inward, pressing against the outer insulation. A similar operation must be performed with the second side of the cable.
Important! The contacts will be damaged when manipulating with a screwdriver; there is no need to pay attention to this, since the operation was carried out using a rough method. If you use a special crimping tool (crimper), such damage will not occur.
This completes the crimping, all that remains is to check the operation of the cable by connecting the computer and the router.
How to crimp a tool-free connector
On sale you can find a tool-free connector, the wires to which are connected without the use of special equipment, and even a screwdriver. All you need is a sharp knife to remove the insulation.
How to crimp a wire for the Internet without a tool - procedure:
- Using a knife or scissors, carefully strip the insulation from the wires.
- Place them in a special connector.
- Latch the port by hand.
Important! Along with the connector there are instructions that indicate the order in which to insert the wires. Once they are placed inside, you simply snap the port in place and the cable is crimped.
The problem with toolless connectors is that they are very difficult to find in regular electronics stores. Typically, such devices have to be ordered on the Internet.
Crimping procedure
Now let's move on to the correct way to crimp the cable. Be careful when working - the main thing is not to damage yourself, and the connectors are cheap)
Step 1. Remove the insulation
First, remove the insulation from the wire - you can carefully pry it off with scissors or use a stripper on a crimper - insert it, turn it, and the wrapper comes off. It is fragile and can be removed quite easily. You don't need to remove much insulation - a couple of centimeters from the end is enough. If anything happens, you can trim everything later. The pliers have special marks indicating at what level the coating should be cut.
Step 2. Straighten the wires
Now we take our wires, straighten them and arrange them according to the pinout diagram. From the recommendations - try straightening them with a pencil or hand - they become smooth and closely spaced to each other - which is what we need.
Step 3. Trim
Now is the time to cut and straighten our wires. We cut it either with wire cutters, or with the same pliers, or even with a knife. Leave about a centimeter of clean wire. With practice, you will learn to accurately check the distance.
Step 4. Getting into the connector
The hardest part. Now we need to insert our design into the connector. When inserted, the connector is positioned with the leg down. Why is it difficult - the wires try not to fall into their grooves, they crawl into neighbors, bend, and get tangled. Here the recommendation - patience and once again paying attention to the pencil treatment - helps.
Step 5. Insert all the way
After the hit, we press on the cable so that the wires go all the way. In this case, the wrapper will be hidden in the connector itself. If the wrapper does not fit into the connector, fractures are possible in the future. If the opposite turns out to be short, the wires will not reach the knives. So everything is done with experience and by eye.
Step 6. Crimping
Now is the time to tighten our knives - the methods were discussed above, but it is better to use pliers. Take it and live it.
Step 7. Check and refinement
Be sure to check the connection on your computer or router before putting away your tools. Sometimes it may not work out the first time. The easiest way to correct the situation before getting upset is to squeeze the knives again, but harder. It helps a lot.
If there is no connection, pay attention to this:
- Are the wires routed exactly according to the diagram? Didn't they fly out? Look through the connector.
- Have the wires reached the stop of the connector? Were the knives able to reach them?
The rest can only be attributed to cable failure.
Initially, before crimping the network cable, you can install these casings. They perfectly protect against bending near the connector, but in practice everything works without them. There are a lot of species, that’s not what the article is about. For reference.
Method 1: when everything is there
If by some miracle you have crimping pliers (crimper) and connectors, it’s a small matter.
The procedure is as follows:
Step 1
We take the old connector, turn its contacts towards us and look at the sequence of arrangement of the wires. There may be 4 or 8. You will probably come across one of the following options:
Although there may be more of them, since in a 4-wire cable pins 1, 2 and 3, 6 can be swapped:
Step 2
Now we strip the insulation, straighten the cores, arrange them in the required sequence, and cut off the excess, leaving 1 cm.
Step 3
We insert the wires into the connector, making sure that the wires do not get mixed up. We carry out quality control - if all the ends are visible, it means the cable is inserted deep enough.
Step 4
We insert the connector into the crimper socket, and, continuing to press the cable inside the connector, press firmly on the pliers. The tips of all cores should be clearly visible during crimping.
Step 5
Let’s check again to see if the wires have “moved away” during crimping? If at least one tip is lost, it is better to redo it.
