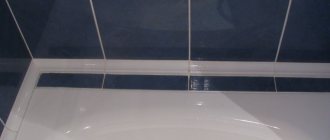
Contamination of tile joints in the bathroom is a common and fairly common occurrence. The formation of dirty deposits and black spots on grout joints is the result of the activity of mold fungi. Neither the high quality of finishing of joints by a master tiler, nor their treatment with the best silicone sealants with a fine-porous structure guarantee protection against mold.
The fact is that particles of dust, dirt, soap and moisture accumulate over time in microscopic depressions and pits, creating an ideal environment for the development of a microbial environment. Therefore, if you keep your home clean and care about your health, we bring to your attention several effective ways to clean the joints between tiles and bathrooms, which you can do yourself, without the help of specialists.
Why wash tile grout?
Many housewives are interested in why so much attention is paid to cleaning the joints between tiles. Actually the answer is quite simple. Firstly, darkened seams can ruin even the cleanest and most comfortable home interior. Secondly, a favorable environment is created between the tiles for the proliferation of pathogenic microorganisms and fungi. Therefore, if you do not clean the joints in a timely manner, you can catch one of the following fungal diseases:
- mycosis;
- dermatitis;
- asthma;
- respiratory tract diseases;
- pathologies of the musculoskeletal system;
- chronic fatigue.
Expert opinion
Evgeniy Taran
You can clean the seams between the tiles using professional products, folk remedies, and also mechanically. Let's take a closer look at the listed methods.
Reasons for darkening of joints between tiles
Ceramic tiles are strong, reliable, durable material. But the seams between the tile elements are less resistant to the external environment.
The reasons why tile joints darken may be the following:
- Untimely cleaning of tiles.
- Lack or poor ventilation. As a result, excess moisture accumulates in the bathroom and mold appears between the tiles.
- Absence or malfunction of the hood in the kitchen. Grease and oil splashes accumulate on the seams, leaving yellow stains.
- Low quality grout material used when laying tiles.
- Failure to comply with joint processing technology when installing tiles.
It is possible to return the tiles to their attractive appearance. To do this, you can do without replacing the tiles. You just need to update the grout mastic.
Mechanical method
It will take quite a lot of time to clean the tile seams from dirt. In such a case, you should clean the old grout between the tiles using the following proven methods:
- First you need to dissolve shavings of laundry soap in warm water. After that, dip an unnecessary toothbrush into the resulting liquid and use it to clean the seams between the tiles.
- It is better to clean off old stubborn dirt with sandpaper. The method of application is simple. You just need to rub a small piece of sandpaper over the blackened or yellowed seams on the tiles until they turn white.
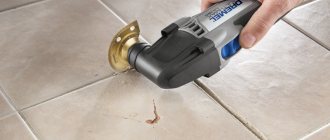
- If you need to deal with deeper dirt, it is better to use a more serious tool - a scraper or knife to clean the seams between the tiles. When deciding to clean the grout with a knife, you must act as carefully as possible so as not to spoil the tile.
Cleaning tools and supplies
You should not approach cleaning tiles and the seams between them with bare hands. It is better to prepare the necessary household items in advance.
During the process you may need:
- Thick rubber gloves to protect hands from aggressive detergents.
- A gauze bandage on the face to protect the mucous membranes if there are traces of black mold between the tiles.
- Goggles to prevent dirt particles and detergent splashes from getting into your eyes.
- Absorbent cotton rag.
- Microfiber cloths.
- A stiff metal brush (you can use an old toothbrush instead).
- A broom or large brush for sweeping up debris.
- Clean warm water.
- Detergent.
- A small metal knife.
- Sponge.
- Spray.
How to clean grout using household products
Undoubtedly, specialized household chemicals will help most effectively clean the seams between the tiles on the floor. Let's list a few tools that can easily put the space between tiles in order:
- A marker that removes dark spots and yellowing from grout, such as Snowball or Grout Aide & Tile Marker. Allows you to clean the grout between kitchen tiles in minutes. To remove black deposits, you just need to run a marker over the grout. As a result, the space between the tiles will become snow-white. In addition, such treatment protects the cleaned grout from fungus.
- Oxygen-based bleaches - Chistin, BOS or To clean the seams between the tiles in the bathroom, you will first need to dilute the active liquid in water in a one-to-one ratio. After which - thoroughly wash the floor. After thirty to forty minutes, clean off the blackening with the hard side of the sponge, and wash the floor again, only with clean water. This method cannot be used to clean colored and dark tiles.
- Chlorine-containing compounds. The most effective: Whiteness, Nathanya, Bleach. To properly clean the joints between the tiles in the bathroom, you will first need to apply the selected product to the joints between the tiles for five to seven minutes. Then rub the problem areas intensively with a stiff brush and rinse off the cleaning agent with water.
- Melamine eraser sponge. With its help, cleaning the seams between the tiles will be as quick as possible. After all, you just need to wet it and walk through the contaminated areas.
Additional procedures
In some cases, after removing the old grout material, some additional operations may be required to completely clean the surface of the joints. For example, small fragments of old grout or small crumbs of broken tiles may remain in the seams. To remove them, just use an ordinary vacuum cleaner.
After cleaning the seams with a vacuum cleaner, you will need to rinse them. To do this, you need to make a solution based on soap or a non-aggressive detergent and carefully treat the seam surface with it, after which you will need to pause the process for up to a day to give time for the seams to dry.
After this, a layer of penetrating primer should be applied. Instructions for its application, as well as the drying time of the substance, are indicated on the packaging and may vary significantly depending on the manufacturer.
Return to content
Traditional cleaning methods
Many experienced housewives are confident that traditional methods can clean the seams between tiles on the floor just as well. We list a few available tools that will help clean tile joints.
Soda and vinegar
If small areas of grout between the tiles have darkened, baking soda will help clean them. The method of application is simple. First you need to sprinkle the contaminated areas with white powder. Then pour them with table vinegar. When the characteristic hissing stops, you can remove the remaining product with water.
Ammonia
To clean up mold in the bathroom on the tile joints, you will need to follow these steps:
- mix two liters of clean water with twenty milliliters of ammonia in a deep container;
- pour the resulting solution into a spray bottle;
- spray the liquid onto the areas where the seams have darkened;
- after half an hour - thoroughly wash the tiles.
Important! Ammonia is quite toxic, so it is better not to use this method for cleaning kitchen surfaces.
Soda, lemon and vinegar
The following proven method will help you quickly clean the seams between tiles on the floor and walls:
- first you need to pour one and a half liters of warm boiled water into the pan;
- add to the liquid sixty milliliters of nine percent table vinegar mixed with soda ash in the amount of one hundred and twenty grams and thirty milliliters of freshly squeezed lemon juice;
- mix the ingredients thoroughly;
- treat the black tile joints in the bathroom with the resulting mixture;
- after fifteen to twenty minutes, the remaining dirt and active product are washed off with plain water.
Soda and white
To restore the original whiteness of the seams between tiles at home, you need to perform a few simple steps:
- pour a glass of baking soda into a small container;
- add a little white to make a paste-like consistency;
- apply the resulting mixture to the seams that have turned yellow;
- When the mixture dries completely, it will need to be washed off.
Expert opinion
Natalya Osadchaya
If you decide to clean the grout using this method, you will need to protect your skin with special rubber gloves for cleaning.
Toothpaste, soda, mustard and lemon juice
An active mixture of several ingredients washes out dirt from the space between tiles well. Consider the recipe for its preparation:
- Pour a liter of warm water into a saucepan.
- Add one hundred grams of baking soda, thirty grams of mustard, five grams of toothpaste and fifty milliliters of lemon juice.
- Mix all components until a homogeneous mixture is obtained.
Expert opinion
Evgenia Taran
The resulting solution will need to be applied with a toothbrush to the stained seams on the floor. After thirty to forty minutes, remove with clean water.
Coca Cola or Pepsi
Cleaning floor tiles will be easy if you use sweet soda. You can choose any: Coca-Cola, Sprite or Fanta. Such drinks contain active substances that will help quickly clean the grout. To do this, you just need to apply lemonade to problem areas and leave for half an hour for effects. After the specified time has passed, thoroughly wash the floor.
Steam cleaner
Using steam, you can quickly remove not only dirt, but also fungus in the bathroom. To carry out the hygienic procedure, you will need to direct a stream of steam at the dirty seams between the tiles. Then wipe the floor or walls with a damp cloth.
Preventing mold from forming in the bathroom
To prevent the appearance of mold patterns on the tile joints in the bathroom, take note of a few useful tips.
- After cleaning, the seams must be treated with a sealant - a special agent that seals micropores. This will prevent fungus from getting into the micro cracks of the grout. Liquid waterproofing can be purchased at a specialty store.
- To prevent the formation of fungus in the bathroom, you need to clean the seams between the tiles with soda twice a month.
- Do not allow moisture to accumulate between the seams, in particular at the junction between the bathtub itself and the tiles.
- Ventilate the bathroom regularly and wipe the joint areas with a dry cloth or towel.
- Treat individual spots of fungus with a special pencil, which can be found in household chemicals departments. The pencil contains special substances that kill mold and mildew.
- You need to wash the bathroom weekly; wet cleaning with ammonia or vinegar will be enough to remove fungal spores and microbes.
How to clean various stains
In order to clean the joints between the tiles as efficiently as possible, it is worth considering the nature of the pollutants that cover them. Let's look at how to deal with pollution of various origins.
After renovation
The method discussed above using soda and vinegar will help to clean the seams between the tiles after repair. After removing dirt, you will need to thoroughly wash the walls or floor with plain water.
Fungus
Medical alcohol removes mold deposits well. To clean the joints between the tiles from fungus, you just need to apply the product to the space between the tiles with an old toothbrush. After fifteen to twenty minutes, remove the alcohol with clean water.
From nicotine
To clean the grout from traces of tobacco smoke, you will first need to mix any washing powder with ammonia in a small container to form a thick paste. The resulting mixture will quickly remove yellow nicotine stains from the space between the tiles.
Removing rust
To clean the grout from rusty stains, you need to treat them with a two percent solution of oxalic acid. After fifteen to twenty minutes, thoroughly wash the cleaned surface. To achieve the best result, these steps will have to be done several times.
Important! It is better not to use this method when working with ceramics, so as not to damage the material. In such a situation, it is worth replacing the acid with a slurry obtained by mixing soda with water.
Old stains
If there are old stains on the grout that are useless to scrub off, you should paint over them with water-based emulsion. Just before applying it, you will need to thoroughly wash the surface and treat it with any antifungal compound.
How to whiten grout
Over time, the grout turns black. To return it to its original whiteness, you will need to treat the seams between the tiles with a heated solution of citric acid in water. To prepare it, you need to mix three liters of water with three packets of nutritional supplement. The exposure time is thirty to forty minutes.
Why is it cheaper to bleach the grout than to replace it?
In order to return the bathtub to its original appearance, you do not need to replace the tiles, just clean the seams.
If you follow the recommendations below, you will be able to remove:
Fungus.
- Yellow plaque.
- Dark coating.
At the same time, you can cope with such a problem without outside help, which will help you save a significant amount. Yes, this process cannot be called easy, but the instructions, which describe everything in detail, will make it possible to return the tiles in the bathroom to the appearance of a new coating. There are several factors that may negatively affect the seams in the future, and then cleaning will take longer :
- Poor functioning of the ventilation system.
- The seams were not processed before grouting.
To make your bathroom beautiful again, it will be enough to use two main methods:
- Use paint/whitewash and do not remove old grout.
- Before applying new compounds, remove the old coating.
Now let's take a closer look at how to update the seams.
When to change grout
In a situation where the fungus has penetrated deep inside the grout, there is no point in cleaning it, since the mold will return again and again. To get rid of the problem, you will need to completely change the composition. To do this you need:
- apply water to the tile joints with the addition of a small amount of nine percent table vinegar;
- when the grout softens a little, clean it completely: a spatula or knife can act as a cleaner;
- treat the seams with an anti-fungal compound;
- apply new grout.
A radical solution to the problem, or if the mold has penetrated too deeply
Once mold penetrates the structure of a material, it is difficult to completely remove. In these cases, chemical-based products become ineffective. It is recommended to use a more radical mechanical method:
- prepare the scraper;
- to facilitate the process, treat the seams with a vinegar solution;
- the joint space is freed from grout, but the tile adhesive does not need to be touched;
- remove dust and debris from the surface, which will increase adhesion;
- the seams are treated with antifungal agents, and it is important to follow the instructions, otherwise the quality of adhesion of materials will decrease;
- new grout is applied.
General rules for caring for the space between tiles
In order not to have to think about how to clean the joints between the tiles later, you should take proper care of them from the first day after the repair work. To prevent contamination, you will need to follow simple rules:
- Periodically, at least twice a month, it is necessary to carry out preventive cleaning of the grout.
- After bathing, be sure to wipe the tiles dry and open the bathroom for ventilation.
- Do not use products containing abrasive particles for hygiene measures; they are a source of micro-scratches that attract dirt.
Points to consider
Also, before you start cleaning, you should take into account the type of tiles installed; the choice of cleaning agent largely depends on this.
- For example, tiles with a glazed surface cannot withstand exposure to any acid-containing substances. Because of them, the surface will become duller, and such a change is quite difficult to correct;
- After cleaning matte tiles, proceed as follows: thoroughly wash the surface and cover with a special protective mastic;
- Mosaic is quite resistant to any external influence, not counting products with high acidity and alkalinity.
Features of the new seam
When starting to work on a new seam, you need to benefit from past experience. Determine what caused the damage to the old composition. In this way, the optimal solution for extending service life can be found.
In places where the seam has been exposed to fungus or mold, compounds with antifungal properties should be used. Or you can use special impregnation. To protect seams that are constantly exposed to moisture, you should use Atlas Delfin or buy sanitary compounds with the required qualities, for example, CERESIT 40 with dirt-repellent technology. You can also consider epoxy grout, which does not require additional impregnation.
You can remove unsuitable grout using tools and compounds, or improvised means. The main thing is to understand the sequence of actions, buy everything you need, and discuss some issues with a professional. You also need to take into account that when using chemicals, people without protective equipment and animals should not be in the room.
Application of chemical reagents
Don't know how to remove old grout from ceramic tile joints? An effective method is chemicals. For each type of fugue, you need to choose your own cleaner.
Let's look at an example of using cement removers using Sopro ESE 548 solvent:
- First of all, you need to apply the composition and wait for at least 20 minutes.
- After the joint filler has softened, mechanical removal begins using a scraper or jointer.
- The separated fugue residues are removed with a wet rag or sponge.
After the surface has completely dried, you can begin filling the new composition.
If the seams were filled with a thick layer of silicone sealant, then a chemical agent, for example, Penta-840, is applied twice, after removing the top layer or most of it from the joint.
Treating cracks with steam and covering with a masking compound
In addition to chemical and mechanical methods of removing sealant from the joint between tiles, you can use hot steam. The fact is that silicone usually withstands temperatures up to 90 degrees, and steam is much hotter, so it has a destructive effect on sealants and effectively removes it.
In such a situation, you need to work as follows:
- Direct the steam stream to the area to be treated and hold for a few seconds. During this time, the sealant literally peels off from the base.
- Afterwards, using a hard-bristled brush and water, the material is removed from the seam with vigorous movements. Typically, exposure to a concentrated jet of steam occurs simultaneously with mechanical removal of the sealant, that is, special brushes are used.
If the place needs to be restored without removing the old grout, then cover it with a special pencil with a waterproof filler or cover it with a water-based composition.
