For many elderly people, as well as people with musculoskeletal disorders, ordinary household items are completely inaccessible. If they can use walkers or special chairs to move around an apartment or street, then simply taking a bath or even going to the toilet without assistance is practically impossible for them. Modern society directs all efforts to maintain their decent standard of living and creates various structures for adaptation. Today the editors of Homius will talk about the rules for using handrails for disabled people in the bathroom and toilet, the choice of which will greatly simplify their life.
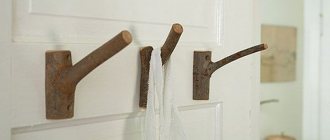
Devices will help people with disabilities live full lives PHOTO: sparta-met.com
What types of bath handles are there to make getting up comfortable?
When arranging a home in which a person with limited activity plans to live, it is necessary to equip premises for special purposes. Among these are places of daily use: the bathroom and sanitary unit. These rooms require a large number of different support mechanisms.
You can get acquainted with the options for handles for a bathroom designed for people with disabilities in specialized stores
Today, handrails for people with limited mobility are divided into:
- Stationary - supporting structures that are fixed at both ends (most often to the wall and floor), are characterized by stability, strength and long service life (due to the absence of a moving element, which often wears out quickly). It is convenient to use such systems for the reason that they always remain “disassembled” when the folding handles need to be brought into the required position (often older people forget that the handle is folded, and this can lead to loss of balance). It is better to install stationary supports in spacious bathrooms: this way they will not interfere with the movement of all family members.
- Folding systems are systems that are mounted to the wall on one side, remain movable and save space in the room. There are modifications of the folding design with turns left and right, up and down. Folding grab bars are often installed next to the toilet, sink, or shower.
- Mobile. These designs include portable handles with a vacuum fastening system.
At the same time, handles come in different sizes and diameters, with different angles of inclination. Depending on the scope of application, handrails are divided into straight and angular for bathtubs and showers, sinks (rectangular, square or curved); overhead on the side of the bathroom; folding ones in the bathroom.
Steps
Part 1
Preparation
- Prepare the necessary tools.
If you have the right tools, installing such a handrail is not particularly difficult for both an experienced craftsman and a weekend tinkerer. You will need:
- Pen or pencil
- Masking tape
- Electric drill
- Handrail, sold in hardware and construction stores
- Drill bit for glass and tiles, corresponding to the size of the dowels
- Universal drill or for wood and metal, also of the appropriate size
- Hand screwdriver
- Screws
- Silicone bath sealant
Take everything out of the box and check the general condition of the handrail. Check the included screws and dowel sizes relative to the diameter of the existing tile drill. If the diameter does not match, you will need to purchase a new drill.
It depends on who the handrail is installed for, as well as on the location of the vertical posts in the wall. In general, the useful height for installing such a handrail is at waist level.
- Locate two posts to which the handrail can be attached. Typically, the posts are 40cm apart when measured from center to center. To find them, you can knock on the wall, check in the room on the opposite side of the wall, or use a special device.
Use this device in places where there are no tiles. You can also measure 40 cm from the center of a stand you know (usually in the corner), but this does not always work. Be sure to find both edges of the rack.
Using a level, extend the post limit marks down to where the handrail will be installed and, using a 3-4 cm long strip of masking tape, mark the location of the post on the tiles. A good place to install the grab bar would be at an angle between two wall studs on the wall on the long side of the bathtub. The bottom of the handrail should be 15-25 cm higher than the top of the bathtub. For racks at a distance of 40 cm, a handrail 60 cm long would be an excellent solution for corner installation.
- To ensure the correct placement of the handrail, use tape to mark the screw installation points on the wall. If you drill into the tiles through masking tape, the drill will not slip and scratch the tiles. It also prevents the tiles from cracking in some cases.
Since most bathrooms are tiled, you will need a glass and tile drill bit. They usually have a chisel end, but there are also diamond bits that last a little longer. Dowels usually require a hole of the appropriate diameter. Select the most suitable drill bit, not exceeding the diameter of the dowel.
- Most handrails require a hole of about 3mm in diameter with a glass and tile drill bit as close to the center of the post as possible to confirm the location. If you hit solid wood, drill the remaining holes. If not, then insert a piece of bent wire into the hole and try to find the stand. Determine the new location for the handrail and mark the holes according to the new location of the post. In most cases, the unused hole will be covered by the handrail support plate.
After drilling through the tile, change the drill bit to make a further hole in the wood or cement panel (behind the tile). If you forget to change the drill, the process will not go as smoothly and there is a possibility of damaging the drill. To widen a hole in a tile, use a glass and tile drill bit or a thin-walled diamond core bit with a diameter of 6 mm, and for drilling wood – with a diameter of 4 mm.
Part 2
Handrail attachment
Install wall studs.
Different wall anchors are installed in different ways, but usually they are simple plastic wedges that are driven into the holes to ensure that the screws grip tightly when screwed in. Insert them into the drilled holes, thread the screws through the rail, place the rail against the wall and tighten. Follow the instructions provided by the handrail manufacturer.
- Typically, stainless steel screws with a diameter of 4.75 or 5.4 mm with a cylindrical head are used for this. In this case, they must enter the rack by at least 2.5 cm. In most cases, the length of the screw is 5 cm.
- Do not use hinged bolts for fastening. They depend on the strength of the wall substrate, which is usually plasterboard or concrete panels. Distribution of more than 100 kg of weight over 6.4 or 13 square meters. cm of such material will clearly not be able to provide reliable fastening of the handrail.
To prevent water from seeping under the tile through the drilled holes, apply a small layer of sealant around the seam. Cut the tube of caulk at a slight angle and apply a layer of silicone around the rail where it meets the wall.
- Some people prefer to apply sealant to the back of the flange before attaching the handrail to the wall. This allows for additional reliability and durability.
Allow the sealant to dry for an hour or two, then apply a little force to check the grip, then pull harder on it. To check the security of the fastening, pull the handrail with a good jerk. Before turning on the water in the bathroom, the sealant must dry completely within 24 hours.
- To install grab bars on a fiberglass bathtub, special filler gaskets are available. Ask the manufacturer or plumbing supplier about them.
If your bathroom has metal counters, you can use drop bolts. Otherwise, don't use them.
How to choose a handrail for the disabled in the bathroom
The main criterion for choosing handrails is the reliability and safety of the design. In addition, the support structure should be comfortable to use.
When choosing a handrail for disabled people in a bathroom, you must take into account its safety and reliability.
Therefore, when choosing handrails, you must follow these recommendations:
- The choice of design should be made taking into account the height, weight and physical abilities of the person for whom they are designed.
How to make a metal stair railing
You can make simple railings for a country staircase from a metal profile. You will need the following tools and materials:
Algorithm of actions:
How to make handrails for stairs with your own hands from metal. Expert advice: video.
Choosing handrails for the bathroom
So, if a person suffers from arthritis, then it is necessary to choose curved handrails that allow you to transfer the load from the hands to the forearms.
In addition, the set of stationary support structures must include mounting elements, and the handrails themselves must be easy to grip (not too thick or thin).
Fastening process
There is a certain sequence of stages for installing a handrail, which may vary slightly depending on the choice of bracket. However, in any case, it is necessary to prepare a preliminary drawing with dimensions marked on it, which will help to avoid errors in work.
For mounting with an overhead cradle:
Handrails for disabled people: requirements
The presence of special support devices for disabled people in sanitary and hygienic facilities is associated, first of all, with safety. After all, even a young person without musculoskeletal diseases can slip on a wet floor or shower tray. In addition, the height of modern plumbing fixtures is often inconvenient for older people: handrails, in this case, allow a person to comfortably sit down and stand up, climb into the bathtub and shower.
Handrails for the disabled must not only meet all requirements, but they must be installed correctly in the bathroom
In order for the design to be reliable, convenient and safe, it must meet the following requirements:
- The supports must have special flanges at the ends, which will allow the handrail to be firmly secured to the wall.
- The holder must be accurately designed for the body weight of an elderly person or a person with limited mobility (maximum load of supporting structures is 150 kg).
- Handrails must be made of moisture-resistant, hygienic material (corrosion can weaken the fastenings and make the operation of the structure hazardous).
- Handrails should be washed and disinfected along with plumbing fixtures.
In addition, the reliability of the supporting structures depends on their correct installation in the bathroom.
Differences in installation method
A handle on the wall will help you get out of a slippery bathtub.
The handle can be mounted on the side of the bathtub or on the wall nearby. Their functional purpose is different.
In the first case, the handrail helps to change position in the bathroom, in the second - to get out of it. In both cases, the handle and fastenings must support the weight of a person.
Handrails can be stationary and fastened with dowels and screws, or removable and installed on suction cups.
Bathroom handles with suction cups are attractive because their position can be quickly changed, but there is a lot of debate about the quality of fastening and safety during their use.
If you decide to purchase a handrail with a vacuum suction cup, then keep in mind that even a high-quality product will only hold well on a perfectly smooth surface.
You can purchase a compromise option - a folding handrail. This type is mounted thoroughly, but the handle can be folded so that it does not interfere with movement in a confined space when it is not needed.
How to attach bathroom grab bars to the wall
It is necessary to install handrails in such a way that a person with impaired musculoskeletal system function can easily find support even at night with the lights off and reach the handrails without effort.
It is quite possible to install handrails for disabled people in the bathroom yourself, if you carefully familiarize yourself with all the nuances of this process in advance
Installation of handrails in bathrooms includes the following steps:
- Marking the room and drawing up a plan for installing holders of different sizes and shapes in the most needed places.
- Arrangement of holes on the handrail flanges (the holes must match the diameter of the mounting elements).
- Installation of handrails with flanges to the wall using dowels.
- Installing plugs over flanges.
Wall stationary handrails are recommended to be fixed to a load-bearing wall, and small vacuum handles can be mounted in any convenient place.
The design should be convenient to use. Therefore, it is necessary that the handles are installed at a distance of at least 40 mm from the wall. The support handrail should be placed at a height of 50-100 cm from the floor (depending on the height and needs of the person).
Types of holders
If the handrail is attached to balusters, then at the bottom the balusters are attached to the steps, and at the top they are connected to a handrail or bar, which will then become part of the structure. If the staircase is located along the wall, you can attach the handrail to the wall using holders. And here it is important to choose the most suitable option correctly.
There are several types of holders, differing in the method of fastening:
With overhead cradle.
There are two types:
- welded - a rigid one-piece structure equipped with holes for fasteners;
- prefabricated - can be adjustable (involve adjustment of either the angle of inclination of the cradle or its height) and non-adjustable;
Hammers.
They differ from the others in that one side of the fastening is driven into the groove provided for this purpose on the handrail, and the other is fixed on the wall.