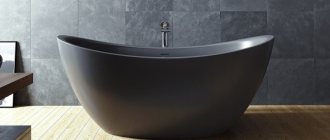
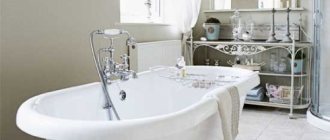
What material is a bathtub made of for a modern house or apartment? Made from artificial stone. This response is not a reverence for fashion or a response to manufacturers’ advertising. Managers of specialized trading enterprises came to him after analyzing the reviews and recommendations of numerous consumers who were already using this miracle of plumbing. Look at the bathroom photo gallery.
Humanity has been using baths for decades. The oldest of them - supposedly made five thousand years ago - was discovered by archaeologists during excavations on the island of Crete. During its existence, the shape of the tanks has not changed. But the material from which they were made was very different.
Baths were made of wood, granite and ceramics, bronze and cast iron, steel and plastic. But recently the time has come for artificial stone products. These are bathtubs made of stone mass or cast.
Interior Design Styles for Stone Bathtubs
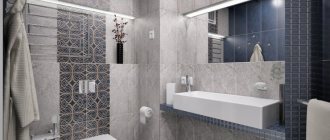
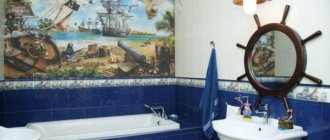
Stone in the interior is used to create designs in classical and neoclassical styles. Such styles are called pompous. And marble is an excellent way to create a luxurious interior. You can use the castle style - this is an interesting option for using stone in the interior. In techno and high-tech styles, stone is used to give the design angular and slightly rough shapes. In country style, in addition to wood, stone is also used. In the loft style, stone introduces elements of brutality into the premises. Art Nouveau and eco-style promote the use of natural materials, which means that stone will fit perfectly into such spaces.
Photo: svetlananikitenko.by
1/2
Photo: thefreepatriot.org
2/2
How to make artificial marble with your own hands
What is the stone we are interested in? It has a heterogeneous color, most often with veins penetrating the entire thickness, and a granular-crystalline structure. The color can be snow-white, pink, blue, black or gray. Less common colors: red, purple, green, yellow. The easiest way to create the illusion of marble is with gypsum, which produces a dense, non-porous mass. However, this option is not acceptable if you need a countertop or cladding in a room with high humidity levels. Therefore, we will consider alternative methods that allow you to make artificial marble with your own hands.
The simplest technology is casting in molds from a cement-sand mixture. Cast marble is durable, waterproof and, most importantly, looks very similar to the real thing. However, it should be taken into account that thin tiles will be quite fragile, and thick ones will be heavy. As a result, it is possible to make a countertop from such an imitation, but the body of the furniture must be very massive in order to withstand the weight of the stone slab. A thinner version can be made using the wooden plane of the table itself as a basis. Next we will look at both options.
Material for making bathtubs
When making baths from natural stone, craftsmen choose granite, marble, onyx or sandstone. They do not contain any impurities, and specialists simply take a solid piece of stone and, using mechanical processing, give it the desired shape. The product is then polished and sometimes varnished.
The main materials in the composition of artificial stone are polymer concrete and stone chips from granite, malachite, marble, serpentine, onyx, and jasper. The composition contains synthetic binders: quartz sand, polyester resins of different colors, catalyst.
Externally, bathtubs made of natural and artificial stone are no different.
Photo: sheetfedmachines.com
1/2
Photo: cdn.shopify.com
2/2
How to make an illusion faux marble
If you want imitation stone to cover an elegant coffee table, you will have to abandon the previously described technology, since it is unlikely that thin wooden legs will withstand the load of a multi-kilogram slab. Instead, the easiest way is to use paints to partially turn the table itself into marble by painting the appropriate stains on it. To do this, you will need a jar of paint for the background, for example, white or green, as well as a small container of color for the pattern. It would be more correct to draw black or gray stripes on a white background, and white stripes on a green or black background.
Before making artificial marble, all cracks and chips on the surface, if any, are filled with a special water-based wood filler. Next, we moisten the tabletop with a spray bottle so that the swollen fibers reveal all the roughness, and, after the 30 minutes required for drying, we sand it as best as possible to a smooth state. Then, having cleaned the surface, we proceed to painting and apply two background layers with the interval necessary for the first of them to dry. To avoid streaks, it is better to use a brush or foam pad. After two hours, you can begin applying the texture pattern.
The pattern of marble is familiar to many; sometimes it resembles zigzags of lightning on a surface speckled with many grains, and sometimes it looks like randomly intersecting cracks. All this is not difficult to depict with a pen brush, with which you can change the thickness of the line. After waiting 5 minutes, mix a small amount of white paint with a transparent polyacrylic coating. Having dipped a wet sponge into the mixture (be sure to remove excess mixture from it), we follow the drawing without pressing hard and thus shade the lines, making them more blurry. After another 5 minutes of drying, wipe the surface with a clean cloth, mixing the colors with light touches. Another 30 minutes of drying and we take up the feather brush again, emphasizing the previously applied and already modified pattern.
After two hours, when the surface has already dried well, we take a thoroughly mixed polyacrylic coating and cover our “marble” with a thin transparent layer. It is advisable to leave the tabletop for a long time after this to allow the film to harden thoroughly. Next, you need to polish the surface with the finest sandpaper, clean it with a damp sponge or cloth and, after letting it dry, treat it again with polyacrylic. Again, we leave the almost formed imitation stone to dry for 2-3 hours, then polish and wipe again. We apply the last layer of transparent coating, wait for it to harden (2-3 hours), and finally polish it, after which we forget about our piece of furniture for about a week.
Benefits of stone baths
Due to the high cost, buyers often doubt whether to buy a stone bathtub. First of all, people pay attention to her external qualities. This bathtub is practical and multifunctional in use.
The main advantage of a bathtub made of natural stone is its high strength; it is considered eternal.
To obtain stone chips, which are part of artificial stone bathtubs, natural materials are used. Therefore, such a bath is environmentally friendly.
Both natural and artificial stone have low thermal conductivity, so the water in the bath remains warm for a long time.
Another advantage of these baths is that the surface does not absorb dirt; mold, bacteria and germs do not grow on it.
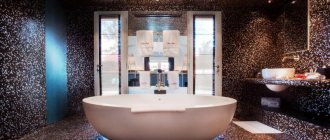
Externally, stone baths are attractive and look very stylish. Stone products absorb sound, so water flows silently through such a bathtub.
Roca bath
Bathtub Jacob Delafone
Photo: vivalusso.ru
1/2
Photo: i.pinimg.com
2/2
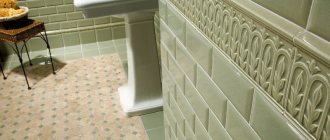
Laying artificial stone slabs on the bathroom floor
To lay tiles on a heated floor, you need to buy a special adhesive that can withstand relatively large linear vibrations of the coating.
Glue
The stone should be cut on a special machine with a diamond disc and water cooling. Ordinary tile cutters are unsuitable; artificial stone is much stronger than ceramic tiles. The thickness of the coating may vary, but in order to save money, practitioners do not recommend buying thick sheets. High levels of physical strength guarantee the stability and safety of the coating even with slab thicknesses of approximately 5 mm.
Tiles - artificial stone
If the bathroom is small, it is recommended to lay the tiles diagonally, due to this the bathroom is visually enlarged. However, at the same time the amount of waste increases.
Practical advice. It is much more convenient to work with floor tiles in special knee pads; they are fixed to the legs, pain does not appear even after prolonged work.
Knee pads
The knee pad is inserted into the pocket
To work, you will need a mixer with a small whisk, a laser level, and a container for mixing glue.
Mixer
Container for mixing glue
Before laying, check the quality of the screed; if the variation in height exceeds 5 mm, it is recommended to use a notched trowel with a comb of at least 10 mm.
Notched trowel
We will tell you how to check the screed a little below.
Step 1. Prepare the glue, let it sit for 5-10 minutes and apply the solution to the area. The size of the area should be such that you can reach the first tile.
Preparation of glue
Applying glue to the floor
Applying adhesive to tiles
Step 2. You need to start laying from the corner of the room, take the dimensions of the first tile and cut off the excess on the machine. Put it in place, check the horizontal position.
Tile position control
Step 3. Using crosses or other devices to control the width of tile joints, continue laying whole tiles; if you are laying tiles without gaps, then crosses will not be needed. But remember that this installation method requires certain practical skills; it is quite difficult to correct mistakes. Near the walls, accurately take measurements and cut the stone on a machine. When cutting, allow for the thickness of the diamond blade. You can leave a gap of up to one centimeter near the walls, which will then be covered with a plinth.
Using crosses to form seams
The diagonal laying method often requires making very complex cuts. For inexperienced craftsmen, this situation causes problems; they take a long time to measure the cut configuration and transfer it to the tile. And after circumcision, it turns out that a mistake was made and the material has to be thrown away.
Checking horizontality
If the cut is small, then there is a chance that the tiles can still be used in other places. How to make a complex cut the first time?
- Take a sheet of paper, transfer the dimensions of the tile onto it, and cut out the template.
- Place the template at the location where the tiles are intended to be installed, and carefully bend the excess paper along the lines.
- Cut the template along the lines and try it on again. If necessary, make changes to the outline size. You can cut immediately after bending the paper, use a sharp mounting knife.
Excess paper is trimmed with a knife
- Using the existing template, mark the tiles. Accurately follow the lines on the machine to bring the tile configuration to the desired look.
The template is laid on the tile
You need to mark the tile according to the template.
Cutting machine
Cutting tiles
Gluing tiles with glue
Despite the fact that you have to make a template, the time for cutting out the complex contour of the tile is significantly reduced in comparison with measuring each line with a tape measure. In addition, the possibility of error is completely eliminated.
Rake - threshold
It is important to check the horizontal surface
Important. For artificial stone, be sure to apply glue to both the floor and the tiles. Numerous adhesive strength tests have proven that only this method provides maximum adhesion.
Cleaning the seams from glue residues should be done no later than the second day after installation. Further, the material gains such strength that it is difficult to remove it from the seam, and the residue will interfere with high-quality grouting.
Applying grout
Wet cleaning of tiles from grout
The floor should be wiped with a soft cloth
Disadvantages of stone baths
Among the disadvantages, it can be noted that a bathtub made of natural stone is heavy and expensive.
Such baths are made from stones that may contain radioactive substances. An artificial stone product requires constant polishing.
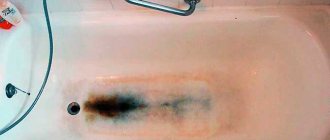
Bathtubs made of artificial and natural stone are easy to paint, so you should not pour coloring liquid into them. Do not rub them with a metal brush, so as not to damage the surface. If a crack appears, restore the bathtub immediately, otherwise you will have to repair the whole thing later.
Photo: i.pinimg.com
1/2
Photo: richstone.by
2/2
Answers to your questions
Fequently Asked Questions
How to properly check the quality of the foundation?
Place tiles without glue in the corners of the bathroom; the same markers can be made along the walls and in the center. Place the long rule or level on the tile with its ends and check the position of the air bubble. If there are deviations, then raise one end of the level until the bubble takes the desired position. The distance between the tile and the bottom plane of the level indicates the amount of deviation from the horizontal plane. Such measurements need to be made in several places. If the deviation is significant, then you will have to make an additional screed; small deviations can be evened out by changing the thickness of the glue.
Using a long bubble level
How to lay tiles near the bathroom entrance door?
Based on the floor, draw the location of the door leaf. The edge of the tile should be located exactly in the center of the canvas. If this is not done, then the difference between the tiles in the hallway and the bathroom will be visible, and this is not allowed by the current rules.
And one moment. At the door threshold, the width of the tiles cannot be less than ten centimeters. Why is there such a requirement? This is where the maximum load on the floor is. If the tile is small in size, then the likelihood of it being undermined increases significantly. As a result, there is a need for extraordinary repairs with all the ensuing negative consequences.
It is important to correctly lay the tiles near the threshold
Correct laying of tiles
The master uses crosses to form even seams
How to hit zero without a laser level?
This can be done with an ordinary water level. Place the tiles in the corners and center of the room. Using a hydraulic level, make marks on the wall and mark a line around the perimeter of the entire room. Depending on the variation in height, select the optimal zero for the floor covering and mark another line around the perimeter. It will be necessary to control the position of the tiles.
Make marks on the wall to make it easier to lay tiles
Where to start leveling the plane of an uneven screed?
Professionals advise starting installation from the area that has minimal deviation values. Why? If a mistake is made, it is never too late to increase the thickness of the glue by a few millimeters. If the installation was done from the lower section of the base, then the error can be corrected in two ways. The first is to remove all the covering and start again. The second is to hammer the floor screed. Both options are highly undesirable. Read how to fix an iron bathtub on the website.
Care
It is very easy to care for this material. The surface cannot absorb soap solution or plaque. Therefore, cleaning walls and other surfaces is very simple.
There is no need to resort to special cleaning products. Simply wipe the surface with a regular cloth soaked in water. And then wipe it with a dry cloth so that there are no streaks left, like on a mirror, for example.