Types of lightning protection
It’s probably not worth reminding that lightning is a high-power electrical discharge. This means that this is a great danger to people and their property. To help you understand what we are talking about, look at the photo below, which shows what happened to an unprotected house after being struck by lightning.
Lightning struck the house Source skopelitissa.com
Therefore, lightning protection of a house is a mandatory element that will save it and the people living in it from harm. If we consider this design in purely technical terms, then it is an ordinary antenna that receives an electrical discharge and discharges it through a wire into the ground. In this case, the antenna is not necessarily made in the form of a pin directed towards the sky. This can be a mesh laid on the roof slopes or a stretched wire along the ridge.
This is exactly the kind of lightning protection that has always been used, and is still used today, as a simple option for lightning removal. They call it passive. Today, an improved version of lightning protection, called active, is offered.
The main difference between active protection is the presence of a special device - a lightning rod. Essentially, it is an ionizer that attracts lightning. That is, its installation guarantees that lightning will not hit anywhere except the lightning rod. This is an important point, because a shock from natural electricity can occur not only in the roof of the house, but also in the power supply wiring for household appliances and lighting. This will not happen with a system in which a lightning rod is installed.
Lightning rod ionizer Source docplayer.fr
However, correctly made passive protection also provides the proper level of safety and still remains traditional and often used.
See also: Catalog of companies that specialize in electrical work.
How does a lightning rod work?
The principle of operation of a lightning rod is quite simple - lightning is redirected to the ground, which allows residents of the house to avoid the threat of an accident. When creating a design, it is important to take into account existing safety measures: do not put your hands into electrical appliances, turn off the power to the switchboard, do not work in precipitation outside. Don't know how a lightning rod works? The design consists of 3 elements:
- A lightning rod that intercepts a lightning charge.
- A down conductor that redirects energy.
- Ground electrode. Thanks to it, there is a stable connection between the device and the ground.
The devices are installed both near a residential building and directly on its roof.
Parts of a lightning rod can be individual roof elements. When creating a structure, it is necessary that all elements are made of a single metal. Otherwise, there is a high probability of incompatibility, which will lead to ineffectiveness of the device.
Making a lightning rod correctly in a private home is not as easy as many people think. This is partly complicated by legislative documents, because before starting installation work it is necessary to make sure, for example, that there are no communications nearby.
A properly installed device will withstand even the most severe blow. An air terminal is most often a device in the form of a rod, which is located on top of the house. Some parts of the building can also play its role: pipes, fences. The roof on which the lightning rod is installed must be intact. This will increase the reliability of the design. In this case, the surface should not have an insulating layer (except for anti-corrosion paint). The device can also be attached to a tree that grows near the house.
Next we move on to creating a down conductor. When making it, you should use the following sections: 16 mm2 for copper, 25 mm2 for aluminum, 50 mm2 for steel. It must be located between the lightning rod and the ground. Turns and bends are undesirable for the down conductor, as this will seriously damage it. It is worth noting that it can be located both outside the wall and inside it.
The ground electrode is made of steel or copper. You will need to dig a trench, the depth of which is up to 0.5 meters. Rods are driven into the ground and connected to each other by welding. Then the resulting element is connected to a down conductor.
Lightning protection components
A lightning protection device is three parts of one design:
- receiver;
- outlet circuit;
- ground loop.
Lightning receiver
It is made from a metal rod with a diameter of at least 6 mm. As mentioned above, there are different design options for the receiver.
- A pin sticking up . Its length varies from 20 cm to 2 m. The main requirement is installation at the highest point of the roof. This could be a ridge, a protruding pipe (chimney, ventilation, etc.), or a television antenna.
- Wire , or even better, a steel cable with a diameter of at least 6 mm. The cable is pulled along the edges of the roof: the ridge, the joints between the slopes of the roller roof, the valleys. The main requirement is to position the cable so that it does not touch the roofing material, and stretch it between two dielectric supports, for example, between wooden blocks.
- Net . Essentially, this is wire laid in the form of a lattice with a pitch of 1-1.5 m. It is rarely used in private housing construction. Only if the roof area is large enough. Optimally used on flat roofing structures.
Cable stretched along the ridge of the roof Source gid-str.ru
Rules for installing lightning protection
Installing the pin to the highest point of the roof is easy. The main task of the work manufacturer is to carry out a strong fastening by any means.
As for the tensioned cable or the wire laid in the form of a lattice, then special fasteners are used, which are manufactured specifically for the lightning protection system. They are directly attached to the roofing material with self-tapping screws, and the wire is passed through special brackets or clamps, which are an integral part of these fasteners.
Now about installing the down conductor. It is laid over the shortest distance. And it is attached to the roof and walls with the same fasteners. It should be noted that the mounting hardware for the wall is no different from the roof mounting.
There are several requirements regarding the installation location of the outlet circuit.
- It must be mounted on walls near which there are no passage routes : alleys, paths, driveways, and so on. The farther from people, the better.
- The distance from the down conductor to the windows and doors of the house should not be less than half a meter . But the further you go, the safer it is.
- There can be more than one current-carrying circuits . At the same time, the distance between neighboring ones should not be less than 10 m.
Fasteners for lightning protection Source goldkryshi.ru
Installation of the ground loop
In the lightning protection device for a private house, grounding is the most difficult section in terms of its installation. It is subject to fairly stringent requirements in terms of parameters and location of elements driven into the ground.
- resistance should not exceed 10 ohms.
- length up to 3 m.
- The distance between the pins is: 2.2xL, where “L” is the length of the pin.
- It is not necessary to drive the pins into one hole and tie them together. You can drive a grounding element near each down conductor lowered from the roof by attaching the first one to it. Just to increase the efficiency of the grounding loop, it is recommended to connect the pins driven into different places with a steel strip.
It should be noted that grounding a roof made of corrugated sheets or any other roofing material is carried out using the same technology. You can use different conductors, different fasteners, but the arrangement of lightning protection elements is always the same, because the requirements for this system are the same.
Passive lightning protection scheme Source sputnikmts.ru
What is lightning protection and why is it so important ↑
Before you start developing lightning protection for your home or cottage, you need to understand what a lightning rod is in principle and how to organize its installation. A lightning rod is a system of conductors that divert an electrical discharge into the ground so that it does not cause harm to the protected object. The task of any lightning rod is to protect the building from lightning striking it. In this video of a lightning rod in action, you can feel the full power of the elements.
Metal roofing is the most dangerous
The key to lightning protection is an integrated approach ↑
Lightning protection of a private home is a fairly broad concept. First of all, it is divided into two subspecies: external and internal. Only an integrated approach and proper installation of both external and internal protection guarantees the safety of your home.
The external component of lightning protection is a lightning rod. Depending on the design of the lightning rod, there are several types:
- core;
- cable;
- reticulate.
The most popular type of lightning rod for a private home is the rod type. This is due to the simple design and ease of making it yourself. A cable lightning rod is one or more metal ropes stretched on supports above the roof of a house. An equally effective type of lightning rod is a mesh design. This is a metal mesh with grounding that breaks the roof over the entire surface.
Lightning protection device
Internal lightning protection should protect the house, its residents and everything in it from the consequences of a lightning strike. A discharge of such power cannot pass without a trace, even if a good lightning rod stands in its way. A super-powerful electromagnetic field is formed, the coverage area of which includes all conductors, most often engineering communications: gas pipeline, water supply, heating system. Severe overvoltage occurs.
For internal protection of the building and electrical appliances, a special device is installed - a surge suppressor or SPD - a surge protection device. This equipment, combined with high-quality external lightning protection, will make the house protected from lightning strikes.
Internal lightning protection is also important
What does a lightning rod consist of? ↑
In order to design, manufacture and install lightning protection in your home yourself, you need to understand what elements it consists of. A lightning rod in a private house consists of several components:
- lightning rod;
- down conductor;
- ground electrode.
In simple language, the principle of lightning protection can be described as follows: the lightning rod “collects” all lightning in its area of action and directs them along the down conductor to the ground.
The lightning rod is the part of the lightning rod that is the first to receive a lightning strike. The most common option for homemade lightning rods is the rod type. Depending on the size and configuration of the house, it can be installed on the roof or on a free-standing support.
Roof lightning rod
A down conductor is a conductor that directs lightning to the ground. It is a copper, steel or aluminum wire. The main condition is that the down conductor should not come into contact with other metal parts of the house.
Ground electrode – metal rods that conduct current into the ground. Most often, the ground electrode takes the form of three long profile sections dug into the soil. They are connected to each other by a triangle. All lightning protection elements in a private house are connected to each other by welding. If this is not possible, use a bolted connection.
Useful tips
Let us outline several recommendations from specialists that will improve the performance of lightning protection and extend its service life.
- If the grounding loop is assembled from ordinary steel conductors , then it must be checked periodically (every 5 years) for corrosion. This is especially true for welding areas.
- If you are going to provide lightning protection for a private house with a roof made of metal tiles, corrugated sheets or other metal covering , then you need to use dielectric devices as fasteners to the roofing material. Or separate metal fasteners from the roof with plastic or wooden pads.
- If the down conductor is installed along the wall of a wooden house, then to secure it you need to use brackets (clamps) with a length of at least 30 cm .
- As grounding pins, use reinforcement with a diameter of at least 18 mm , a corner of at least 32x32 mm, pipes with a minimum diameter of 32 mm and a wall thickness of 3.5 mm. Strip for tying pins: width 50, thickness 3 mm.
Why is a lightning rod needed?
Lightning discharges are an extremely dangerous natural phenomenon, especially in situations where structures are located in open areas, precisely because in order to ensure the peace and safety of your family, it is necessary to install a lightning rod. Installing a lightning rod will not require a huge amount of time, but in the end you will be sure that the buildings are reliably protected from various weather troubles.
Necessary funds and building materials
To install a lightning rod in a private house you will need:
- pin for lightning rod;
- metal wire made of copper or aluminum with a cross-section of 6 mm and corrugation for the current conductor;
- stainless steel for grounding preparation;
- welding machine;
- Bulgarian saw with a metal blade;
- electric drill-screwdriver;
- multimeter;
- sledgehammer or hammer;
- bayonet shovel;
- spanners;
- M8 or M10 bolts;
- dowels;
- clamps for fastening;
- powerful wooden pole;
- holders.
Preparation stage
Planning must begin with determining the height of the structure. The top of the lightning rod must be positioned up to 12 meters above the ground.
It is necessary to take into account that structures designed to protect buildings from lightning strikes protect buildings only in a limited area. The space around the structure itself can be considered protected. Therefore, when building a lightning rod, it is necessary to take this into account and build them in such a way that all objects located on the site are protected.
There are two types of structures:
- Type A
- Type B
Type A lightning rods provide 99% protection, making them the most effective lightning protection structures.
Structures of type B, compared to structures of type A, are less efficient and, as a result, protect the structure by only 95%.
Important! The safety zone created by the lightning rod will be within a radius of 1.5 times the height of the mast.
That is, at a height of 10 meters, the lightning rod will cover an area with a diameter of 30 meters. If it is necessary to protect a larger area with buildings, then the construction of two or three masts, evenly spaced throughout the area, will help solve the problem of lightning removal. The lightning rod must be at a height of more than 2 meters from the roof surface to effectively perform the function of protecting the house from lightning.
Selection of grounding installation location
The grounding loop must be located at a distance of up to 1 meter from the foundation of the building that will be protected by the lightning rod, and a few meters from the sidewalks and porch. The grounding point during a thunderstorm is dangerous, so it is necessary to position it so as not to put household members and guests at risk. It would be best to find a place for it near a wall or fence enclosing the house. One option is to place some kind of flower bed or other composition of boulders, stones, etc. around the grounding zone.
The most suitable materials for the components:
. For these purposes, the most suitable would be a steel rod with a thickness of at least 60 mm; an alternative option is a copper rod with a cross-section of 0.70 cm or a rod of 0.35 cm made of aluminum.
Lightning rod base- Down conductor . Copper or steel wire with a diameter of at least 0.6 cm in a corrugated sheath or protective casing.
- Ground electrode . It uses three sections of a 50x50 mm corner made of stainless steel, each 2 meters long, as well as stainless steel plates with the following parameters: length from 1200 mm, width 40 mm, thickness more than 4 mm.
It is also necessary to determine and mark in advance the locations of all structural elements.
Installation of the structure
- Installation of ground electrode.
After marking, a triangle-shaped hole is created using a shovel - each side of which must be at least 1200 mm, with a depth of 600 - 700 mm. A trench is laid from the top of the triangle towards the wall of the house. At the end point the end of the down conductor will be suitable.
At the ends of the vertical parts of the grounding elements, the corners are cut off with a grinder, then the pointed ends are driven into the ground to a depth of 2 meters with a heavy metal sledgehammer. When digging the pointed ends of the grounding into the ground, it is necessary to strike with a sledgehammer strictly vertically so as not to bend the structure.
Using a welding machine, pieces of the same material are welded, from which a metal triangle is formed in the trenches.
- Installation of a lightning rod (lightning rod).
To install an air terminal, you can use two methods:
strengthen the pole on the roof using two fasteners with clamps at one end, which are installed to the chimney with dowel-nails, one above the other.- Attach a pole to the rafters, having previously ensured that the roof covering is airtight.
The current collector is laid on the roof and then vertically down on the wall and is attached to the roof and wall with semicircular plastic or metal clamps. The lower part of the current washer must be fixed to the grounding lead from the wall of the house.
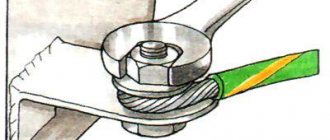
To do this, a hole is made in the grounding plate into which a bolt with a washer, nut and locknut is installed. The stripped (sharp) end of the down conductor is clamped using a washer, nut and bolt, along with a twisted pair wire wrapped around the bolt. Then the holes are filled in.
Examination
The installed system must be checked with a multimeter. Perform a resistance measurement - the device should have a value no higher than 10 ohms. If the device readings differ from the standard ones, check all the joints of the structure - there should be good electrical conductivity along the entire contour of the structure.