According to the current SanPiN, PUE, SP and SNiP, a sauna in a bathroom in an apartment is allowed for permanent use. It is impossible to legalize such redevelopment in other premises of an apartment building. The heating device is an electric or infrared stove with a conventional, ceramic or carbon emitter. For the hammam mode, a steam generator can be used.
Do you need permits for redevelopment?
Clause 8.12 of SNiP 31-01 specifies the requirements for designing a sauna in an apartment building:
- steam room volume less than 24 m³;
- only in buildings with slab floors;
- installation of a factory oven with automatic shutdown after 8 hours or at a temperature of +130°C;
Sauna stove.
- the minimum distance of the heating device to the walls is 20 cm;
- installation of a heat-insulating board made of non-combustible material above the stove;
- air exchange rate 0.5 when not in operation, 10 cubic meters/hour for each user when the stove is on;
- prohibition on placing saunas above/under residential premises;
- use of a fire-retarding valve in the ventilation duct according to SNiP 41-01 regulations.
Fire damper
Manufacturing from scratch or installing a ready-made modular bathhouse, sauna, or hammam in an apartment falls into the redevelopment category by default. Because to connect a heating device to it, you will have to install electrical wiring and install ventilation.
This is already enough for the actual state of the layout to not coincide with the sketch plan from the documentation stored in the BTI. The apartment will become impossible to sell; the regulatory authorities of electricity suppliers and the management company may legally demand that the layout be brought back to its original form.
Coordination of the redevelopment takes place in several stages with visits to the SES, Rospotrebnadzor department, housing inspection, management company, fire service and architectural department of the local government.
It is the sauna that is specified in the building regulations, since its temperature and humidity conditions correspond to the values of +100°C ... +120°C and 15%, respectively. The bathhouse is characterized by a lower temperature of +80°C and high humidity - from 40%. When designing a Turkish hammam in a bathroom, you should take into account that at a temperature of 50°C the humidity here can reach 100%, which requires high quality ventilation.
Who issues the permit?
Steam rooms - with their powerful heat and birch or pine aroma, are loved by many. Most Finns use their own sauna by organizing a small steam room in their house or apartment. In Russia, it has recently become possible to make a mini bathhouse in a multi-storey building. A sauna in an apartment is acceptable; standards and projects are regulated by two regulations:
- “Residential multi-apartment buildings” (SNiP 31 – 01 – 2003).
- “Architectural and planning solutions for multi-apartment residential buildings” (SP 31 - 107 - 2004).
So, in order to obtain permission to organize a home bath in the bathroom, it is necessary to make a construction project and coordinate it with the following organizations:
- Housing inspection.
- State Fire Service.
- HOA.
- Sanitary and Epidemiological Service.
- Office of Rospotrebnadzor.
- Inspectorate of the State Architectural and Construction Supervision.
A home sauna in an apartment requires the development of a project that must meet the following requirements:
- Only a special factory-made stove with an automatic shut-off function at 130⁰ and after 8 hours of continuous operation is allowed as a heater;
- It is mandatory to install a drencher for spraying water or a perforated pipe, which must be connected to the water supply system outside the mini sauna;
- a small bathhouse in the bathroom should have a total area of at least 8 m² and no more than 24 m²;
- To decorate walls and create shelves, only wood with special impregnation that resists burning and rotting should be used.
A mini sauna in an apartment with your own hands can be of several types, and before you start arranging a steam room, it is worth studying what types of home baths exist.
Advantages and disadvantages
A home sauna has enormous benefits. Even despite the costs and approvals, the benefits and pleasure from bath procedures are worth it.
Advantages of a home steam room.
- with regular visits, immunity to colds and infectious diseases is strengthened, toxins are removed and weight is regulated, the entire body is rejuvenated, stress is reduced, many diseases are treated, and hardening occurs;
- steaming is an excellent way to rest and relax after a tiring day of work or intense physical activity;
- To take bath procedures, you don’t need to leave your home, book a time in advance, pay for the hours spent there, or take a lot of necessary accessories and things with you;
- installation and connection costs quickly pay off during operation.
There are also relative disadvantages.
- the budget for installing a home sauna is quite significant and not always available;
- in a small apartment, where every meter of usable space counts, it can be difficult to place such a structure;
- energy costs and electricity bills increase;
- You must comply with all requirements and approvals in order to use the bathhouse legally.
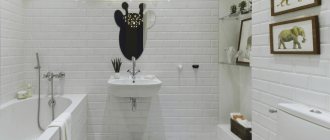
Photo
The device, which includes a shower stall and a sauna, makes it possible to carry out comprehensive measures to improve the health and relaxation of the body. Before purchasing, you should discuss the details and make the necessary calculations in order to properly manage your budget and purchase a functional item for the whole family.
Sauna equipment
The heart of the steam room is traditionally a heating device - a heater for a bath, an infrared or electric heater for a sauna, a stove with a steam generator for a hammam. It can have one or more temperature and humidity modes, and be equipped with additional options - aromatherapy, salt dies.
If the steam room is small in size, you can make a bath canopy of 2–3 steps inside. If space allows, a full-height lounger is arranged, on which visitors hover each other with brooms.
The stove is protected by enclosing structures - railings on racks. Waterproof lampshades and LED strip are used for lighting. Temperature and/or humidity control is carried out using built-in sensors.
To ensure maximum comfort, a shower and a tray with a drain connected to the drainage system can be built into the cabin. Removable, retractable, transformable seats, shelves, floors simplify cleaning and maintenance of the steam room.
Glass doors are convenient because they do not deform from humidity and temperature, unlike wooden ones, but they are more expensive.
Varieties of microclimate
There is a rule that states that the air temperature in the sauna plus relative humidity in total should not exceed 110. Experts strongly recommend adhering to it, for example, if the air temperature is 65 ° C, then the relative humidity should not be higher than 45%.
| Modes | Steam room | ||
| Finnish (dry) | Wet | Steam | |
| Temperature, °C | 90-110 | 70-90 | 40-65 |
| Relative humidity, % | 10 | 25-40 | 45-70 |
| Character traits | High temperatures and dry air lead to increased sweating | Pouring water on the stones on the stove creates increased humidity | Water vapor comes from a generator, into which you can add herbal tinctures for inhalation |
Sauna interior design options
The most common layout options for domestic saunas for use inside an apartment are:
Thus, a mini steam room with a sauna, hammam, bathhouse mode can be assembled on a balcony, in a pantry or bathroom on your own, or you can order the installation of a factory model, taking into account the shape and size of the room.
Advice! If you need bathroom renovation specialists, there is a very convenient service for selecting specialists from PROFI.RU. Just fill out the order details, the experts will respond and you can choose who to collaborate with. Each specialist in the system has a rating, reviews and examples of work, which will help with the choice. Looks like a mini tender. Placing an application is FREE and does not oblige you to anything. Works in almost all cities of Russia.
If you are a master, follow this link, register in the system and be able to accept orders.
Installation features
Sauna structures are supplied with everything necessary for installation. The installation technology is no different from the standard cabin. You just need to assemble it correctly according to the included instructions. You should start with the shower stall itself, and then move on to the sauna. The last to be mounted are the hanging elements.
To connect, you will need to run a power cable from the panel and install a separate circuit breaker. Care should be taken to insulate electrical wiring from contact with steam and moisture. The connection is made to a 220 V household network.
It is imperative that all metal parts of the shower stall are grounded.
DIY sauna in the bathroom
Ideally, the place to place a mini-sauna is the bathroom, since the necessary communications are already connected to it, and in order to place a sauna in it there is no need to seek various permits from the relevant organizations.
The walls and ceiling of the bathroom, in the place where the sauna will be located, must be lined with mineral wool on a wall frame. The wooden lining of the sauna is most conveniently attached to a wooden frame.
The walls separating the steam room from the rest of the bathroom space must be assembled on a frame in the same way as occurs when arranging frame partitions. The cabin walls also need to be covered with thermal insulation.
In order for the sauna to warm up well with minimal energy consumption, all heat-intensive surfaces located inside the box - walls and ceilings made of bricks, blocks, concrete, logs or timber - must be protected with thermal insulation. The thickness of mineral wool insulation usually varies from 50 to 100 mm for insulating the wall from the outside. Based on this, the internal height of the sauna should not exceed 2 m.
It is recommended to use mineral wool slabs as thermal insulation, rather than the rolled version. Due to the fact that the slabs differ from the rolled version in greater density and are less susceptible to slipping from vertical surfaces. A sauna with dimensions of 200x200 cm will best fit into a bathroom with an area of 12 m2. From the inside of the sauna, the insulation must be covered with a heat-resistant (operating temperature must be at least 110 ° C) vapor-proof film, which is laminated with aluminum foil.
The film allows you to prevent the insulation from getting wet, as well as protect the interior of the sauna from harmful emissions from the insulation, such as mineral wool dust. The film should be laid over the thermal insulation, so that the aluminum foil is located inside the booth. The joints and places where the film is attached (nailing) must be sealed by gluing them with aluminum tape.
There are mineral wool slabs specially designed for bath rooms on sale. The manufacturer pre-cuts these slabs with aluminum foil. During installation, all seams and joints are taped with aluminum tape. But when choosing slabs, it is necessary to rely on the fact that materials that are harmless to human health were used as a binder in the production of the material.
For example, you should not use slabs intended for facade insulation, since their production uses a variety of formaldehyde resins as a binder. This material will constantly emit deadly formaldehyde, and when heated, the intensity of the release of this substance increases many times over.
The wooden cladding (block house, lining) of the interior of the sauna must be at least 12 mm thick. Interior panels must be made from strictly specified wood species. For example, coniferous wood, cedar, fir or northern spruce, begins to release aromatic substances when heated. But at the same time there should not be too much aroma, it should be light and unobtrusive.
Therefore, pine wood, which contains a fairly large amount of aromatic resins, is not recommended for use for this purpose. The most successful option is to use linden or aspen wood in this case, as they allow you to create a neutral atmosphere inside the sauna.
To prevent the cladding from darkening over time and maintain its original attractiveness, it must be coated with a liquid heat-resistant compound that is specifically designed for such purposes. Elements made of wood that are not exposed to high temperatures, such as a door threshold or floor grate, can be coated with regular varnish.
The outside frame of the steam room can be sheathed with wood, plasterboard or some other board material, which can then be lined with tiles or plastic panels.
A more expensive version is a cabin made entirely of wood, without the use of insulation. The walls of the cabin are constructed from planed thin profiled timber or boards with a cross-section of 40-80 x 140-180 mm, laid on edge. There is no need to additionally protect walls built from timber with any compounds or special films.
Externally, timber walls are treated with vapor-proof varnishes and paints. To seal the joints between the beams, use a tape or cord made of jute or flax, which is placed in the grooves between the beams. A ventilated gap of 20-50 mm is left between the timber wall and the bathroom wall. It is necessary to take into account that when the sauna is heated, the timber will increase slightly, due to the fact that the heat capacity of the timber is much higher than that of the lining.
Steam room for luxury housing
Modern floor construction involves the creation of not only budget housing, but also comfortable apartments for wealthy people. Typically, this category of the population tries to take care of their health; the bathrooms are quite large, so arranging their own steam room is one of the prerequisites. Such apartments involve the construction of a sauna made of expensive natural materials.
For an elite sauna, expensive wood is used
If you are not short on funds, then a natural wood sauna may be an ideal option. For work, profiled timber with a cross section of 40-80 x 140-180 millimeters is used. Experts recommend laying it on the edge. Such thick wooden walls do not require additional heat and vapor barrier. The outside of the sauna is decorated using vapor-permeable paint or simply varnished. Be sure to leave a gap of 2-5 cm between the wall and the timber structure.
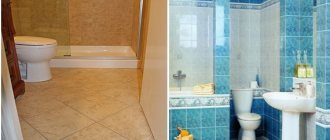
Bathhouse at home - in the bathroom with your own hands.
Cost 85,000 rubles
The author of this project purchased an apartment, but the bathroom in it was more than 6 meters long , and there was a lot of free space left, so he decided to make a mini sauna . I made a sketch of the proposed sauna and ordered the production of all wooden parts at a special production facility . A week later, these parts were brought to him, he inserted 150 mm prepared insulation into them (and 50 mm for the part that is against the wall) and assembled the frame. Photo 6 shows how they drilled the wall from the shield in the sauna.
I ran the hood to a standard hole in the wall; here the author was lucky that in this house, each apartment has its own pipe to the roof, so the neighbors won’t smell anything. Then the entire insulation was covered with a membrane inside and out. Then the inside was lined with foiled isolon (or whatever it’s called) and the seams were taped with tape, also foiled. The result was a thermos . The outside is lined with pine clapboard, the inside is lined with linden and cedar. The outside was painted with a polysander stain, and the inside was painted with special oils and water-based varnish. Author's comment: As a result: the bathhouse heats up to 80 degrees in 50 minutes, to the point where the thermometer reaches 125 in an hour and a half. What could be better than taking a steam bath, splashing water on the stones and being at home?
Where to begin?
First of all, build a strong frame, which will become the basis of the structure. Externally, it looks like a corner cabinet.
For the frame you will need thick support beams measuring 50 x 50 mm, some of which are installed vertically, others horizontally for tying and fixing. Adjacent supports are connected by 3-4 transverse parts.
For the ceiling perimeter, boards are used instead of beams. The door frame is also assembled from beams. You can use ceramics or hardwood to finish the floor.
Do-it-yourself sauna in the apartment's closet
Budget: 35 thousand rubles
Time spent 6-7 days, as I wrote above from lunch 1-2-3 to 7 o'clock.
35 thousand rubles spent. Of these, the stove - 10, lining and boards for shelves - 12, tiles for the floor - 1.5, insulation, regulator, sensor, relay, ventilation hatch, wire, switches, stones, galvanization, all sorts of screws, dowels, nails and other shells - 10-12.
The stove consumes 4 kW. The sauna is heated for 1.5 - 2 hours to 80 degrees (dry steam).
This is strange, but the author of the photo made a sauna in a rented apartment in a closet 170 x 140 cm (or as they call it in the sabotage industry), which, by the way, had a ventilation window.
I dismantled the old pine shelves (20-25 mm) in the pantry, split them, and made load-bearing slats from them for attaching the lining. I lowered the ceiling level and made a hatch for the hood. Then I made a thermos - covered the walls with 10 mm thick thermal insulation. I taped the joints with shiny tape. I connected a Harvia stove with a temperature sensor (9 photos - thermostat). I covered it with linden clapboard and installed a galvanized sheet behind the stove. Installed shelves. I upholstered the slopes and left the old door (temporarily). Added skirting boards
Sauna on the balcony for two
Budget: 35 thousand rubles.
The sheathing is aspen paneling. The shelves are linden. Insulation – glass wool. Kamenka – Harvia mini BC 35 (3.5 kW). Quartz stones. Sauna for two (+ 7 year old son on the bottom shelf). Size inside 98x120. Heats up in 40 minutes
The glass in the window on the balcony was replaced with a sandwich, otherwise the glass would sweat. Ceiling height 220. Everything was attached to the corners. Once finished, the frame was insulated with 50 mm mineral wool and 100 mm on the ceiling. I attached the cotton wool to special mushrooms and to the sandwich with staples. Next, I covered everything with foil, attached the foil to the staples, and sealed all the holes and staples with foil tape. I secured the slats under the clapboard with a thickness of 15 mm, in increments of 50 cm. Then sheathed the clapboard, first closed it from the inside, then from the outside. Ventilation had to be done above the door, perhaps this is wrong, but doing it outside is not an option - everything will freeze, and it’s impossible to go into the wall. It seems to be working fine. I covered all the baseboards, corners, and door frame. The shelves are 1 m high and 0.45 m wide, 55 cm and 30 cm wide, respectively, sanded, secured the shelves with corners from the inside, and a back rest. I lubricated everything with oil for the Tikkuril shelves. The walls were also treated with a Tikkurilov soup sauna. There is no smell, it smells like wood.
Warm it up, air it out - and go!
What to make the floor, door and heater from?
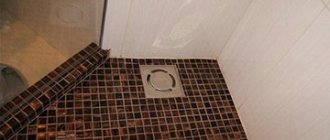
In a sauna, the most successful would be a concrete floating floor on a layer of insulation made of extruded polystyrene foam. Ceramic tiles are laid on the concrete floor screed. The sauna floor in the passages must be covered with special removable wooden gratings. This design is resistant to water and makes sauna cleaning easier. For greater convenience, it is recommended to install a drain in the floor - a receiving grid with a siphon for draining water into the sewer.
Doors to the sauna are usually made of wood. But on sale you can also find bath doors made of tempered glass. For safety reasons, no locks should be installed on the doors to the sauna, but only latches; in addition, the door should open strictly outward. To prevent door handles from burning your hands, they are also made of wood. As a rule, the height of the doors is usually 180-190 cm. The width in this case can be any, but not less than 60 cm.
Benches and shelves in the sauna are also made of wood, but from species that do not contain resin - linden, aspen or exotic species that are commercially available. The width of benches and shelves should be between 31 and 55 cm. Shelves and benches are arranged in two tiers in height.
The vertical distance between the first tier and the floor should be approximately 40 cm. The distance between the top shelf and the ceiling should be 120 cm. The width of the top shelf should not be less than 50 cm. For the manufacture of benches and shelves, it is recommended to use slats, leaving a gap of about 0.5-1 cm, this is necessary for free air circulation.
The simplest option for heating a sauna is an electric heater. Such a stove can be easily connected to a regular single-phase power supply in a house or apartment without any problems. The power of the stove is directly proportional to the size of the sauna. It is selected according to the calculation of 1-1.5 kW per 1 m2 of sauna area. For a mini-sauna with dimensions of 2x2m, an electric heater with a power of no more than 6 kW is sufficient. The power of the furnace can be considered optimal when it is able to heat the air to 80°C within half an hour.
As a rule, an electric sauna stove must be equipped with a thermostat, which will automatically maintain the required temperature in the sauna. Place the stove in the sauna on the wall or on the floor, always near the door. This is done due to the fact that the cold air that passes through the doors is captured by the hot air coming from the stove, due to which the cold air mixes and quickly warms up.
Thanks to the heater stove, you can create two types of microclimate in the sauna - a wet or dry sauna. In order to create a steam microclimate in the sauna, you will need to purchase a steam generator for the sauna. It must be mounted externally and requires a direct connection to the water supply. The water is fed into a generator, where it is brought to a boil until it turns into hot steam, which is supplied through a pipe into the sauna. The tip of the pipe should be located in the sauna under the shelves.
The sauna must be equipped with ventilation. An air supply hole is made in the wall of the sauna, namely at the bottom near the floor. It should be located under the stove or next to it. The hole area is approximately 125cm2. The outlet vent is located at the top of the wall or ceiling. It should be located as far as possible from the supply opening and from the doors. Its area should be approximately twice that of the supply air and be approximately 250 cm2.
Thrifty homeowners, in order to use the heat of the sauna to heat the house, install an economy duct, which serves to force air from the bathroom into an adjacent room, such as a hall or corridor. With the help of a fan, air is sucked into the economy channel from the top of the bathroom and then sent down through the pipe, after which it is released into the adjacent room at floor level.
Ventilation device
The stove in the home sauna design is initially equipped with its own fan, which mixes the internal atmosphere and equalizes the temperature.
To ensure additional ventilation, you need to maintain the dimensions of the sauna cabin. Its height should not be less than 2.2 meters. If the ceilings of the apartment are higher, then an additional mezzanine can be created to level out the free space.
To ensure the natural movement of air flows, it is necessary to nail the inside of the boards with gaps of two centimeters at the top and bottom of the structure.
Electric sauna stove - tips
Home bath care
Untreated wood begins to deteriorate due to constant exposure to moisture, and therefore one of the most important points when caring for a sauna is to ensure that it dries well after each use. In order to keep the sauna clean after your visit is over and while it is still warm, you need to:
- using a damp sponge or rag, wipe all shelves and benches in the sauna;
- lift a rug or grate from the floor, lean it against the wall and let it dry;
- remove any remaining water, wipe the floor dry, take away wet towels;
- open the door and vent.
If these requirements are met, the sauna will dry out easily and quickly, as the fresh air warms up and removes any remaining moisture. Thanks to this, it is possible to prevent the appearance of various fungi and molds, for which a humid and warm environment creates favorable conditions.
As the sauna's wood begins to become dirty, general cleaning will need to be done periodically. Elements made of wood must be washed with a brush and detergent. The remaining detergent must be rinsed off, then wiped with a damp cloth and wiped dry. After which you need to turn on the heater and dry the sauna.
The market offers special products for cleaning the internal parts of the sauna, which are also used for disinfection, thereby greatly facilitating maintenance. It is recommended to coat all wooden surfaces with a protective compound. The composition, which contains natural wax, allows you to create a dirt- and water-repellent layer, thanks to which the surfaces will be easier to clean and less dirty.
The stone container for the heater needs to be cleaned at least once a year. To do this, you must first remove stones from it, and then fine sand and remaining water.
It is quite possible to build a sauna in your own apartment if you follow all the recommendations given above, which will prevent most problems when using it. All the work and money spent will more than pay off thanks to the adoption of useful and relaxing steam treatments that can be taken without leaving your home.
Reviews
In Finland, almost everyone has a sauna in their apartment, this is a common thing. Russians have also long been famous for their reverence and love for bath procedures, so the idea of installing saunas right in the bathroom was to their liking. Well-known Finnish, Swedish and Russian companies producing ready-made saunas offer prefabricated options that receive excellent reviews from owners of compact steam rooms.
Buyers note the excellent quality of the material and the dimensional accuracy of the components for assembly, the reliability and safety of the stoves, which can be selected in terms of power for the specific dimensions of the bath, quick heating to the desired temperature and a long service life.
Clients like phyto-barrels for their compactness. You can steam in them using herbal and pine infusions, increasing the therapeutic effect of the procedure.
Some owners prefer a sauna built with their own hands, while others steam in a portable fabric steam room. Owners of different types of baths who have been using the cabins for a long time have noticed a general improvement in their health, skin, nervous system and believe that all the costs and efforts to install a home steam room are paid off many times over by the benefits and pleasure of this wonderful invention.
Sources
- https://MasteraVannoy.ru/raznoe/sauna-v-vannoy-komnate-v-kvartire.html
- https://stroy-podskazka.ru/banya/sauna-v-kvartire/
- https://novamett.ru/banya/mini-sauna-v-kvartire
- https://SantehnikPortal.ru/sanuzel/sauna-v-kvartire.html
- https://dkedra.ru/informacia/staty/infrakrasnye-kabiny/sauna-v-kvartire-kak-pravilno-obustroit-i-ne-poluchit-shtraf/sauna-v-kvartire-kak-pravilno-obustroit-i- ne-poluchit-straf.php
[collapse]