General principles for creating pots and flowerpots from concrete
Concrete is mixed in the following proportions: 2:4:8:1 - cement powder, sand, filler and water, respectively. If the pot is planned to be large, for outdoor compositions, large crushed stone will be suitable as a filler. For home decor, it is recommended to use fine chips, otherwise it will be impossible to sand the surface properly.
The principle for making all pots is as follows:
- Select a form into which the concrete will be poured. Even juice bags or thick cardboard are suitable for small containers. For medium-sized products, they usually take plastic: cans without a neck, food cups, just plastic dishes. But for very large pots (meaning containers with a height of more than 50 cm), you will have to construct a base from plywood or boards.
- In addition to the outer walls, you will need a container that will form a space for planting the plant. That is, you need to insert another smaller one into the main form. For this, plastic cups or the same cheap store-bought pots are almost always used.
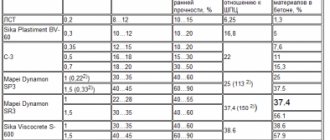
- After pouring concrete into the mold, you need to wait 4 hours. After this, the mold is torn or cut and removed, but the pot itself cannot be touched yet. You need to let it stand for at least 3 days: during this time it will gain 30% strength. Full strength is gained after 28 days, only after which can the plant be planted. If you neglect this condition, the concrete planter will simply crumble.
- Concrete is porous, and filler often protrudes from the walls after the mold is removed. To make the pot look attractive, you must first adjust its shape with a file and then sand it with sandpaper. But this is not enough. You can get rid of pores only with the help of grout, which is made from the same cement mortar or from a primer. It is also sanded, but with fine sandpaper or a special paste.
Important!
Concrete is a heavy material. A medium-sized pot will weigh 15-20 kg. If there is no person in the family who can easily move such a weight, it is logical to think about a stand with wheels.
There are a few other points to consider. The concrete product should remain in a damp room for the first 4-5 days. Otherwise, the workpiece will crack. If it is not possible to leave it in the bathroom, you should spray the surface with a spray bottle 1-5 times a day.
The proportions of the concrete mixture may vary. Before mixing the solution, you need to clarify the recommended proportions - information is indicated on the packaging.
Technology for making cement pots
Cement pots are made in the simplest way, following all the rules.
- First you need to prepare all the tools and materials necessary for the work. To do this, use concrete mortar, terry or waffle towels; instead, you can take any fabric with a dense structure. A beginner can try to make a flowerpot from a bucket; you still need to prepare polyethylene. The work is carried out with gloves, as the cement will damage the skin of your hands.
- Water is added to the cement so that the mixture becomes similar to liquid sour cream. The container, in this case a bucket, is turned upside down and wrapped in prepared polyethylene, so the pot can be easily removed after drying. After this, the towel or fabric is immersed in the solution, thoroughly soaked, taken out, and straightened. There should be no dry areas left on the fabric, this indicates that it is completely saturated.
- Place a cloth over a bucket or other prepared container and smooth it out so that no wrinkles remain, otherwise the pot will lose stability. The remaining folds that hang down can be straightened in any convenient way. The product is left to dry for about two days and then removed from the bucket.
After this, the flowerpot is considered ready, the product can be decorated in a decorative way, painted, drawn with patterns, or made into a wavy surface using cement-impregnated fabric.
Canister pot
The easiest way is to pour the concrete mixture into a plastic mold. You need to take a standard 5 liter canister and cut off the top to the point where the walls stop expanding. A plastic cup is inserted inside. You can take a 9 liter canister as a basis and insert a 5 liter container into it. You will get a ribbed pot. It is perfect for planting succulents. It can be safely kept outside.
Small pots for cacti
It is difficult for beginners to start with volumetric structures. Some people may not be able to pour the solution into the container at all.
Then you can use the following instructions:
- Buy some cheap glass glasses. These can be found at IKEA, for example, “Darroka” for 29 rubles. a piece.
- Dilute the cement mortar in a plastic container. The glass should fit freely into it, with the top down. There is no need to add filler, just like sand. All you need is cement powder and water.
- Paint the glass with white paint. It is recommended to purchase a spray can; when sprayed, the paint adheres better to the glass. You can choose another paint. The main thing is that the glass ceases to be transparent.
- After waiting for the paint to dry, dip the glass in the newly diluted cement mortar. Allow the product to dry overnight.
Color can be added to cement to give it a specific color. It is recommended to use natural shades.
You may be interested in:
Really Useful Plastic Bottle Craft Ideas Since the late 1970s, plastic cans and bottles have become widely used as packaging materials for...Read more...
DIY cement flowerpot (step by step)
What to prepare:
- Cement;
- Water;
- Sand;
- Mixing container;
- Master OK;
- Vegetable oil (spray is convenient to use);
- Plastic flowerpot of the desired size;
- Plastic container for installation inside;
- Sandpaper.
Set of flower pots
You can create several concrete pots at once to combine them into a beautiful composition. An example is shown in the photo. It is enough to make several forms so that the pots can be folded into a single object, like a puzzle.
Fact!
Ready-made silicone molds are sold for the pots shown in the photo. You can find them on Aliexpress, the cost is only 530 rubles.
Square pots with gilding
Typically, concrete pots are left uncovered: this makes them look more authentic. But why not play with their appearance? With the help of simple paint, faceless gray concrete can be turned into a decoration not only for minimalist interiors, but also for rooms in the Empire style, ethnic style, and so on.
The manufacturing process is similar to that which has already been described many times above. Square pots are best suited for painting. They are easy to use stencils on. After the cube pot is ready, you need to:
- Wait at least 4 hours for the concrete to set. Remove from the mold.
- Cover with white paint. If you choose a paint with the addition of fine sand, it will help hide minor surface irregularities. In this case, you will be able to do without thorough sanding, but before applying the substance, it is still recommended to go through the corners with a file.
- When the first coat of paint has dried, apply a second coat if necessary. This may be necessary if the paint is translucent and the gray base shows through.
- Wait for the paint to dry. The drying speed and time required to apply the second coat are indicated on the packaging. Usually it is 12 hours.
- Cut out a stencil from cardboard. You can repeat the pattern in the photo or use your own sketch. Using metallic paint in a gold or bronze shade, apply the design through a stencil.
Such a pot will delight the eye for a long time and is suitable not only for strict men’s interiors, but also for elegant women’s bedrooms.
Advice!
Since concrete is porous, it is best to use a thin layer of primer before applying paint. This way the paint will adhere better, and you won’t have to renew it in a couple of years.
You may be interested in:
How to decorate and illuminate garden paths in an original way? With the onset of the spring-summer season, summer residents clean up their garden plots. They plant flowers and trees,...Read more...
How to beautifully paint cement planters?
The simplest design is to paint the flower pots. For this, acrylic paints are used, as they are highly resistant to weather conditions. Also, during the preparation of the solution, you can add a special pigment of the required color. Before painting the flowerpot, it is thoroughly dried and primed. To give a flowerpot a beautiful look, you need to choose the right color; it should not be too bright, but rather natural in nature, and the beauty will be emphasized by the flowers inside it. This is done so that the shades of the flowers and the pot do not merge and also do not look cakey. The surface can be decorated with a composition of plants or various designs.
To achieve originality, bright plants that have beautiful decorative leaves are planted in such flowerpots. If there is not too much land, then the plants will need frequent watering, as it will dry out quickly. You can combine plants in cement pots and make various compositions. In spring, bulbous plants are usually grown, and in summer, lavatera or viola will highlight the flowerpot. In autumn you can plant petunias or asters. Making a flowerpot out of cement with your own hands will not be very difficult; such products are original and can decorate gardens and entrances to a room or site. The surface of such pots is decorated with various patterns or compositions of plants. Even a beginner can do this kind of work, without any experience.
Planter under a wooden bucket
It’s not hard to figure out how to make such a pot: just use an old wooden bucket as a mold. You can put together something similar yourself. After the concrete has set, it needs to be decorated. Wood grains will not appear immediately; they need to be created using a cutter. The overlay imitating a metal ring will also have to be applied separately. Finally, holes are made in the concrete for the rope.
It's a bit heavy to carry 10 and 20 kg pots. To make the structure lightweight, foam should be used as a second filler. This tip can be applied to any design.
Hanging planter
If you have limited space at home, you can hang the pots. For manufacturing you will need metal triangular plates. Cement mortar without filler is spread on them with a layer of 3-5 mm. Having made three such plates, they need to be combined into a single structure, coating the joints with cement mortar. Even before complete hardening, a hole should be made in each plane. A rope will be threaded through them.
Round base
To create such a container, you will need round sponges. It is necessary to make a small recess in them, which will later serve for planting plants. Then the sponge is dipped in cement mortar. The result is a very light pot, and even a child can make it. Since the planting hole will be small, you can only place a succulent there.
Crafts made from cement and plaster
Dry building mixtures left over from construction can be used to make a variety of useful and simply beautiful things. These are flower pots, flowerpots, garden figurines, candlesticks and even decorative tables and stands.
Preparation of the solution
Even regular cement can be used to create garden crafts if you mix it with tile adhesive. The proportions are:
- cement – 1 part;
- tile adhesive – 1 part;
- clean sifted sand - 2 parts;
- water - as much as needed for the solution to acquire the density of thick sour cream.
Prices for cement and basic mixtures
Cement and base mixtures
This mixture turns out to be very plastic and easy to work with; after drying, the products do not become cracked.
Preparation of the solution
Decorative composition made of rope impregnated with cement mortar
The same consistency should be achieved when mixing gypsum mortar. But you need to remember that it sets very quickly, so the portion should be such that it can be used in one go. In addition, gypsum products are not suitable for outdoor crafts, since this material is quickly destroyed by moisture.
If you plan to manufacture large monolithic products such as a bowl for a mini-reservoir or a pedestal for a garden figurine, then pebbles or crushed stone are added to the cement mortar to add strength.
Pots and vases
To make a flower pot, you need to take two containers - one larger, the other smaller. Fill the large one halfway with the solution and press the small one into it, placing it in the center and filling it with weight so that it does not float up.
Fill the space between two containers with the solution.
DIY miniature flowerpots made of concrete
After a few days, when the solution has completely hardened, the containers are removed, and the finished product is primed and painted. You can drill a hole in the bottom to drain excess liquid.
Another way to make flowerpots is using collapsible formwork from boards
DIY concrete flowerpot
DIY flower vases
There are several ways to make such flowerpots more impressive. For example, place bubble wrap, lace, or large leaves in a large container before filling it with the solution. Their design will be imprinted on the hardened cement mixture, making the outer walls of the product in relief.
Garden decor
You can fill a variety of objects with cement or gypsum mortar or make casts of them to create unusual decorations for your home or area. Let's give a few examples, and the first will be a simple master class on making an openwork ball, the photo of which is posted above.
Step 1.
We prepare a not very thick cement mortar and saturate it with rope or long pieces of fabric cut from an old sheet or T-shirt.
Soak the rope with the solution
Step 2.
Inflate the balloon to the desired size.
Inflated balloons
Step 3.
We wrap the ball with a rope soaked in the solution, creating an openwork mesh. Let the product dry.
The ball is wrapped with a rope soaked in solution
Step 4.
We pierce the ball with a needle, remove it from the ball and, if desired, paint the garden decoration with spray paint.
The ball is pierced and taken out
This principle can also be used to make decorative flowerpots. It’s even easier to make them: you just need to soak any old rag in the solution, throw it over an inverted bucket or other container and dry it.
DIY flower pot made of cement and fabric
And an inflated balloon or a rubber children's ball can also be used to create thin-walled spherical vessels for a wide variety of purposes - from decorative to completely practical.
| Manufacturing stage | Description |
| Stage 1 | Mix the solution, inflate the balloon and place it on a glass jar or other support. |
| Stage 2 | Carefully coat the ball with the solution on top and sides, trying to make the coating continuous and of the same thickness. |
| Stage 3 | After the solution hardens, deflate the ball. |
| Stage 4 | We paint the resulting container inside and out. |
| Stage 5 | And we use them as flowerpots or outdoor candlesticks. |
By coating a leaf of burdock or another large-leaved plant with a thick layer of solution, you can get a decorative birdbath or an element for creating a mini-waterfall.
The sheet is coated with solution
Flowerpot leaf
Garden decor
small waterfall
A very unusual and original idea for creating a mini-flower bed is to use rubber gloves. After filling with cement mortar, they need to be given the desired shape by placing them in a bowl. After freeing from the shell, the cement hands are glued together with the same solution if necessary.
Sculpted hand made of cement
An original flowerpot for the garden made from a pair of rubber gloves and cement
A simple and interesting way to decorate flower beds
Sculpture with a bird
