Methods for installing lighting on the ceiling
The most common place to install LED strips is suspended ceilings (especially plasterboard).
This product can be installed on the ceiling in the following ways: Please note! The methods for attaching an LED strip to the ceiling are similar to placing it on the wall (for example, in a niche in a partition or wall)
- creating hidden lighting by installing LED in a box;
- placement of the light source on a special profile;
- installation of the product on the ceiling plinth.
The most common way to create hidden lighting is using a box. In this case, you need to create a box with a hidden cornice from drywall.
Hidden LED lighting in a plasterboard box
This is a rather complicated implementation method, as it involves creating a box around the entire perimeter of the backlight. In addition to the box, the LED strip can be installed on a profile, which today can differ both in the material from which it was made and in type. The most popular is the aluminum profile. It is best to choose when installing in the kitchen.
Profiles for LED strip
But a plastic profile can also be used here. This profile is suitable for the bedroom and living room. Modern models, which have increased resistance to temperature changes and moisture, are perfect for installation in the kitchen. Profiles for LED strip come in three types:
- corner. Used to create ceiling lighting around the perimeter of rooms. With such a profile, you can create an unusual illumination of the ceiling surface, even if there are various figures on it;
- mortise More relevant for furniture lighting. They are often used in the kitchen to illuminate the work surface;
- built-in When installed, it looks three-dimensional, which allows you to play with it in the interior of the premises in a variety of ways.
Another rather original way to attach an LED strip to the ceiling is to install a ceiling plinth. The main advantage of this installation method is the simplicity of the work, on which you will spend a minimum of effort and time. Here you just need to install the plinth at a distance of 8-10 cm from the ceiling.
Ceiling plinth for LED strip
Once the installation method (box, profile or plinth) has been selected and implemented, you can begin installing the light source itself.
Installation of LED strip
After fastening the profile, we move on to the ice tape. Cut it to the desired length.
This is done in special places marked with “scissors” or another similar pattern. Where the contact pads are located.
If the tape is short, it can be extended by soldering.
Next, if there is no factory adapter plug, again solder two power wires to the beginning of the tape.
Just don’t forget to first pull them through the side plug.
There are plugs with factory holes for this purpose.
Do all soldering work in advance, on a table, and not on the ground, when good contact cannot be achieved without skill.
Those who do not want to do soldering can use special connectors.
They are sold for mere pennies in hardware stores or on Ali.
With some modification, these plastic things can even be hidden inside the profile.
Otherwise, in the open, all this will not look very aesthetically pleasing.
Select the wires of such length that they are enough with a small margin to reach the location of the power supplies.
Next, carefully remove the self-adhesive backing from the LED strip.
For greater reliability, you still shouldn’t trust these double-sided tapes 100%. Therefore, it never hurts to apply a few extra drops of glue to the flat base of the profile.
At the same time, do not forget to thoroughly wipe and clean the surface.
The best type of glue is in the form of a gel.
Just don't try to use hot glue from a gun. Why is described in the article about the errors of the most popular methods of attaching LED strips.
Power wires are led to the installation site of the unit from the infrared sensor and the LED backlight power supply.
Let's move on to connecting and assembling the entire circuit together.
How do you get white light?
As we mentioned above, white light should be used to illuminate work areas in the kitchen. But getting it from monochrome lamps is not so easy; four technologies are used for this.
Table. Methods for producing white light in diode strips
| Options | Brief description of production technology |
| First way | Colors with three light streams are mixed using RGB technology. Red, green and blue diodes are fixed on a single matrix, light rays from all of them enter the lens and mix there. At the output we see a smooth white color. This method is the most common; on most feeds you will see a lighting icon under small lenses. |
| Second way | This method is used much less frequently due to its complexity and low efficiency. On LEDs, primary and secondary colors are mixed during production. For example, green and red phosphors (which create a secondary yellow color) are applied to a blue LED. A phosphor is a substance that converts absorbed energy into light radiation of various lengths. The glow can be caused by ultraviolet radiation, electrons or electric fields. Expensive technology causes the price of tape to increase. |
| Third way | Diodes are selected that can emit the maximum amount of ultraviolet rays. Their sizes are relatively large; three phosphors are fixed on the surface, emitting three primary colors. The method is very similar to the technology described above and has similar advantages and disadvantages. |
There is another method, but it is almost never used in the manufacture of LED strips. White color is obtained using the semiconductor ZnSe. Blue obtained using ZnSe technology and a substrate are used. The active part gives blue, and the substrate yellow, after mixing it turns out white.
RGB technology is considered optimal, and it is these LED devices that are recommended to be purchased. This method is not only the simplest and cheapest from a technological point of view, but also gives the maximum power of the luminous flux with the same losses of electrical energy.
RGB LED strip - the best choice for the kitchen
How to make kitchen lighting with LED strip?
Illuminating the work area in the kitchen with LED strip can be done in all sorts of ways. One interesting idea is to assemble a pendant linear light on the work area of the kitchen table or sink. GIZA aluminum profiles from the KLUS company. Don’t be alarmed by this profile and all the accessories for it you can buy in Russia. The cost of this profile is quite affordable.
Kitchen lighting with LED strip – Aluminum profile GIZA
Article: B5556
Possible execution options.
Installation instructions.
In order to make kitchen lighting with LED strip with your own hands, as in the photo, you will need:
- Aluminum profile GIZA – Sold by 2.5 m.
- End cap kit. - 2 pcs.
- Cable suspensions – 2 pcs.
- Power supply for LED strip – 1 pc.
- LED strip – Sold by 5 m.
How to secure
Garlands are hung on trees according to the “fluffiness” of the branches and attached to them using plastic cable ties or clamps.
For facades you will have to look for special clamps with dowels or screws included. Or with a hole for them.
As a rule, they are drilled once and left in the wall in this form until the next winter. In the spring, simply freeing the wires from the clamps.
If you are not ready to damage the wall, then you can only create lighting decorations on windows, cornices, gutter overhangs, etc. It won't be as impressive, but it will leave your home intact.
On the above facade elements, the wires can be attached painlessly using the same clamps or glued cable pads. And in the spring, remove the whole thing and put it off until next year.
The connection of the garlands will depend on their voltage. There are models designed for 220V and 12-24-36V.
Those powered by a 220V network are considered the least safe. They should not be placed along paths, metal fences or other places where accidental human touch is possible.
Still, street operating conditions still affect the technical condition of the insulation. Such garlands do not require low-voltage power supplies and will require separate 220V wiring.
And such products, as a rule, have a serial connection circuit. Accordingly, you will not be able to extend or cut off an additional few meters of the garland at will.
Moreover, if there are several different pieces of them on the facade, then a separate power wire will have to be pulled to each one. Remember that they all have a very short factory cable (the one with the plug).
Of course, experienced homeowners sometimes install a couple of street outlets at the construction stage. Both on the facade of the house and in the courtyard area near the paths.
1 of 2
But most of you, unfortunately, do not have this.
When installing hidden wiring, use the correct cable that will last outdoors for many years. For example, the same VVGng with insulation resistant to ultraviolet solar radiation, cross-section up to 1.5 mm2, and not PVA.
Make connections in a protective junction box to the self-clamping terminals of the car. They will allow you to painlessly connect and, in the spring, disconnect the monocore of the VVG cable from the flexible power wires of the garland.
From this distribution box you will have only one cable going into the house. And it is he who will connect to the 220V network. You can simply connect it through a separate switch or from a relay with a light sensor.
By the way, the connection diagram can be used the same as that widely used for street lighting in a country house.
It will work both automatically and manually.
Do not forget that when installing lighting in a two-story house, you cannot do without a rafter system or special lifts. Consider the costs of these mechanisms in advance.
1 of 3
Low-voltage garland models are connected via 12 or 24V power supplies. They may not always come as a set. Therefore, you will have to choose them yourself.
The most important thing here is to choose the right power and, again, the degree of moisture protection.
Never choose them, as they say, end-to-end. Always do this with a margin of at least 20%.
Find out the power of your garland and multiply it by 1.2. Next, look at the step-down blocks closest in terms of watts and select the appropriate one.
Basic installation rules
Before starting work, it is necessary to carry out some preparatory procedures. First you need to check the purchased tape for damage. There should be no creases or scratches along the entire length. This may cause the lighting fixture to eventually not work. Check the power compatibility of the power supply and tape.
If the work is being carried out for the first time, it is important to study all the information that will help you do everything correctly the first time and avoid the need to redo something.
Illumination of the dining area and bar counter
In order to highlight certain areas with light, you need to first think through the location and fastening of the tape:
- To illuminate the bar counter or dining area, you should choose a not too bright LED strip. At the same time, its glow should be soft and not intrusive.
- Based on the degree of moisture protection for illuminating these objects, you can choose the middle type, since the humidity level here is less than near the working surface.
- To attach the tape to a table or bar counter, you must use a special aluminum profile. It performs a protective function and hides all wires from prying eyes. Using double-sided tape is not such a reliable option.
Step-by-step installation
Once all the tools and materials are ready, you can start doing the work yourself.
All work must be performed in strict sequence:
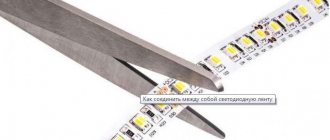
- Today, the most commonly sold reels of tape are five meters long. If there is a lot of this length, you need to cut off the required piece using scissors. The incision must be made in a strictly defined location. Such places are marked on the tape. After the incision is made, you need to expose the contact from the silicone coating by 1-1.5 cm as carefully as possible.
- After the contacts are exposed, two cables need to be soldered to them. The connection can be made using connectors, but it is preferable to use the first connection option.
- After soldering is completed, it is necessary to perform insulation. For this purpose it is better to use a special heat shrink tube. To do this, you need to cut a piece 2 cm in size and put it on the adhesion site. Next, use a hair dryer to heat the tube, thereby securing it in the desired place. Using a tube is a more reliable option and looks much more attractive.
- The tape can be secured using double-sided tape or special staples. Especially in cases where it is attached to the walls of kitchen furniture. The fastening area must first be cleaned and degreased, this will allow it to be fixed as efficiently as possible.
- It is worth considering the location of the transformer in advance. It should be mounted next to the tape. On the low voltage side, a cleaned tape wire is attached to the device. On the other hand, you need to attach the plug with the electrical cable.
- All wires must be connected in parallel.
- It is also necessary to install a plastic box. The wire is secured in it using electrical installation brackets.
- If there is a dimmer, its installation is carried out at the final stage along with the installation of the power supply.
The procedure for installing the tape anywhere is almost the same. In case of ceiling lighting, you need to use a PVC corner for mounting.
Installation and necessary materials
To install the LEDs yourself, you should select the desired version of the tape and other accessories. Then carry out the necessary work.
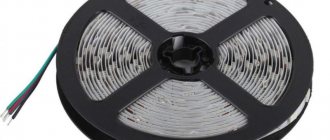
Selecting LED strip
Before purchasing, you need to clarify how many diodes there are per linear meter of tape. It can range from 30 to 120 pieces on a single strip, up to 240 on a double strip. Usually for the kitchen they buy from 60 LEDs/linear meter. The tape is also selected according to the dimensions of the diodes, which are determined by the first digits of the marking. For example, in the SMD3528 model the size of the bulbs is 3.5 x 2.8 mm.
Selection of power supply
Typically, LEDs operating from 12-24 volts are purchased for the kitchen, since 220 V devices are used only in rooms with low humidity. Therefore, luminaires will require step-down transformers or power supplies. For them, it is important to correctly calculate the power, taking into account the total length of the connected tapes.
Preparation for installation
Before starting installation, it is important to prepare a number of tools, devices, and materials:
- reel of tape;
- cable (section 0.74 sq. mm);
- dimmer with or without remote control;
- solder with rosin;
- scissors;
- soldering iron;
- double-sided tape;
- insulating tape;
- PVC corner or aluminum profile;
- drill;
- self-tapping screws;
- voltage indicator;
- a router if you need to cut the strip into the bottom of the cabinet.
Installation
First, choose the location of the future tape, taking into account the need for lighting and the design of the room. A universal method of attaching diode strips is using aluminum profiles with protective light-diffusing films. The installation order will be as follows:
- Route the wire to the connection area by drilling an inconspicuous hole on the back of the cabinet. Measure the required amount of LED strip, cut it, and expose the edges of the silicone coating by 1.5 cm.
- Solder 2 cables to the contacts or connect them with connectors, if possible. Insulate the joints.
- If there is an adhesive layer, the protective film is removed and the tape is pressed to the selected location. If there is no such layer, use double-sided tape. If necessary, you can fence off the tape with a profile or corner in the color of the cabinet for camouflage (the profile is secured with self-tapping screws).
- Secure the power supply and carefully connect the wires with the supplied clips. The room must first be de-energized.
- Check the wiring for short circuit with a tester (voltage indicator). Then connect the tape to the network.
Installation Features
You should not buy and attach cheap tapes to kitchen cabinets, they will break down faster. Great attention must be paid to the insulation of wires, because there is always a lot of humidity in the kitchen. The symbols on the tape will help you connect the cables correctly - plus and minus. Connectors are used only in the absence of a soldering iron, but professionals do not recommend this method of fastening wires, it is less reliable.
LED kitchen lighting is a beautiful and practical lighting option. It does not interfere with bright, irritating light, while fully illuminating the entire work area, which is why it is appreciated by users.
Installation instructions
To install the tape, you need to follow the instructions, and you will succeed. The simple rules below will help you make your own kitchen apron lighting with LED strip:
- To illuminate the workplace, the color range is best suited to cold or natural light.
- It is better to take the installation tape in a silicone protective shell, this will make cleaning easier in the future, and thereby increase its service life. If it is not possible to buy a product made of silicone, we recommend that you read our article on how to protect LED strip from moisture.
- Before purchasing a power supply, you need to find out the power of the future backlight; each type of LED has its own power consumption. The table below shows the power consumption of one meter of lamp.
- The power of the unit must be taken with a margin of 20%, since operation at the maximum capacity will lead to premature failure of the voltage source.
- Cutting pieces of tape must be done in the place marked for this purpose with the image of scissors.
- The power supply should be installed in a location where it can be easily maintained. At the same time, it must be protected from moisture, debris and overheating.
- The soldering area must be carefully cleaned of silicone and tinned without overheating, while avoiding excessive heating of the substrate and its detachment from the self-adhesive strip. You can also purchase special connectors that will allow you to install the tape without soldering.
- Protect exposed wires after soldering by using small pieces of heat shrink tubing of the appropriate diameter.
- To glue LEDs and illuminate the kitchen apron, the surface must be degreased with alcohol for better results. Otherwise, it will periodically begin to peel off and sag.
- In the event that you plan to make the main lighting of the apron from several strips in a row, and not background lighting in the kitchen, you need to take care of good heat dissipation. As a heat sink, you can use aluminum plates, metal cases or reflectors from old, worn-out lamps.
These 10 rules will help you make your own kitchen backsplash lighting. We also recommend watching videos that discuss 2 installation options: single-color and RGB LED strip.
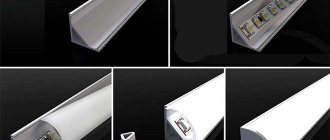
Types of profiles and installation method
Based on the material used, a distinction is made between plastic and aluminum products.
Plastic boxes are made from special polycarbonate. Flexible plastic makes it possible to widely use cable channels to design rounded arches.
Advantages of polycarbonates:
- Low price.
- Elasticity.
- Different texture (color, wood-like surface...).
- Matte or transparent body.
- Easy installation.
There is only one drawback - the thermal conductivity and cooling of the tape is worse compared to aluminum.
Metal channels are made of aluminum. They are cut into pieces of different lengths: 1150, 2000, 2500 mm.
A useful property of an aluminum profile is the removal of heat from the light source.
Strips based on SMD 3528 and similar LEDs do not require an additional heat sink. It is not advisable to mount products with SMD 5050 and higher directly on surfaces with low thermal conductivity (plasterboard, chipboard). Heat sinks (aluminum strips, profiles) are used for them.
Flexible plastic profile for LED strip
IN
Expert opinion
Alexey Bartosh
Specialist in repair and maintenance of electrical equipment and industrial electronics.
important! Long-lasting LED operation is ensured at temperatures up to +70⁰C. When overheated, the service life is sharply reduced due to the destruction of the device structure.
The profile is installed using double-sided tape, glue or self-tapping screws.
The aluminum body is suitable for use in kitchen lighting, steps, and public places. To seal the housing installed outdoors, a special tape is used.
Different types of profiles allow you to direct the light flux in the desired direction.
According to the installation method, profiles are distinguished:
- Overhead.
- Angular.
- Built-in or mortise.
- For illumination of glass ends.
- Suspension.
Invoices
Overhead models are popular and in demand. Installation is carried out on any flat surface.
Fastening is done with glue, self-tapping screws, using high-quality double-sided tape.
In addition to the profile, the product kit includes a plastic cover. The element is made of transparent or matte polycarbonate, which serves as a diffuser. The type of cover is chosen depending on the purpose of the lighting. A transparent screen is used for lighting, a matte screen is used for decorative purposes. The end is closed with plugs.
Different types of housings: rectangular, square, cone-shaped, round allow you to find products for different types of installation.
The housings of pendant LED lamps, which you can make yourself, are made from overhead profiles.
Overlay profile for LED strip
Corner
They are used for installation in the corners of building structures, commercial equipment, and cabinets. Allows you to hide uneven joints.
This option is convenient in places where lighting is required at an angle.
Diode sources emit bright, eye-irritating light; to reduce the effect, a diffuser is included in the kit.
Built-in
The difference between the mortise type is the presence of protrusions that cover uneven edges of the material at the installation site.
There are two installation options.
In the first case, a groove is made in the material, into the cavity of which a profile is built.
In the second - installation in places of transition from one material to another. For example, a line connecting plasterboard and chipboard, plastic panels of different colors...
The hidden structure is not visible to the human eye - only a strip of light is noticeable.
Built-in profile for LED strip
For illumination of glass ends
A widely available profile for illuminating glass is 8 and 10 mm, which is used for installing tape and fastening glass.
Acrylight technology is becoming widespread in decorative design. A pattern is applied to a glass sheet or plexiglass using laser engraving. The pattern becomes visible only when the end of the glass is illuminated with an LED strip. A profile is used to frame the canvas and install the tape.
Hanging
The hanging profile is similar to the overhead profile, but the design is smooth on the outside. The ease of processing and cutting allows you to make lamps of various lengths with your own hands.
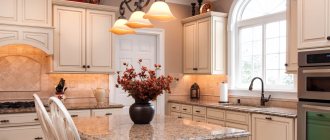
Installing lighting on kitchen units
LED lighting is very common today in the kitchen. Moreover, LEDs are often used for high-quality and complete lighting of the kitchen work area.
LED illumination of the working area
In addition to the work surface of the sink, stove and countertop, LED strips can be used to illuminate kitchen units quite effectively. In the kitchen, lighting can be installed in the following places:
inside hanging cabinets. In this way, the internal contents of the shelves are illuminated with high quality;
Kitchen cabinet interior lighting
on top of wall kitchen cabinets or below floor units. In this case, lighting performs only a decorative function;
Headset illumination from below and above
illumination of drawers for spoons, forks and other necessary things in the kitchen.
Drawer lighting
You can create any type of lighting here in two ways:
Directly stick the tape equipped with a self-adhesive base onto the surface of the kitchen unit;
Installing tape with self-adhesive base on the surface of the cabinet
use a mortise or overlay profile. A mortise profile will make the lighting as comfortable as possible for use, but its installation requires a significant investment of time and effort to cut the required hole in the cabinet. The overlay profile is easier to install, but it will stand out a little from the background of the kitchen unit.
Mortise and overlay profile in the kitchen
As you can see, the easiest way to attach the tape in this case is to simply glue it using a self-adhesive surface. All stages of mounting this product will be similar to the previously described installation on the ceiling.
LED lighting for the kitchen under cabinets: the advantages of such a solution
LED lamps appeared on the domestic market long enough for anyone who was at least somehow interested in this issue to learn about the advantages of such a solution in comparison with conventional incandescent and even energy-saving lamps. First of all, LED lighting in the kitchen is famous for its efficiency, as well as its long service life. In addition, the LEDs glow at maximum power from the first second, since they do not require time to warm up, and the frequency of switching on and off does not affect their service life.
Everyone knows about the advantages of LED lighting compared to both traditional incandescent lamps and energy-saving lamps - these are extremely high efficiency and durability
Of course, not everything is so smooth, and LEDs have one significant drawback - cost. The price of such illumination will indeed not be low, however, as all those who have already used it say, such an investment is fully justified very quickly.
The lifespan of an LED strip can be several decades, and the level of electricity consumption will be so low that the money spent will soon be compensated.
An important advantage of LED lighting is its durability; kitchen tape can last 14 years or more
LED strip in the kitchen: ready-made options
This is how the LED strip in the kitchen looks great in the interior, we decided to make a short review for you so that you understand what can be done with such a simple device. Interesting article on the topic: How to connect an LED strip in basic ways.
( 3 votes, 4.33 out of 5)
Power supply
The power of the power supply and LED strip are coordinated. For example, a 12-volt power adapter that delivers (according to the description) a current of 2 amperes, which corresponds to a declared power of 24 watts, must power 5 m of SMD-3528 LED strip (3.5 * 2.8 mm) with 60 diodes PC. /m. Exceeding the design power by at least 1.5 times will lead to the fact that the light from working will become decorative. And although reducing the maximum operating brightness to moderate levels will extend the life of the LED strip up to 20 times, the power supply will soon fail due to overload due to constant overheating. To extend its service life, take the power with a 20-25% margin - for example, for the same 5-meter tape, the adapter power is selected at least 30 W.
How to choose LED strip?
Factors to consider before purchasing the product:
- power;
A 12 V tape consumes less electricity than a 220 V analogue. But to operate the LED strip at 220, you won’t have to buy an additional power supply, which will save a significant amount.
- stream of light;
- variety of colors;
- quality;
- base;
It depends on whether the tape can be made in various forms, installed throughout the room or on kitchen furniture.
Classification
LED illuminators are divided into 3 categories:
- open; If liquid gets in, it will damage, if not the entire strip, then certainly some LEDs.
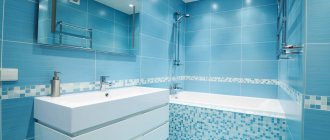
- waterproof; Contact with moisture is allowed. Because of this feature, the devices are used in kitchens, bathrooms, baths and swimming pools.
- sealed. Such devices continue to shine brightly when completely immersed in water. Despite the tightness, you should not keep the tape in liquid for a long time.
Advantages of installing LED lighting under cabinets
Installing lighting under wall cabinets provides good illumination of the desktop. Lighting up to full power is instantaneous, unlike other lamps. The operating period of LEDs is long, independent of the frequency of switching on/off modes. Taking into account the low energy consumption, over several decades it will be possible to save a good amount, which will find more useful use in the family budget.
During operation, energy-efficient lamps practically do not heat up and do not create noise. The only drawback can be considered the high cost. However, if we take into account durability and economical energy consumption, this fact is not confirmed.
What lighting options are there?
LED lamps for kitchen cabinets come in 3 types.
Check out our article about organizing lighting in the kitchen.
Spotlights
Round, square, rectangular - they can either be built into the bottom of the box or mounted on top of it. Spotlights look good both under cabinets and under open shelves. To ensure there is enough light, choose the appropriate brightness and place the sources at a suitable distance from each other.
LED panels
To achieve soft, diffused, homogeneous light, there is no better option. Unlike strips or spots, panels typically occupy the entire bottom surface of cabinets, ensuring an even flow of lumens. The panels do not heat up, are safe for the eyes, and last about 50,000 working hours (~15 years). Easy to install and maintain. The only drawback is the relatively high cost.
Important! Any diode lamps - strips or panels - are characterized by energy-saving properties. They consume much less energy compared to conventional incandescent lamps and even energy-saving lamps.
In the photo, illumination with spotlights
LED Strip Light
An affordable option with a low price. Just like panels, tapes do not emit heat and last for many years. They can be installed anywhere:
- the angle between the apron and the bottom,
- in the center of the bottom,
- near the front side.
At the same time, you can install lighting in the kitchen under the cabinets yourself, without the help of specialists. The only disadvantage of the tapes is the serial connection. That is, if one LED burns out, all of them will stop working, which means the strip will have to be changed completely.
Important! Any lamps used to illuminate the work area must be marked IP65 or higher. This marking confirms that the equipment can be used in wet areas.
Wall corner
For some reason, everyone places the LED strip strictly in the upper part of the ceiling, placing this decorative element parallel to the wall.
However, the tape can be installed directly and in the corner between two walls.
To do this you will need a special profile.
It is not necessary to make continuous lighting from the ceiling to the floor; standard two-meter sections that will illuminate the upper part of the room are sufficient.
Here you can mount both a regular strip on multi-colored SMD LEDs and a smart addressable one.
This solution looks truly unexpected and will not only bring a new play of light and shadow to your old apartment, but will also add an extra source of lighting where it was previously missing.
For example, you can refuse a sconce if you forgot to lay the wiring under it in advance. At the same time, the wall itself remains absolutely free for other decorative elements - paintings, TV, functional shelves, etc.
Which LED strip for the kitchen is better?
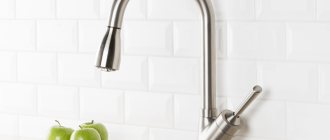
The kitchen is a place of cleanliness. There should be no dark corners or shadows.
First of all, this concerns the work area. This is where the lighting should be of the highest quality.
The convenience of preparing food and your health directly depend on this.
The optimal lighting temperature for the work area is neutral, about 4000K.
However, in some cases, you can choose a warm glow color. For example, for a kitchen made of natural wood.
But not too yellow. It may look beautiful in the dark, but the functionality and benefits of such lighting are zero.
Missing a fish bone when cutting it in this light is a piece of cake.
Also, do not forget that RGB color lighting is used in the kitchen solely for decorative purposes.
Therefore, here use a single-color tape with an even white light. The most popular power is 14.4 W per 1 linear meter.
The most commonly used models are SMD 5050.
The illumination of the working surface should be uniform and range from 200 lux and above.
Color rendering index CRI>90. The higher this indicator, the closer the light is to natural daylight.
And this is especially important when preparing food and inspecting products.