Design and principle of operation of a three-key switch
The three-keyboard is made in the form of a box from an insulator. It is made of fireproof plastic. The box contains a mechanism responsible for opening and closing contacts. There are also terminals for connecting the cable. It includes 1 central wire and 3 after opening. They go to lamps.
Additionally, there is a fastening mechanism and external elements. They are intended for protection and decoration. This is a plastic frame panel and keys. The parts are simply removed and mounted with latches.
To install lighting for 3 rooms or a chandelier with 3 bulbs, you need to prepare wiring and a hole for mounting a triple switch for three bulbs.
Types of switches and their advantages
A typical triple switch is available in the following versions:
The last option is an example of extended functionality, combining switching and power units.
Other versions of switches are also possible, differing in their appearance (design).
The advantages of these devices, regardless of their type, include:
Touch devices allow you to control the process of turning on and off by lightly touching the central part of the key; switching them does not require effort.
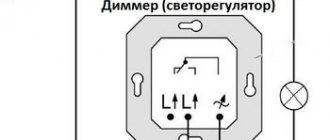
Wireless samples are still a rarity in everyday life, since they are very expensive. Often, special modules (dimmers) are built into “advanced” models that allow you to change the brightness of the light or backlight connected to them.
Areas of use
The three-circuit device has many advantages. The three-key switch looks aesthetically pleasing. Laying electrical conductors to the connection area is extremely simple. The box is placed in a technological niche. When choosing other types of devices, you have to make several holes in the wall.
Three-button switches are used for buildings with non-standard layouts. Switches are used for long corridors and for controlling the lighting of several rooms from one place.
View this post on Instagram
Posted by Electrical Products (@sistemplus) Oct 25, 2018 at 5:26 am PDT
Switching order and schemes
Connection diagram for individual rooms
The order of laying and connecting the conductors suitable for the switch depends on the method of its inclusion in the switched circuit. According to the connection diagrams used for light switches with three keys, the following options are possible:
- Only a phase wire is supplied to the device, switched for three different loads. The zero wire was laid to the chandelier from a nearby distribution box during the construction stage.
- For connection, a phase wire is used, running together with the neutral conductor from the nearest outlet.
In the first case, the supply wire is embedded in the wall (with hidden electrical wiring), and its end protrudes outward. Its length must be sufficient to allow the end to be connected to the common terminal of the switch. Three outgoing conductors are laid along the wall surface to the appropriate load through the distribution box.
The second method is used when connecting triple switches with a socket in old houses, where full-fledged distribution boxes are most often absent. In their place, under the ceiling, there is a plastic box with twists placed inside.
In this circuit, both a phase and a neutral are taken from the socket, and the latter is routed bypassing the switch and, together with the phase conductor, is connected to the existing twist. From there they are crossed together onto the lighting fixture. When making connections in a distribution box or twist, you need to carefully monitor the color of the insulation of the conductors that are suitable and extending towards the lamp.
Neutral conductors usually have light blue (blue) insulation, and the protective coating of phase wires is either red or brown in color. Switching of a pair of power contacts is carried out strictly in compliance with color markings.
Regardless of the circuit in which the switch needs to be connected, it can be used for the following needs:
- Connecting a separate chandelier with three or more groups of lamps.
- Switching the operation of spotlights or lighting elements (based on LED strip, for example).
- Lighting control in three rooms from one remote location (a corridor is usually chosen for these purposes).
The main proposed options should be considered in more detail.
Connection schemes
Triple switch connection diagram
It is more convenient to start familiarizing yourself with the connection diagrams of electrical devices with the standard version, in which one phase conductor is supplied and connected to it. From each of the three response terminals, three wires are routed towards the distribution block, which inside the box are switched to the corresponding lighting device (group).
In accordance with the requirements of the PUE, the phase wires must be connected to the lower contact of the switch, and the three wires extending from it to the upper terminals.
On some product models, the input terminals are marked with an arrow pointing inside the housing, and the output terminals, on the contrary.
When controlling lighting in three rooms, three wires are routed from the top terminals to the junction box of each room. From them it is laid to the local lighting fixture (chandelier).
With any method of connecting the wires coming from the switch, you should remember that the zero bus is connected to the junction box separately. From there it is also switched to the corresponding terminal of a chandelier or other lighting fixture.
Phase and neutral conductors are distinguished by the color of their insulation (this marking is standardized by the standard). The former have a red protective coating, and the latter – blue. However, in reality, this correct approach is sometimes violated, so the performer has to hang tags with designations on the wires.
Connecting a three-key light switch
If the main switch is easily accessible, post a sign warning you of electrical work. After this, you need to connect the wires to the neutral wire.
Malfunctions that arise during operation can be divided into two categories: - mechanical - associated with the breakdown of external and internal elements of the case, springs, fasteners, erasing keys, etc.
After the switch mechanism is securely fixed, a decorative frame is installed on top, which is secured with latches.
The left contact of the switch works in the same way.
However, the restrictions imposed by a standardized electrical wiring network in apartments force the use of switches with a limited number of switching sections in the control mechanism.
The triple switch has 4 contacts, 3 of which go to the lamps and one to the mains supply wire, Figure 3. Next, we insert and screw the phase into the input mount, and the wires going to the light bulbs into the other 3 mounts, securely install the switch into the wall or glass, after which we assemble the body itself.
There are usually no significant differences in design. Damage or breakdown of insulation, in the absence of the provided grounding of the lighting device, will lead to voltage in the device body. How to connect a three-key switch.
Selecting a three-key switch
When choosing a three-circuit switch, you should carefully examine it. You should study the physical characteristics and make sure that the wiring diagram is present. A high-quality three-key player has the following characteristics:
- There are no scratches, dents or damage on the case.
- The keys work easily and do not stick.
- Turning on 1 key is accompanied by a click.
- The core and its clamps function properly.
For rooms with high humidity levels, you need to purchase a device that has special protection. Cores with screw and clamp terminals have additional advantages. This will make installation easier and extend the life of the switch.
It is not recommended to buy a device with any defects. Not only uninterrupted lighting, but also safety directly depends on this.
Combined triple instruments
Switch with built-in socket
The triple switch, combined with a socket, is a combined version. It is suitable only for installation in certain places where it will be convenient to control the lamp and use the socket. The most suitable place for this is a dressing table in the bathroom, equipped if you need to connect a hairdryer or curling iron while simultaneously turning on the lighting.
You can install and connect such a module in its usual place – on the wall.
However, in this case the provisions of the current standards are violated. According to the PUE, the height of the switches must correspond to the level of a person’s forearm. The same requirements stipulate that the outlet should be located at a level of no more than one meter from the floor. The inconveniences of such an arrangement also include difficulties in including it in the existing wiring. To connect the combined device, you will need to modify the wiring diagram or run separate wires to it, which is not entirely aesthetically pleasing.
How to connect a three-key switch with your own hands
Connecting a three-circuit device is extremely simple. To do this correctly, you need to follow many step-by-step steps. The entire connection process is divided into stages:
- connecting the cable to the three-key player;
- connection of wires in the box;
- checking the correct connection and eliminating errors.
Before carrying out the process, it is advisable to study the connection diagram. This measure will help minimize possible mistakes.
Switch connection diagram
There are several ways to mount such devices. The difference between them is only in connecting the neutral and protective wires.
Connection from the distribution box.
This is the most common connection scheme. Its essence is as follows: Before connecting a triple switch with a socket, it is recommended to turn off the voltage in the corresponding box. If there is more than one lighting group in your house and their cables also pass through the box, then we also remove the voltage from them.
Next, we open the distribution board itself and establish which wire is neutral, which is phase, which is protective. If your wiring complies with clause 1.1.29 of the PUE, then the “zero” will be blue, the protection will be yellow-green, the phase will be the remaining wire.
After that, connect these wires to the corresponding contacts in the box in the outlet. Then we connect the device itself. To do this, connect another wire to the phase contact of the electrical socket. It must match the input. As a rule, triple mechanisms have only one input.
We take out and connect the wires from each terminal of the device. In the distribution box you need to connect “protection” and “zero”.
Connection errors
There are problems with connection. It is important to prevent them. Otherwise there is a risk of short circuit.
- A common mistake when connecting a three-key switch is when the switch does not work when the socket is working. The reason lies in the confusion of phase and zero on the socket. The jumper is connected not to the common terminal, but to the phase. The latter turns out to be zero. Use an indicator screwdriver to check the direction of the conductor.
- When replacing the switch block, it is worth checking the voltage on the wires. The rule is not suitable for installation on a new site. Specialists connect the phases to the socket and switch. In this case, there will be 2 power supplies in the block at once. This triple switch circuit will cause a short circuit.
- The light does not light on 2 keys until the third one is turned on. When activated, everything functions properly. The problem is the wire is connected incorrectly. It is directed to the output contact of the last key, but should be directed to the common input. To correct the error, a check with a screwdriver with indicators is required.
- When replacing used blocks with new ones, problems arise. Checking the voltage on the contacts shows all phases. The light comes on on all circuits at once. The switch breaks zero instead of phase. Either the electrician or someone else could have missed. He transferred the wires in the meter or panel to someone else's apartment.
- The contact indicators light up due to the bulbs being screwed into the sockets. The circuit is closed by a filament. After unscrewing the lamps, you need to check the conductors. The glow will disappear if you find a common zero and throw it on the central contact of the new device.
- Connection in the block cannot be made with one key. The method is convenient, but it is erroneous. The load is connected through the socket contacts. An example is a 1.5–2 kW hair dryer.
This is how a tee or extension cord is often connected. However, the switch contacts are not compatible with this magnitude and duration of current. After some time, the voltage in the unit will disappear and a fire may occur.
For more information about connection errors, watch the video:
How to properly connect a triple switch
Before connecting the three-key switch, be sure to de-energize the network by turning off the machines near the meter. If there is public access to the switches, put a note on it about installation work.
For work you will need:
- flat or figured screwdriver;
- pliers;
- knife or stripper (for greater convenience);
- insulating tape;
- indicator screwdriver;
- WAGO terminal blocks or others.
First you need to disassemble the three-pin switch to get to its terminals. This is done easily: pry the keys themselves with something thin, and then remove the frame. Now let's take a closer look at connecting the triple switch. There should be four wires going to it. This can be a four-core cable, one core of which will be a phase. Although it is more common to see a single-core wire coming out of the wall - a phase - and a three-core wire nearby - for lighting devices. You can determine the phase using an indicator screwdriver.
Connection is done in just three steps:
- We connect the neutral wires of all consumers (luminaires) with the neutral supply. In the diagram of the figure they are indicated in blue. To connect the wires, it is convenient and practical to use WAGO terminal blocks, although you can get by with any other or simple twisting, only then do not forget to insulate the connection.
- We connect the phase of the supply wire (brown) with the common wire of the light switch (white).
- We connect together all the phase wires from the switch and lamps. For a better understanding, we have assembled the entire circuit according to color coding (green with green, etc.).
Note! Only the phase wire should go to the input of the three-key switch! If zero is interrupted, the light bulbs will also work, but then the electrical wiring will remain energized when in the off position. This means that even when replacing the lamp there will always be a risk of electric shock.
The wires in the switch are secured with clamping screws. No more than 5-10 mm of insulation is removed from the cable so that there are no exposed wires. If the wire is stranded, use special NShVI lugs so that it does not break off when tightening the screws.
That's all. As a result, our connection diagram for a three-key switch has been assembled. All that remains is to mount it into the socket box, open it with screws and install the lining with the keys in place.
By the way, the version of a multi-pole switch with a socket has almost the same circuit. The only difference is that a separate neutral wire is supplied to the socket, and the phase is common. It can be connected either by parallel cables (separately to the socket and separately to the switch), or by one cable (by a jumper from the socket output to the common contact of the switch). The figure below shows the second connection diagram.
Triple switch connection diagram
Note! Surface mounted switches are produced for installation on fragile walls or wooden surfaces. They are also suitable for temporary use.
How to choose?
Nowadays there is such a huge range of switches on the electrical goods market that you can find a suitable model and color for any design solution or interior. However, you understand perfectly well that shade and appearance are far from the main indicators that you should pay attention to when choosing a device. When purchasing a three-key switch, check the following:
- The presence of modern self-clamping terminals, they are more convenient to use. Simply insert the wire into the hole and it will immediately be fixed.
- The outer side of the product is without burrs, scratches or damage.
- Normal operation of all terminals; they must ensure reliable fixation of the wire cores.
- The keys do not stick when pressed (on or off) and work clearly, with a clearly audible characteristic click.
- On the reverse side there should be a connection diagram for the triple switch.
Try to avoid cheap Chinese electrical wiring products. Buy devices from trusted companies and manufacturers.
