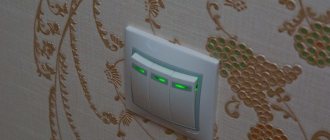
Installation stages of a single-key switch
Deciding on the installation location
When installing a light switch, you should be guided mainly by ease of access to it. Most often, it is installed next to the door frame so that the open door does not interfere with turning on the light. The installation height is usually 1 - 1.5 m from the floor. However, in some cases it is more rational to raise the switch to the height of human growth. For example, when there are furniture and interior items in the room that will block the switch when installed below. It is not recommended to place it in an area exposed to water. Therefore, usually switches for bathrooms and toilet rooms are placed in the hallway.
Pre-installation work
You need to install a socket box in the selected location for mounting the switch if you are doing hidden wiring . This process will take quite a long time. To begin with, make a hole in the wall using a hammer drill with a crown and attach a socket box in it. The distribution box is installed in the same way - in the place that is located between the switch and the lighting fixture. Then they cut channels for the wiring - the cable will be laid to the junction box from the installation site of the lighting fixture, from the switch and from the electrical panel. For this installation method, you need to buy a hidden switch. When installing open wiring, there is no need to ditch the walls - just secure plastic cable ducts to the walls and lay the wire in them. In this case, a surface-mounted switch without a socket box is selected. The distribution box is also mounted in an overhead manner. This option requires much less time and labor. However, exposed wiring can disrupt the design of the room. Therefore, it is chosen for cottages, offices and other premises where the presence of cable channels on the walls does not play a big role.
In the electrical panel, the power cable is connected to the circuit breaker and leads to the distribution box. From the installation site of the lighting fixture, another piece of wire also leads to the box.
Important! Before carrying out any work on electrical wiring, turn off the power! This is done using fuses in the panel.
Switch installation
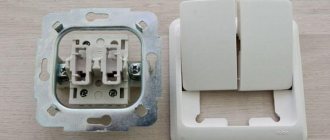
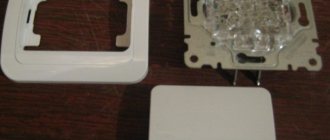
First you need to remove the key and the front panel of the switch. You can carefully pry the key off with a flat blade screwdriver. Then you need to connect the wires to the mechanism. To do this, strip their ends by about 2 - 2.5 cm and insert them into the terminals. After this, they need to be secured with screws. As a rule, markings in the switch mechanism help determine which terminal to connect the phase to and which zero. If you are installing a hidden switch, fix the socket box in a pre-prepared hole using gypsum plaster. Wires running along the groove are inserted into it. After connecting the wires to the switch, its internal part is fixed in the socket box and the front panel with the key is installed on top. There are several mounting options. The mechanism can be fixed in the socket box using two spacers, which are moved apart and tightened with screws, or two self-tapping screws are screwed into the socket box. When installing a surface-mounted switch, you need to drill holes in the wall and secure the back of the device with dowel nails. After connecting the wires, a decorative cover with a button is installed on top.
READ Fsw 100t how to connect
It is important to know! Stripping the wires differs when installing a surface-mounted and a hidden switch. In the latter case, it is necessary to leave a reserve of about 10 cm of wire in order to strip it, place it smoothly in the terminals and then recess the mechanism into the socket box. When installing the overhead, the wires are trimmed strictly under the switch.
Connecting wires
Three wires converge in the junction box - from the switch, the lighting fixture and the power wire from the electrical panel. They are inserted into slots in the box. Then remove the insulation from them, first the outer sheath, and then strip the ends of each wire by about 2 - 3 cm. To do this, you will need an insulation stripping tool. You can use a knife: first make a longitudinal cut with its blade, then open the shell and cut it around the circumference. Professionals usually use a stripper. A specialized tool wraps around the wire and, when compressed, makes a cut along the entire diameter of the sheath. The user then pulls off the cut portion of the sheath, leaving the wire intact.
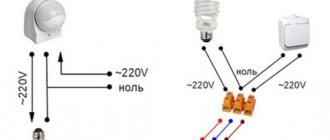
Having removed the outer sheath of a two-core cable, you will see two wires inside: blue is always zero , brown (or another color) is phase . There are a total of 6 wires in the junction box that need to be connected correctly. To avoid confusion, use the diagram below. A connection is made from the phase wire of the power cable to the phase wire of the switch (red line - L). And from the neutral wire of the power cable, a connection is made to the neutral wire of the lighting device (blue line - N). The final step is to connect the phase wire of the lighting fixture to the neutral wire of the switch (orange line).
Single-key switch connection diagram
Important: the wires in the junction box are connected using twists. You can use long-nose pliers to make it easier to hold the wires at the base and twist their ends into a spiral.
Functionality check
To ensure that all connections are made correctly and the circuit is working, you need to check the voltage. Take a voltage tester and apply the contact tip to the twists in the junction box. Voltage should only be detected at the junction of the supply wire and the switch. In this case, the indicator will light up. After this, turn on the lighting device using the switch - press the button. Did the light come on? Congratulations, you did everything right!
Insulation works
If the connections are made correctly, they can be isolated. The simplest method today is to install plastic caps. They are made of non-flammable plastic, so they are absolutely safe, and the spring inside reliably holds the twisted wires. The choice of caps is made by color. For example, gray ones are suitable for twisting two wires with a cross-section of 1.5 mm, blue - three wires with a cross-section of 1.5 mm, orange - two wires with a cross-section of 2.5 mm, etc.
Important: the plastic elements should not just be put on the twists, but a little force should be applied to press the ends of the wires into the metal part of the cap. This will help achieve better contact at the joints.
Connecting an external single-key switch
If home electrical wiring is done in an open way, that is, on top of the walls, then external switches are used. In this case, a box for the switch is not used; the switch is mounted directly on the wall using self-tapping screws, and in some cases, dowels.
Operating procedure:
- Disassemble the switch. To do this, remove the keys from it and unscrew the screws securing the mechanism to the body.
- Having cut off the insulation at the ends of the wires, insert the phase wire coming from the junction box into the inlet of the mechanism, and going from the switch to the installation site of the lamp into the outlet.
- Tighten the screws to securely fix the wires.
- Attach the socket box with the mechanism to the wall and connect it to the switch body. Some models of switches come without a socket box, in which case the mechanism is mounted directly on the wall.
- Set a key.
Connection diagrams for various switches
Now you know how to install a regular single-key switch. In practice, there is a need to install products of another type - two-key ones for chandeliers with several bulbs, passages into long corridors, etc. To have an idea of the features of their installation, we suggest studying the connection diagrams.
Light switch connection diagrams
We hope that our article will be useful to you. As you can see, there is nothing complicated in installing switches. By following the rules, you will easily cope with this task. The switch will work properly for many years, of course, provided that it is of high quality. You can buy reliable electrical products in our online store. We offer products from leading Russian and European manufacturers. Make your choice!
READ How to activate the access restriction service in Beeline LK
Preparatory work before installing the switch
To connect the light switch, preliminary preparations must be made. Installation is carried out from the nearest distribution box, to which power is supplied - network cables for supplying electric current.
Power to the switch and lamps is supplied from the distribution box
The type of wiring installation can be of two types - internal (hidden) and external. Hidden wiring is installed in the thickness of the wall or ceiling. The outer one runs along their surface, the cable is packaged in a corrugation or cable channel, which is attached to the wall with special brackets or other fastening material.
After the wires are separated, you can begin installing the switch.
Single-key switch connection diagram
The principle of operation of the switch is based on breaking the power supply circuit of a light bulb or any other device. Switching the toggle switch activates a contact pair, which disconnects the power wire from the current consumer.
The switch usually opens the phase wire
When assembling the circuit, you should pay attention to the reliability of the contacts. If the wires have large gaps, then at one point a so-called electric arc may occur, the temperature of which is sufficient to melt and ignite the insulation. This can lead to smoke in the living space and even a fire. In order to avoid such phenomena, the following connection methods are used:
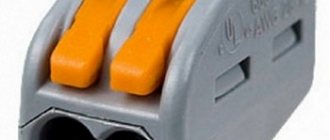
When connected through the terminal block, strong, reliable contact is ensured, so the wires will never spark
The wires are twisted tightly using pliers and then soldered
Twisting of copper and aluminum wires is also possible. But if the connection is overloaded, aluminum can melt because it has a lower melting point than copper. The contact will be interrupted.
Tools and materials for connection
To connect you will need the following tools:
The materials on hand should be:
Photo gallery: materials for switch installation
Connecting a two-key switch: preparatory work
It is worth noting that before connecting the light switch, which is a double switch, you need to lay out the electrical wiring. If the house is just being built and hidden wiring is being installed, then there are no difficulties. The wiring itself is installed before the plaster is applied.
After this, you need to connect the switch itself and the lamps to the wiring. All wires are laid according to the diagram (see below).
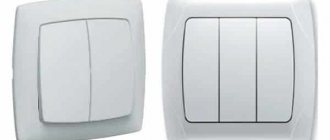
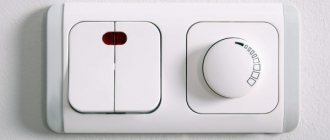
A two-key switch is designed to turn on and off two electrical appliances from one place or control individual sections of one device.
Most often, such switches are used to switch the operating modes of a chandelier: each of the two keys turns on one of the two groups of lamps, and when both keys are turned on, the entire chandelier is connected.
Using such a switch, you can control the illumination of the room. Also, the use of a light switch with two keys is useful for turning on the lighting of a separate bathroom and toilet.
Making a wiring diagram for a pass-through switch for two lamps is actually not as difficult as it might seem at first glance. If this is a private house, connecting a double light switch will be convenient to illuminate the street when leaving. If it is possible to use a lighting device with a two-key switch on the balcony, having a device there would also be appropriate.
Each group can have a different number of light bulbs - it can be either one or ten or more lamps. But a two-key switch can only control two groups of lamps.
It is clear that if you plan to carry out open installation of wiring, then each cable that needs to be connected to a two-key switch and a lamp is laid in separate cable ducts or corrugated pipes.
If the wiring in the house has been used for many years, and the existing electrical wires are not suitable, then they will need to be replaced. If they were installed in an open way, there will be no problems. If they were hidden under the plaster, you will have to make new grooves and lay new cables. After placing the cables in their places, begin to connect them.
Step-by-step instructions for connecting a single-key switch
If all the tools and materials are ready, you can begin assembly. The procedure can be divided into two steps:
Before this, all wires are fixed in their designated places in cable ducts or corrugation. The distribution box and socket for the switch are firmly installed in (or on) the wall. The order of actions does not really matter, but experienced electricians always start connecting with the periphery - the switch and light bulb, and end with connecting the wires in the box.
Connecting the switch and lamp
Two wires are connected to the cartridge and fastened with screws to the corresponding contacts
When connecting wires to the switch and socket, the order in which the wires are connected does not matter
There are various models of switches, but in most cases they are mounted in a socket box using a spacer mechanism mounted on the base. Before attaching the base, you need to connect the wires to it. To do this, the screws of the clamps are loosened, the wires are inserted into the sockets, and the screws are clamped again. It is important not to overtighten the threaded fastener - you need to tighten it so as not to damage the screw slots.
If there is no socket box and the switch is attached externally, screw the base to the wall surface with two screws.
The external switch is installed directly on the wall surface
At this stage it needs to be positioned correctly. It is customary to install the switch so that turning off is done by pressing the button down, and turning on is done by pressing up. This is done for security reasons. If something accidentally falls on the switch from above, the mechanism will break the circuit and turn it off.
READ How to connect a cam module to a Sony TV
After screwing the screws into the wall and securing the base, the installation of the switch can be considered complete. All that remains is to insert the key into place, but this can be done at the very end, after checking the operation of the entire circuit.
Connecting cables in a junction box
Before connecting conductors, it is necessary to de-energize the line supplying electric current to the junction box. To do this, you need to turn off the plugs or the automatic breaker on the meter panel.
It is very convenient to carry out switching according to the color of the cores. Using a voltage indicator, you need to determine which core contains the phase and which contains the zero. Touching the phase wire will cause the diode on the probe to glow.
The indicator is activated by placing your finger on the red cap
Typically, the “phase” is connected to the red wire of the wire, “zero” to the blue, and “ground” to the white.
If everything works fine, you can assemble the switch and close the junction box
If the wiring in the house is made with three-core cables, all the white ground conductors are connected to each other.
Video: connection diagram for a single-key switch
How to connect 3 sockets and 1 switch from one junction box
Sometimes you need to connect one or more additional sockets to the existing wiring. This can easily be done by running another cable into the junction box.
The connection process consists of connecting the wire to the power line that comes to the distribution box from the switchboard. As with the installation of the switch, all work should be carried out only with the plugs turned off.
Special jumpers are used to connect sockets to each other.
The line of sockets is connected directly to the phase and neutral wires coming from the panel
When connecting wires using twists, it is advisable to thoroughly clean all contacts with a knife or fine file. Sometimes old wiring oxidizes at the connection points and the contact becomes unstable. When adding new wires, twisting is done using pliers.
To avoid a short circuit, the insulation must completely exclude possible contacts of wires with different poles.
Video: connecting a single-key switch and socket
How to connect a chandelier with 2 wires to a switch with 2 keys?
The general connection diagram for a two-key switch is shown in the image below. On it:
The neutral conductor (blue or white-blue wire) goes to the chandelier directly, from the distribution box, without going into the switch. It is common to all chandelier lamps and is connected to each of them.
The phase conductor (white wire) from the distribution box goes to the two-key switch, where it is divided into two independent phase wires, the voltage supply through each of which is regulated by its own key.
The grounding conductor (yellow-green wire) is connected directly to the chandelier body.
This is where the 4 wires on the ceiling come from to connect the chandelier - these are zero, two independent phase and ground. If the electrical wiring of an apartment or house is old, you may have only three wires, in this case there is simply no grounding, the rest of the conductors are the same.
The chandelier has two available wires for connection - these are the phase and neutral conductors, respectively; the protective grounding is most often connected directly to the conductive part of the body, simply tightened with a screw.
So, we have 3 or 4 wires coming out of the ceiling and two 2 wires from the chandelier, in which case we have two main connection options.
1. Connect as is.
In this case, the entire chandelier will turn on at once, using one of the keys of the two-key switch, while the second will not be activated in any way.
This connection option can be chosen if there is only one lamp in the chandelier and it is impossible to physically make it a dual-mode lamp, or if you are not afraid of one of the switch keys not working.
The connection procedure will be as follows:
One of the chandelier wires is connected to the neutral wire coming out of the ceiling (blue or white-blue), and the second (white) to one of the two phase wires.
It looks like this:
But don’t rush to connect it like this, there is another installation option.
2. Converting the chandelier to a two-key switch
The second option, although more labor-intensive, will still be preferable. We remake the chandelier for a two-key switch, in other words, we divide the lamps in the lamp into 2 groups, each of which is turned on by its own switch key . It sounds daunting, but it's actually quite easy to do.
To operate, any lamp requires power, which is usually supplied through two wires; in the case of lamps for alternating current in a household residential network of 230 Volts, this is a phase conductor and a neutral conductor.
In any chandelier, all the wiring from the lamps/shades comes to one place, where the phase and neutral wires are combined , and only two wires come to the connection point of the power cable.
Our task:
1. Find the connection point of all the wires in the chandelier
2. Divide the chandelier lamps into two groups
Knowing that somewhere all the wires from the chandelier lamps are connected, you can easily find the place where the connection is located. Usually it is located either at the base of the chandelier, option 1 in the image, or in one of the structural elements, which is often accessible even on a suspended chandelier, option 2.
Now we need to divide all the chandelier lamps into 2 groups, this can be done as follows:
— The neutral wires remain connected to each other, there is no need to touch them
— We disconnect the phase wires and form two groups of them instead of one. The principle of separation is selected individually, for example, you can make one half of the lamps the first mode, and the second the second, or connect the lamps alternating through one, i.e. the first group is 1, 3 and 5 llamas, and 2, 4 and 6 are the second in a six-arm chandelier, it all depends on your imagination.
If we consider the scheme for dividing lamps into groups, using the example of a two-arm chandelier, it should look something like this:
Instead of two connections, you get three - (two connections of phase wires and one neutral), for this, another wire must be inserted into the place where the chandelier is connected to the electrical wiring from the two-key switch for the circuit to work. Usually there are no problems with this; all elements of chandeliers are usually hollow and require wiring.
Now we have everything together, 3 wires from the switch with 2 keys on the ceiling (+ grounding) and three at the chandelier (grounding is connected to the body). By connecting them according to this scheme, we get a fully functioning two-key switch and a two-mode chandelier. As you can see, everything is quite simple.
If you encounter any difficulties while connecting a chandelier with 2 wires to a two-key switch, or you simply have questions or additions to the article, be sure to write in the comments!
How to connect a one-key switch to two light bulbs
If you need to turn on two light bulbs located in different places simultaneously from one switch, the same connection diagram is used.
The current supply to the lamps is controlled by a single switch, but the connection options for the lamps themselves may vary.
New cable in box
Another cable is inserted into the junction box. The ends of the conductors are stripped and connected to the same terminals as the first lamp. This will take up some additional space inside the box, but if there is enough space, then nothing bad will happen.
One way to connect two light bulbs to one switch is to connect both pairs of wires to the same terminals
Cable from an existing device
The advantage of a parallel circuit for connecting lamps is the ability to use them in any quantity
The choice of connection is selected depending on the situation. The second option is used more often, since there is often not enough space in the distribution box to insert additional cables. In addition, in this way you can connect not only two lamps, but also a larger number of them. The main thing is to follow the principle of parallel connection of wires.
When installing household electrical equipment, you need to remember to comply with safety standards. Before starting work, be sure to turn off the power supply. It is better to use tools with dielectric coating and cables of the appropriate cross-section. Do not throw bare ends of conductors onto radiators or water pipes. In addition, the standard connection parameters must be observed.
Source
