Beautifully laid tiles decorate the room for a long time, but over time you want to update the interior. Removing old tiles and laying new ones is a labor-intensive, lengthy process that requires financial costs, and it is not always possible to carry it out.
Today, paint for tiles is produced, with the help of which you can quickly and at minimal cost change the design of the room. You can not limit yourself to painting, but use artistic decoration with thematic drawings, apply patterns with stained glass ceramic compositions. Those who are not good at drawing can use stencils.
Benefits of cosmetic repairs
Many owners whose tiles have lost their aesthetic appearance over the years would like to receive a detailed answer to the question of whether it is possible to paint tiles in the bathroom. In this case, you can either start a major overhaul or try to update the coating that has become unusable.
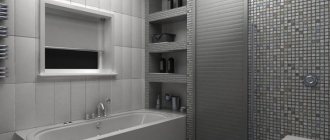
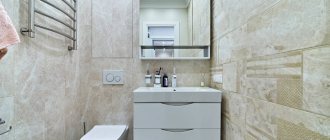
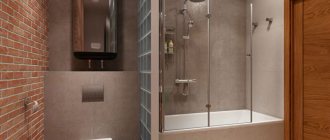
By painting tiles you can change the interior of your bathroom
It is necessary to immediately make a reservation that a complete renovation of the premises is fraught with significant financial losses and requires free time. If now, for one reason or another, you cannot afford it, cosmetic restoration of the tiles will be the best way out for you.
Firstly, this method does not require significant financial investments and labor costs. Secondly, you don’t have to dismantle all the plumbing for this; it will be enough to simply cover it with polyethylene. And finally, the resulting interior will be able to please you and your loved ones for several more years.
Remember, before you paint the tiles in the bathroom, you must clearly decide on the tone of the coating and the nature of its application. Today it is possible to completely change the color scheme, apply elegant patterns or create an unusual panel.
Types and characteristics of tile enamels
So how can you paint bathroom tiles so that the coating lasts as long as possible? Immediately exclude water-based paints, as such decor will not please you for very long. As noted above, there are two different methods of ceramic restoration - complete and partial. So, in each case you will need your own types of dyes.
Latex dyes cover the surface well and dry quickly
When completely changing the color scheme of the interior, acrylic, alkyd or oil enamels . Latex-based paints have also proven themselves well . They fit perfectly on the surface, completely covering it. In addition, these dispersions dry quickly and do not have an unpleasant and pungent odor, unlike their oil counterparts.
However, before you paint the tiles in the bathroom, you will need to carry out a set of preparatory work. This is explained by the fact that these types of dyes are not intended for shiny, smooth surfaces and their service life will not be even a year if the tile is not sanded first. In addition, when painting, do not dilute the dye to reduce its consumption. Its consistency should resemble thick sour cream.
Since the cladding is often smooth and glossy, in case of fragmentary renovation you will need special dispersions for glass or ceramic surfaces so as not to spoil the entire wall if you need to apply a design or pattern. These dyes are able to form good adhesion even with such coatings, since they have a slightly different composition than latex or oil dyes. In principle, you can cover the entire wall with them. The only disadvantage of this solution will be the very high cost of these dispersions, comparable to buying new tiles.
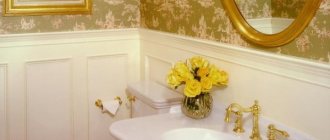
Using paints for glass and ceramics, you can create an interesting ornament or panel.
If we talk about the technical properties of this paint, it dries quite quickly at an average temperature of 20 to 25 degrees. In addition, if you want to create a design with a slight haze effect, you can pour a little solvent into the enamel to remove the color saturation. This technique will help create a truly unusual bathroom interior.
Possible color options
It is possible to use various options for painting the walls in the bathroom. Still, the following methods are considered the most popular:
- The coloring is complete. This method involves painting the entire surface. You can use any type of paint, the main thing is that it can withstand high humidity well. The color is selected at the discretion of the owner; the tiles can even be painted in a contrasting shade to the original shade.
- Partial. In this case, only coloring of some elements is used. For example, if the tile is plain, then leave the main color, adding another shade. As a result, you can get a checkerboard pattern or stripes on the wall.
- Return of color. Here they do not make a radical change of color; they take the same shade of paint that was previously painted on the surface, and then the composition is applied to the ceramics, giving the walls brightness. This method is necessary if the tiles have faded over time.
- Drawing. First, part of the tile is painted with a single shade of paint; basic colors are usually used. Once the paint has dried, a design is applied to it using a stencil or by hand.
You can use other methods to change the interior of your bathroom. For example, if the owner has artistic skills, then he can apply a full-fledged drawing to the wall.
Before painting begins, the surface to be painted is prepared. But such projects are not very popular, since they are more difficult to implement.
We update the color scheme completely
Typically, painting a complete ceramic tile in a bathroom will not be too difficult for someone who is familiar with the basics of building craftsmanship. To do this, it is enough to have only certain skills in painting and working with an electric sander. To begin, you should prepare the following materials necessary for the event:
Proper preparation will ensure excellent results
- metal brush and foam sponge;
- dry cleaning abrasives and degreasing liquids;
- personal protective equipment (apron, gloves and petal respirator);
- grinding attachment for a drill or turbine; if the work is done manually, you can get by with not very coarse sandpaper and a sanding mesh;
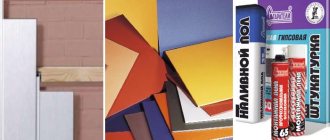
- primer and paint for bathroom tiles;
- enamel tray;
- brushes of different sizes made of natural bristles and a foam roller;
- masking tape and ready-made stencils if you plan to paint in two or three different shades.
In the future, all work is divided into two stages - preparing the wall and, in fact, painting.
Protecting the paintwork in the bathroom
To increase the “life” of the paint and varnish coating, it is recommended to apply one or two layers of varnish after painting and complete drying of the coating.
The same requirements apply to the selection of varnish as to the selection of primer and paint. It is desirable that the varnish and paint have the same chemical composition, that is, if acrylic paint was used, then the varnish should be based on acrylates.
For the future. If the bathroom has poor ventilation and there are all the prerequisites for mold growth, then the painted surface should be periodically treated with antifungal agents, which are sold in a wide variety in construction and hardware stores.
Preparing the tiles for painting
Of course, only wall cladding can be restored. Painting floor tiles makes no sense, since the floor is an area where water constantly penetrates. The fact is that the painted floor plane will lose its attractiveness within a few weeks.
First you need to wash and degrease the tiles
First of all, you need to remove all contaminants from the coating. To do this, you can use any abrasive powder detergent and a metal sponge. Cleaning requires some physical effort. Your task is to remove even stubborn dirt. After cleaning the tile, wipe it with regular alcohol for initial degreasing and improve the quality of polishing.
Afterwards you need to remove the gloss completely. Before performing any actions, take care of the safety of the floor covering and other items. The floor should be covered with thick cardboard, and it is best to cover the plumbing fixtures and furniture with cellophane film.
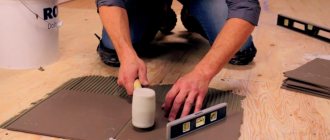
The optimal solution for grinding work would be fine sandpaper No. 0 or 1. The fact is that larger sandpaper can leave deep chips, which will significantly complicate the work process. Let’s say right away that this stage will be quite labor-intensive and will take a significant amount of time, but after going through this procedure, you will receive a well-made coating.
After sanding, carefully collect debris and rinse the surface again. After this, it should be degreased again and dried thoroughly. The next step is to apply a primer to the prepared tile. It should be noted that this step is not at all necessary, but priming will significantly increase the adhesion of the ceramics to the paint. The best choice would be substances that are resistant to moisture. This will help extend the life of the dye.
Paint selection
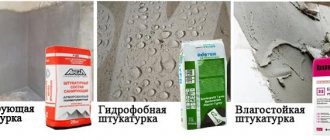
The main criterion when purchasing paint for tiles is moisture resistance and durability. When using a regular coloring agent, after a while peeling and flaking will appear on the tile. To transform an old coating, it is preferable to choose one of the following types of paint :
- Latex . Has excellent adhesive properties. Rubber paints are suitable for waterproofing. And for decorating dry rooms, products with an acrylic-latex base are suitable. The coating is absolutely safe for health and odorless.
- Epoxy . It has excellent water resistance and adhesion, but you will have to pay a good amount of money. The ink substance does not peel off over time and firmly adheres to the coating.
- Oily . Before application, a mandatory step will be priming.
- Alkyd enamels . Suitable only for rooms where it is always dry and demonstrate good adhesion.
- Stained glass . No preliminary preparation of the canvas is required. It's not cheap, but it's easy to apply to a clean surface. Most often, they are used as decoration.
- Polyurethane. They are wear-resistant, are not afraid of temperature changes, do not cause peeling and can withstand humidity.
Important! Water-based primer is not suitable for use on polyurethane or epoxy products. It must contain organic solvents.
Painting the tiles
After the primer layer has dried, you can begin painting. Choose the tools you will use. Remember, a foam roller will create the effect of a velvet coating, and brushes will leave their characteristic texture. As noted above, do not dilute the dispersion, otherwise you will not get the desired result. Cover all adjacent elements or surfaces with masking tape.
To paint tiles in several different shades, use stencils
If you plan to paint multi-color tiles in the bathroom or apply a pattern of a different shade, stick stencils on the desired areas. This can be done using glue in an aerosol can. Remember that you need to glue paper or cardboard with clear and confident movements to avoid smearing the glue.
Now you can paint the tiles with the chosen color. Do not try to press the brush or roller into the wall. Paint smoothly but sweepingly.
You need to apply the paint with clear, confident movements.
In this case, another nuance plays an important role. Do not try to cover the surface with the desired color in one thick layer at a time. It would be more expedient to paint the wall in several stages. Gradually overlapping layers of paint will create the shade of saturation and brightness you need. This way, you will achieve a better quality coating, and the overall aesthetics will only benefit from this. The resulting result will look stylish and modern. In addition, to get a similar effect, you do not need to make a major investment.
Application
Only after the surface of the tile is ready should you begin to apply the coloring solution. Based on the chosen style, it is necessary to place limiters in the form of masking tape along the boundaries of the future drawing. This will not only prevent you from staining the surrounding space or objects, but will also allow you to paint the ceramics better.
Applying paint to a roller
For better painting, a regular foam roller will do. It will help you easily and quickly paint even a large surface. If you plan to create a special or unique design without stencils, you can use brushes of various sizes. Moreover, tougher models are radically different from soft pile, so you need to approach this issue also carefully.
Applying paint to the wall
The work of painting the tiles is carried out in 2 stages. Initially, the main or base layer is applied, after which you need to wait until it dries completely. Then the ceramics should be repainted, and in a strictly perpendicular direction. If you are painting a surface, you can use less paint, since one layer will be enough. However, then the paint should be more concentrated and richer.
It is worth remembering that you need to limit the use of the bathroom while the paint is drying. Otherwise, the design may be blurred or damaged, and dust and dirt may enter. To speed up the drying of the solution, you should maintain a comfortable temperature regime. The warmer it is, the faster the paint dries, and when painting a large area, the work should be done in several approaches.
Methods for creating a panel or ornament
If there is no need to completely paint over the entire surface, but you would like to refresh the interior, it may make sense to apply a pattern or ornament to the tile. In this case, you will not need to carry out special preparation of the surface; it will be enough to simply wash it well with your usual cleaning agent with a soft sponge and degrease it.
Gluing a stencil will help maintain smooth and clear lines and color transition boundaries
We paste the finished stencil onto the finished dry cladding. Now you can start getting creative. Apply shades one at a time, remembering to clean or change brushes. Try to apply the enamel evenly with precise movements. Remove excess dispersion from the brush, otherwise smudges may form. If you want a velvety finish, simply blend the paint with a foam sponge. To do this, dip it into the tray and squeeze it out slightly to avoid the dispersion from spreading under the stencil. Apply paint in this way using barely noticeable touches.
Professionals advise first applying a special contour layer. It will prevent the enamel from flowing beyond the outline and mixing with other colors. You can purchase the contour together with colored paints. It comes in small tubes with a pointed end because it is applied straight from the tube.
If for some reason you decide not to use a contour, there is another way to prevent different shades from mixing. Since latex enamel dries quite quickly, simply cover the already painted area with a paper towel.
Options for painting tiles
Price for drilling a hole using diamond core bits
| Diam. holes in mm. | Work with bricks and screed in rubles per cm. | Work with concrete in rubles per cm | Work with reinforced concrete in rubles per sm.p with reinforcement diameter > 16 mm | In reinforced concrete, rub/cm.p Reinforcement diameter above 16 mm |
| 25-52 | 16,2 | 21,8 | 25,8 | 26,8 |
| 62-82 | 17,2 | 24,3 | 28,1 | 31,0 |
| 92-102 | 22,0 | 29,6 | 33,5 | 37,3 |
| 112-122 | 23,7 | 31,3 | 38,1 | 43,3 |
| 132-152 | 26,7 | 35,3 | 42,0 | 47,5 |
| 162-182 | 31,2 | 41,1 | 47,5 | 53,8 |
| 202-222 | 38,0 | 47,7 | 53,8 | 60,7 |
| 232 | 42,6 | 56,8 | 60,7 | 67,7 |
| 252 | 45,8 | 62,5 | 67,7 | 76,6 |
| 282 | 49,3 | 68,0 | 76,6 | 86,2 |
| 302 | 54,1 | 71,8 | 86,2 | 98,0 |
| 352 | 63,0 | 80,1 | 98,0 | 106,8 |
| 402 | 76,5 | 90,0 | 106,8 | 120,1 |
| 452 | 88,3 | 105,8 | 120,1 | 143,7 |
| 502 | 103,7 | 120,2 | 143,7 | 160,6 |
| 602 | 118,8 | 137,5 | 160,6 | 175,0 |