Do you need a threshold in the bathroom or not?
If, as a result of repairs, the floor level in the bathroom is equal to the floor level in the next room, it is possible that the BTI will not approve such changes. You don’t have to worry about official permission for such redevelopment, only if the apartment is not for sale.
Circumstances in life change, and you may want to sell this apartment and buy a new one. Therefore, it is better to do the repairs according to all the rules that are prescribed in the regulatory documents, then there will be no problems with the registration of redevelopment of the apartment.
If a leak suddenly occurs, the threshold will be able to stop or at least delay the flow of water and prevent the entire apartment from flooding. Therefore, the answer to the question of whether thresholds are needed in the bathroom and toilet is obvious (about
How to raise a bath higher above the floor?
Often there is a need to raise the bath to a level higher than it costs. As for the arrangement of thresholds and the requirements for slopes, everything is clear.
But often there is a need to raise the bath to a level higher than it costs. This may be due to drainage problems when the slope is low or the elevation difference is negative. Or maybe the legs of the product are short and the bowl is inconvenient to use. The most popular are 4 ways to raise the level of a bathtub, which do not require large financial and labor investments. There are some difficulties in solving the problem because the weight of the font is large. This is the bath itself, water and the human body, so even the most approximate calculation shows that the mass of the bath reaches 400-450 kg, while the load is distributed over 4 risers, the total area of contact with the floor does not exceed 20 cm2. This is where you have to think about choosing a way to raise the bathtub above the floor, while complying with the requirements of SNiP, making a good slope and ensuring a comfortable evening relaxing procedures.
Material selection
The materials for making the threshold can be very different, for example:
- Steel is the most durable material. It will be very difficult to spoil or break the threshold from it. Steel thresholds can have, in addition to the metal color, absolutely any color.
- Stainless steel . Such thresholds do not occur often. Stainless steel has a beautiful silver coating, so it is most often used for finishing walls or furniture.
- Bronze . This material has a very high cost, so such thresholds are made only to order. It can be replaced with an aluminum threshold painted “bronze”. Their price is much lower, and their appearance is almost the same.
- Brass . The price of this material is also quite high, but it looks very beautiful. The thresholds are very durable and have a long service life.
- Aluminum . Thresholds made from this material are lightweight and inexpensive. They have a wide range of colors.
- Wood . Most often, thresholds are made of wood, since it is easier to match the color to a wooden door. Wood is a natural material, and a beautiful one at that. It’s not difficult to make such a threshold yourself. It is better to use oak or pine, because these types of wood are the hardest and most wear-resistant.
- Plastic . The most accessible material of all. Thresholds are available in various sizes and colors. They are inexpensive and look great. However, there is one significant drawback: the service life is short. Such thresholds must be changed after a short period of time.
- Concrete . The threshold will be solid, which in the event of a flood will be a reliable obstacle to the water. You can make such a threshold yourself. You can lay tiles or laminate on top of the concrete.
Where is docking used?
In modern interior design, various combination techniques are widespread. This applies to the combination of colors and shades, textures, materials.
The combination of tiles and laminate is relevant and quite economical. A more expensive and luxurious coating is obtained by using parquet boards instead of laminate, and tiles successfully replace the more practical porcelain stoneware.
Issues of color when combining floor coverings are resolved using simple design rules for color compatibility, but in practical implementation there is often a need to “bring together” laminate and tiles into one plane.
This happens in the following cases:
The materials are joined at the border of the two rooms. For example, a bathroom and a corridor, a corridor and a kitchen, a bedroom and a balcony. Typically, two coverings are combined under the door separating the rooms, and the transition can be created using a simple and effective solution - a decorative threshold;
However, you should not give up such a practical finish due to the complication of the process of laying materials. Connecting different floor coverings has a number of advantages:
- When tiles and laminates, which have different performance characteristics, are used only in those conditions that suit them best, the coating as a whole will last much longer. So, it is very practical to decorate areas with high humidity with tiles, and lay laminate in drier areas;
- Tile lasts longer in areas with high traffic and mechanical loads, and laminate looks more comfortable and decorative. By combining these materials in transit areas, you can get a reliable and beautiful coating;
- The floor finish looks more fresh and original;
- Ceramic tiles, and especially porcelain tiles, are expensive. Finishing an entire room with only these materials is much more expensive than combining them with laminate;
- If it is necessary to make a heated floor in the house, it can be laid only under the tiles in order to save money, or you can choose a laminate with the appropriate marking that allows installation on a heating system, and insulate the entire room;
- The pattern, relief and color pattern created by the two materials visually increase the space in small rooms.
Why is a smart threshold not suitable for a bath?
The mechanism of operation of such a threshold is simple, and at the same time unique. When the door closes, the threshold begins to smoothly fall out of the door. Once completely lowered, the threshold hides the gap between the floor and the door. When you open the door, the smart threshold begins to rise silently. It should be noted that the smart threshold has the following advantages:
- It has the unique properties of automatic leveling on uneven floors.
- It facilitates simple and unhindered movement of all residents.
- Also contributes to sound and thermal insulation.
- When the doors are closed there will never be drafts.
- The mechanism is very convenient and safe to use.
If this type of threshold has so many advantages, why can’t it be used for the bathroom? The thing is that the smart threshold is not static. That is, he is a threshold, in the usual sense of the word, and arises from the door.
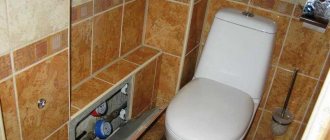
Beautiful threshold in the bathroom
If suddenly there is a flood in your bathroom, when the door is closed, the water will not get out of the bathroom, but as soon as you open the doors, the water will immediately rush into the corridor, because nothing will hold it back anymore.
That is why experienced developers advise making a cement threshold lined with porcelain stoneware between the bathroom and the corridor. We really hope that our article will help you create a comfortable and functional threshold in the bathroom. This task is not at all difficult, but during actual work you will have to take into account a lot of nuances. Therefore, be careful and do all the work efficiently, so that the result can please you for a very, very long time.
What should be the proper transition from their bathtub to the hallway?
In addition to its protective functions, I would like the threshold to also serve a decorative role. Everyone tries to step on it, so you need to make it out of durable material. There are several practical options:
- Steel - such a threshold can easily withstand any load;
- Wooden is the usual option, but wood cannot tolerate moisture and begins to rot;
- Aluminum is a popular type of threshold, practical and durable;
- Made of stainless steel - if an ordinary steel threshold can become covered with rust, then in the case of stainless steel this will not happen. True, you will have to pay more;
- Plastic is a common choice, but is only durable for a few years.
Preparing to create
Before you start creating a threshold between the bathroom and the hallway, you need to do a lot of preparation. So, first of all, you need to take care of the availability of protective equipment. In order to protect himself during the process, the construction worker must have:
- special glasses that will help prevent dust from getting into your eyes;
- gloves for working with cement and other materials;
- clothes that will reliably cover all areas of your body;
- shoes and hats, which you cannot do without during construction:
After you yourself prepare for the future event, you will need to prepare a place for the threshold. For these purposes, the old door frame, and accordingly the old threshold, must certainly be dismantled. If the above-mentioned elements have already been dismantled, you need to thoroughly clean the surface of the future working area. It is also very important to ensure that you have all the necessary tools in advance. You will need:
- a tank where you will prepare the adhesive mass;
- a device specifically designed for leveling cement screed;
- building level, which will be used to check the evenness of surfaces;
- three spatulas: regular, rubber and serrated;
- grinder, which has a special attachment for cutting tiles and porcelain stoneware;
- a puncher, with which you can remove all unnecessary fragments;
Don’t forget that you also need to prepare the finishing material. This can be done by taking measurements, after which they are transferred to porcelain tiles. It is for this purpose that you will need a previously prepared grinder.
A grinder will be needed to install the threshold in the bathroom
The adhesive substance should also be prepared in advance. If you are going to make a threshold from porcelain stoneware, you will need a special mixture that will help fix the facing material quite reliably and at the same time very high quality. This seven is sold in almost all hardware stores. It must be prepared in accordance with the instructions, which must be in the packaging container (or on it). According to the instructions, the composition must be mixed with water. This must be done in a special tank that you prepared earlier. The glue must be poured into the water in small portions, while stirring, this will help make the adhesive of better quality (without lumps).
Before starting to build the threshold, check the working surface again. It must be cleaned of dirt and dust, and, of course, covered with a primer composition. This will ensure a high degree of adhesion for all building materials used.
Installation process
In cases where unevenness is visible on your work surface, or it is located at a low level, you need to perform a screed. A special wooden formwork must first be organized, which can prevent the solution from leaking beyond the expected threshold.
In order to prevent the building substance from sticking to the wooden formwork, it can be covered with cellophane or plastic film. Only after this the prepared space can be filled with mortar. Based on the sides you have built, the mixture needs to be thoroughly leveled. In order to determine the evenness and horizontality of the surface being created, use a building level.
Complete hardening of the screed will occur a few days after completion of the work. During this time, the screed must be moistened with running water. This will eliminate the possibility of cracks forming. After the substance has completely set, you need to remove the formwork. Now the lining of the threshold with porcelain stoneware begins, but before that the resulting surface must be covered with a primer composition.
Threshold installation
The back side of the tile must be coated with an adhesive before laying. For this tutorial you will need a notched trowel. This technique will allow you to evenly distribute the solution over the tiles, thereby saving some adhesive. Now the porcelain stoneware is applied to the cement base and pressed for a few seconds. Porcelain stoneware tiles are leveled using the same building level. After laying and tiling, grouting of the joints must be carried out. In this case, a special composition must be used. It is applied to the joints of the tiles using a rubber spatula so as not to damage the front side of the porcelain stoneware. When the substance dries, its remains are removed from the tile with a simple sponge.
Wait until the solution is completely dry, and then check the quality of your work. All you have to do to do this is knock on the tile. If there is no sound indicating the presence of voids, you don’t have to worry at all - all your work has been done properly. And this, in turn, means that the threshold you create will last a long, long time.
Construction of a concrete threshold
Before starting work, you need to prepare the necessary tools and materials:
- building level;
- spatulas – standard, rubber and with teeth;
- perforator;
- roulette;
- rule;
- glue container;
- grinder, diamond wheel and attachment for cutting porcelain stoneware;
- crowbar, hammer and hacksaw;
- work gloves, protective mask or goggles;
- old clothes.
Removing the old threshold
Using a hacksaw, the lower parts of the door frame are filed, after which the main part is carefully broken out. Remains of the product can be removed using a hammer and crowbar. Care must be taken not to destroy the door frame (unless it is also planned to be replaced).
Afterwards, the freed surface is cleaned of construction debris, then covered with a primer.
Removing a concrete threshold in the bathroom using a hammer and chisel
When you start working, you will almost immediately understand that knocking down a threshold in a concrete bathroom with a hammer and chisel is not so easy. Here you will encounter fairly strong concrete mixed with fine gravel. I’ll say right away that you will be beating the threshold in this way for more than one hour. Moreover, such work refers to noisy work, and in order not to disturb the neighbors, it is better to warn them about this in advance (see the article Noisy work):
Removing a concrete threshold in the bathroom using a hammer drill
If you have a hammer drill in your house, then the procedure for removing the threshold will not be quieter, but it will be faster, that’s for sure.
Here you can combine hammer drill attachments. These can be blades with different blade widths and a Pobedit drill bit for concrete. A good option is to first drill the threshold in many places with a drill to weaken its integral structure, and then, having secured the blades, beat off pieces of the threshold. The only thing you need to pay attention to is that you should never use your impact drill for these purposes. You will cause serious wear to the tool. This should only be done with a hammer drill. Also, you should not beat the threshold with a cheap, low-quality hammer drill, as it may burn out.
Installation of a wooden threshold
You should choose oak or pine as a material for a wooden threshold - they are strong, hard and durable.
Preparation
Before you begin installing a wooden threshold, it is worth inspecting the old one, if you have one. How badly is it damaged? It may be easier to restore it than to make a new one from scratch.
If the old one does not have large cracks, traces of dents and signs of mold damage to the wood, it should be thoroughly sanded, then covered with protective agents (antiseptic, water-repellent and fire retardant), and then paint or varnish applied in the color of the door and door frame.
Dismantling
If the damage to the old product is significant, it must be removed. A crowbar is driven under the bottom of the wooden block, and then, gently pressing, it is lifted. If the threshold is fixed with fasteners, the screws are unscrewed and then knocked out with a hammer. You can also simply cut the wood into several pieces to make this easier.
The surface on which the threshold will be located is cleaned of debris and construction dust and wiped with a damp cloth.
You can purchase a ready-made wooden product at the construction market or in a store - it will already be sanded and painted, that is, almost completely ready for installation, all that remains is to adjust the dimensions of the part to the doorway. If this option does not suit you, you will have to make it yourself. In this case, it will take more time to level the surface, carefully sand it and paint it.
Installation
It is recommended to make the threshold slightly longer than the width of the doorway in order to install it in special grooves - this method will ensure reliable fixation.
The place for the future threshold is cleaned of dirt and dust and primed. Grooves are made in the lower parts of the side elements of the door frame, placing them at the height of the threshold. The wooden blank is inserted into the prepared grooves using a hammer.
2 or 3 holes are drilled in the tree, placing them along the entire length. The threshold is removed, and dowels are installed on the floor at the marks made by the drill. Place the wooden piece back in place and fix it to the floor surface using self-tapping screws.
Next, the surfaces are coated with paint or wood varnish.
If there is a gap between the installed threshold and the floor surface, it should be filled with silicone sealant to prevent moisture or steam from entering the structure.
By learning how to make a threshold in the bathroom, you can save a lot - doing most of the work yourself will not be difficult.
Expert recommendations
If the old threshold cannot be restored and needs to be replaced, it is removed using a good lever, which must be driven under the surface of the threshold. When the structure rises above the floor, it should be freed from fasteners and then knocked out with a hammer. The threshold can be cut into several parts. Before installing a new product, you should take care to remove debris. In a hardware store you can find a ready-made threshold that is already sanded and painted. You just need to install it, after adjusting the size.
Fastening to the surface is carried out with nails. In order to prevent cracking, you must first make holes for the nails and then attach the threshold. Painting and varnishing is the final process. If there is a small gap between the door and the threshold, it is filled with moisture-resistant sealant.