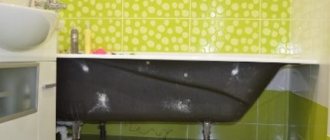
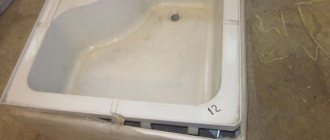
Low shower trays are more popular today than regular ones. They look much better and are more convenient to use. In addition, low trays are considered safe for children and the elderly. The small gap between the bottom of the tray and the load-bearing base puts forward special structural requirements for siphons.
Siphon for shower cabin with low tray
The main one of these requirements is a small installation height. Reducing the size of the siphon forces designers to make original solutions to ensure the necessary drainage capacity and increase the service life of all elements. Not only the appearance of the siphon changes, but also the nomenclature of the internal filling. To make it easier to clean drains from various deposits, some manufacturers produce self-cleaning siphons.
Shower cabin with low tray
Self-cleaning siphon
What is a siphon used for?
Not only the shower tray, but also all other plumbing fixtures must be connected to the drain through a siphon. The task of this element of drainage fittings is to ensure unhindered drainage of water from the shower stall into the sewer.
Manufacturers are developing new, improved models that not only drain water, but facilitate its rapid removal in a matter of seconds.
The smell from the sewer is not just unpleasant. Gases can be toxic and hazardous to health if inhaled
This creates a water plug that prevents sewer odors from passing from the pipe into the room. More detailed information about the water seal for sewerage is discussed here.
A water seal is a special siphon design. If you do not use the shower stall for a long time, the water plug may dry out. If this happens, the bathroom will fill with an unpleasant odor.
To correct the situation is very simple - turn on the water. A new hydraulic seal is formed, and the problem disappears.
Image gallery
Photo from
Shower cabin with a tray built into the floor
Space between pallet and floor
Siphon for low shower trays
Device with water seal for high pallets
Replacement
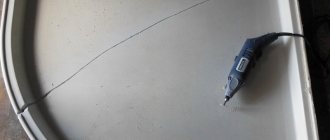
Let's take a closer look at how to change the siphon in a shower stall. Buy high-quality, reliable products so as not to face the problem of secondary replacement. In the store, make sure that the product is intact.
First, remove the decorative shower panel by pressing down on it until the retaining clips release. Then proceed to dismantling:
- disconnect the elbow from the sewer pipe;
- unscrew from the bottom using a washer or an adjustable wrench;
- unfasten the overflow (if available);
- remove the device.
Recommendations are given for those who do not know how to unscrew the siphon from the shower stall.
Classification of siphons by design
Based on their design features, there are several types of siphons:
- bottle type;
- pipe;
- corrugated;
- dry.
Separately, the presence or absence of an overflow in the design should be highlighted. All of them can be used when connecting a shower tray. When choosing a specific type, you need to take into account the presence of an overflow hole in the pan design.
If the tray for the cabin is equipped with an overflow, you definitely need an appropriate siphon, because when the tray overflows, water will simply flow through the hole onto the floor.
Such fittings can be any of the above varieties. A distinctive feature is the presence of an additional pipe connecting the siphon structure and the overflow.
The presence of such a feature as an overflow makes the use of a shower tray more practical. With sufficient depth, you can bathe a small child in it, like in a bath, or even do laundry
As a rule, the upper hole has a smaller diameter - about 4 cm. The connecting hose is made flexible - from a corrugated pipe, since the location of the overflow can vary depending on the type of shower stall, and the siphon should fit most models.
Now let's take a closer look at the main types of siphons. To understand how they work, you need to familiarize yourself with the features of each type, as well as their disadvantages and advantages.
Type #1 – bottle siphon
The first type of siphons is the bottle type. In its design it resembles a flask. A drain from a pan with a filter grid (outlet) is connected at one end, and a sewer pipe is connected at the other end.
The hydraulic seal is formed due to the fact that the outlet from the siphon is located above the edge of the inlet pipe.
There are two construction options: with a tube immersed in water, or with two communicating chambers with a partition. Both varieties are equally effective
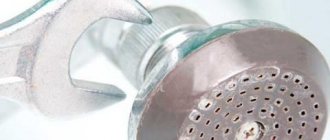
The device is made of plastic. Sediment collects at the bottom and must be removed periodically.
To clean a bottle model, the drainage fittings must be accessible from below, and the design of standard shower trays rarely requires a comfortable height. For this reason, the classic bottle shape cannot be used for low trays.
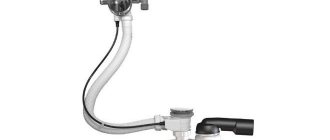
Type #2 – pipe version with a water seal
An equally common option is a pipe siphon. It is a curved tube made of hard plastic. A bend is required.
Most often, pipe models are made in the shape of the letter “S” or the letter “U”. This configuration ensures the natural formation of a water plug in the bends.
In addition to the height of the siphon itself, it is necessary to take into account the necessary angle of deflection for normal outflow of water. The reference point is the place of insertion into the sewer pipe
Pipe siphons are compact and easily fit under the shower stall. There are modifications for pallets of any height, even the lowest ones. Thanks to the smooth inner surface of the plastic from which the device is made, contaminants do not accumulate on the walls, but are sent straight to the drain.
The main advantages of this type of drainage fittings are durability and the absence of the need for frequent cleaning.
Type #3 – corrugated siphon
The most popular siphons for low pallets are made from corrugated pipe. According to the principle of operation, they are identical to conventional pipe models, but their main feature is contained in a flexible and elastic corrugation: the siphon can be manually set to any suitable shape.
This versatility makes corrugated models suitable for all shower enclosures.
The main condition is that the bend of the siphon must be made so that the water in this place completely blocks the pipe opening. Only in this case will the hydraulic valve function correctly
The main disadvantage of this design is caused by the structure of the corrugated hose. Since its entire inner surface consists of small folds, dirt accumulates in them.
In addition, to ensure the necessary flexibility, the thickness of the hose walls is quite low, which also affects the durability of the device. The siphon quickly breaks down and requires cleaning.
Type #4 – dry siphon version
In order to ensure the minimum possible height of the siphon, manufacturers abandoned the conventional water seal in favor of a new technology for protection against sewer “odors” - a silicone membrane.
Models with such a system are called dry siphons, because water does not linger in them, but goes directly into the drain. The silicone membrane acts as a valve, allowing water to flow in the desired direction, but retaining gases from the drain.
It looks like a tightly rolled polymer tube, which straightens out and allows the flow of water to pass through, and as soon as it stops, it returns to its original position.
Another advantage of this design is that it does not freeze or dry out. Even in the presence of a heated floor - a frequent culprit of evaporation of the water seal and the appearance of unpleasant odors in the bathroom - the silicone membrane will not be damaged in any way
This feature plays an important role in rooms that are heated intermittently, for example, in a free-standing bathhouse or sauna in the country. In this situation, the presence of a siphon, which does not need to be “preserved” every time so that it does not crack due to frost due to the water remaining in it, is a significant advantage.
This type of siphon is the most expensive, but its efficiency justifies the high price. Fittings with a dry seal are installed even under the lowest shower trays, where it is impossible to install other models.
In addition to the high cost of the device itself, if the membrane becomes dirty or damaged, repairs will also be expensive.
We reviewed more detailed information on the types of shower drains in this article.
Installing a drain for a shower stall with your own hands: step-by-step instructions
The installation procedure depends on the type of drainage structure chosen, however, there are general recommendations that improve the quality of the work performed. If the siphon or drain is installed incorrectly, the risk of flooding or sewer gases entering the room increases.
Installation of a shower channel
This system is laid under the floor. Before installation, the grille is covered with masking tape.
The work order includes the following steps:
- Preparation of the external surfaces of the canal. Sanding with sandpaper improves the adhesion of plastic to cement mortar. After roughening the surface, wipe it with a degreaser.
- Securing the channel. At this stage, a bracket is used. The water collection tray is grounded. The sewer pipe requires rigid fixation, because it will experience stress when a person is in the shower room. One end of the corrugated tube is connected to the sewer line, the other to the channel pipe. The hose is inserted into the holes until it stops. Before installation, the surface of the tube is treated with sealant.
- Connecting a tray for water drainage. To do this, use a pipe with smooth internal surfaces.
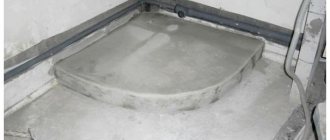
- Elimination of gaps between the channel and the pedestal. The thickness of the cement layer is selected taking into account the type of tile being laid.
- Floor covering. The height of the tiles should overlap the edges of the channel. The material is laid starting from the drain hole. Form a slope of 1 cm/m. The joints of the tiles and the decorative grille are cleaned of cement and sealed with sealant. After the composition has dried, the cabin becomes ready for use.
When laying a duct system, the following points are taken into account:
- The distance between the drain outlet and the sewer line should be minimal.
- Before installation, the drain capacity is determined. The tray is placed on the floor, after which water is supplied under pressure.
- To connect structural elements, hoses with a cross-section of at least 40 mm are used.
- The duct system located close to the door is equipped with a sectional grille.
Installation of water drainage drain
We follow all the rules when installing the ladder.
This plumbing fixture is installed in the same way as a duct device. Cheap ladders do not have latches. To hold the body in its normal position, improvised materials are used - tiles, bricks.
You cannot fix the drain with foam, because... it fails under load.
The cement screed gives the structure horizontal stability. The formation of the floor is carried out in stages. Watching the appropriate video will help you complete this stage of work correctly.
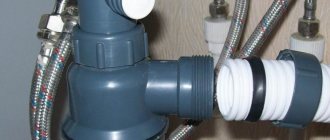
Installing a siphon on a pallet
A correctly assembled siphon for draining a shower stall.
The process of installing a siphon on a low or high tray cabin includes the following steps:
- Connecting the drain outlet to the water seal. The pipe is equipped with a conical rubber seal. The narrow part is left at the neck. The outer surfaces of the gasket are coated with sealant. One end of the pipe is inserted into the flask or elbow tube all the way. Fixation is ensured by tightening the nut.
- Installation of the plug. A sealant is applied to the water seal pipe. Screw on the plug. If such a detail is not provided for in the siphon design, this step is skipped.
- Neck connection. A gasket is installed between the pipe and this part. The nut is tightened until it stops. At this stage, make sure that the seal does not move. If this happens, you need to unscrew the nut and return the gasket to its original position.
- Installing a siphon on a pallet. The neck is aligned with the hole, the drain hose is connected to the sewer line. The upper part of the plumbing fixture is secured with a screw. A sealant is preliminarily placed under the neck.
- Arrangement of a drain-overflow system. This stage is performed when installing a high pallet. The hole in the wall of the container is combined with a flexible tube connected to the water seal.
Types of siphons according to the method of drainage control
The siphon for the tray is part of the drain design. There is often a need to leave some water in the pan. To do this, close the outlet of the siphon.
There are several options on how to do this:
- using a cork;
- using a lever;
- by pressing the button.
Let's look at all drain control methods to understand how they work.
Cork as a control mechanism
The most primitive elementary option is a design with a plug. This outlet is not equipped with any valves; the water simply leaves the pan through the hole and goes straight into the siphon. To collect water, the drain hole is closed manually using a plug.
This design does not present any complexity. This technique is familiar to everyone, because it is used in ordinary bathtubs and sinks. In modern shower stalls, ordinary drains are used less and less.
Tray siphons, in which the drain hole is closed with a plug if necessary, are in little demand. They are being replaced by more convenient models with a button
The concept of a “drain plug” will soon completely disappear from everyday life; it will be replaced by new automatic devices.
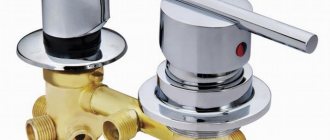
Drain control using a lever
An outlet with an automatic bottom valve is much more convenient than a conventional “plug” system. There is no need to constantly look for this same plug; the hole closes automatically when you turn the lever.
The design is quite simple; the lever is usually located in the mixer area. The valve and mixer are sold and installed together, which is not very convenient.
Turning the valve leads to partial or complete blocking of the drain hole. This system is convenient because there is no need to bend over, look for a plug or immerse your hand in water.
Click-clack button for water release
Separately from the mixer, you can purchase an automatic drain valve of the Click-clack system, also known as Push&Open. The valve is a large button that can be pressed with your foot.
The push-button flush system is easy to use, looks stylish and doesn't require you to dip your fingers into dirty water to release the water, as is the case with a plug.
When pressed once, the drain closes, when pressed again, it opens. Using such a device is as easy as shelling pears, and its installation is much easier and faster than an automatic lever valve.
Mirror
Many showers come with built-in mirrors, which require proper care to keep them clean and looking great. To eliminate stains on a mirror, you can use several methods:
- Apply lemon juice to the surface of the mirror, leave for 10 minutes and thoroughly wipe the surface with a soft cloth.
- You can mix water and ammonia in equal proportions. This product is ideal for polishing mirrors. You can use crumpled newspapers to rub the surface and remove streaks.
- Alcohol-containing products help deal with black stains. You can create a solution of water and vodka in a ratio of 10: 1. You need to moisten a cloth with this product and wipe the mirror. Crumpled newspaper will help eliminate stains.
Features of choosing drainage fittings for showers
Choosing the right siphon for a shower tray is not as simple a task as it seems at first glance.
Decisive factors to consider when choosing:
- geometric dimensions - hole diameter and height;
- quality of material;
- technical characteristics - throughput and performance;
- complexity of installation;
- operating features.
Having comprehensively assessed the model you like based on all indicators, you can finally make your choice.
Geometry and appearance of the device
The installation height is selected depending on the design of the pallet and the method of its installation. If the shower stall is installed on an elevated surface, the range of sizes increases significantly.
The most common siphons are with a height of 8 to 20 cm. The most difficult thing to choose is a suitable option for low pallets installed directly on the floor. We recommend that you read the information on how to choose the right siphon for a low tray.
Low pallets, as a rule, are installed without any foundation, directly on the floor, and even glued tightly with polyurethane foam, without thinking about the consequences. The siphon for such a booth must be chosen with all responsibility, because replacing it will require considerable effort
According to standards, the diameter of the drain hole can be:
- 52 mm;
- 62 mm;
- 90 mm.
Here the choice is obvious - the diameter of the inlet grid of the drain fittings must coincide with the hole in the pan. When purchasing, evaluate the quality of the build and the parts themselves.
The plastic case should not have visible damage: cracks, scratches, chips, dents. Any traces of deformation of the product will undoubtedly affect the tightness of the fittings and will make themselves known by an early leak.
Technical parameters and operating features
The throughput of the siphon shows how many liters of water per second go into the sewer. This indicator is important for shower stalls, because the depth of the tray is usually not high, and a lot of water is consumed.
To ensure that the pan does not flood and the water has time to drain away, the drainage fittings must be selected in conjunction with the mixer and its performance.
The minimum throughput is standardized by GOST 23289-94. For low shower trays with outlet it should be at least 15 l/min, and for deep trays and siphons with overflow - at least 21 l/min
The throughput is calculated in accordance with the height of the pallet itself and the diameter of the siphon outlet hole. The outlet diameter of 5.2 and 6.2 cm makes it possible to collect up to 12 cm of water in the pan, the diameter of 9 cm – up to 15 cm.
Performance characteristics and installation complexity
Installation of plastic siphon models is carried out using a minimum of tools. The main thing is to maintain the tightness of all connections.
According to regulatory documentation, drain fittings must be easily disassembled by hand, which is very important in emergency situations when the drain is clogged or broken.
A good addition is catchers for hair and large debris. Such meshes make siphon maintenance simple and quick.
The main difficulty in operating tray siphons is cleaning. When choosing a siphon, analyze how easy it is to get to it and whether this is possible without dismantling the entire cabin.
Some fittings with an outlet diameter of 90 mm can be cleaned directly through the drain hole. Its size allows you to disassemble and remove all the necessary elements, and then install them in the reverse order. There are also self-cleaning models.
Basic operating rules
To keep the shower stall clean and fresh, there are a number of rules:
- After taking a shower, rinse the walls and tray first with hot, then cool water to completely clean the shower stall from soap stains.
- Clean the walls of the box from moisture with a rubber scraper.
- Use a soft cloth to wipe the entire cabin dry.
- Clean the shower weekly with special gels.
- Clean your plumbing fixtures thoroughly every month, brushing every hard-to-reach area.
- Metal parts are washed and thoroughly dried each time after use.
Such regular maintenance will ensure that the cabin retains its original, radiant appearance. However, if the plumbing fixture is in a state of disrepair and has acquired an unpresentable appearance, prevention will no longer help: a more serious impact on the pollution will be required.
Best answers
Pavel N:
Pour in Mole, it will dissolve your hair
Dovahkiin:
This cap is threaded. You just unscrew it and that's it. And then with a plunger.
Zhanna Korabut:
We had this thing in our shower, it unscrews, under it there is a regular drain, twist it, select the hair + Mole
Tane4ka:
Nowadays these are everywhere on modern plums. She stupidly wriggles out. Unscrew it, and there is a ball of your hair. I have the same problem at home, my daughter has braids. We unscrewed it once and don’t install it again.
Vladimir Petrov:
First, work with a plunger, then use tweezers to remove all the hair. And then pour baking soda into the drain and fill it with vinegar. Wait about five minutes and pour hot water over everything
Zaretskii Kostya:
Why do you need to twist and remove something? Does the water leave at least a little or not? If so, pour out a couple of bottles of “Mole” all night and rinse with hot water in the morning. If it doesn’t help completely in one go, repeat it the second night and that’s it. Or immediately buy some drug that’s cooler than “Mole.” The main thing here is that you don’t skimp on the amount you pour, and everything will work out.
Zhandos Zhandosov:
I do not even know
irina sichkova:
I found an interesting thing, similar to a plunger, only more serious, it’s called a “pneumatic plunger”, kerntool, I watched a review on YouTube, now I want to buy one for myself and I advise you to try it
Igor Chekerda:
Try pouring mole, but it’s not certain that it will help. Mole against fat. Most likely mechanical cleaning is needed. You probably won't be able to do it on your own. I recommend plumbers from santehnik-home /ustranenie-zasorov/. They do it in good faith.
Causes
There are 3 main causes of blockage.
1. Debris and hair. After each shower, your hair, threads from clothes, and pet hair get into the drain, and it gradually becomes clogged.
Even if you carefully monitor the cleanliness of the bathroom, this is inevitable. After some time, the debris clumps together and forms a blockage, which complicates the drainage of water from the pan.
2. Small items. Sometimes it happens that small objects fall into the drain hole: stones from jewelry, pieces of gel polish, or something from the floor. Such things do not pass down the siphon and interfere with the outflow of water.
3. Grease and soap residue. Deposits of grease and soap accumulate on the walls of the sewer. Over time, the layer of dirt grows, debris sticks to it, and water begins to flow worse.
Cleaning glass doors
Most hydroboxes are presented with glass walls, which, with frequent contact with water, lose their original appearance. Glass models can be safely washed using special products to remove dirt from the mirror or glass. They need to be sprayed over the surface of the product, wiped with a sponge and wiped dry. You can use a special scraper to clean the glass cabin. It has a thick elastic band on one side and a sponge on the other.
A homemade solution is excellent for cleaning glass. Dilute 5 drops of ammonia in a glass of water. This product is perfect for removing soap stains. Some housewives also add 100 ml of glycerin, which helps protect the surface of the cabin from moisture.