Designing a swimming pool
It is necessary to take into account 3 parameters:
- dimensions and shape of the bowl;
- pool location;
- installation of additional elements (stairs, springboard, lighting, etc.).
The depth of the bowl should be up to 1.5 m - this is enough for an adult to swim. If you plan to add a springboard, then the depth is increased to 2.5 m.
The following factors should be considered when designing:
- Inner dimensions. For an adult, a length of 5 m and a width of 2 m is sufficient.
- Bowl depth at critical points. For a pool without a diving board, 1.8 m is assumed at the lowest point, 1.5 m at the highest point (taking into account the height of the sides).
- The thickness of the walls and bottom is 0.2 m and 0.25 m, respectively.
- The height and width of the sides are 0.3 m and 0.5 m, respectively.
The first step in building a pool is its layout and choice of shape.
The water level will be 1.3 m.
After developing a drawing of the bowl, it is necessary to think over the connection points for water supply and drainage, and the location of the steps.
What types of swimming pools are there - a short overview of the designs
For personal use, indoor and outdoor pools with small geometric dimensions are usually used. The first ones are installed inside any buildings, the second ones - outdoors. Installation of very small structures, called mini-pools, is allowed even in the basements of high-rise buildings or in large apartments. Experts divide the structures described in the article into three types:
- Inflatables are the simplest pool option. It is easy to transport. Such structures can be easily installed on any horizontal site, be it an asphalt road leading to a garage, or a concrete path to a residential building.
- Stationary - complex structures equipped with treatment systems, equipment for filling the bowl with water, and so on. Their installation is carried out in special rooms - in pool pavilions with an open or closed top. Also, stationary bowls are installed directly in the courtyards of country houses. In this case, no structures are built for them.
- Seasonal - the most popular designs used in the warm season. They are made on the basis of a special frame, which guarantees quick assembly of the bowl in the country. As a rule, a frame pool is placed directly in the open air and is used exclusively in the summer. Sometimes such structures are installed in covered buildings - galleries, the walls and upper part of which are made of translucent materials.
A frame pool has many operational advantages. We will talk about them in more detail below.
Step-by-step description of the construction of a concrete pool
You can build a rectangular pool with your own hands from concrete by following the following sequence of actions:
- digging a pit;
- reinforcement of the bottom and walls;
- arrangement of formwork system;
- concrete works;
- waterproofing the bowl;
- wall and bottom cladding.
You must follow the step-by-step instructions.
Pit preparation
Having determined the location and dimensions, they begin excavation work. After clearing the area and marking the corners of the pool, they dig a pit. In this case, you need to take into account the size of the bowl, the thickness of the cushion layer under the concrete bottom and the place to install the formwork. When digging the walls for a future pool, it is recommended to make a slope of 3-5º vertically so that the earth does not crumble to the bottom.
At the stage of excavation work, it is necessary to provide for the installation of drainage and wastewater systems - this will protect the soil around the pool from flooding. When installing a drain at the bottom of the bowl, a slope of 5% is arranged towards the drain hole.
A drainage cushion should be poured onto the bottom of the finished pit (leveled and compacted) - a gravel-sand mixture consisting of a layer of sand 30 cm high and a layer of gravel 10 cm high. Each layer must be thoroughly compacted while maintaining a slope of 5% towards the drain.
A pipe should be connected to the drain hole to pump out contaminated water; In addition, a pipeline for water supply must be provided anywhere in the pit.
Then it is necessary to lay a layer of primary waterproofing - sheets of roofing material are laid with an overlap of 10-15 cm, brought to the surface of the ground, covering the walls. The joints can be sealed with mastic or welded with a construction hairdryer.
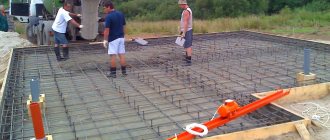
Reinforcement
It is necessary to strengthen the concrete structure and is performed after laying the primary waterproofing. At the same stage, pipelines for water supply are installed.
At the bottom of the bowl you need to lay a mesh in 2 layers - carefully so as not to damage the waterproofing. The mesh is laid out from reinforcement with a diameter of 14 mm in increments of 15-20 cm, the elements are fastened together with wire.
After this, the walls of the bowl are reinforced in the same way. The lower ends of the reinforcement should be inserted into the bottom mesh. It is not advisable to weld the reinforcement so that later, due to internal stress, cracks do not appear in the concrete structure.
Formwork installation
The formwork is arranged to form the walls of the bowl, so it is advisable to install it after pouring the bottom of the concrete pool. It is recommended to construct spacers to strengthen the sheets and prevent them from moving apart under the pressure of the concrete pour.
Formwork can be constructed from available materials: plywood or corrugated sheets, timber, edged boards. It is necessary to maintain a gap of 5 cm between the surface of the formwork and the reinforcing mesh. The inner side of the formwork should be covered with film for subsequent removal. In this case, the formwork sheets must be higher than the reinforcing mesh.
Concreting
After installing the formwork, a solution consisting of cement, crushed stone and plasticizer additives is prepared and poured. First, the bottom of the bowl is poured, after hardening, the concrete is poured into the formwork for the walls.
In order not to break the tightness of the connections between the walls and the bottom of the bowl, the joints are additionally secured with a hydrophobic cord. It is able to absorb moisture from the solution and expand, filling all the free space. This way the tightness of the joints is restored.
It is advisable to remove air bubbles from the solution using a vibration installation to make the concrete structure more durable.
The remaining elements - steps, seating areas - are poured after removing the main formwork in the same way as the bowl. Structures also need to be reinforced.
A concrete structure needs 21 days for the concrete to gain grade strength. After 3 weeks, the formwork can be dismantled.
Then the bowl is polished. The surface is rubbed, leveled, all roughness and protrusions are removed. If the bowl is small, then grinding can be done manually; if the pool is large, then a grinding machine is used to make the work easier. If necessary, cracks that arise are rubbed out and filled with epoxy resin.
The final stage of concreting is the installation of embedded elements. This includes installing a drain, supplying communications, and treating the surface with a primer.
Waterproofing
Types of insulation:
- bitumen;
- roofing felt;
- liquid rubber;
- liquid glass;
- composition of polymer-cement mortar;
- PVC membrane.
The best option is a coating composition that fills the pores of concrete and prevents the penetration of moisture. The joints between the bottom and the walls, the outer edges of the side slabs, and the places where communications enter, must be thoroughly processed.
The insulation is applied with a roller (if the pool is small) or spray. It is recommended to apply at least two layers; for better adhesion, the layers are additionally reinforced with a fine mesh.
No less high-quality insulation is self-healing liquid rubber, which is a seamless membrane. It is resistant to mechanical damage, is steam and waterproof and does not require repair in case of microcracks.
Another option is liquid glass. This is an emulsion of water-based polymer resins that, when released into the pores of concrete, fills them, creating a barrier to water. Liquid glass is an excellent base for laying tiles or applying plaster.
After treatment, you need to wait until the surface is completely dry, then fill the bowl with water and leave to check for 2-3 days. If the amount of water has decreased significantly (the volume of evaporation is not taken into account), then the waterproofing work is repeated.
Types and description of concrete pools
Such a swimming structure came to us from Ancient Greece, where these artificial reservoirs were used for training athletes and warriors. Over time, there was a transformation of their purpose, their appearance, and methods of water purification.
The structures stand out from other structures with their undoubted advantages:
- Durability. In the case of competent design and construction in compliance with technology and the use of high-quality materials, they will last 100-150 years.
- Strength, resistance to deformation.
- Resistance to corrosion and atmospheric influences.
- Hygiene.
- During production, it is possible to bring to life any design ideas and solutions. It can be made in any, most non-standard shape, using a variety of materials for finishing. In such a reservoir you can install any attractions.
What can be daunting when analyzing different options for making an artificial pond from concrete is the cost, labor intensity and construction time. However, everyone makes their own choice.
Varieties:
- According to their intended purpose, they can be used for public and personal needs, be exclusively for children or intended for all age categories, used for sports or just for fun.
- It can be installed indoors, outdoors, even on the roof of a building, or have a pavilion, the enclosing structures of which allow the bath to be used as an open or closed structure.
- Depending on the time of operation, it can be seasonal, year-round or combined.
- The shape of the bowl can be varied: from round or rectangular, to the most complex.
- Depending on the purpose, the water temperature in the reservoir can vary from 24 to 32 degrees.
- It can be equipped with various equipment that provides recycling, heating, purification and disinfection of water.
Completed projects:
- In entertainment centers, and even in the country, you can install attractions in the pond: slides, trampolines, waterfalls, hydromassage, artificial currents.
Room with attractions
- Both private and public options for water recycling schemes can be overflow and skimmer.
- In skimmer artificial reservoirs, polluted water is filtered using special devices called skimmers. In such structures, the water is located at a certain (15-20 cm) distance from the top side. From the skimmers and bottom drain, water flows for filtration and heating, and is returned using supply nozzles (as shown in the photo).
Skimmer view
The skimmer is simpler in design and cheaper than overflow ones.
- In overflow structures, the water level coincides with the level of the sides. Water is poured into specially installed trays located around the perimeter of the bowl (in rare cases, the overflow chute is located on one side of the bowl), from where it enters a storage tank installed below the level. From the tank, water is moved for filtration and heating, after which it is returned through the bottom nozzles. Nozzles can also be placed on the walls, but it is the supply using bottom devices that ensures better water circulation.
Overflow view
The storage tank is installed in the technical room. It can be made of concrete or plastic. Plastic structures are purchased ready-made or welded on site. The containers are equipped with sensors to regulate the water level.
Overflow tank
Overflow designs provide optimal quality of water purification from. However, the price of the issue is high.
- According to the installation option, structures can be recessed, surface or semi-recessed.
When placed outdoors, all three options can be used.
In buildings they are usually installed on the ground floor. All equipment necessary for operation is also placed there. With this installation, the surface is brought to the level of the first floor.
If the height of the basement floor is not enough, then the pool is partially buried in the ground. If, on the contrary, the height of the floor exceeds the height of the bowl, it is installed on special supports.
Ground floor of the building
Open version on the surface of the earth
Let's consider how labor-intensive the construction process is.
Finishing
It is carried out at the final stages of work after the waterproofing has completely set to the concrete surface and has been tested for strength.
To finish the bowl of a self-made concrete pool, use ceramic tiles, tiles, mosaics or film.
Each material has its own requirements:
- Tiles and tiles should have a rough surface, so a glossy finish will not work.
- The mosaic should also be rough, but not porous, otherwise its moisture resistance is reduced and the risk of destruction of the finish increases.
- PVC film must be sufficiently strong and dense, resistant to mechanical damage.
Mosaics are used to decorate the pool.
All types of material must have good moisture resistance.
In addition, the material must be:
- easy to install and maintain;
- affordable;
- repairable (with the ability to replace individual elements - for tiles).
For laying tiles and mosaics, a special adhesive with increased moisture resistance is used. After laying, the tile joints must be treated with antifungal agents.
POOL WITH YOUR OWN HANDS
Next to the bathhouse, I dug a hole of the required diameter, its bottom was made at a slight slope towards the center (photo 1) like a funnel, so that when pumping water from the pool, the pump could be installed in the center.
EVERYTHING YOU NEED FOR THIS ARTICLE IS HERE >>>
The sandy bottom was covered with foam plastic (polystyrene), then polyurethane foam slabs were laid on it. The latter were connected to each other with tape (photo 2) on a fabric basis. Then covered it with geotextile.
From painted metal sub-wood (bought at the building materials market) I assembled the edge of the pool. Then I covered the bottom with penofol so that its edges slightly overlapped the wall of the pool (photo 3). The result was a soft bottom, which is very comfortable when swimming.
I attached a plastic insert around the perimeter and filled the pool with water from the well (photo 4)
Backfill under the bottom slab
At this stage, a pipe is laid for bottom water drainage - if one is provided. It is brought out into the pit at a slight angle. If the pool area is large, one drain hole will not be enough. You need two or three of them. Accordingly, you dig trenches and lay pipes at a slight slope towards the pit.
After these works, the bottom of the pit is leveled and compacted. In this case, a slight bias is formed towards the bottom drains. Then roll out a layer of geotextile along the bottom. It makes the base more durable and prevents the formation of cracks. In addition, it prevents the soil from mixing with the bedding, without interfering with the drainage of water. Geotextile strips are laid overlapping, with an overlap of 15-20 cm.
Preparation of the base - laying drainage pipes, pipes under the bottom drain, then leveling the base with a slope towards the drain. From above everything is covered with crushed stone and sand
The next step is waterproofing. Choose the material at your discretion. The cheapest are roofing felt or plastic film. It is not advisable to use film; it breaks during work. Ruberoid is more reliable, it is rolled out with an overlap of 15 cm. At least two layers must be made, the seams of one must overlap the other.
Then a layer of crushed stone is poured - 20 cm, compacted to density with a vibrating plate. Sand is poured on top - a layer of 15 cm. It is spilled and compacted. The base for the bottom slab is ready.
Main features and advantages of monolithic pools
The advantages of monolithic concrete pools include:
- highest strength and reliability;
- variety of shapes and sizes;
- compliance with hygienic and sanitary requirements and standards;
- possibilities for finishing the bowl with tiles, mosaics, natural and artificial stone, as well as other materials.
A properly designed and implemented structure will last for many years. Moreover, it can be placed anywhere on your site. Concrete pools are located not only outside, but also indoors. You will also appreciate the fact that the special installation technology allows you to supplement the bowl with various equipment: a hydromassage system, stairs, water slides, countercurrents, etc.
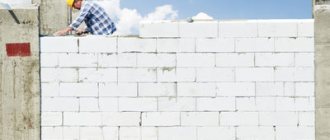
No. 9. Pool made of concrete rings and blocks
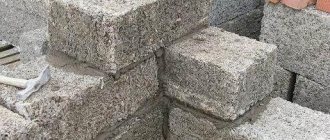
To make their life easier, many summer residents resort to tricks. Not wanting to deal with formwork and concrete mortar, some use ready-made concrete blocks . In this case, the installation process boils down to pouring a flat base and installing block walls. They are held together with mortar, and every third row is reinforced with mesh. After all this, all that remains is to carry out waterproofing and finishing.
Another option is to use a ready-made concrete ring designed for constructing wells or sewers. It is mounted on a layer of cement mortar, then, as usual: waterproofing and finishing.
Which is better - concrete, composite or polymer?
Concrete bowls are not the only design choice. There are less expensive options that are faster to install and do not require a long wait for the concrete to crystallize.
The most popular alternatives include composite and polymer bowls , which have a range of useful and practical qualities. For ease of comparison, let's create a table:
| Indicators | Concrete | Composite | Polymeric |
| Durability | From 50 years old | Up to 50 years | 15-20 years |
| Bowl strength | High | Average | Low |
| Installation duration | From 2 months | 1-2 weeks | 1-2 weeks |
| Bowl size restrictions | No | According to the terms of transportation | Depends on the thickness of the plastic |
| Duration of bowl maintenance (per week) | 8 ocloc'k | 1 hour | 2 hours |
| Thermal conductivity of the bowl | High | Low | High |
| Possibility to move the bowl to another place | Absent | Depending on installation conditions | Absent |
| The need to drain water for the winter | Drain required | You don't have to drain it | You don't have to drain it |
| Dependence of installation on groundwater level | High | Low | Average |
| Waterproofing | Required | Need not | Need not |
| Price level | High | High | Average |
Analyzing the data in this table, one can note the high durability and strength of concrete bowls. In other respects, concrete pools lag somewhat behind lighter composite or polymer bowls.
In addition, concrete tanks require longer maintenance, and their construction time is several times longer than the installation time of other types. Therefore, concrete bowls are recommended if you want to have a large swimming pool.
If you need a small tank just to cool off on a hot summer day, it is easier and cheaper to purchase composite or polypropylene models.