Features of electric swing gates
The advantage of swing gates is the ease of self-installation.
The automatic type of swing gates differs from standard ones in the presence of an electric drive. The two doors can be opened inwards and outwards. When making products with your own hands, you need to consider the advantages and disadvantages. The advantages of swing structures include:
- possibility of arrangement even with a limited budget;
- popularity - all automation components are on sale;
- unhindered passage of vehicles if space is available;
- making sashes from any materials;
- ease of self-installation of the canvas.
The disadvantages of automatic gates are associated with the lengthy work of digging and concreting pillars and the need for a large space to open the doors. For normal operation of an electric drive, two engines are required, which is associated with significant financial costs.
Types of automatic country or garage gates
There are the following types of automatic gates:
- recoil;
- swing
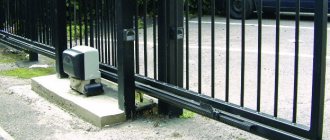
The design of automatic sliding gates, which are a single piece, has a mechanism that opens the doors to the left or to the right. It does not provide the necessary tightness to the premises, since the gate must move using rollers on a special rail. It is advisable to install automatic open gates at the entrance to the territory.
The automatic swing gate system involves the installation of double doors, as well as the connection of automation that drives the mechanism. The structure is controlled using an electric drive. An assessment of a number of initial parameters allows you to choose it correctly:
- valve size;
- weight of the entire product;
- length from the middle of the door hinges to the side walls.
The doors can open outwards or inwards. The first method is the most suitable. Hinged models have the following disadvantage: the possibility of breakdowns due to the presence of any obstacle in the way when the doors close.
The cost of swing structures is the main argument that is the reason for the increased demand for this product. For example, a gate whose dimensions are 2x4 m costs the buyer 0.8–1 thousand. e. If there is a gate in the door leaf, the cost of the model increases by 25–30%.
A necessary condition for installing fast gates of any type is the availability of free space, which allows you to open the doors without interference. To make the frame for such models, a profile with high rigidity is used. It should be paneled with metal or wood.
Automatic forged gates always look presentable. The design features durable, elegant doors that can cover openings of different sizes. In this case, a separate gate is not required. The disadvantages of this model are:
- the need for free space;
- high cost of the product.
Models of forged carved grilles are always very beautiful and elegant.
This is interesting: Electrical project in a private house (video)
Types of electric drives for gates
Linear electric drive for swing gates
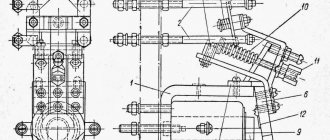
The drive mechanism of the structure is a metal “arm”, which, upon command from the remote control, directs the doors to the desired position. For self-installation, you can choose two types of drive:
- Linear – the units are compactly located in one housing. The solution is suitable for entrance groups of townhouses, private houses, dachas, and cottages outside the city.
- Lever - the electric drive is installed on the garage entrance, it is massive, easy to operate and reliable.
- Hydraulic – used for areas with large throughput, it works on the principle of pumping oil pressure.
There is no significant difference between the types of electric drives, but for selection you will need to take into account the total weight of the blade and its dimensions, the distance from the side support to the center of the loop.
Before installing the drive, the valves are adjusted.
Wiring diagram for swing gates
The figure above shows typical terminal contacts on the gate automation control board, the maximum wire cross-section that can be clamped into them without additional tricks is 1.5 mm, however, it should be taken into account that some wires have to be twisted together and then clamped into the terminal. On photocells these terminals are even smaller. So, let's look at the wiring diagram for electric swing gates.
The red lines on it indicate the wires that we need to lay. The first thing you need to understand is that all the wires come to the control unit in the diagram, it is indicated by a green rectangle. It is recommended to leave free ends of 1-1.5 m. It makes sense to place the control unit on the side where it is easier to connect the 220V power cable. Lead all wires into the box with corrugation only from the bottom, otherwise water will get in. So, we have determined that all the wires go to the swing gate control unit and come out in plastic corrugations from the installation site of the control unit box. In practice, this is implemented as shown in the photo below:
For metal poles like this:
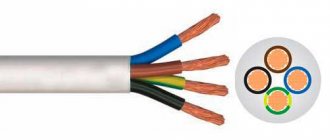
For the drive installed on the pole farthest from the control unit, a 3-core cable PVS3x1.5 is also required. This wire passes under the opening; it is convenient to run it in the same corrugation with the TX photocell wire. The photo below is an example of correctly executed wiring for swing gates.
Next comes the wiring of the photocell cables. It is this stage that causes the greatest difficulties, so let us dwell on it in more detail. Wiring for photocells is best done with a 4x0.22 “intercom signal cable”. The first thing that causes difficulties is where to install the photocells. Photocells are installed at the ends of the poles, at the same height of 500-600mm from the ground. See photo:
Main components of automatic gates
Main elements of automatic gates
Gates equipped with an automatic mechanism open quickly, eliminating unnecessary user actions. The design includes:
- rigid metal frame;
- electric drive;
- support pillars, or racks;
- metal valve;
- decorative cladding;
- big loops.
To further strengthen the frame and increase its wind resistance, stiffening ribs are installed inside.
Sectional automatic gates
This option is also often used for driving into a local area and for a garage.
There is only one sash, but it consists of movable horizontal sections on movable joints, which provides flexibility to the sash. Moving on rollers along the guides, the entire canvas goes up, gathering under the ceiling.
The operation of all sashes is facilitated by springs: torsion or extension springs. They are selected individually for each structure based on its weight.
This system can be used either manually or with an automatic drive.
Advantages
- Versatility. Can be matched to any existing opening.
- Safety. There is protection against the drive breaking and the entire sash falling.
- Attractive design. You can choose any color and texture.
- Practicality. If installation technology is followed, the service life without breakdowns reaches up to 20 years.
- Simplicity of design. And with an additional electric drive there is also comfort.
Automation for sectional doors
If you decide to organize a garage door with your own hands with automatic opening/closing, you must consider the following:
- Not only the size, but also the weight of the structure. Both the rotation ratio and engine power depend on this.
- Additional options - photocells, antennas for the control panel.
- Backup switch to manual control.
- Country of manufacture. The desire to save money is understandable, but it is advisable to give preference to well-known and trusted brands.
Standardly, the entire automation kit consists of:
- Electromechanical drive with self-locking gearbox.
- Guide rail.
- Electronic control unit.
Also included additionally:
- Photocells;
- Motion sensors;
- Lighting fixtures and so on.
The modern market of Europe and China offers a wide selection of automation for sectional doors.
Main types of drives for sectional doors
There are several types of drives for sectional doors
Bulk drive
Such systems are installed under conditions of high intensity use of the device. They have a large power reserve.
Recommended for installation in industrial enterprises. The automation is duplicated by a manual drive - a chain mechanism.
Ceiling drive
Recommended for installation on individual automatic garage doors.
The power of such a mechanism is sufficient for a home garage and is much easier to use. The price segment is significantly lower than bulk drives. The device itself is mounted on the ceiling in the center of the room. The door leaf is driven by a motor with a metal cable. It is also possible to duplicate it manually.
Setting up automation systems
After the DIY garage door and automation system are installed, a set of additional configuration measures is required.
Usually it is necessary to adjust the cable tension and torsion springs. But this work must be done carefully, avoiding distortions of the sections.
A properly installed system has the following characteristics:
- responds to commands from the remote control;
- there are no signs of incomplete lifting of the canvas or, conversely, partial lowering;
- no uneven movement in the grooves:
- there are no extraneous sounds when the mechanism operates.
You can actually do all these adjustments yourself with your own hands.
Such systems are convenient, visually attractive and are gaining popularity in our country.
Materials, tools for installation
Gates made of sandwich panels
Independent production and installation of swing gates with automation is made from the following materials:
- professional pipes with a cross section of 60x30 mm and 40x30 mm;
- channel or profile pipe with a cross-section of 10x10 cm;
- decorative cladding - corrugated board, wood, sandwich panels;
- brick for racks;
- reinforcement 14 mm in diameter;
- electrodes for welding parts of a structure;
- crushed stone, cement and sand for preparing the solution;
- primer with anti-corrosion properties, alkyd enamel and solvent;
- insulating PVC pipes;
- electrical wire with three cores for powering the automation.
To perform the work, you will also need a ruler, a level, a screwdriver or riveter, an angle grinder, a welding machine, and a special brush for metal surfaces. To dig trenches under the poles - a shovel, to protect the electrical part - an RCD. It is better to paint the product with a paint brush. You can use an indicator screwdriver to check the voltage.
How to select and install an electric drive
Drive for automatic swing gates
A standard swing product becomes automatic at the last stage of installation. To make the right choice of drive, you need to consider:
- Distance from the inner edge of the support to the hinge. If it is up to 15 cm, a linear electric drive without handles will be suitable for the gate. For distances greater than 15 cm, a lever mechanism is appropriate.
- Automation must be adjusted. The smooth movement of both doors is checked. If force is applied when opening, it is removed.
- The canvas should not have any distortions. Otherwise, the automation will last up to 12 months.
Before putting the gate into operation, all open parts must be lubricated.
Homemade automation system for swing gates
The simplest version of a homemade automatic system and drive can be made using a lever design based on parts and spare parts from a modern car.
As a do-it-yourself swing gate drive, you can use a motor with a comb from a Gazelle with a gear wheel or a built-in gearbox from any passenger car.
The system itself will not work; it requires automatic operation of the glass closer when closing.
To install the system on the gate, you will need an adapter bracket; it can be made from a piece of profile pipe, which can simply be welded to the post at a height of at least 200 mm above ground level. The drive must be installed either very low or at a height of at least 180 cm, so that a car passing through the gate does not demolish the entire automation system.
From the same pipe you can make a lever arm. In any case, no matter which fastening option was chosen, it is necessary to ensure that the axis of rotation of the lever and the axes of the gate leaf canopies are parallel. Otherwise, when opening the gate, the lever will lower or rise and jam the motor, and the automation system will simply burn out.
A control panel must be added to the system; you can use a remote automation unit for lighting.
In terms of price, if you make the drive and automation unit yourself, then assembling a module of mediocre quality will cost 2500-3000 rubles.
If you can buy a ready-made gearmotor from industrial equipment, you can build a drive and automation system on a lever basis. There is no fundamental difference with the previous version, but the industrial drive is more reliable to use and protected from rain and snow. In addition, with the correct setup of the system, namely the location of the limit switches, it is possible to achieve swing gate openings of more than 90°. In fact, this is the only, but very powerful argument in favor of lever systems.
Self-assembly of automation
Installation of swing gates
Do-it-yourself automation for sliding gates is mainly made from car window regulators. The part will need to be modified for quiet operation. The disadvantage of the device is the limitation of draft force. During the assembly process you need to consider:
- To drive the gate, window lifters with a movable element in the form of a rack or powered by a toothed wheel are suitable.
- The electric drive is placed on a metal platform, rigidly attached to a post or fence.
- The movement of the slats is carried out towards the canvas, parallel to its plane.
Window lifters are modified as follows:
- An elongated metal rod is placed on the rack, and a knee lever is placed on the wheel.
- A drive rod or two parts of a knee lever with a door leaf are connected according to the principle of door closers.
- To prevent backlash and quality of movement, two folded metal plates are installed at the connection site. The distance between them corresponds to the width.
- The entrance to the resulting hole is checked. The second hinge plate smoothly falls into it.
- Fastening elements in the form of a finger using a bolt or self-locking nut.
- Selection of drive position. The swing type of gate is set open and then slowly closed.
Upon completion of installation, the automatic mechanism is placed in a protective casing.
Sliding gate automation
In order to make an automatic system for sliding gates, it will take time, and most importantly, desire and resources. Sliding electric gates operate by shearing; the weight of the moving leaf can reach 500-800 kg, which can pose a certain threat to human life and health. Therefore, the quality of development of all parts and operating modes of the automation unit must be maximum. Of course, you don’t have to try to make the automation and drive for sliding gates yourself; you can buy a ready-made block of parts and assemble them yourself.
Ready-made automation units from world brands
Among the world's most famous manufacturers of automation systems are the following companies:
- Italian “Rotelli”, one of the leaders in the production of heavy-duty and reliable sliding gates. Budget versions of automation, for example, SL500, designed for a maximum sash length of up to 8 m, cost 260EU. The most powerful automation system for structures weighing up to 2 tons and sash overhang up to 12 m costs 490EU;
- Hörmann Linea Matic produces automation systems for relatively small gates. The cost of the model for sliding systems weighing up to 300 kg and a reach of up to 6 m will be 330-350EU;
- The Chinese manufacturer Miller Technics offers automation units for sliding gates weighing up to 1000 kg and leaf lengths up to 12 m. Good build quality and an acceptable level of automation reliability are estimated at 250EU;
- The Italian company CAME GROUP is one of the most famous and reputable manufacturers.
The main characteristics of the sliding gate drive for all of the listed manufacturers are approximately the same; first of all, the hardware implementation of the electronic units and the radio channel differs.
For example, the most affordable line of automation systems for Came BX gates includes models BX74 and BX78. The cost of the set is 335-350EU.
The kit includes:
- Branded Came gate drive with built-in control unit and radio decoder. The power of a 240V asynchronous motor is sufficient to move a Came gate leaf up to 14 m long;
- Toothed rack M4 with blade length up to 4 m;
- Remote control for Came gate model TOP 432E, with its own anti-interference system and increased coverage range to 25 m.
For your information! When purchasing an automation unit, it is important to purchase the drive together with the remote control and rack.
Gate programming, namely the remote control and radio decoder, are programmed at the manufacturer’s factory with its own command system, which is a good way to protect against unauthorized activation or control of the gate automation. In this case, the gate control panel simultaneously plays the role of a key to the lock, which is the automation unit.
The parameters of the rack, for example, the tooth module and the meshing gap, are adjusted in accordance with the dimensions of the drive gear mounted on the electric motor shaft.
Asynchronous gear motors designed for a 230V household network are usually used as an electric motor, or in the country version a 12V or 24V DC electric motor can be used for sliding gates.
To choose the right automation and drive for sliding gates with your own hands, you need to take into account the size, weight of the movable gate leaf and the required engine power. The fact is that the design of sliding gates should ideally be perfectly aligned in the horizontal direction. Any deviations create additional resistance to the movement of the web, and the automation can turn off the engine due to overload.
Therefore, if you plan to build a system with your own hands, the drive and motor for sliding gates must be selected with one and a half power reserves. Usually, the current consumption and drive power are indicated on the automation unit. The actual load value can only be determined with a wattmeter after the gate, automation unit and drive are finally installed.
The device will show the maximum power developed by the engine when the gate is opened. If the measurement results show that the motor and automation are operating at the limit, then it is better to replace the system in advance with a more powerful option.
Characteristics of valid nodes
ACSTM 114R - wireless two-channel remote control kit
When installing automation suitable for sliding gates and doing all the work yourself, you need to take into account the technological aspects of the product.
Control type
The standard control unit can be replaced with the ACSTM 114R. A two-channel wireless module opens and closes the doors according to the “code jump” principle. The machine's alarm panel can be used as a control mechanism. It will prevent overloading of the structure and eliminate the risk of foreign objects getting between the sashes.
Basis for the mechanical drive part
The manufacture of an electric drive for sliding gate leaves is carried out manually on the basis of a DC gearbox/motor powered by 12-24 V. Such a circuit operates uninterruptedly in bad weather and in case of blockages. Suitable electric motors:
- windshield wiper of the VAZ-2110 car with high output torque;
- MAZ windshield wiper - an element from a truck is designed for 24 V and operates at high power;
- gearbox for elevator door leaves;
- motor from the VAZ radiator cooling fan - operates via an i-80 worm gearbox.
For the actuator you will need a pair of spiers 1 m long and 16-20 mm in diameter.
Use inexpensive motors without disassembling - the worm gearbox is already in a special casing.
How the device works
Principle of automatic gate design
The electric gate drive operates by supplying an impulse from the gear motor shaft gear to the driven gears of the ends of the studs. To achieve this, torque and a hypoid gear are used.
At the moment of rotation in the opposite direction, the gears on the pin are motionless. Only the nut connected to one end of the rod moves. The second end is connected to the sliding structure. The screw, rotating, moves the nut along the slider guide. This element pushes the rod on the gate.
The second part of the drive mirrors the functionality of the first. The screws rotate towards each other, and the nuts move apart depending on the direction of rotation. Rods are used to move the valves behind the nuts.
Factory brass nuts feature abrasion-resistant threads. For strength, a steel casing is placed over the element, and the rod is mounted on hinges. Angular contact bearings ensure optimal load distribution. The system is installed above the channel on top of the gate, which is connected to the support posts.
Assembly option with a bicycle sprocket
Sliding gate drive with bicycle sprocket
The driven gear is activated by a gear motor. The gear pulls the chain along the profile guide pipe. Carriages with traction joints move along it.
The use of two bicycle sprockets with a hub, as well as a bicycle chain or steel cable, makes the adjustment process easier. In terms of cost, this system is cheaper, but modification requires the use of drilling or turning equipment. Not every home craftsman has such machines.
Work with ready-made nodes.
What does a sliding gate drive consist of and how does it work?
Sliding gates can be cantilevered or suspended, with a guide attached at the top or bottom. Today there are many models of drives from different manufacturers, but the components for all are almost the same.
The drive for sliding gates is usually mounted on the foundation, near the gate.
It consists of the following elements:
- an electric motor having a drive gear;
- gearbox with liquid or grease lubricant inside;
- Control block.
Electronics and a friction clutch control the force, which is transmitted directly to the door by a special rack mounted on the gate. It is noteworthy that the drive system automatically locks the door, so the closed gate cannot be moved to the side manually and there is no need to install an additional lock.
Rack and drive for gate opening
Manufacturing nuances
When manufacturing gates, it is necessary to take into account an independent automation system.
Automatic doors operate remotely, but the quality of the structure’s functioning depends on the type of electric drive. When making your own, you need to take into account:
- complete set of a ready-made automation system - photocells and a control unit for opening the sash in 15 seconds;
- there should be no obstacles in front of the opening - they will cause jamming;
- for a homemade drive, you can use a satellite dish mechanism powered by a voltage of 36 V;
- the optimal range of the remote control is at least 50 m. The remote control will require two key fobs and a current relay;
- the type of decorative cladding, its weight, and the intensity of opening determine the category of the drive.
For normal operation of the structure in winter, it is better to make an electric drive with a power reserve.
Common mistakes and how to avoid them
The drive mechanism must be protected by a box
Installation of automatic gates is a multi-stage procedure, starting with design and ending with connecting the assembled equipment to the network. Each phase of the process must be carried out in accordance with the recommended technology, without simplifying or ignoring seemingly minor nuances. Otherwise, time and effort will be wasted; at best, everything will have to be redone.
Installation of an automatic gate drive
Even knowing how to correctly install a motor on a sliding gate, many approach this stage with a whole set of previously made mistakes.
The most characteristic:
- Purchasing equipment whose power does not correspond to the weight and size of the gate.
- Failure to comply with the curing period of concrete used when pouring support and embedded elements.
- Distortions during the manufacture of the mounting base. Violation of the distances between parts.
- Welding the motor until the drive mechanisms are adjusted.
- Ignoring soil properties, climatic features, and intensity of equipment use when calculating.
As a result, sliding and stationary elements may become askew, collapse, or jam. During operation, loud squeaks, clicks and jamming are possible.
Connecting a sliding gate drive
The wires must also be insulated in a box to avoid damage.
Sliding gates must be installed so that the electrical wiring is reliably protected from mechanical influences.
Errors during self-installation:
- Laying cable in a trench without using plastic or corrugated tube.
- The use of wires with an insufficient cross-section of cores, which leads to their heating, melting of the insulation and short circuit.
- Combination of cables with aluminum and copper conductors. This causes corrosion, sparking and loss of contact.
- Ignoring grounding. The gate is operated in a damp environment and the protection will protect against electric shock in the event of a short circuit to the body.
- Carrying out installation on a live line. Incorrect movement may result in personal injury or equipment damage.
Installation and connection of the signal lamp
For safety, it is recommended to install a warning light
The signal lamp is not included in the sliding gate kit, but allows you to increase the level of comfort and safety when using the equipment.
When installing the product, the following errors are allowed:
- Placement on an external support, which creates preconditions for its theft.
- Use of a low-power lamp. Because of this, the situation in the travel area is practically invisible.
- Fixing the device on a plastic plug in a pole. Unstable and unreliable.
- Passing wires along the surface of the support.
Quite often, the cheapest products are purchased, which shine dimly and do not last long.
Do-it-yourself installation of automatic swing gates
Independent creation of swing gates equipped with automation occurs in stages.
Drafting
Hanging the canvas before painting
The drawing, which shows the dimensions, appearance and features of the automation, is drawn up on paper by hand or in a special program.
Fabrication
According to the dimensions of the product, markings are made on the base material, taking into account the dimensions of the sashes and the gap between them. The material can be corrugated sheet or steel. For the stiffeners you will need a professional pipe. The elements are cut on a machine and connected with a welding machine.
Welding the reinforcing frame
Rectangular frames are connected with rigid jumpers and sheathed. Assembly is carried out on a flat surface, the geometry of the valves is carefully checked.
Need for frame
Gate automation
There is no need for a structure at the entrance - the gates are fixed on the posts with canopies. If there is a frame, its parameters are calculated and the lines are diagonal and parallel.
Construction of supports
After measuring the opening, marks are set and holes are dug along them, the bottom of which is filled with crushed stone. The columns are leveled and filled with concrete mixture.
Gate installation
Canopies and balls are used to secure the canvas. The sashes are placed in the contour of the frame, the alignment is checked and they are fastened to the canopies by welding. Frameless products are attached with clamps and reinforced by welding.
Drive installation
The electric drive is installed on the gate upon completion of the door leaf installation process. After this, the power supply option is selected and the connection is made according to the diagram. Equipment with wires is hidden in a mounting box. At the final stage, the system is checked.
Automatic gates are controlled remotely, which increases the comfort of living on the site. If you have the knowledge and skills to work with electrical appliances, you can not buy a drive for the shutters, but make it yourself.
/
Installation of roller trolleys to the channel
Installation of roller carts
Roller carts can be called the most important mechanism, since they must withstand the load of the entire structure, so they should be attached to the channel as securely as possible. The plates for fastening the rollers must be welded to the channel. Everything is done as evenly as possible and in the same plane so that the gate moves freely. To align them exactly, you can use a laser pointer or a stretched cord. Another option is to draw a parallel line on the foundation, which will be a tangent line to the edge of the plate. The plates should be welded in the middle of the channel. To do this, step back 15 cm from the edge, closer to the opening and fix the first plate. The second plate is attached 10 cm from the opposite edge.
Installed roller support
Now you need to fix the roller carts to the plate. They are usually connected using bolts and nuts. You need to tighten them securely and install the gate. Check the smooth running, take control measurements and adjust the position of the roller supports to align the gate perfectly level. To do this, you can use a cord, which must be pulled along the gate opening line, at a distance of 20 cm from the surface and 3 cm from the second post. The cord will serve as a guide to help you align the gate perfectly straight.

