How the hood works
Before you start repairing the hood with your own hands, it is worth understanding its structure. This technique can be of an exhaust (discharge) or recirculation type (the air is cleaned and released back), but in both types the main working element is always an asynchronous motor (8).
In addition, such a technique will necessarily have a fan (2), which may be axial or tangential. The axial one consists of blades that “draw” air inside. The air flow will pass along the axis of rotation of the engine. Tangential type fans have blades evenly spaced in a circle. Such a fan is preferable - its operating principle provides increased efficiency.
There will definitely be filters in the hood. For example, a budget carbon filter (9) is placed on the round inlet window of the motor, and a more expensive filter structure with carbon granules will be one that has a rectangular shape and is installed immediately behind the fat filter. The grease filter, in turn, is located immediately behind the working surface (12). There are also fabric filters and impregnated paper products (disposable), but now mesh reusable metal grease traps are most common.
As for the control panel, it can be of a touch or mechanical type, but will always be a common unit, as shown in the photo below.
If the device provides for changing speeds, then there must be a circuit that generates the control voltage. The design is also complemented by lighting. These can be incandescent, halogen or LED lamps.
Repairing a hood with your own hands is not difficult if you follow a certain algorithm. It is clear that first you need to decide on the problem.
If the hood breaks down and does not turn on, you must check the functionality of the built-in lighting. In this way, the integrity of the power circuit and the correct connection to the outlet are monitored. If the lights work, then the problem is with the motor or control system, in which case you need to buy new parts that fit your hood model and are approved by the manufacturer.
Spare parts for kitchen hoods are sold in specialized stores of spare parts for household appliances and in online stores.
WHY IS IT BETTER TO CONTACT A SPECIALIST TO REPAIR A HOD?
As a rule, repairing a hood often requires specialized equipment, certain experience and knowledge in this matter, especially when it comes to the electrical board, hood motor, or problems with electrical wiring. Repairing the hood with your own hands can only aggravate the situation and contribute to even greater costs for solving the problem in the end. Therefore, you should not risk your household appliances and it is better to contact only qualified specialists when it comes to repairing the hood. Our technician will arrive upon request, determine the exact cause of the malfunction of your unit, repair the hood in Moscow efficiently, accurately, safely and in the shortest possible time, make sure that the device is working, and our company will provide you with a guarantee for the work performed. A hood repair technician will arrive upon request free of charge, assess the scope of work, and give you a price for hood repair.
Why is it better to order hood repair in Moscow from our company?
- We work around the clock, without breaks or weekends. Our master will repair the hood at any time convenient for you.
- The visit of the master is free. The master will come for free and assess the amount of work and advise you on the cost of repairing the hood in Moscow.
- We provide a discount for pensioners. Pensioners receive a 10% discount when ordering hood repair in Moscow.
- Quality assurance! We are confident in the professionalism of our craftsmen, so we provide a guarantee on the work done.
History and design of the hood
Since the beginning of ancient times, people have thought about ventilating indoor spaces. This was especially true in food preparation areas. Initially, all actions were reduced to simple ventilation or such an arrangement of the cooking area that naturally removed combustion products.
With the development of house building, kitchens also changed. They began to use stoves and fireplaces in which chimneys were used to remove combustion products. In the 19th century, the Russian scientist E. H. Land suggested that high-quality ventilation is impossible without artificial air exchange. The production of hoods was mainly developed thanks to the Italian company Faber, which released the first plastic hood in 1958.
But only since the 1970s, kitchen hoods gained popularity and began to be installed in Europe and America. In the countries of the USSR, the first household hoods appeared in the early 80s, but only with the arrival of foreign manufacturers on the market in the 90s did they take their place in kitchens.
Modern hoods fully cope with the tasks assigned to them. Without losing performance, they have become compact and easy to use. Competition between companies leads to constant improvement of product technical characteristics, such as performance, noise reduction, and reliability.
Types and principle of operation
A kitchen hood is a device designed to clean the air from smoke , odors, particles of fat, and moisture that arise during the cooking process. Depending on the operating mode, kitchen hoods are either flow-through or circulation. The first type involves exhaust mode, when the exhaust air is drawn outside from the room, most often into the ventilation shaft. This mode is more preferable than the second. The circulation mode is based on passing air through a filter system and returning it back to the room.
According to their appearance, exhaust devices are divided into the following types:
- dome;
- flat;
- built-in
Despite their appearance, their operating principle and structure are the same. The main part of a kitchen appliance is the motor. The quality of air purification depends on its operation and location. Having an exhaust fan, it ensures the creation of air flows passing through the filter elements.
An asynchronous motor is used as a motor. Its axis follows the movements of the pumped or discharged air flow. Such an electric motor consists of a rotor located inside the stator. The distance between them is no more than two millimeters. The stator is a core with slots on which the winding is wound. The rotor, the moving part with the shaft, consists of a core with a short-circuited winding. This design resembles a squirrel wheel in appearance.
When alternating current is supplied to the stator winding, according to the laws of physics, an alternating magnetic field appears. Electromagnetic induction occurs on a closed conductor placed inside this field, which leads to the appearance of a current, and this, in turn, causes the rotor to rotate. Due to the fact that the stator has several leads, connecting different numbers of them leads to a change in the fan rotation speed.
Structural elements of the system
A special element of the hood is the check valve. It can be electric, with a motor opening when starting, or mechanical, triggered by the pressure of the air flow. Its job is to pass air in one direction and prevent it from passing in the opposite direction. In addition to the electric motor for the hood and the valve, the device includes:
- frame;
- power unit;
- control board;
- control unit panel;
- motor holder housing;
- backlight lamps;
- filters.
The body itself is made of sheet steel and is powder coated to prevent rust. The power supply is designed to start the electric motor and provide the required voltage to the control board and backlight lamps. The motor holder is used to reduce the level of vibration and noise from its operation, as well as to securely fasten it. The filters have different designs, but in all cases a perforated aluminum mesh is used as the primary element. It effectively protects parts of the hood from contamination with grease. The control unit is made in the form of mechanical buttons or touch surfaces.
Reasons for failure
It’s one thing if your kitchen hood is already ten years old and recently it has been extracting air poorly. Here you don’t have to think about repairs; it’s easier to buy new equipment. But what if your purchase has not lasted you even a year, and the fan no longer copes or has completely failed? The first step is to find out the cause of the malfunction, and then fix it on your own. The main “culprits” of the breakdown may be:
- Improper operation of the home exhaust system. Firstly, you should clean the mesh filter (grease trap) at least once every 3 weeks. The carbon filter must be completely replaced every six months or when indicated by the display on the panel (in new models a special light is installed). Secondly, it is forbidden to run an exhaust fan over a switched on stove if there is no pan on it. Hot air can quickly damage the system, which will then be quite difficult to repair yourself. Thirdly, the hood must be turned on 2-3 minutes before the start of cooking and turned off 10-15 minutes after the end of cooking. Otherwise, the fan may not be able to cope with the volume of fumes, resulting in an unpleasant odor throughout the room.
- Lost contacts. The operation of the system is accompanied by slight vibration, which can lead to a break in a bad contact on the control unit or further along the circuit. This happens rarely and only with Chinese products.
- Incorrect installation. If installed incorrectly, the hood in the kitchen may stop working, which occurs for reasons such as poor-quality connection of wires in the terminal block or a strong bend in the air duct (corrugations).
- Problems with electrical wiring. Perhaps the socket simply stopped working or the circuit breaker on the panel went out, and you are already panicking that the hood is not working in the kitchen and needs to be repaired urgently.
All these reasons can lead to failure and further repairs, so take into account all the points for the future so that this situation does not arise again!
Other breakdowns
Almost all failures that can be observed on kitchen hoods are associated with broken contacts. The winding on the motor may well burn out, or the tracks on the printed circuit boards may come unglued. Without electrical knowledge, such breakdowns are difficult to repair on your own. Wires and contacts can be connected using a soldering iron, but with the motor winding everything is more complicated. And we must not forget that sometimes it will be easier and cheaper to contact a workshop that repairs kitchen hoods.
If the engine does not start: what to do?
Mostly the following breakdowns occur - the backlight or engine does not work. In this case, the hood repair instructions say that the problem is in the power supply. How this can be corrected was described above. On retractable models of hoods, a similar problem can occur due to the fact that the limit switch on the bottom does not work. It is enough to adjust it and everything should work if the problem was there.
If the backlight indicates that the hood is working, but in fact the motor of the device is stopped, then the problem is in the control unit. This is especially likely if it is a push-button one. The contact of the button itself often burns out. As a result, the gear shift system fails, which prevents the engine from starting. To get rid of this problem, you need to solder the contact that has burned out, or replace the entire unit. It is not difficult to find a similar analogue of a control circuit on the open market.
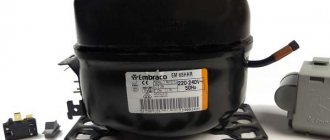
Motor for hood
Vibration waves can cause this problem. Because of this, some wires may fall off. To identify such a problem, you need to check all the wires and pull them. If a flying wire is found, it can be soldered.
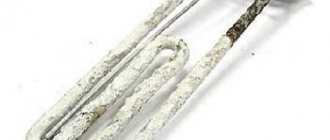
The engine hums and refuses to work
In such a situation, when a hum is heard from the engine, but it refuses to work, first of all you need to check the fuse in the motor winding. Most likely, this is the reason. This ceramic fuse is located in the motor housing itself. Therefore, to replace it, you will have to completely disassemble the case.
Then you need to ring the motor winding with special devices. The ringing must be done in at least 2 windings: one of them is working, the other is starting. If the hood provides for speed switching, then there can be significantly more windings, in accordance with the number of speeds.
If the check shows that everything is fine with the fuse, then you need to check the capacitor responsible for turning on the engine. Just look at it: if it is swollen, then it definitely needs to be replaced. If not, it still wouldn't hurt to check it with a multimeter.
Exhaust condenser
If the backlight fails, how to solve the problem?
Such a breakdown may occur due to burnt out lamps. So, you just need to replace them. It may also be that the problem lies in the power button, especially if there are incandescent lamps. If there are halogen lamps on the backlight and the test shows that they are working, then the reason is in the transformer - it simply burned out.
In the case of fluorescent lamps, the cause of the breakdown must be sought in the ballast. The reason may be trivial: the button simply breaks or the contact in the cartridge disappears. Such problems can easily be eliminated by soldering and replacing the button.
Speeds don't change
If one of the speeds refuses to work, then usually the reason lies in the button. It must be checked for serviceability and, if this is the reason, replaced. It is also possible that a track on the board has burned out: in this case, it is easier to replace the entire block. In some models of kitchen hoods, a capacitor is connected to the motor winding circuit, so this may be the reason. It needs to be found and replaced.
Hood with mechanical panel
Odors are not removed
The most common problem is that the hood does not remove odors. The main reason lies in untimely cleaning of filters. If there is a carbon filter in the hood, this may be due to its ineffective operation. We need to see if it can be taken apart. If possible, disassemble the device and replace the granules in it. Any person can easily cope with this. If it is impossible to disassemble it, then the filter is simply replaced with a new one.
If a reusable filter is installed in the kitchen hood, everything is much simpler. It is enough to take it out and rinse thoroughly in water, then dry it and then carefully put it back in place. That's it, problem solved. As you can see, most breakdowns can be solved on your own, but it is better to consult with specialists, otherwise you can only worsen the situation.
Main types of breakdowns
Now we will do the following: we will list all the existing faults one by one and under each one we will provide instructions for repairing a kitchen hood with your own hands. Breakdowns will be listed from the most popular to those that occur least often and that are more difficult to repair at home.
The light doesn't turn on
Very often, an exhaust panel is used to illuminate the work area in the kitchen. This is really convenient and a smart approach, because... In modern technology, powerful LED lamps or halogen lamps are installed.
If your lighting does not work, you must take the following repair measures:
- Check the light bulb itself, it may have burned out.
- Turn on the fan to see if it works. If the blades don’t spin, we’ll talk about how to repair the system a little lower. The engine is running - we are looking for the fault further.
- Check the voltage in the outlet using an indicator screwdriver. Immediately look at the switchboard, perhaps the machine has been knocked out. Is the socket OK? If so, you need to check the integrity of the electrical cord, and then use a multimeter to test the backlight switch and other elements of the circuit. Thus, using the method of elimination, you will find the cause of the malfunction and can move on to repairing the kitchen hood with your own hands. Usually they don’t get around to it, because... Most often the light bulb burns out or the socket fails.
Pulls weakly
The second most popular kitchen hood malfunction is that the fan does not exhaust properly. Don't know what to do in this case? Here things are easier. First of all, check the dirtiness of the filters and grease trap. Most often, these two components are the culprits that the hood does not draw air into the ventilation or ventilates poorly.
In order to repair the hood with your own hands, you need to clean the filters and turn it on again. You can see how to properly clean in this video lesson:
Instructions for cleaning the grease trap
Another possible situation is the appearance of a vacuum in a room with closed windows. As a result, the hood will draw weakly or stop drawing air at all. In this case, the repair consists of opening the windows yourself and ventilating the kitchen naturally.
Another reason that the hood does not draft well is the lack of draft in the ventilation duct of the house. In this case, you can check the presence of draft with a regular lighter - light a fire and bring it to the ventilation hole in the wall, as shown in the photo. If the flame does not draw into the ventilation hole, you will need to do forced ventilation, which we will discuss below.
Clogged filters
An experienced user will immediately notice by the abundance of odors a decrease in the efficiency of the exhaust equipment. The kitchen quickly fills with odors, which during normal operation are only felt in the stove area. The most likely cause of such discomfort is untimely maintenance of the filters. Cleaning them should improve the situation.
Washing and cleaning the filter elements should be carried out in accordance with the manufacturer’s recommendations, which are set out in the instructions for each specific model. If there are disposable inserts, they will need to be replaced with the same ones.
Lack of traction
In the flow-through cleaning option, a problem may be the loss of draft in the ventilation shaft. You can check its presence in the old, old-fashioned way: by holding a candle, match or lighter near the ventilation grille. When the light does not go out and does not vibrate, the channel is likely clogged. If this happened in an apartment building, after installing the equipment you will have to contact the management company or the relevant services. If a problem is discovered before installation, you will need to find an alternative, most likely with the duct vented to a window. When there is draft in the trunk, but the hood still does not pull, mistakes are possible with laying the air duct from corrugated, less often from PVC plastic.
Problems with built-in lighting
Modern hoods of all types are equipped with built-in lighting elements. For this, LEDs, halogen lamps, and less commonly, in the most budget models, incandescent lamps can be used. When the backlight is not working, the cooking area is not well lit. This is not critical, but it creates unnecessary problems. If there is power in the network and the engine is working properly, the cause of this breakdown will most likely be a burnt-out lamp or a lack of contact on the switch in other places in the circuit. The specific reason is determined by checking the circuit, restoring contact, or in the simplest case, replacing the lamp.
Speed shifting doesn't work
Even budget models of exhaust equipment can operate in several speed modes. Usually these are 2-3 speeds, for example, the standard number of speeds of the Spanish Cata is 3 normal modes plus one intensive, however, the latter depending on the model. When gear shifting does not occur while the electric motor is running, we can confidently say that this is a problem with the control unit. You can verify this by visual inspection with the screen removed or by ringing using the mentioned multimeter.
If suspicions are confirmed, it is best to completely replace the board with a new one, without resorting to partial repairs. It can be repaired, but it is not a fact that the working life will be sufficient to avoid repeated breakdown in a short period of time.
Reverse current
In some cases, the user may experience unpleasant odors escaping from the device when it is turned off. This situation most often occurs on the upper floors of high-rise buildings or in private houses when the air duct is routed to the basement. The way out of the situation is relatively simple. You will need to purchase a check valve and install it at the junction with the corrugation. When the hood is turned on, the valve will be open, which will ensure the free release of vapors into the ventilation; when turned off, the valve closes and does not allow reverse flow.
Doesn't work at all
If nothing happens when you turn on the button on the panel, it will be much more difficult to repair the hood in the kitchen yourself. This is exactly the case that we talked about above - the fan does not turn on and the light does not turn on. First, you need, again, to check the electrical cord, the voltage in the outlet and the circuit breaker in the panel. If everything works, pick up a multimeter and proceed to “testing” the circuit. First of all, you need to test the switch on the panel; perhaps one of the contacts has burned out (usually the first one). Next, look at the diagram to see where the fuse is located, which blows out at least as often. Is the fuse in working order? Check the capacitor; if its resistance is normal and does not appear to be swollen, the engine most likely does not work. We talked about how to check a capacitor in a separate article. The motor windings need to be checked and if the fault is a break in the motor area, it is better to throw it out and buy a new one, because repairing the part will be very difficult and impractical.
The fan is noisy
If the hood hums when it is turned on, the cause may be poor-quality manufacturing of the device. A lot of negative reviews about increased noise levels can be found on the Internet. The answer to the question why the system is noisy is quite simple - poor quality assembly of the product, which in this case cannot be repaired with your own hands. For example, with companies such as Cata, Kronasteel and Elikor, the hum during operation is practically inaudible even at maximum speed. We recommend that you immediately familiarize yourself with how to choose the right hood for your home so that you can know the best manufacturers of kitchen appliances by name!
If you are confident in the quality of the selected product and probably know that the fault is somewhere else, we recommend checking the quality of fastening the case to the wall/kitchen unit. Even a small gap during vibration can cause knocking, rustling, and ringing. To prevent the equipment from making noise, you need to do the following - tighten all the fasteners or place a piece of foam rubber in the problem area, which will eliminate the knocking.
If the engine hums but does not start, the cause of the problem is most likely a fuse. Repairing the hood with your own hands in this case is quite simple - you need to replace the fuse with a new one.
They don't change speeds
Everything is obvious here - the button in the control unit does not function. You must remove the protective shield and visually check the button, because... Maybe the contact just burned out. After this, look at the tracks on the board and test the circuit with a multimeter.
In addition, the cause of the malfunction may be a starting capacitor that has burned out. In this case, repairing the hood with your own hands is quite simple - you just need to replace the capacitor yourself.
Instructions for repairing the backlight are provided in the video:
How to fix a kitchen hood light
How to check a range hood motor with a multimeter
Is there any way to check it at home? And is it really possible to buy it?
quote: The cheapest thing is a capacitor, but you may not be able to find a drive. There is no particular point in opening it; it is unlikely that anyone will undertake to rewind it.
quote: I don’t understand, does it smell like burning?
quote: The engine is not a heating device
quote: There is no particular point in opening it
quote: I couldn’t open the engine itself, I only disassembled it to such a state, the body is probably soldered
quote: Originally posted by navit:
Right now I want to check the capacitor and am looking for a place to buy it.
By the way, there is something wrong with the markings of your Conder. Capacitors CBB61 have a rectangular case, and CBB60 have a radial case.
quote: Originally posted by vWv:
author, do you live far from the youth group?
quote: where did you get the idea that the capacitor died?
quote: how many wires come from the engine?
quote: does the armature shaft rotate by hand?
quote: author, do you live far from the youth team?
By the way, there is something wrong with the markings of your Conder. Capacitors CBB61 have a rectangular case, and CBB60 have a radial case.
Source
How to change the hood motor
- Turn off the power supply to the hood.
- Remove the filters by pulling the tab. Unscrew the bottom panel of the hood, holding it from below so that it does not fall.
- Disconnect the backlight wire connectors, this way you will disconnect both panels from each other.
- Remove the hood or remove it from the cabinet by unscrewing the screws and place it carefully on the floor. Attention, the hood is heavy, so it is advisable to remove it with a partner.
- Remove the fan from the engine by releasing the spring clip or other fastener.
- Now you need to remove the engine. To do this, disconnect the green ground wire from the screw on the hood body, and then cut the wires connected to the motor. Remove the 3 screws from the mounting plate as shown in the photo below, remove the plate and pull the fan motor out of the hood.
- Connect the new motor to the mounting plate, then place it in the hood body, ground wire back.
- Reinstall the fan blades using the spring clip. Install or build in the hood in its place, fasten all the body panels back and connect the power supply, check the operation of the new motor.
What to do if the control panel is broken
If the motor runs all the time but does not change speed, then in 92% of cases the problem lies in the control panel. It’s better and easier in this case to just buy a new one and replace it; repairing the board yourself is quite difficult.
Now let’s look at possible minor hood malfunctions.
What to do if the hood does not turn on
There are several possible problems here:
- The device may not be connected to the electrical network. You need to check both the fact of connection and the presence of voltage in the outlet.
- The functionality of the switch is checked by a tester. If this element does not “ring”, it must be replaced.
- It may turn out that there are problems with the power supply. They can occur due to a breakdown of the machine or failure of the fuses.
- The power plug may also fail. By the way, the plug may have a built-in fuse that may blow out - in this case it will need to be replaced.
- The internal wiring of the device can also cause malfunctions. It must be checked with a tester, and any bad contacts found are eliminated by tightening the screws or crimping the tips with pliers.
- But electric motor malfunctions require major repairs and professional intervention.
The power does not turn on - what to do?
After all the filling has been studied, you can begin to independently repair the kitchen hood. If there is a malfunction, you should first look at the filter: it may need to be replaced or cleaned. A dirty filter can easily cause damage to the hood.
But first, if the hood refuses to turn on, you need to check the power light. If it is working, then the problem is in the power circuit or the control circuit or even the motor has failed. The easiest way is to test them separately from the system and then replace them. This is the simplest solution.
The power may not turn on because the fuse has blown. Almost every electronic device is equipped with such an element of protection against voltage surges. It needs to be checked, and if it is not working, then the fuse is simply changed. It doesn't hurt to check the power cord and plug.
Hood power supply diagram
Recommendations to extend equipment life
There are also recommendations that can be followed to extend the life of the hood for many years. The first of which is the switching sequence. The problem is that the unit usually operates under fairly harsh conditions - elevated temperatures and steam. Therefore, the main recommendation would be to turn on and stop the kitchen hood for and a few minutes before and after cooking. The second important steps for servicing the device are periodically changing the carbon filter and washing the fat filter. Air passes through these surfaces, and if its movement is obstructed by dirt, this creates a certain extra load on the fan.
Kitchen hood repair
It is difficult to imagine a modern kitchen without a hood, which has a certain service life. It is better to entrust the repair of any household appliance to a professional who can easily determine the cause of the breakdown and put it back into operation. Our service center technicians will repair your kitchen hood at home on the same day you call, efficiently and inexpensively ! We value our reputation and always do the job well and provide a guarantee , this makes it much easier to maintain a trusting relationship with clients.
Incorrect installation of the hood, poor operation, mechanical damage - all this can lead to malfunctions. The design of a kitchen hood is not that complicated, but identifying the cause can be quite problematic. The Removi masters service center technicians will be happy to help you fix any problem!
All consultations are free.
The master arrives in 59 minutes. Discounts up to 30%!
Call now!
Hoods vary in appearance and installation method, but their operating principle is the same. The main component is the motor. How well it works determines the quality of the kitchen hood as a whole.
Having a kitchen hood will preserve your health and extend the life of your kitchen furniture. It filters air filled with various impurities and combustion products. Obsessive food odors that do not disappear for a long time do not make a pleasant impression on everyone, and can also be quite harmful.
It is important to install the hood correctly for proper functioning. Our service center technicians will help with installation of any complexity . Also, if necessary, we carry out dismantling. Carefully. Without dirt and very quickly.
If your hood is broken, you should contact a service center. Removi masters will repair your equipment in the shortest possible time at your home . All tools and spare parts are always in stock , no need to wait for anything. You don't need to carry and then pick up your kitchen appliance. You don't have to wait several days for the part you need. Regardless of the brand and model, we will repair your hood on site .
Here are some reasons, if they occur, you should contact a service center for repairing household appliances:
— the kitchen hood does not turn on;
— the fan is very noisy;
— the hood turns on, but does not absorb odors;
— lighting does not work;
— the control panel does not work (if there is one);
— you need competent installation of a kitchen hood.
Our experienced technicians will carry out work of any complexity, from replacing a burnt-out light bulb to eliminating a motor malfunction. Do not forget that a kitchen hood, like any household appliance, requires preventive maintenance.
Many people underestimate the importance of proper installation of a hood and then face a number of problems. It doesn't draw well, doesn't remove odors, and is loud. All this can be avoided by contacting a specialist. After all, it is much more difficult to redo a poorly installed hood.
By contacting Removi masters specialists, you will receive not only guaranteed assistance in installing or repairing a kitchen hood, but also detailed advice on proper care and preventive measures.
If you need to change your hood filter, you can also contact our service center. Our craftsmen will help you make the right choice and make a high-quality replacement.
How should a network connection be made?
99% of hood malfunctions occur from an incorrect approach to their power supply; often, during installation, they are already connected incorrectly. It is at the time of initial installation that the owner should be faced with the question of how to connect the hood in the kitchen to electricity correctly, so that subsequently no problems related to its functionality arise.
Naturally, the cable itself coming from the device is taken as a basis - it can be connected through a socket or involve a connection in a junction box. Accordingly, the place of its contact with the power grid of the house is mounted next to the kitchen hood. But then the nuances begin. The line connecting the hood to the power supply must be protected. The currents here are small, so you can use a circuit breaker up to 10 A. It will protect the power bus from burning out if a short circuit occurs in the device itself. The machine is placed in the general distribution panel of the apartment and through it either the outlet or the hood connection box is supplied.
Naturally, it is not advisable to carry out suspended installation of cables - plastic boxes or corrugations are used for this. As for the wire itself, the most suitable option would be either aluminum with a cross-section of 2.5 mm or copper from 1.5. But using RCDs as protection is quite pointless. The principle of operation of the device is directly related to the presence of a third wire in the line - “ground”. Which on most house panels is simply connected to zero. And it’s not a fact that there is wiring for this contact in the hood itself. The operating consumption of the unit is too low, rarely reaching 150 W. Accordingly, few manufacturers protect the unit itself according to the scheme.
Fault prevention
Obviously, repairing a broken kitchen hood with your own hands is quite feasible. But it is better to do everything to avoid its need. To do this, you should follow basic rules that will help extend the working life of the device:
- Clean grease and carbon filters regularly, the first time every 3 weeks, the second time every six months;
- do not use the hood when the stove is not working and there is no food being cooked on it;
- turn on the device a couple of minutes before the start of cooking and turn it off 15 minutes after the end.
These simple recommendations plus instructions from the manufacturer will help the user protect their appliance from premature failure, ensure its long-term operation and a comfortable atmosphere in the kitchen.
Where does greasy soot come from in chimneys?
Many restaurants today offer their visitors dishes prepared on a traditional wood-burning grill or grill. Dishes with a special, recognizable taste are extremely popular, so the number of catering establishments using this cooking method is growing every year. To use barbecues with an open fire in the kitchen, special high-power exhaust devices are installed and special exhaust ducts are laid. However, during operation, soot from burning wood and fat evaporated by meat roasting over coals inevitably settles on the walls of the smoke exhaust channel. This mixture is extremely flammable. Moreover, over time it often leads to failure of the hood fan, settling on its parts. Fat deposits also accumulate in exhaust air ducts laid from conventional stoves from kitchen areas. Dust particles adhere to the settling grease, and over time the internal diameter of the outlet channel narrows. This reduces the capabilities of ventilation equipment, which is forced to work with increased power. One spark is enough to start a fire, which instantly spreads throughout the entire ventilation network. In addition, dust and fat deposits are an excellent breeding ground for harmful microorganisms.
Tips for installation and operation
Following the rules for installing and operating a kitchen hood will allow you to avoid many inconveniences associated with the operation of the appliance.
- It is necessary to ensure correct installation of the unit, which eliminates poor-quality wire connections and kinks in the corrugations. This will help prevent problems such as broken contacts or high noise levels.
- When installing, you must comply with the standards for the location of the device above the hob: 75–85 cm from gas, 65–75 cm from electric. If the weight is low, structural elements may overheat and deform; if the weight is too high, the efficiency of work will decrease.
- Before connecting to the ventilation shaft, you need to make sure there is good draft. To do this, just bring a sheet of paper to the ventilation hole - the sheet should be held by the draft created by the ventilation. If this does not happen, you need to think about cleaning the ventilation ducts or organizing forced ventilation or venting the kitchen hood to the street instead of the general house ventilation duct.
- It is advisable to provide additional protection against power surges by installing a protective relay, since the fuse inside the device cannot always cope with increased loads.
- The operation of the hood must begin from the first stage. Switching on the maximum speed immediately increases the load on the engine and reduces its service life.
- It is necessary to carry out timely and proper care of the filters, since in a clogged state they do not allow air to pass through and the efficiency of the device is sharply reduced. The grease trap mesh is removed and thoroughly washed at least once a month, either by hand using detergent or in the dishwasher. Carbon filters are typically changed every 3-6 months. Top models of hoods are equipped with LongLife carbon filters, which last 2–3 years.
- Do not run a fan over working burners without dishes on them. Hot air can damage the control panel and internal parts.
- The hood should be turned on a few minutes before the start of the cooking process and turned off 15 minutes after the end. If the device only works when cooking, it may not have time to clear the air of odors and fumes.
Sources
- https://kitchendecorium.ru/tehnika/hood-fan/remontiruem-kuxonnuyu-vytyazhku-samostoyatelno.html
- https://kuhnya.guru/remont/remont-kuhonnoy-vyityazhki
- https://samelectrik.ru/sovety-po-remontu-vytyazhki-na-kuxne-5-osnovnyx-neispravnostej.html
- https://tehnopomosh.com/dlya-kuhni/vytyazhki/kak-otremontirovat-svoimi-rukami.html
- https://ProFazu.ru/bytovaya-tehnika/repair/remont-vytyazhki.html
- https://VentingInfo.ru/raspolozhenie/v-kuhne/remont-vytyazhki
[collapse]