Basics of installation and model selection
There are three main types of dishwashers:
- Freestanding.
- Partially built-in.
- Fully built-in.
If free-standing machines are placed anywhere in the kitchen, then other types of PMM “Electrolux”, “Ikea”, “Gorenye” and other brands are built into the furniture set. Initially, decide on the installation location and prepare a niche for the dishwasher. How to connect the PMM correctly, read one of the previous articles.
The advantage of the built-in PMM model is that it is completely hidden behind the door, being part of the interior.
- This option is easier to choose; you don’t need to look at the design of the case that will fit into the kitchen set.
- The hidden control panel is a big advantage if there are small children in the house.
- Reduced noise level. It is hidden by the cabinet panels where the equipment is mounted.
The decorative panel can be screwed to the door, hiding the equipment from prying eyes. Most often, the wall part is made of the same material as the rest of the kitchen: for example, Leroy MDF.
A template for mounting a decorative facade is supplied complete with built-in models from Siemens, Beko, Miele. Depending on the type of installation, the front panel may be attached before the door is attached to the dishwasher.
Connecting the water supply
The first thing we want to immediately emphasize is that, regardless of the type of PMM, it is highly not recommended to connect it to the hot water of a domestic water supply. This is due to the fact that fewer requirements are applied to the “purity” of hot water than to cold water, which will negatively affect the operation of the PMM.
In most cases, the reason why a dishwasher check valve fails is directly related to poor water quality. The result will appear instantly - cleanly washed dishes will have a rather unpleasant odor. To eliminate such a breakdown, repairs will be required, for example, in Astana or Balashikha.
Note that many models of imported PMMs (Bosh, AEG, Ajnev, Beko, Candy) are very critical to the composition of water, as well as its hardness, so it is recommended to install filters even for cold water. This will significantly extend the life of the equipment.
Now let's move directly to the connection. It is carried out according to the following algorithm of actions:
- the whole process begins with shutting off the water entering the apartment. There is no need to turn off the entire riser in the house; as a rule, taps are installed on the supply to the apartment, and they need to be closed;
- After the water is turned off, it is necessary to disconnect the henka (hose) from the mixer installed on the sink. We no longer need the old waterproofing from the hose, so we need to remove it;
- screw the tee onto the pipe and connect it to the mixer. A ball-type valve is screwed into the middle outlet of the tee, and a hose from the PMM is screwed onto its output. When making all connections, each threaded joint must be wrapped with FUM waterproofing tape, and if required, a rubber gasket must be installed.
If you want to watch the whole process in more detail, then its video can always be found by visiting thematic sites.
Example of a completed connection
If the hose included in the kit is short, you can extend it or purchase a new one of the required length. The latter is preferable.
Errors and rules
1Connect the dishwasher in the 220V panel from the machine.
Remember that all equipment and devices in your house and apartment that are interconnected with water and electricity - a boiler, instantaneous water heater, washing machine, including a dishwasher - must be connected through:
automatic combination + RCD
or automatic differential
There shouldn’t be any simple modular machines, much less traffic jams, here. Reliability of protection and your safety in the event of an electrical breakdown of the wiring should come first.
2
As a result, the supply or drain hoses may become pinched, impairing water circulation. An error will constantly appear on the display.
And you won’t even guess why. Therefore, the minimum distance from the wall should be at least 5cm.
3
If the installation is uneven, you will have problems with the quality of washing dishes. There may even be a water leak.
For example, Electrolux models allow a deviation from the horizontal of no more than 2 degrees. This whole thing is checked at the building level.
And it is regulated by twisting and twisting the legs.
The back leg of most models is adjustable from the front. Using a special screw in the lower central part.
When adjusting the legs, according to the instructions, the machine must be raised to the maximum so that there are no gaps left between it and the table top.
4
Although this may seem like the closest and most convenient place to connect the power plug, try to avoid this type of connection.
The slightest blockage and subsequent leakage guarantees a short circuit and fire. For the same reason, it is not recommended to place the extension cord directly behind the dishwasher.
If the factory cord is not enough to reach a stationary outlet, then connect the carrier away from the hoses, at the greatest possible distance.
5
Remember that not every PMM can be connected to a hot water supply system. Be sure to read the instructions, otherwise the device will fail much earlier than its warranty period.
In addition, the water temperature in this system may be higher than that for which the sink is designed (usually no more than 60 degrees). Even if it supports such a connection.
Also keep in mind that the hot water in our pipes is dirtier than cold water. Therefore, experts recommend connecting to cold water.
6
It may well happen that the factory hose, which has a standard length of no more than 1.5 meters, is not enough for you. Therefore, you will have to buy more footage.
The most important thing is not to bite off, unscrew or throw away the main one. It can come with leak protection.
Wires are hidden inside it and when a break occurs, a short circuit occurs and the valve installed at the end automatically shuts off the supply.
Therefore, when lengthening, simply extend the existing one.
7
If you are not a plumber and do not know how to properly and in what quantity flax is wound to seal threaded connections, then it is better for you not to use it.
You may encounter this when reworking the connection of the dishwasher to the siphon and installing a tee for the cold water supply.
If used in excess, the flax will eventually swell and the flimsy union nut may burst, ultimately leading to a flood.
In such places it is better to use a factory rubber gasket or fum tape.
Sources - https://cable.ru, Kabel.RF
Connecting a dishwasher - 2 ways.
Installation and connection of the dishwasher can be divided into 3 stages:
Let us consider in detail, indicating common errors, precisely the stages of installation to utility networks and communications.
To connect the dishwasher to a 220V network, you will not need many materials:
A dishwasher (DMM) is not a particularly powerful consumer of electricity, such as a hob (from 7 kW and above). Its power usually does not exceed 2.0-2.5 kW.
Modern energy consumption models correspond to class “A” or “A+”. That is, in a year, approximately 220 kW will run on your meter.
Despite this, it is still advisable to connect the PMM at the repair stage to lay an independent cable line in a separate groove.
The socket should be placed at a convenient height - up to 90cm from the floor level.
At the same time, place it on the right or left side of the washing machine, but not behind it.
Please also take into account the fact that the total length of the cord with plug for this equipment rarely exceeds 1.0-1.5 m. Based on this, choose a place for the outlet so that you don’t have to use an extension cord later.
The outlet itself must, of course, be grounded. But not everyone has this same grounding. Especially in apartments in old high-rise buildings.
Therefore, many people use regular ones, and everything seems to work fine. However, the level of protection will no longer be sufficient.
Roughly speaking, if there is a grounding contact and there is a current leak, then you will not even be able to turn on the RCD. The consequences of these leaks, even small ones, can be quite lethal.
With a simple socket, the shutdown will occur only at the moment when you touch the body, which is already energized.
Connecting the dishwasher to the water supply can be done in two ways.
The first is when you are at the stage of construction or major renovation, and you can afford to lay separate pipes, trench walls, etc.
The second is when your entire kitchen has already been installed and all finishing work has been completed. At the same time, you bought a dishwasher and you need to connect it all somewhere, to the existing water supply and sewerage system with minimal alterations and hassle.
For major installation you will need a varied range of materials:
When installing pipes, the socket method is used. To do this, you will need a special apparatus for soldering polypropylene pipes.
The total length of the pipe and the number of fittings are selected individually. This depends on how far the dishwasher is from the cold water collector.
To begin with, mark the route where the pipes will be laid from the distribution manifold to the installation site of the PMM.
Then, use a wall chaser to cut to the required depth.
Next, connect the PPR connectors with a union nut to one of the manifold outputs.
Cut a piece of pipe so that it will last until the first turn or corner. At the same time, do not forget to leave a margin of 15mm for connections on each side.
Connect the pipe and fittings using the soldering method, controlling the position of the elbow.
After connecting all the pipes along the marked area, install a water socket at the very end. Be sure to fix it on the wall.
Next, screw a ¾-inch male threaded elbow into the water socket.
Mount the water supply hose onto the angle.
The AquaControl or AquaStop system with which it may be equipped should protect against leaks in the event of a breakdown and automatically stop the water supply.
Turn on the water and check the entire system. If everything is fine, you can finally seal the groove.
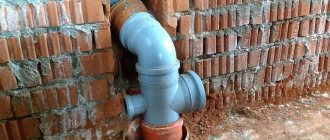
All that remains is to connect the drain hose from the PMM to the sewer outlet through an adapter collar of the appropriate diameter.
And the drain hose itself has a bend at 70cm from the floor. That is why it is attached to the top of the dishwasher, and not at all so that it does not dangle.
All that remains is to connect the washing machine to a power outlet and check the functionality of the entire system. Then secure it in a specially prepared opening.
By the way, some models, for example from Siemens, have non-standard sizes. Therefore, think about your kitchen furniture in advance.
Preliminary work before installation of PMM
There are two options for installing a dishwasher: yourself and with the help of specialists. In the first case, you risk connecting the car incorrectly; in the second, you will have to part with part of the family budget.
Sometimes the skills of one craftsman are not enough; you have to call a team of specialists: a furniture assembler, a plumber and an electrician.
Installation services for built-in equipment are offered by companies that sell them. For a certain fee, a universal master comes at the appointed time, carries out all the connection work and checks the serviceability of the machine.
However, if you carefully study the installation instructions, think about connecting hoses, find or install an additional outlet, you can save money and acquire new skills by doing everything yourself.
Choosing a location based on size
An important step is choosing a location for installation. For the built-in model, furniture modules of the first level are suitable, that is, cabinets standing on the floor.
But if you like a compact mini-dishwasher, then its installation is a little easier - such equipment can be inserted at waist or chest level (for ease of maintenance).
There are several conditions for choosing a good location. If they are not followed, you may later encounter problems with water supply/discharge or PMM maintenance.
Image gallery
Photo from
The furniture module adjacent to the washing unit is the most suitable place, since the water supply and drainage units are located nearby, so it is easy to connect the hoses. The length of the hoses should not be long, otherwise the supply and drainage of fluid becomes difficult, which often leads to breakdowns
Prudent owners, even at the stage of interior planning or renovation, think about installing several grounded outlets for powerful household units. If there is no free power point, you will have to draw an additional line
The machine must be placed freely inside the furniture module, with a margin of 5 cm on each side - more precise information is provided in the instructions. The cabinet walls must be strong and able to withstand the fastening elements and the weight of the dishwasher. Rear wall not provided
You should not expect that the machine will be installed once and for all. Sooner or later you will need to replace parts, reconnect hoses or clean some elements. Therefore, the installation is carried out in such a way that possible dismantling is easy and access to communications is open.
Built-in dishwasher next to the sink
Separate grounded socket for dishwasher
Suitable cabinet for dishwasher dimensions
Dishwasher Maintenance
Many installation difficulties arise when a dishwasher is integrated into an already installed kitchen set. You have to adjust cabinets to fit, and sometimes dismantle and remodel some of the furniture.
We recommend that you take care of the installation location before purchasing furniture. This also applies to other household appliances that require integration. Usually, the models you like are first selected, and when drawing up a sketch of the headset, their location and exact dimensions are taken into account. We have provided recommendations for choosing a built-in dishwasher in this material.
Preparation of tools and materials
Manufacturers of built-in PMMs sometimes list in the instructions what tools may be useful during the installation process. However, they expect that preliminary work has already been done.
If measures are required to lay a power line or tap into a pipe, the list of necessary items will increase.
To be on the safe side and save time, you should stock up on the following tools:
- hammer drill or powerful drill;
- adjustable wrench;
- hammer;
- a set of screwdrivers, including flat and Phillips;
- chisel;
- pliers;
- laser level;
- tape measure, square, pencil;
- screwdriver
In addition to tools, you will need connection parts. It is not recommended to use used elements - this will reduce their service life.
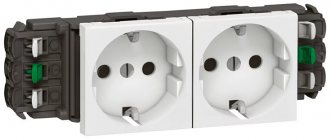
To install a socket, you need to buy the electrical installation product itself, a socket box for it, a three-core copper cable, and an additional automatic protective device.
There are special requirements for the socket: it must be of a “European” type, with grounding, preferably protected from moisture, fully operational, without damage
To connect water, you will need a metal tee for inserting into the water supply system, fum tape, a tap for shutting off water, rubber gaskets, clamps or ties for fastenings.
If the siphon is not provided for connecting another drain hose, then it will also have to be changed.
If the voltage in the network often fails, we recommend purchasing a stabilizer. It can be installed on several devices at once.
Connecting a built-in dishwasher
You can do a lot of the work yourself. But there are some that must be performed by specialists with experience and permission to carry them out. This applies to work related to electricity: running cables and installing sockets.
Installation in a prepared place
Before installing the dishwasher in a finished kitchen, you need to make sure that you can easily fit it into the prepared space, and there will be an area for hoses on the side or back. First, the equipment is placed opposite the prepared compartment.
The hoses that are built into it are pulled through the holes to the place of sewerage and water supply, and the power cord is pulled to the outlet. Next, install the device in the chosen location; before doing this, you should make sure that the length of the hoses and cord is sufficient.
Installation is carried out according to the attached step-by-step instructions for the specific model. You can also read forums and watch videos. Sequentially fasten the parts included in the kit:
- stick a vapor barrier film;
- sealing tape is fixed along the edges;
- install damper elements.
If the dishwasher body is not level, correct it by adjusting the height of the legs. Some equipment manufacturers, for example, Electrolux, Bosch and others, include noise protection with the kit, which must be secured to the bottom.
At the end, the device door is closed with a facade or a special decorative overlay. The front parts are adjusted and strengthened using self-tapping screws.
Electrical connection
The surge protector cannot be pulled through, so the device is connected to the closest power point. The cord has a standard length - approximately 1.5 m, so the socket should be located no further than this distance.
Extension cords cannot be used, because they will not be able to withstand the load and will melt. Do not use shared sockets that include other appliances. It is best to designate a separate point for the dishwasher and use grounded sockets with a separate bag.
The latter serves to protect against short circuits and network overload. It is impossible to build an electrical point close to the floor; if flooding occurs, a short circuit will occur. The distance from the floor to the place where the machine is located should be more than 25 cm.
Connection to sewerage
In order for the PMM to drain used water, it is connected to the sewer system. There are several methods. The first way is to connect it to the sink drain system.
If it is impossible to attach the hose directly to the sewer pipe, it is mounted in this way. In this case, it is necessary to change the siphon, so the option is considered costly and time-consuming.
The other method is very simple. It consists of installing a hose from the dishwasher to the cuff of the sewer pipe outlet. For fixation, a special tape is used, which provides excellent sealing. This method is used if there is a free hole under the sink.
Connection to water supply
Most models can be connected to hot water, but experts do not recommend this because it is not of good quality. This will negatively affect both people’s health and the device itself, which will fail faster.
Before connecting to the water supply, turn off the water on the riser. To install the tee, unscrew the mixer hose. The mixer is installed at one of the splitter inputs, and the cleaning filter is installed at the other.
Install a shut-off type ball valve. A hose that comes from the dishwasher is connected to the faucet. The joints are wrapped with special tape. It prevents water from flowing through.
Installation of the “facade”
The front side of the built-in dishwasher must be covered with a panel. As for the facade, it must be made in accordance with the design of the room.
The kit for such household appliances comes with a special fixing element and a pattern, which are necessary for installing the panel. It is mainly made to order. The work of installing the facade can be easily done independently.
Take a sheet of paper and mark on it all the necessary places and areas where the fasteners are to be installed. This layout is applied to the front door, and the decorative panel is marked. The necessary places are marked using a regular awl.
Then the paper sheet is removed and holes are drilled for the screws. The front door handle and latches are installed in the required places. This guide is suitable for installing fronts of any size.
After the panel is assembled, it is put in place. A decorative element is fixed on the dishwasher door and the prepared screws are screwed in.
Source: https://make-a-choice.ru/kak-vstroit-posudomoechnuyu-mashinu-v-gotovuyu-kuhnyu
Instructions for connecting to the water supply
As a rule, flexible hoses from pipes with hot and cold water go to the mixer tap located in the sink. That is why the most convenient way to connect the PMM is located in the place where such a hose is connected to the water main. Otherwise, you will have to make a tap into the pipe using a tee or a manifold with two bends and taps. When connecting a flexible hose to a water supply, a tee with a shut-off valve must be installed under the sink.
Connecting a tee at the junction of a flexible hose with a water main coming out of the wall
A shut-off valve in the tee is necessary so that you can quickly stop the water supply in case of an emergency. Since most PMM models only require cold water, one tee will be required.
For work, you should prepare the following tools and materials:
- a tee with a built-in faucet, made of brass or bronze, with a thread diameter of 3/4 inch (this diameter is suitable in most cases);
- inlet coarse filter (if one is not included in the dishwasher kit);
- fluoroplastic sealing tape (FUM tape);
- adjustable wrenches;
- sharp knife.
2-output splitter with 3/4" thread diameter
If the kitchen already has a washing machine or plans to install one, the tee should be replaced with a manifold with two outlets with the same diameter (3/4 inch) and two shut-off valves (see photo above). In addition, some PMM models are equipped with inlet hoses that are too short, a little more than a meter long. If this length is not enough, you will have to buy a new hose from a specialized store.
PMM inlet hose together with the built-in Aquastop system
To properly connect the dishwasher to the water supply with your own hands, the work should be done step by step, in several stages:
- Shut off the water supply to the apartment.
- Disconnect the flexible hose supplying cold water to the faucet from the water supply pipe.
- Connect the water pipe to the inlet of the tee or splitter by first winding FUM tape onto the thread.
- Connect the outlet of the tee or manifold to a flexible hose going to the mixer. Don't forget to use FUM tape.
- Connect the filter and dishwasher inlet hose to one of the side outlets.
- If you have a washing machine, connect its inlet hose to the second outlet of the splitter.
- Check the tightness of all connections by supplying water to the main line.
This completes the connection of the dishwasher to the water.
It happens that when installing a dishwasher you have to redo the fastening and supply of communications
Sometimes the situation does not allow installing a PMM near the sink. In this case, you have to crash into the water pipe. If it is made of metal-plastic, there will be no difficulties. It is necessary to cut out a piece of pipe and install a tee or manifold with press fittings in its place to ensure a reliable connection.
Push-in connection of metal-plastic pipes using compression press fittingsThere is no need to cut the metal pipe - just put a clamp with an outlet on top and drill a hole in the pipe through the outlet. This connection is also reliable.
Tee clamps for metal pipes, with attached shut-off valves
Selection of components
Parts and tools for a Siemens dishwasher are basically no different from other brands. There are some features:
- Aquastop hose. Not all machines are equipped with leakage protection. Therefore, you can purchase it separately. Give preference to original Siemens or Bosch parts. Although the latter are not always suitable.
- Drain and fill hoses are often short. If they are not long enough for you to connect, it is better not to use extension cords. Also purchase Siemens brand elements that will fit your model 100%.
The mountings and connections of the Siemens dishwasher are quite non-standard. Therefore, be prepared for the fact that you will have to buy additional parts or adjust the system for connection.
What you will need:
- tee (brass or bronze) with shut-off valve;
- flow filter;
- siphon with two outlets;
- clamps, gaskets;
- waterproofing tape;
- two hoses.
The operating instructions may also indicate additional components:
- Pressure stabilizer. This is a special valve that will protect equipment from pressure drops, water hammer and other troubles.
- Network stabilizer. For powerful devices, it is recommended to install an automatic circuit breaker that will protect the electronic component from damage as a result of a power surge.
- Set of tap and hose for connection to hot water supply.
Having prepared everything you need, you can begin installing the dishwasher.
How to install a dishwasher under the façade
Before starting work, read the installation instructions and make sure you can handle the job. Remember to follow safety precautions. It is useful to watch a current video, e.g.
To begin with, installation of communications is carried out: water supply, sewerage, electrical network. Only after a test check can the PMM be secured in a niche, under the tabletop, and a decorative panel hung. Fastening is done with bolts (screws, self-tapping screws) included in the kit. Along with fasteners, gaskets, instructions, you will find a stencil. Applying it to the cabinet walls, countertop (depending on the PMM model), draw the locations of the holes for fastening. They are easy to make with a hammer drill. Do not make through holes; drilling ¾ of the wall thickness will be enough. All that remains is to screw on the countertop protection and place the dishwasher in the cabinet. Last steps:
- Attach fittings, slider mechanism (if necessary).
- After attaching the stencil, determine the attachment points on the inner surface of the facade.
- Use a narrow drill to drill points, not all the way through, to avoid damaging the exterior finish.
- Remove the transport screws from the door (if equipped).
- If you are working without an assistant, try temporarily fixing the facade on the door with double-sided tape so that you can easily screw in the fastening bolts in the right places.
- Check the tightness of the fit, the quality of fixation, locking, and the presence of interference when opening and closing.
Household appliances have been purchased, built-in and connected to the power grid and communications. All that remains is to complete the work and hang the facade. How to attach it, read the article.
Install the front on the dishwasher according to the instructions and the attached template.
There are three main types of dishwashers:
- Freestanding.
- Partially built-in.
- Fully built-in.
If free-standing machines are placed anywhere in the kitchen, then other types of PMM “Electrolux”, “Ikea”, “Gorenye” and other brands are built into the furniture set. Initially, decide on the installation location and prepare a niche for the dishwasher. How to connect the PMM correctly, read one of the previous articles.
The advantage of the built-in PMM model is that it is completely hidden behind the door, being part of the interior.
- This option is easier to choose; you don’t need to look at the design of the case that will fit into the kitchen set.
- The hidden control panel is a big advantage if there are small children in the house.
- Reduced noise level. It is hidden by the cabinet panels where the equipment is mounted.
The decorative panel can be screwed to the door, hiding the equipment from prying eyes. Most often, the wall part is made of the same material as the rest of the kitchen: for example, Leroy MDF.
Types of dishwashers
Household appliances come in different brands, sizes and functionality. Siemens, Bosh, Electrolux and other manufacturers produce three dishwasher options:
- Freestanding. This technique can be located in every free space in the kitchen.
- Built-in. This model is attached to the inside of the cabinet under the countertop and is closed externally using a special panel or door.
- Tabletop. The type has minimal dimensions and options. Places on the table or between kitchen cabinets.
Example of a countertop dishwasher
Connecting hoses and testing
We connect the hoses to the machine at the very end, but before the side fastening is made.
The housing moves forward to provide access to all components. Both hoses are usually attached to the body on one side, at the top or bottom.
They protrude a few centimeters, and to provide space in the closet, the back wall is usually simply removed.
The connection is made as described above: the hoses are inserted into the holes and secured with union nuts or clamps. No special tool is needed for fixing; everything is done manually, with a screwdriver or pliers
Once connected, the machine is placed in place for testing. We turn on the machine on the panel, then plug it into the socket, ensure the water supply and press the “Test” or “Start” button. How to perform testing correctly is explained in the instructions.
If there are no leaks, the machine does not hit the countertop or walls, and the test wash cycle went through without incident, then you succeeded in installing the dishwasher yourself.
But before you start using it, it is advisable to familiarize yourself with the rules of operation and maintenance of the machine.
Preparation of tools and materials
To ensure that the work does not disappoint and only brings pleasure, you should prepare for it correctly and select the right tools and materials. The following devices and working tools are suitable for this:
- Screwdriver. An indispensable electrical device for quickly loosening or tightening screws. You can also use it to make holes for future fastenings.
- Drill. Use if there is no screwdriver available. It is also necessary for drilling and helps make holes in the panel. The diameter of the drill is selected according to the diameter of the screws.
- Roulette. It is needed in order to correctly perform any measurements and ensure that the actions are correct.
- Screwdrivers. You cannot do without this tool. The characteristics and purpose of the tool depend on the type of fasteners that need to be fixed.
- Awl. Sometimes it is necessary to pierce neat holes in fragile materials; for this it is advisable to use a sharp, durable object.
- Pencil. We use it when we need to mark places for drilling mounting holes.
- Stencil. This is a very convenient device in the form of a large sheet that will help you correctly mark the places for installing fasteners. To do this, you just need to put it on the panel and mark the points with a pencil.
- Double sided tape. Helps to fix the façade and the main surface until they are screwed in place using screws. Experts recommend preliminary “trying on”, since an error of a few millimeters can lead to disastrous consequences.
If the overlay is made by yourself, then you may need sandpaper for sanding the surface, an antiseptic for impregnation and paint for applying to the ends or the entire surface of the facade.
Housing Installation
After connecting to the power supply and communications, the dishwasher is leveled by adjusting the height of the legs. Before integrating it into a furniture set, it is necessary to carry out a test run without dishes, but with detergent
To properly install a dishwasher, you should pay attention to some points:
It is recommended to cover the furniture body with a vapor barrier on the inside to extend its service life. If the support of the machine is not the floor, but the base of the headset, it must be strong and installed at a horizontal level. It is not recommended to install the dishwasher box near a hob or electric oven. When adjusting the height of the machine, it is important to take into account the fact that the height of the dishwasher must correspond to the level of the countertop.
For normal operation of the dishwasher, its body must be strictly level.
To hide the dishwasher from prying eyes, a decorative facade is mounted to the machine door. Built-in dishwashers are supplied with special templates for fastening the façade. The fastening elements are installed in the grooves on the machine body and the decorative panel or door is installed.
How to install a dishwasher: checking the contents and unpacking
Preparing for installation of a dishwasher includes two more stages, in addition to choosing a location: unpacking and checking the contents. It is recommended that unpacking be carried out in the presence of employees of the company from which the unit was purchased. This is necessary in order to check the presence of all parts necessary for installation. If there is a problem with the packaging, then you must inform the company’s employees about it.
Note! You also need to check the availability of instructions (necessarily in Russian). Without it, it is much more difficult to independently understand the design features of a particular model.
If necessary, you can try looking for installation instructions on the company's website. Many well-known brands add them to the product description (for example, Bosch). Dishwasher instructions are very important, so don't ignore this point.
When checking the package, you need to pay attention to the presence of instructions in Russian
In addition to the dishwasher itself, the kit often includes parts that are necessary for the correct installation of decorative trims. It is also necessary to check the presence of retaining elements, a rubber apron used for protection, and gaskets with hoses. The latter are needed when connecting the device.
Features of installing a dishwasher
If the dishwasher is installed separately, then you can allocate some space for it on the floor or on one of the tables. Otherwise, if the unit can be built-in, you will have to sacrifice one of the cabinets. However, built-in appliances do not overload the kitchen interior with technical details and are generally invisible, hiding behind one of the facades.
Many manufacturers provide detailed instructions on how to connect the dishwasher to the communications.
Selecting a location
The location of the equipment depends on its type.
Dishwashers come in two types: wide and narrow. The first have a width of just under 60 cm, and the second - 45 cm. Naturally, for a small-sized kitchen, the narrow option looks more preferable. But don’t forget about other parameters – height and depth. Often, custom-made sets may differ from the standards in the height of the countertop and the depth of the cabinets. Therefore, at this stage you need to be extremely careful, because a small error of just 1 cm can make installation of the device impossible.
A compact dishwasher can be built into a niche, hidden in one of the modules, or simply placed on the countertop.
It is possible to use 2 furniture blocks at once, however, then you will have to decide how to secure the dishwasher between the cabinets.
It is worth noting that there are also more compact models that differ in height. As a rule, such options are recommended to be built into furniture modules located not on the floor, but higher - in the second row.
To ensure that the connection does not cause problems, it is necessary to take into account the proximity of water outlets, sewerage and electrical outlets.
What you need for installation
When choosing the location of the dishwasher, you need to consider where exactly the plumbing pipes and electrical outlets are in your kitchen. If, in principle, it is not difficult to run an electrical wire from an outlet to any place in the kitchen, then with the supply of water and sewer pipes, great difficulties can arise, especially if the kitchen has been renovated a long time ago and a suite has been installed. That is why, first of all, it is necessary to consider options for installing the machine next to the wash.
If the machine is located further from the water riser, it will take longer to draw and drain water, and the hoses will be more loaded.
Installation of a Siemens dishwasher
Installing a Siemens dishwasher requires a competent approach. It’s good when you have extra money to hire a specialist who will correctly connect complex and expensive German equipment. But what if the installation falls entirely on your shoulders? It is important to follow clear rules for connecting the PMM to three communications - the electrical network, water supply and sewerage. We will tell you the details of this process and tell you about the intricacies of installing Siemens dishwashing equipment with your own hands.
How to integrate a dishwasher into the kitchen: integration into the cabinet
The cabinet located next to the sink must have a width greater than 45 cm. In such a situation, there is no need to come up with complex installation diagrams; you just need to install it into the adjacent module. When purchasing products from some brands, you should be aware that they require the installation of a special siphon when connecting (for example, Electrolux devices). Videos of installing a dishwasher of this type can be easily found on the Internet.
To prepare the lower cabinet for installation, you will need to do several manipulations. First of all, you need to remove the transverse partitions (shelves) from the cabinet, and also dismantle the back wall. The bottom panel is removed only if necessary, for example, if the height of the module itself is not enough to accommodate the dishwasher. To fix the case, it will need to be positioned strictly in a vertical plane. For this, adjustable legs and a building level are used.
If you wish, you can call a specialist who will do the job professionally. However, this will come with additional costs. The cost of installing a dishwasher depends on many factors: model, location, technical difficulties, etc.
Don’t forget about the front panel, which performs a decorative function and contributes to the harmonious integration of the dishwasher into the kitchen set. The facade is usually made from a cabinet door. However, it can also be purchased separately (to order). Devices that are part of the partially integrated group do not require a decorative front panel.
To prepare the lower cabinet for installation, you will need to remove the transverse partitions and dismantle the back wall
Installing a dishwasher in a separate module
Sometimes there are situations when it is not possible to allocate free space for installing new kitchen appliances. In this case, you can place an order for a separate module that will complement the existing kitchen ensemble. However, the rules regarding its location are the same. It must be located in close proximity to water supply and sewerage.
Thus, it is possible to transfer equipment that was previously located near the sink into the new module, and integrate a dishwashing unit into the old one. In this case, everything will depend on the features of the installation. Built-in dishwashers must be leveled and secured. This is required to ensure that the device does not produce vibrations during operation. If you ignore the fixation of the PMM, then it will make a lot of noise and move the cabinet.
When connecting certain models, you must carefully read the instructions. Bosch dishwashers, as well as other devices from popular brands, are sometimes quite difficult to integrate into an old set. To avoid having to change furniture, you need to study the issue of “compatibility” at the stage of choosing a PMM.
Access to hoses supplying and removing water in a separate module must be free
If the unit is located under a common kitchen countertop, maintenance becomes more complicated. A communication problem that arises in such a situation will require dismantling the dishwasher unit.
Subtleties of installing a dishwasher in a cabinet
If the cabinet was ordered to fit the dimensions of a specific model, then there should be no problems with installation.
The dishwasher body fits freely into the niche, leaving small gaps on both sides. To reduce vibration, seals are glued to the walls.
When installing some dishwashers, for example, Bosch, there is a mandatory part - a metal protective plate fixed to the bottom surface of the countertop. Cars of other brands may not have it.
To take into account all the connection nuances, the machine must be installed in this order:
- First, carry out a fitting - push the unit into a cabinet or niche, check the dimensions and connectivity;
- pull out and carry out preparatory measures - fix the mounting panels, fasteners and vapor protection;
- connect the hoses , push the housing into place;
- install decorative panels.
The difficulty is that models from different manufacturers differ, and therefore some installation points also have discrepancies. To avoid mistakes, you must carefully study the instructions and follow all the recommendations step by step.
A few tips that may come in handy during the dishwasher installation process:
Image gallery
Photo from
Correct insertion of mounting sleeves
Adjusting the dishwasher support legs
Measurements of actual niche parameters
Installation instructions and recommendations from the manufacturer
Before “planting” the decorative facade on the car door, first degrease its surface, then glue double tape and the panel onto it. This is necessary to be able to adjust the position of the overlay.
When it becomes clear that the holes on the door and the panel match, you can take a screwdriver and tighten the screws. We recommend that you read the detailed instructions for installing the front on a dishwasher.
Lastly, the side fastening is done. Insert self-tapping screws from the inside of the case into the holes opposite the bushings and also tighten them with a screwdriver. It is prohibited to use nails, otherwise machine parts may be deformed during dismantling.
Self-installation of facades
A front can be installed on a dishwasher only when the device is already connected to the water supply line and drainage system. The built-in dishwasher should already be installed in the niche provided for it. For high-quality fastening of the facade, you will need:
- a long ruler or tape measure (for accuracy, a ruler is more suitable);
- flat and Phillips screwdrivers;
- fasteners;
- handle for car door;
- façade panel.
When setting yourself the task of attaching the facade, it is necessary to mount the device to the side cabinets and from above, to the kitchen panel. Then, on the front part of the facade you need to attach a handle for the door. Use a drill to create a hole for the screw. Drill with a thin screw from the main side of the facade.
Then you will need to calculate the distance at which the façade panel fastenings are located. This is simply necessary so that the front of the machine and the fronts of the lockers are on the same level. Using a ruler, evaluate the clearance between the kitchen panel and the cabinet fronts. After this, measure the distance between the top fastening and the countertop, subtract one parameter from the other and the resulting indicator will be the distance between the fastening point and the edge of the dishwasher facade.
When all the measurements have been taken, you will need to remove the template stencil from the kit and attach it to the inside of the façade panel. This can be done using tape; it is better not to use double-sided tape; at first glance it will seem convenient, but it will leave traces of the adhesive base.
We advise you to practice with the template on an unnecessary piece of board about 16 mm thick, this will help to avoid mistakes. Remember that errors on the facade panel can be critical.
The template will help you mark the correct points for future fastener holes.
Drill carefully, it is better to drill less than to risk getting a through hole. Three quarters of the thickness of the façade panel is sufficient. The process of fastening the facade is completed by fixing the panel with screws
If it turns out that the panel rests on the base, you will have to make a small gap in the base itself. The width of the gap will be the thickness of the panel (add 2 mm on top, this will not affect anything). If the facades are not level, then increasing the clearance of the base is the most correct and optimal solution to the problem. Especially if you are unable to make an adjustment by adjusting the legs of the machine (naturally, because you fixed it to the side cabinets and tabletop)
The process of fastening the facade is completed by fixing the panel with screws. If it turns out that the panel rests on the base, you will have to make a small gap in the base itself. The width of the gap will be the thickness of the panel (add 2 mm on top, this will not affect anything). If the facades are not level, then increasing the clearance of the base is the most correct and optimal solution to the problem. Especially if you are unable to make an adjustment by adjusting the legs of the machine (naturally, because you fixed it to the side cabinets and table top).