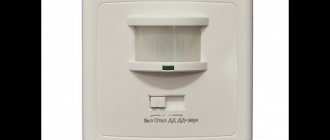
How motion sensors work
There are many types of motion sensors:
- infrared;
- microwave;
- ultrasonic;
- combined.
They are all united by a common operating principle: when changes occur in the viewing sector, the electrical signal is amplified and sent to a relay, which closes the contacts to turn on, alarm, lighting or other devices, such as a fountain or music. Let's take a closer look at the operation of infrared sensors, since they are most in demand by consumers due to price and quality.
How does an IR detector work?
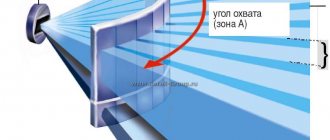
The operating principle of an infrared motion sensor is based on recording changes in the density of thermal radiation in the controlled space using a Fresnel lens. As long as the infrared background of the room is stable, the sensor is in standby mode. As soon as a person enters the room, the level of thermal radiation changes the balance towards increasing the IR flux. This will cause a change in resistance in the lens, which will give a signal to the relay, which in turn will turn on the light. When the movements of people in the room stop, the reverse process will occur, and then the light in the room will go out.
Operating principle of the IR sensor:
Adjust your settings
If your motion sensor does not turn off the lights or is not working correctly, first take a closer look at the settings. There are three regulators on the body of the device: SENS, TIME and LUX.
- SENS — determines the level of sensitivity of the motion sensor to infrared radiation;
- TIME — adjusts the shutdown delay time;
- LUX - adjusts the light level: if the threshold is increased, the lighting will not turn on; if the light level is lower than the set level, the sensor will turn on the lighting devices.
These settings help prepare the sensor for specific conditions. Initially, they must be set either by the installer company or by the owner of the sensor.
When working with professional equipment, it is important to adhere to the recommended values. For example, the LUX regulator has these.
As practice shows, in passage areas it is approximately 75-200 lux, in work areas (offices and cubicles) - 600 lux, when working with heavy eye strain - 1000 lux. The average range of illumination levels in sensors is 2-2000 lux.
If you do not know the correct values, then it is better not to adjust these indicators yourself. Set the lowest value - the sensor will turn on at minimum illumination, set the maximum - the sensor will turn on constantly.
At the same time, from a technical point of view, the device will work correctly, that is, it will perform its functions based on the settings. On the practical side, its operation will not bring any benefit to the owner, so in case of such problems it is worth contacting a specialist who can adjust the device settings.
An incorrectly adjusted SENS parameter can also disrupt the operation of the motion sensor. If you set its value incorrectly, the sensitivity of the area where the motion sensor is present will decrease, and in certain cases, for example, with minimal movements, the device may simply not work.
Due to incorrect settings of the SENS, LUX and TIME parameters, the lighting may not go out. If the lamp does not turn off for a long time, in the absence of movement, then it is worth checking the turn-off delay time.
The TIME control may be set too high, preventing the output contact that controls the lights from opening. This indicator also has its average values: for passage areas - 5 minutes, for work areas - 15 minutes.
What can cause a false positive?
To understand why the motion sensor turns on spontaneously, you should highlight possible problems in its operation.
These may include technical problems or external factors. False alarms due to technical problems are extremely rare.
To identify it, they either use special devices that can be used to monitor the correct operation of the sensor, or replace incorrectly functioning sensors with new devices.
Basically, a technical malfunction of the sensor, leading to its false operation, is associated with incorrect installation, poor contacts or incorrect configuration of functional parameters.
External influences are the main factors to which the motion sensor reacts. Since they incorporate IR radiation sensors, any external emitters or reflectors of rays in this part of the spectrum can cause the motion sensor to malfunction.
Reasons for false alarms of motion sensors
The main reasons that can lead to the motion sensor constantly triggering include:
- the presence of pets in the house, which the sensor mistakes for those who have violated the security zone;
- various insects that “settle” in the sensor and lead to its malfunction;
- wind flows, drafts and movement of air masses with different temperatures;
- the presence of external IR emitters, generated waves that fall into the sensitivity area of the sensor.
Quite often the question arises whether the motion sensor works through glass.
It turns out that IR radiation that passes through windows from the sun or even from the headlights of a passing car can trigger the sensor. Therefore, these factors should also be taken into account when installing a security alarm.
Elimination methods
To prevent false alarms from motion sensors caused by pets, devices with a special design should be used. Such sensors are “immune” from animals and will not disturb over trifles.
It is important to monitor the condition of the sensor, namely its housing. If you periodically clean the sensor, you can prevent it from being triggered by living creatures that have gotten inside the housing.
Before arming the alarm, you need to make sure that all vents and windows are tightly closed and that the air conditioner or fan is turned off. This will eliminate drafts and movement of air masses, which also provoke false alarms.
When installing sensors, you should choose places for their installation so that they are not affected by heat rays from radiators of the heating system, autonomous heaters and other devices that can generate thermal radiation. After all, even an ordinary incandescent light bulb can cause an alarm to go off for no reason.
You should also exclude the possibility of infrared radiation coming from outside the house. Curtains or blinds will help solve this problem; they can be used to cover windows from solar and other external radiation.
If you follow these simple recommendations, you can almost 100% eliminate the possibility of a false alarm of the security sensor. In this case, you won’t have to worry about how to turn off the motion sensor, which causes constant inconvenience.
Having excluded the listed factors, the main reason that can trigger the alarm can only be a technical malfunction of the sensor.
As a rule, this happens quite rarely, since modern motion sensors are fault-tolerant and very reliable devices.
Conclusion
To prevent alarms from being disturbed due to false alarms of the motion sensor, it is important to fulfill several simple requirements.
Firstly, the installation and installation of sensors must be carried out by professional personnel.
Secondly, the factors listed above that provoke triggering should be taken into account. And thirdly, it is necessary to periodically inspect and maintain the sensors.
Once again about sensor circuits
So, I will give the most popular motion sensor circuit again:
Motion sensor circuit 3
This diagram was sent by my regular reader Alexander from Korolev in December 2014, for which I thank him again. I will rely on this diagram throughout the text of the article, since it is the most typical. It should not be confusing that the circuit in our example will be scattered across two boards - low-current and power.
At the end of the article, a refinement of this scheme will be given.
Now I’m publishing photos of motion sensor boards sent by another reader of mine, Renat.
Low current motion sensor board
Motion sensor power board
Here is our correspondence with Renat:
Renat did a great job with his own hands, and I will try to help him in this article.
The light sensor works in reverse
And if for some needs you need the relay to operate in reverse mode? It supplied voltage and turned on the load during the day and turned it off at night.
For example, for lighting in a barn with animals where there are no windows. What to do in this case?
Then go to the nearest store and buy an intermediate relay, in which one of the contacts closes and the other opens when triggered.
All you need to do is connect this intermediate relay after the light sensor according to the diagram below.
A starter with additional contacts can also act as such a relay.
Check the location of the sensor
When choosing a motion sensor, you should pay attention to its detection range and range. The same parameters must be taken into account when selecting the location of the device.
During installation, the device must be installed and focused so that these parameters optimally suit the characteristics of the selected room. The optimal location for the sensor corresponds to the following indicators:
- From this position, the sensor's detection zone monitors the entire required space. This takes into account different operating ranges for “working at a desk”, “moving straight towards the sensor” and “walking to the side of the sensor”.
- If possible, the sensor should be installed to the side of the direction of movement of people and vehicles.
- The minimum distance to the lamp being switched on is one meter.
- The light to be switched on must not be within the detection range of the sensor. The light cone of indirect luminaires should not hit the sensor directly.
If one of these parameters does not match, the motion sensor may malfunction. You can check this yourself, and to troubleshoot problems due to the incorrect position of the device, contact a specialist.
Incorrect sensor orientation
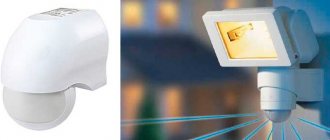
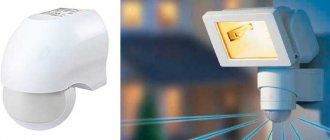
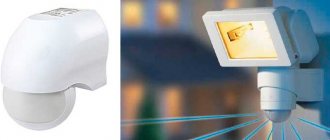
In the accompanying documentation of the motion sensor, the manufacturer usually indicates the orientation of the motion detector in the space of the room. The horizontal device is made in the form of a volumetric toroidal disk, which is attached to the ceiling. The DD review is 3600. Its installation is quite simple and does not cause any difficulties.
Horizontal sensor:
Corner and wall modifications require proper orientation. If the room has two doorways in adjacent walls, then install corner models. In other cases, the device is hung on one of the walls, but not opposite the windows. Direct sunlight can have a detrimental effect on the condition of photocells. Incorrect setting of the DD can create “dead” zones where the device will not respond to the appearance of a person. Therefore, you need to spend some time walking around the room while tilting and turning the head in order to obtain the optimal detection range and range of the device.
If the room is an L-shaped room or corridor in plan, then it is advisable to install two sensors. They should be turned as close as possible to each other so that there are no “dead” zones. It is also important that the luminaires are kept out of the detection range. The light flux should not fall on the multilenses of motion detectors.
When purchasing a motion sensor for lighting, it is better to pay attention to branded devices and not go for cheap ones. High-quality sensors will not cause short circuits and will last for decades. If you lack experience and knowledge of radio engineering, then it is better not to undertake repairs yourself, but to have the broken device repaired by professionals.
What problems occur with such equipment?
When using alarm equipment, there are situations when the motion sensor stops working correctly. The equipment may not work at all, or may not work correctly, and this is very dangerous because it leads to problems with the operation of the security system as a whole.
Standard breakdowns include the following:
- when moving objects appear, the alarm does not go off, which is especially dangerous and this problem must be checked regularly for prevention;
- the output relay contacts do not switch, but the sensor is triggered, which leads to a lack of signal transmission at some stage;
- the motion sensor does not turn off, even if the moving element goes beyond its tracking zone, which leads to a problem with the operation of the entire security alarm system;
- the appearance of false signals or spontaneous switching on and off, which is especially annoying or leads to problems in the operation of other security equipment.
If this happens, repairs cannot be delayed as this will create a gap in the security alarm system. You need to understand that the safety of people or property may depend on this, therefore it is very important to promptly check the operation of tracking systems and sensors in the building security system. If repair is impossible or there is no desire to repair and restore the equipment, then you need to buy new one to restore the functionality of the building or premises tracking and security system.
Motion sensor repair methods
You should always start with a visual inspection of the sensor. There may be mechanical defects, damage to lenses or housing. Pollution accumulates on them. Often, simply wiping the lens will fix the problem.
When all external factors that can affect the operation of the device have been checked, the case is opened and the search for internal defects begins.
Important! You will need to check the device under voltage, so you must know and follow all electrical safety rules.
- After opening the outer casing, you should check whether the detector is connected correctly;
Motion detector connection diagram
- Using a multimeter or tester, check whether the voltage at the input contacts of the sensor is suitable;
- If voltage is present, you should begin to artificially create conditions for the detector to trigger. When modeling, you must first set the settings: set the degree of illumination (average for day and night), set sensitivity to maximum, response time to minimum;
- If adjusting the settings does not lead to a positive result, you need to turn off the voltage from the device and disassemble the sensor, gaining access to the printed circuit board;
- A visual inspection is again carried out to identify burnt components. At the same time, it is checked whether the wires are intact and whether the soldering is secure. If visible defects are detected, the wires and elements on the printed circuit board must be repaired;
- If burnt out parts are identified, it is necessary to replace them, selecting identical ones in the relevant parameters, and be sure to check adjacent elements, even if they show no signs of damage;
- Cases when, when simulating external conditions for operation (passing of a person), a clicking sound of closing the contacts of the output relay is heard, but the lighting devices operating from it do not light up, may indicate a malfunction of the electrical circuit from the relay contacts to the lighting devices. The defect may be in the relay itself, for example, oxidation of the contacts, then they need to be cleaned. The integrity of the wires going to the external load is also checked. If there is only one lamp, it may burn out. But, as a rule, this is given priority attention;
- The detector circuit is powered by a converted DC voltage from 8 to 24 volts. To detect defects in the converter, you need to check the voltage at its output. This indicator is measured in relation to “zero”. For “zero” you can take the minus point of the capacitor installed after the bridge of diodes. If there is no voltage, all parts of the converter circuit are checked, including the diodes of the rectifier circuit;
Motion sensor circuit board
- Power is supplied to the relay through a transistor. Its serviceability also affects the operation of the circuit. Its performance characteristics are monitored with a multimeter.
Adjusting Sensor Settings
On the front of the motion sensor housing there are adjustable adjustment knobs for lighting:
- SENS. Serves to set the degree of sensitivity;
- TIME. You can set the time interval from the appearance of moving objects until the sensor is triggered;
- LUX. Setting the required level of illumination.
Motion Detector Controls
Adjusting the settings serves to set the operating parameters required by the user. The settings affect the correct operation of the detector.
For the LUX regulator, they usually start adjusting from the middle position, but if the installation sites are too dark, then you can set it closer to the “night” icon.
Important! Particular care must be taken in adjusting the SENS regulator, since incorrect operation of the sensitivity parameter blocks the functioning of the complete sensor circuit.
When regulation begins, SENS is set to maximum and TIME to minimum, and artificial conditions for the circuit to operate are created. During normal operation of the sensor with these settings, you can gradually set the desired indicators, checking the correct functioning of the device with each shift of the controls.
A working detector does not turn off the circuit
There are situations when the sensor is working properly, but the lighting devices do not turn off, despite the absence of external conditions for operation. The reasons may be the following:
- The TIME interval is set too long. We must try to reduce it;
- High level of illumination. It is necessary to lower it by moving the LUX control;
- A third possible cause, rarely observed, is residual load on the circuit after being under voltage for a long time. In this case, you can remove power from the device and reapply it after a short period of time.
Prevent false positives
Foreign objects can affect the operation of the motion sensor both directly and indirectly. The infrared sensor is directly affected by large moving heat flows from objects such as a fan coil, convector, etc. Large objects (racks, cabinets, etc.) limit the detection area of the sensor and create “dead zones” in the room.
Heaters indirectly affect the operation of the sensor. The thermal air flows they transmit will lead to malfunctions due to which the motion sensor will turn on randomly. To limit the sensor and eliminate false alarms, you need to reduce the sensitivity of the sensor or use special lens masks that come with the sensor
High-frequency sensors are almost impervious to external factors. Their work is practically independent of ambient temperature, sound or light. But such sensors are only suitable for indoor installation. Outdoors, they will react to any movement, such as falling leaves or swaying trees.
This type of sensor is installed in rooms with a large number of partitions. For example, public bathrooms. To automate lighting, it will need several PIR sensors.
With the help of high-frequency sensors, you can close the entire room with one device, since they easily detect movement through light partitions. Some models of high-frequency sensors, for example, HF-MD1, are suitable for installation in a luminaire. Also, sensors with two technologies are suitable for this type of room: PIR and noise.
How to choose a motion sensor?
If the device is purchased for installation outdoors, you need to know:
- Temperatures at which the device can be operated: from -35 to +50 degrees, humidity – up to 100%.
- The class to which the device is protected.
- Quality and ease of setting device parameters.
- The presence of an anti-sabotage function that gives notifications if someone wants to break the device.
If the DD is purchased for internal use, then it may have a low operating temperature, but the available detection angle is important for it: from 180 to 360 degrees.
Before you start choosing a DD, you should highlight the main parameters:
- Area of use: at home, on the street, in organizations.
- Availability of energy saving function.
- Operating mode range.
- Fine-tuning the parameters for turning the sensor on and off.
Selection tips:
- For apartments and houses, it is best to purchase an infrared motion detection sensor; it will not pose a danger to people, it does not emit radiation, and it is energy efficient.
- It is not recommended to use DDs with fluorescent light bulbs; it is better to give preference to LED or regular ones.
- The protection class for street versions of DD, security slope, should be 65 or 55.
Main signs of sensor malfunction, possible causes
There may be three signs:
- unauthorized activation, at any time without any reason;
- does not turn off the lighting lamp;
- does not turn on the lighting lamp or other terminal devices, and does not respond to obvious signs of movement in its field of view.
Sequence of troubleshooting and troubleshooting
In any case, you need to start by inspecting the appearance to see if there is any obvious mechanical damage to the optical system of the Fresnel lens, or a simple layer of dust and dirt. If necessary, clean the lens and check the functionality of the sensor. This is the most common and simplest cause of malfunction. If there is no positive result, you will have to perform more complex operations:
- Remove the housing and check that the connection is correct.
Scheme for connecting the sensor to the network
- Use a multimeter or other devices to check the presence of incoming power at the input of the printed circuit board.
- If there is power, simulate the conditions under which the sensor should operate. Set the average lighting level at which the sensor is triggered in the dark and daylight, the maximum sensitivity level and the minimum operating interval.
- If in this position the sensor begins to operate, gradually set the desired parameters from the sensitivity level, then lighting and operating time. Periodically checking the response to the source of movement.
- After these operations, if the result is negative, turn off the power to the electrical circuit, remove all decorative elements and carefully inspect the printed circuit board.
- Areas of burnt elements, integrity of wires and jumpers, and reliability of soldering of radio components are identified. It is recommended to do this with binocular glasses or a magnifying glass. If you find poor-quality soldering, solder the contacts of the dropped elements. After this, check the functionality of the sensor.
- If you find burnt-out elements, replace them, having first checked the parameters of the neighboring ones involved in the circuit chain.
Motion Sensor Circuit Boards
- If, when simulating driving conditions, the relay is activated, a characteristic click is heard, and the lamp does not light up, it means that the circuit between the relay contacts and the lamp is faulty, ring it. The relay contacts may have oxidized; replace it or clean the contacts. I do not consider the lamp to be faulty; this needs to be checked first.
- Measure the DC voltage after the converter; depending on the sensor model, it can be from 8–24 V (see diagram and other documentation). The measurements are carried out relative to zero; it is convenient to take the “-” diode bridge on the boards.
- If there is no required voltage, ring the elements in the converter circuit, most often these are diodes of the rectifier bridge.
It happens that a short circuit in the circuit following the bridge or stabilizer extinguishes the incoming voltage. To verify this, disconnect the entire circuit after the stabilizer. If there is voltage, look for a short circuit, a faulty element after the stabilizer. This way you can ring the entire circuit up to the relay and lamp; if faulty elements are identified, replace them and check their functionality. If you follow this method, you will definitely find the cause of the malfunction; this method is good when a person has skills in working with electronic equipment, measuring instruments, and knows how to solder. When you don’t have such skills, you need to limit yourself to the first points: wiping, setting up, checking the power supply. If the elements on the board are faulty, contact a specialist.
How motion sensors work
Motion sensors differ in their operating principles, but they all perform the same task. Each has advantages and disadvantages:
- Active sensors use infrared energy, radar waves and other methods to cover a given area. The sensor sends active pulses, receiving in response echo signals that arise when waves are reflected from objects. When a person enters the scanned area, the response time changes and the sensor is triggered;
- Passive infrared sensors work by measuring infrared energy from the environment. All living things produce heat, and this is the basis for the functioning of the sensor. When a person or animal is in the area covered by the sensor, an increase in infrared energy occurs. The sensors can be calibrated to only trigger at certain levels of infrared heat to prevent them from being triggered by the movement of birds and small animals;
- Beam and photoelectric sensors rely on a focused beam of light moving between an emitter and a sensor unit. Typically, this beam is invisible infrared energy; some inexpensive devices use visible beams. Some passive sensors are triggered by ambient light, but then only detect movement in the immediate vicinity.
The most effective motion detectors are active sensors, although they consume more power to run and require calibration to prevent false alarms. Passive infrared allows you to cover a much larger area with less power, but slowly rising temperatures can cause delays in detector response.
The most popular type of sensors are passive infrared detectors. Their sensitive element detects infrared waves, which are focused through lenses. Built-in lenses also help expand the sensor's coverage area. In this case, the voltage is increased through the amplifier, compared with the background signal and sent to the relay. If the signal does not go beyond the background, the relay contacts remain open. As soon as the signal level increases, the relay closes the contacts and connects the load circuits.
Power circuits
We don’t delve into the intricacies of operational amplifiers yet; we continue to explore the most obvious and probable.
In this case, this is checking the operation of the power board relay. This relay turns on, that is, a 24V voltage is supplied to its coil, if the key transistor opens. In this case S9013, npn.
It is better to check with the low-current board completely disconnected. We just turned it off when checking the power supply in step 4.
To check the operation of a transistor, its base must be connected to the emitter, preferably through a resistor. It is there (R21, 20 kOhm), or use your own, about 2 kOhm - 33 kOhm. The transistor in this case will be closed (no current flows through it), and the relay should be turned off.
Next, we check the opening of the transistor and, accordingly, the activation of the relay. To do this, through the same resistor (a resistor is required, the jumper will burn the transistor) we connect the base of the transistor to +24V. The relay should turn on.
If the transistor does not work, it must be checked with an ohmmeter by turning off the power (you can check it before manipulating the resistor). How to check a transistor - is it possible, I won’t write?
The relay may also be faulty.
Operating rules
When planning the placement of detectors, a number of rules are followed:
- The lamp should not be located directly above the motion sensor
- There should be no glass partitions in the detector scanning area; glass does not transmit infrared radiation.
- You should check whether the sensor will be located near large interior items that would complicate the scanning process.
- The presence of an air conditioner or heater in the range of the device interferes with its operation, since the detector detects moving air currents and falsely triggers, turning on the lighting
In large rooms, detectors mounted on the ceiling are used. The devices detect moving objects in a circular area.
