Ceiling decoration is one of the main elements in the design of any room. It is completely visible and therefore the decoration of this enclosing structure must be taken with full responsibility.
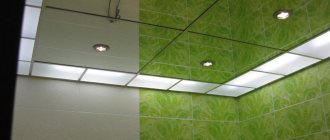
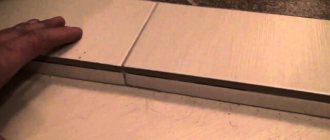
There is a high level of humidity in the bathroom, as a result of which condensation appears on the walls and ceiling. Therefore, the main requirement for finishing materials is moisture resistance. Perhaps the best option is a suspended ceiling in the bathroom covered with moisture-resistant slabs. It has many advantages over whitewashing and wallpapering, since it does not require special preparation of the base floor, is able to hide communication networks, heat-insulating floor systems, and is quite easy to install.
Choosing a material for finishing the ceiling in the bathroom
Let's look at the main types of suspended ceilings, their strengths and weaknesses.
Table. Types, advantages and disadvantages of suspended ceilings.
| Ceiling view | Advantages | Flaws |
| Rack and pinion | Moisture-resistant, easy to clean material | The appearance of such a ceiling is inferior to other types of finishing - such as cassettes |
| Ceiling made of plastic lining | Like slats, plastic panels are moisture resistant and easy to clean | As a rule, such a ceiling also has a very budget-friendly appearance. |
| Plasterboard ceiling | Environmental friendliness, ease of processing of the material, affordable price, the ability to paint it in any color | Drywall is not very resistant to moisture, so this ceiling may not last long |
| Cassette ceiling | Easy to install cassettes | Relatively high price |
Types of ceilings
To select a suitable ceiling, study all the advantages and disadvantages of suspended structures. Their undeniable advantages include the ability to hide flaws in the ceiling surface - curvature, differences in slabs. Inside buildings, wiring parts, water pipes, and ventilation systems are easily hidden.
For owners of apartments located on the upper floors of apartment buildings, curtain systems bring tangible benefits - they keep them warm in the winter and protected from the heat in the summer. It is enough to simply place heat-insulating mineral wool in the ceiling space of the system.
Four types of hanging structures are installed in the bathroom: from moisture-resistant plasterboard, plastic lining, slatted panels and cassettes. The characteristics given in the table allow you to evaluate the strengths and weaknesses of products:
| Ceiling type | pros | Minuses |
| From slats | Resistant to moisture, easy to clean, repels dust. Durable and flexible, you can create any design. Fireproof, wide choice of colors. It is easy to replace a single element. The average service life is 30-35 years. | Inferior in external design compared to cassettes. Dirt can accumulate on the seams. It costs more than plastic. |
| Plastic lining | Moisture resistant, easy to wash. Finished appearance, does not require additional finishing. There is a large selection of colors and styles, textures made from natural materials, patterned and with a mirror shine. The panels are sealed, fireproof and easy to install, combine a light and stable effect, and support different installation options for lamps. | The quality of appearance suffers. The plastic is very fragile and cannot be installed if damaged. |
| Drywall | Eco-friendly material, different color options. It's easy to process. | Afraid of moisture, easily damaged by flooding. It is necessary to additionally plaster and seal the seams before applying decorative finishing. |
| Cassette | Easy installation. It looks unusual and impressive. Glass cassettes are not afraid of moisture and fungus and are easy to clean with detergents. The coating lasts for many years. | High price. During installation, accurate load calculations are required. Not recommended for weak floors. |
The procedure for assembling the ceiling and the necessary tools
In order for the structure to be strong, it is necessary to mount it on a reliable foundation, which will consist of three parts: the initial, main and longitudinal additional frames.
The main stages of installing plastic panels on a bathroom ceiling include:
- installation of wiring for spotlights;
- marking;
- installation of the initial frame around the perimeter of the room;
- installation of the main frame along the entire perimeter of the ceiling;
- installation of an additional longitudinal frame;
- installation of slats, plastic lining, drywall or cassettes.
Set of hand tools for installing suspended ceilings
Tools you will need:
- ruler and pencil for marking;
- perforator;
- knife, hacksaw or metal scissors, glass cutter, jigsaw, grinder, construction knife for cutting finishing materials to the desired size;
- drill with a crown (to drill holes in the panels);
- screwdriver for tightening screws.
This is an incomplete list; depending on the type of frame chosen and the material that will be attached to it, other tools may be needed.
Why suspended?
Wherever there is such an opportunity, owners of apartments and houses try to install suspended ceilings. Under structures of this type it is convenient to hide communications and shortcomings of the main ceiling. Such problems are quite typical for bathrooms, especially in apartment buildings.
Under a suspended ceiling you can disguise a ventilation duct, sewer pipes of an apartment located on the floor above, electrical wiring, etc. In addition, the hanging canvas ideally masks the unevenness of the main ceiling.
Installing a suspended ceiling made of plastic panels is not difficult to do using ordinary construction tools and detailed instructions
Of course, you can level the surface using plaster, but for large differences in surface height, it is more advisable to use a special design. The suspended ceiling is not too difficult to implement; even novice craftsmen can handle its installation. The design is usually resistant to external influences and durable.
Lamps can be beautifully mounted into the suspended ceiling fabric. This finishing option leaves many interesting options for developing a stylish room design.
Frame for installing panels
There are three main materials for assembling the frame:
- tree;
- plastic;
- metal.
A wooden frame is not suitable for a bathroom, since this material is not resistant to constant exposure to moisture and will begin to warp and rot over time. Even if you carefully treat the wood with protective compounds, there is every chance that these problems will not be avoided.
Prices for suspended ceilings
suspended ceiling
Frame for suspended ceiling
Plastic , on the contrary, does not deteriorate at all in a room with high humidity and does not rot. However, plastic has a significant drawback - it lacks strength, so a ceiling assembled on a plastic frame may be too short-lived.
The best option, which is chosen by almost everyone who assembles a suspended ceiling, is a metal profile frame . This design is durable, reliable and safe, it is easy to install, and it will serve for a very long time.
Suspended ceiling installation
Tools and materials
In addition to PVC panels, to install a suspended ceiling you will need the following tools:
- drill (can be replaced with a hammer drill);
- sharp knife;
- hacksaw for working on metal;
- fasteners (screws with a press washer, dowels, etc.);
- roulette;
- marker (pencil);
- building level.
You will also need a special metal UD profile (25X25mm) and a CD profile (25X60mm), a starting strip, hangers, and a ceiling plinth.
In a bathroom or toilet, it is better to use a galvanized profile for the suspended ceiling frame. If the ceiling area is small, sometimes you can do without additional hangers
Installation of wiring for lamps
There are several basic nuances of installing lamps and wiring for them that must be kept in mind.
- The distance between lamps that use incandescent lamps or energy-saving lamps must be at least 10 cm. For lamps with LED and halogen lamps, this figure must be at least 5 cm.
- It is better to run a separate wire to power each of the lamps, because in this case a lot of wiring will be needed, but if something happens to one of the lamps, the others will continue to burn.
- Wiring in the bathroom must be located at least 1.5 m above the floor level.
- In order to avoid short circuits, each wire must be placed in a corrugated pipe. In addition, in this case there will be no need to disassemble the ceiling if something happens to the wiring. To replace the old wire, it will be enough to insert a new one into the pipe so that it comes out on the other side (at the place where the lamp is installed).
- You can secure the wires to the suspended ceiling using clamps. In this case, their length should be such that the ends hang down 10-15 cm below the level of the frame. In this case, it will be convenient to install lamps.
- The installation box must be below the intended ceiling level, in which case you will have free access to it at any time.
Installation of wiring for lamps
Important! You need to connect one wire to the switch, which will be located in the bathroom, and several wires from the switch to the lamps in accordance with the number of lamps.
Nuances of choosing a stretch ceiling
First of all, you should choose high-quality material that will last you more than one year. The highest quality stretch ceilings are made in France - Barrisol, Alkor Draka, EXTENZO. German ceilings from the companies Lackfolie and RENOLIT and Belgian PTMC Polyplast are no less good. Materials made in China and Russia are inferior to them in terms of quality, but they are attractive due to their lower price and wide selection.
BARRISOL, world leader in suspended ceilings
Stretch ceilings Alkor Draka
French stretch ceilings Extenzo
When purchasing, you should take into account the width of the ceiling, since some manufacturers produce film up to 2 meters wide and for ceilings of a large area the canvas has to be sewn together. The seams are not too noticeable, but are still visible, especially on a plain glossy finish.
Ceiling made of several stitched fabrics
Width of suspended ceilings
The color aspect also matters. Most often, the color of the canvas is matched to the tiles on the walls, which gives the bathroom a harmonious, attractive look. If the room has colored plumbing fixtures, you can choose a fabric in the same color scheme - this will make the interior look more original and stylish. To visually enlarge the space, choose a material with a glossy or mirror surface, and its color should contrast with the color of the floor tiles. A dark blue, black, green ceiling looks very impressive. At the same time, you should not use more than 3 different colors in the design of the room to avoid tackiness.
The manufacturing technology of PVC sheets allows you to combine several types or colors of film in one level
Contrasting black and white ceiling
Canvas with photo printing should be selected even more carefully. The image should match the style of the interior: for example, for a marine-style bathroom, images of marine life, waves or a blue sky with light white clouds are ideal. If the bathroom is decorated in Japanese style, the best option is an image of cherry blossoms or bamboo. The color scheme of photo printing should be in harmony with the wall decoration or plumbing fixtures.
Stretch ceiling with photo printing. Dolphin image
Abstract drawing in blue tones
Drawing - shadow of a lizard
Assembling a starting frame for a suspended ceiling
The first step is to mount the starting frame (other names are wall or edging profile). This is the basis on which the entire suspended ceiling will be assembled. For the construction, you need to use a U-shaped profile if plastic panels or drywall are supposed to be fixed to the frame, and for a slatted profile, both U-shaped and L-shaped are suitable. A corner is usually used for finishing with cassettes.
Step 1. Make markings by drawing horizontal lines on the walls 10-20 cm from the main ceiling. You can also use a painter's cord to mark. The lines must be very even, because this determines whether your entire ceiling will be even.
Step 2. Cut the metal profile into pieces of the required length so that each of them can clearly fit along the perimeter of the walls. If you use the U-shaped option, you first need to cut the sides or shelves, then bend the metal profile in the direction opposite to the shelves and cut off the part that is located between them - the back. If the profile, on the contrary, turns out to be too short, you will have to attach two or even three pieces to one wall.
Step 3. Drill holes for self-tapping screws in the metal profile. They can be placed at a distance of 0.5 m from each other.
Assembling the starting frame
Step 4. Attach the profile to the wall along the previously marked line, drill holes there at points that correspond to the locations of the holes in the profiles.
Step 5. Install dowels into the walls, and then screw screws or self-tapping screws into them.
Ceiling frame prices
ceiling frame
Starter frame for suspended ceiling
If you use a U-shaped profile, it must be butt-joined in the corners of the room. To do this, you need to widen the sides of one of the profiles using pliers, and then insert the shelves of the other between them. Two pieces of L-shaped profile can be installed overlapping, that is, in such a way that the bottom side of one overlaps the bottom of the other.
Video - False ceiling in the bathroom. Frame assembly
Installation procedure
When choosing panels for a plastic ceiling, you should decide on their color and thickness. The color must comply with the overall design of the bathroom, and the thickness must comply with the requirements of building regulations. It is believed that plastic with a thickness of 5-10 mm is suitable for the ceiling. Most often, suspended ceilings for the bathroom are made of 8 mm thick plastic.
You should not use cheap and thin plastic 4 mm thick for these purposes. If spotlights are installed on such panels, the lighting will be visible through the panel, and all communications hidden behind the suspended ceiling will be illuminated from the inside. It looks very ugly.
Plastic ceiling panels can be chosen in different colors and designs, but remember that they should not be too dense or too thin
You should not purchase panels made of too thick plastic. They are intended for finishing walls and are quite expensive; for a ceiling such costs will be simply unnecessary. In addition, to cut such thick plastic you will need a grinder, which will significantly complicate the work.
Stage #1: Preparatory work
To begin with, you should remove all items from the bathroom that could interfere with the renovation. What cannot be removed should be protected from accidental damage. Of course, the old suspended ceiling (if any) must also be removed.
But the previous finish of the main ceiling can be left unchanged. It is removed only in cases where it is significantly damaged (so as not to collapse on the finished suspended ceiling) or if the ceiling is damaged by fungus or mold. Then sanitary treatment of the premises also becomes part of the preparatory work.
If fungus or mold appears on the main ceiling of the bathroom, such contamination should be removed before installing the suspended ceiling, and the surface should be thoroughly treated with special products.
Stage #2: Frame installation
The procedure for installing a ceiling made of plastic panels is clearly presented in the following video:
So, let's go through the entire technology from start to finish. First you need to do the marking. To do this, at the level of the future ceiling, a horizontal line is drawn along all walls using a building level. When calculating the distance from the main ceiling to the suspended ceiling, you should take into account not only the size of the communications hidden under the canvas, but also the height of the lamps built into the ceiling.
It is recommended to purchase lighting fixtures in advance to ensure maximum measurement reliability. If the bathroom walls already have ceramic tiles laid in regular horizontal stripes, you can use a horizontal tile joint as a guide instead of a building level.
After this, you can begin installing the frame:
- Cut the UD profile according to the length of the bathroom walls.
- Make holes in the profile for dowels (step – 500 mm).
- Place the profile against the wall and mark the places for fastenings.
- Drill holes in the wall for the dowels.
- Secure the profile to the walls using dowels.
- Cut the CD guide profile into pieces to fit the length or width of the bathroom.
- Insert the pieces of the guide profile into the installed UD profile (pitch - 400 mm or less).
- If the profile exceeds 1500 mm in length, secure it with self-tapping screws at the insertion points.
- To provide additional rigidity, the CD profile should be secured using additional hangers.
The distance between the profile slats should not be excessively large so that the plastic panels do not sag under their own weight. In addition, suspended ceilings are not always equipped with spotlights. For a separate chandelier or other structures that are supposed to be mounted on a suspended ceiling, a separate frame of the appropriate size should be installed.
Stage #3: Installation of plastic panels
The panels themselves are not too difficult to install. They are usually directed across the CD profile. First you need to cut each panel to the appropriate size. After this, you should install a starting rail or ceiling plinth, indicating the starting point for installing the plastic panels.
The first plastic panel is inserted at one end into the starting rail, and then, slightly bending, the second end of the panel is inserted into the desired place. The first panel is slightly pressed against the wall, after which its position is fixed with screws and a press washer.
Plastic panels are installed in a direction perpendicular to the direction of the frame structure slats. If the distance between the frame guides is too large, the plastic will sag
The remaining panels are installed in the same way, one after another. The panels are mounted end-to-end or connected with a special lock, depending on their type. During the installation process, you should avoid applying excessive force to the fragile plastic to prevent accidental breakage of the material. The last panel may need adjustment. Its width is adjusted by trimming along the entire length. Sometimes the finishing panel, like the first one, is fixed with screws, but this is not necessary.
Stage #4: Installation of spotlights
The installation of spotlights should begin before installing the panels, after the frame structures have been installed. At this stage, it is necessary to install electrical wiring to each lamp whose installation is planned.
It is recommended to leave the cable with a good margin, since cutting off an extra piece will be much easier than extending the missing one. Since the installation is carried out in the bathroom, it is worth using double-insulated wiring. A plastic corrugated hose will provide additional protection. Upon completion of work with the wiring, you should immediately check its functionality.
The installation of spotlights on a suspended ceiling is carried out after the completion of the main installation work, but you should take care of the necessary electrical wiring even before installing the frame
Holes for spotlights are made in the panels as they are laid. To cut a suitable size hole for the lamp, you can use a knife. Immediately after installation of each panel, the lamp can be installed in place. But usually the wire is simply put out into the holes made.
After all the panels are installed, move on to the lamps. Each of them is connected to the electrical wiring using terminal blocks. Then the light bulbs are inserted, after which the lighting system is ready for use.
The diagonal placement of plastic panels on a suspended ceiling looks very impressive, but is not used often, since installing such a ceiling is a little more difficult
Typically, plastic ceiling panels are laid parallel to the long or short wall of the bathroom. An interesting design option could be the diagonal direction of plastic panels. However, this installation method may require more time and effort, since the ends of the panels will have to be cut not perpendicular to its side, but at an angle of about 45 degrees.
Using plastic panels, you can also make not only a regular ceiling, but also a multi-level ceiling. It may also be interesting to implement the idea of installing plastic panels of different colors or shades.
From plastic panels you can create a beautiful multi-level suspended ceiling, decorated with spotlights. The result is the effect of a “floating” structure, which visually increases the height of the room
Installation of the main frame
To construct the main frame, the following are used:
- traverses (stringer tires) - if the ceiling is finished with slats;
- PP profile 60×27 mm or CD profile - for ceilings made of plastic lining and plasterboard ceilings;
- L-profile - for cassette ceilings.
Symbols for metal profiles
Assembly of the main frame takes place in five stages.
Step 1. Make marks on the walls at the points where the profiles or stringers should be located. The first one can be placed at a distance of 30 cm, and all subsequent ones - in increments of 1 meter. If you plan to use heavy finishing material, such as metal cassettes, the distance should be smaller - about 0.5 m.
Step 2. Mark the ceiling using a painter's cord and attach the hangers to it.
Suspension mounting diagram for mounting a plasterboard ceiling
To do this, tighten the screws in the right places so that they stick out approximately 0.5 cm, and wrap the cord first around the profile at the level at which the end mark is located, then pass it around the screw, and then again around the profile and next screw.
Metal suspension with sound insulation
Step 3. The next step should be to install the suspensions on the main ceiling. Screw the metal profile segments to the ceiling, which will act as hinge joints, and then insert the hanger hooks into them.
Step 4. Attach the profiles or stringers to the hangers. Also, the profiles of the main frame must be fastened to the starting one, the only exception being rack and cassette ceilings - in this case it is not necessary to connect them into a single structure.
A clear example of a slatted ceiling design unit
Step 5. Adjust the length of the hangers so that all profiles or stringers are located at the same level. If you want to get a flat ceiling, you need to approach this step very carefully. To do this, you need to use a mounting thread, securing several of its rows 1-2 mm below the level of the main frame. If one of the profiles or stringers comes into contact with the thread, the suspension or suspensions on which it is supported must be carefully adjusted.
Assembling the main frame
Important! If the stringers you use are shorter than the length of the room, you need to fasten them in one row of 2 pieces close to each other. Then the hangers will need to be placed no more than 30 cm from each of the edges of the traverse.
A short profile can be extended using plug-in connecting elements: the ends of two profiles are inserted into such an element and then mounted using self-tapping screws.
Armstrong ceiling prices
Armstrong ceiling
Drywall
So, what is needed to install a suspended ceiling in a bathroom with your own hands from plasterboard?
Materials
| Image | Description |
PP (bottom) and PNP (top) | Galvanized steel U-shaped profiles of two types - ceiling 60x27 mm and ceiling guides 28x27 mm. In the domestic designation system they are labeled as PP and PNP, in the foreign one - as CD and UD. |
Galvanized straight hanger | Suspensions. As a rule, in the bathroom, with its small distance between the floor and the roof of the bathroom, direct hangers with a metal thickness of 0.5-0.7 mm are used. |
Wall fasteners | Dowel-nails, which we will use to attach PNP profiles to the walls of the bathroom. |
40mm wedge anchor | Wedge anchors size 6x40 mm. The price of one anchor is only 2-4 rubles, depending on the specifics of the local market; At the same time, unlike dowel-nails, anchors hold perfectly in hollow-core floor slabs or in a thin roof of a sanitary cabin. |
GKL ceiling moisture resistant | Moisture-resistant drywall (GKLV). For the ceiling, you can use both ceiling (9.5 mm) and wall (12.5 mm) materials. |
Fasteners for gypsum boards | Self-tapping screws (phosphated or galvanized) 25 mm long for attaching gypsum boards to the ceiling sheathing and 9 mm long for connecting profiles. |
Turkish finishing ABS Saten | Dry gypsum putty. We have to putty the seams between the edges of adjacent sheets and the heads of the screws. |
Self-adhesive serpyanka for seams | Fiberglass mesh intended for reinforcing seams (serpyanka). Without reinforcement, cracks between adjacent edges will appear within a year of ceiling operation. |
Penetrating acrylic primer | Acrylic primer. The penetrating primer will finally prepare the ceiling for painting by gluing the remaining dust after sanding and filling the pores of the gypsum board surface. Thus, it will reduce the consumption of much more expensive paint compared to primer when applying the first layer. |
Please note: it is often practiced to assemble ceiling lathing under plasterboard from a block. However, this solution is not suitable for the bathroom: in a damp room, the wood will inevitably warp, decorating your ceiling with cracks, and will most likely rot. Galvanization is devoid of these disadvantages and will serve indefinitely.
Tools
At different stages of work you will need:
- A hammer drill with a 6 mm drill bit for drilling holes for fasteners;
- Drill-driver. A battery-powered one is better, but the author gets by just fine with a mains-powered tool;
- Two bits for a screwdriver - a regular Phillips (useful for assembling the frame) and a Phillips with a limiter (it will not allow you to twist the screw when filing the gypsum board to the sheathing);
Bits for fastening gypsum boards with self-tapping screws
- Whisk for mixing putty;
Whisk for drill chuck for mixing construction mixtures
- Container for mixing it with a volume of 5-15 liters. A plastic bucket of water-dispersion paint is quite suitable for this purpose;
- Two spatulas - wide and narrow;
- Metal scissors. We will have to cut profiles with them. Abrasive cutting with a grinder with a cutting wheel is contraindicated for galvanizing: heating the edges of the profile leads to the fact that the anti-corrosion zinc coating completely burns out, and the steel begins to rust in the humid atmosphere of the bathroom;
- Knife (stationery knife, shoe knife, linoleum cutter, etc.). We have to cut drywall for them;
Cutters for gypsum boards
- Long steel ruler. It will be useful both when marking and cutting gypsum boards;
However: in the latter case, the ruler can be replaced by a piece of PP profile (PPP does not have the required rigidity).
- Laser or water level. In their absence, an ordinary construction one will do. To mark the position of the guides on the walls, you will have to tape a ruler, a long straight strip or a section of profile to it with tape;
The easiest way to mark is using a laser level.
- Hammer and hammer for attaching hangers and guides;
- A grater or grinder with mesh No. 80-160 for grinding;
- Roller with paint tray or primer brush;
Primer Tools
- Tape measure, pencil and square. They are needed for any markup.
Frame assembly
To assemble a suspended ceiling in the bathroom with your own hands, you first need to mark and mount the frame.
This is done in the following order:
- With an indentation from the ceiling, we mark a horizontal line along the entire perimeter on the bathroom walls. The minimum distance between the ceiling and the marking is equal to the width of the guide profile. It can be increased to install lamps with long sockets for incandescent or halogen lamps, as well as for hidden wiring of ventilation and other communications;
- We fasten the PNP profiles using dowels and nails according to the markings (end-to-end, or inserting the ends of the profiles into each other). The fastener pitch is half a meter. Holes can be drilled directly through the profiles attached to the wall;
Installation of PNP on walls
Attention: if the guides are attached on top of tiles laid on the walls, the tiles must be drilled through the glass before drilling holes. The tiles are drilled at low speeds and with constant wetting of the drill: otherwise there is a risk of overheating its soldering tips or getting a radial crack in an unevenly heated tile.
Pobedite drill bit for glass and tiles
- We mark the position of the CD ceiling profiles. They will be located parallel to the longer edges of the plasterboard sheets in increments exactly equal to 60 centimeters: then the edges of adjacent sheets will converge in the middle of the sheathing profiles;
- We drill holes along the markings and attach the suspensions with wedge anchors. The step is the same - 60 centimeters;
Installation of suspensions (in this case, noise-insulating ones, with a vibration-damping insert)
- We cut the ceiling profiles to length one by one and insert their ends into the PNP fixed to the walls. If the span between the guides is large enough for the sheathing elements to sag, we press them to the ceiling and fix them by bending the ears of the straight hangers;
- Alternately align the PP along the ruler and screw the hangers to the side walls of the U-shaped profile, bending upward the remaining free part of each ear;
The free part of the hangers is bent towards the ceiling
Hint: when spanning more than 2.5-3 meters (yes, there are bathrooms of this size in cottages), it is easier to align the profiles not with a ruler, but with a string stretched at right angles to them between the guides.
A cord stretched between the guides will help align the sheathing in a horizontal plane.
- We use self-tapping screws to tighten the guides to the ends of the PP profiles.
The guides are screwed to the sheathing profiles
Frame covering
How to install gypsum board and fix it to the ceiling lathing?
The sheet is lifted, aligned with the wall and/or the edge of the adjacent sheet and screwed with self-tapping screws. Fastening is carried out to all profiles covered with a sheet of plasterboard, including those located along the perimeter of the PNP.
Preliminary marking of the profile axes will help you screw in the screws correctly
A caveat: it is physically impossible to hold a full-size (2.5 x 1.2 meters) sheet under the ceiling, level it and screw it at the same time. You will have to resort to the services of an assistant or use improvised supports made from a block, board or profile.
Supports made from scrap materials will help secure gypsum boards to the ceiling without an assistant
A few subtleties of filing gypsum boards to the sheathing:
- The screws are screwed in so that the cap is recessed by about a millimeter relative to the surface of the cardboard shell. In this case, the cardboard should not break through: in this case, the strength of the fastening will suffer. The required screw-in depth can be achieved using the already mentioned bit with a limiter or the ratchet setting of a screwdriver;
- Avoid screwing fasteners near the edge of the sheet (closer than 2 centimeters): it may crumble;
- Don't be afraid to leave a gap where it meets the wall or between the edges. The junctions will be covered with ceiling moldings, and we will have to putty the seams.
The baguette hides the junction of the ceiling and the wall
How to cut gypsum board?
When cutting straight, the sheet needs to be cut along a ruler and broken off at the edge of the table, after which all that remains is to cut off the cardboard shell from the back. The advantage of this cutting method is the minimum amount of dust rising into the air.
Cut and break off
Curved parts and holes (for ventilation grilles, lamps and hatches for servicing utility networks) are cut out with a jigsaw. Round holes for spotlights can, in addition, be cut with a crown of the appropriate size (including after the sheet is fixed to the frame).
Crown according to gypsum plasterboard
Pre-finishing
How to prepare a plasterboard ceiling for painting?
- Use a knife to chamfer 1/2 - 2/3 of the thickness from the edges formed when cutting the gypsum board. Jointing allows you to fill the joint as deeply as possible when filling;
Chamfered edges
- We glue the seam with sickle and immediately apply the first layer of putty, filling the seam directly through the reinforcement cells;
Embroidered seam reinforcement
- After drying the putty, apply a second layer, completely hiding the sickle;
Please note that the seams between the factory edges PLUK (short for “semi-circular thinned edges”) after puttying are flush with the surface of the ceiling. The seams between rectangular edges (including those obtained when cutting plasterboard) protrude above the surface of the sheet thanks to putty and reinforcing material. This problem is solved by applying a continuous millimeter layer of gypsum over its entire surface.
Reinforced seam between sheets with PLUK edges
- We sand the completely dried putty (if possible under oblique lighting, which will highlight all the putty defects);
Oblique lighting of the ceiling emphasizes its unevenness
- Sweep the ceiling from dust and prime with primer.
Primer before painting
Construction of an additional longitudinal frame
An additional frame is usually made from profile sections. They are connected to the main profile at an angle of 90 degrees so as to form quadrangles. The longitudinal frame can be secured to the main frame using special locks. If drywall will be attached to the frame, the additional frame is attached to the base frame using special crabs. They are put on the main profile from above, after which an additional profile is applied, the antennae are bent and screwed onto self-tapping screws.
This is what a finished frame looks like for installing a suspended ceiling
What to look for when choosing a kit for a slatted ceiling
The best option is expensive aluminum slats. Steel and plastic are cheaper, but less durable. It is also necessary to consider the arrangement of ventilation. Before purchasing materials, the bathroom space is measured and the number of products is calculated. You need to do this correctly:
- the direction of the slats is selected;
- their width;
- manufacturer.
Aluminum slats.
To create less visibility of gaps, the panels are placed parallel to the view. A longitudinal arrangement visually lengthens the room, while a transverse arrangement makes it wider. Contrasting color inserts enhance the effect.
You can arrange the parts diagonally, but this is a difficult task and not always accessible to a novice craftsman. You should not choose panels of large width, they look ugly. A good option is 70-100 mm. When purchased, panels must be wrapped in film.
Attention is also paid to the manufacturer of the product. The products of the French company Cesal and the Dutch company Hunter Douglas are in greatest demand.
Attaching the slats to the frame
Step 1. Calculate how many slats will be needed to cover the entire ceiling. If necessary, cut the last of them lengthwise so that it fits clearly between the penultimate batten and the wall, closing the remaining gap. A plastic panel must be cut with a special knife; for a metal panel, you will need a metal knife.
Slat ceiling installation diagram
Step 2: You may also need to trim the slats to length. They will fit into the end profile more easily if they are 3-5 cm shorter than the length of the room.
Step 3. Cut holes in the panels for the lights. To do this, you can use a jigsaw, knife or metal scissors.
Step 4. Place the first strip on the stringer so that it fits into the profile mounted on the wall.
Step 5. After this, one by one, insert all the other slats into the end profile, turning them slightly in a diagonal direction, and attach them to the stringer, pressing until they click.
Step 6. Immediately after you install the panel with the hole for the light, run the pre-wired wire through it.
Sequence of installation of a rack ceiling
Step 7. If the ceiling design you choose involves the use of interpanel profiles, install them during the installation of the slats. In order to do this, you must first pass one end between the panels, and then the other, pressing on it so that the element fits securely into place.
Step 8. The final step is connecting the lamps and installing them in the prepared holes. To install the lamp, you need to squeeze the antennae, insert it and press well.
Make a hole for the lamps using a cutter of the required diameter
Prepared hole for lamp
At this point, the installation of ceiling slats can be considered complete.
Covering installation
As already mentioned, the ceiling can be finished with slatted or plastic panels, plasterboard or cassette slabs. Installation of each type requires special attention.
Fastening the slats
Before you start covering the ceiling with slats, you should calculate the amount of material needed. The last panel usually does not fit completely into place, so it is cut lengthwise to fill the space between the wall and the penultimate panel without a gap. This is done with a special knife, and metal slats with steel cutting scissors. The length of the slats is also taken into account, which, if necessary, is cut for better placement on the ceiling.
Chain of actions for attaching panels:
- Before installation, a hole is cut out in the panels for the lighting fixture. This is done using a knife, metal scissors or a jigsaw.
- The first rail is inserted into the wall profile at its ends and put on the stringer.
- The remaining panels are dealt with in the same way, one after the other and attached to the stringer. The rail is secured under pressure until a clicking sound is heard.
- Once the panel with the hole for the lamp is installed, an electrical wire is passed through the drilled hole.
- For open-type structures, it is necessary to attach interpanel inserts.
- The final step is to install the lamps in the prepared holes.
Plastic panels
A simple diagram of actions allows you to understand how to make a suspended ceiling in the bathroom using plastic panels.
It looks like this:
- To begin with, attach a special ceiling plinth with grooves to the wall into which the first panel will be inserted. Or they set the starting level.
- Install the initial panel into the grooves of the baseboard. To do this, first insert one end, then the other, into the grooves of the plinth, press the product tightly and fix the outermost side with self-tapping screws.
- The next ones are laid out using the same method.
- If the last panel does not fit, it is cut to the required dimensions and inserted tightly. At this step, installation is considered complete.
Drywall sheets
According to the installation rules, sheets cannot be attached to the frame close to the wall; a gap of 2-3 cm must always be left. They are mounted in a checkerboard pattern so that the joints do not coincide. The whole sheet should be in the first row and only ½ of the sheet in the second.
To install plasterboard sheets on the frame, you will need to complete several steps:
- Drywall is adjusted to the required dimensions, laid on a convenient surface and marked with a pencil. When the measurements are taken, a line is drawn along which the cutting is done with a mounting knife.
- The sheets are fastened using self-tapping screws installed at a distance of 20 cm from each other.
- After finishing is completed, the drywall is primed.
- As soon as the primer has dried, the seams, places where screws protrude and joints along the walls are sealed with putty.
- After this, the ceiling surface is painted or wallpapered. Install skirting boards.
It is more convenient to assemble drywall with an assistant. If this is not possible, then use supports in the shape of the letter T, which will hold the sheet until it is secured. During installation, self-tapping screws are used for fastening. It is desirable that the caps of the fastening elements are flush with the ceiling.
Cassette slabs
The cassette ceiling is quite easy to assemble. First the main frame must be completed. For an open type of frame structure, the cassettes are laid out on top in cells. If necessary, the material is cut using a convenient method. If it is mineral fiber, use a jigsaw. Mirror and glass cassettes are cut with a glass cutter treated in kerosene.
If a closed type system is used, steel and aluminum cassettes are installed on it. In this case, a fastening mechanism is provided on the ribs, with the help of which the products are attached to the frame. The cassettes are laid out one after another, in strict sequence, starting from the outermost row.
From the finishing methods discussed, we can conclude that installing a suspended ceiling in a bathroom or toilet is a simple process. All that is required is to mark and follow the laying technology step by step. For people with no experience in this area, the procedure may take a little longer, but the results will last for years to come.
Installation of plastic panels on the frame
Plastic panels are similar to slats, but they are attached differently.
Step 1. First of all, you need to fix the starting strip or a special ceiling plinth with a groove for attaching the panel near the wall.
Step 2. Next, you need to install the first panel, first inserting one, then the other end into the groove of the baseboard or starting strip and pressing firmly so that the product fits securely. The fourth side must be secured with self-tapping screws.
Installation of plastic panels on a metal frame
Step 3. All subsequent panels are installed in the same way, one after another.
Step 4. If the last panel turns out to be too wide, it will need to be cut with a jigsaw or grinder, adjusted to the desired size, and installed like all the others.
Advantages and disadvantages of slatted suspended structures
Ceilings have many advantages and disadvantages. The advantages include:
- ease of assembly and disassembly;
- moisture resistance;
- low manufacturing costs;
- there is no need to repair the main ceiling;
- ease of construction;
- the ability to hide communications;
- use at any temperature;
- long service life;
- environmental Safety;
- the design does not require special care.
The ceiling surface is freed from mold and primed with an antiseptic. All irregularities will be hidden by a suspended rack structure. It does not require high power fasteners. The lightness of the slats does not give rise to fear of unexpected destruction of the structure. Ventilation ducts, electrical cables and other engineering equipment can be hidden behind the newly created decking.
The suspended structure is used for any temperature and humidity readings. Aluminum parts last more than 20 years, steel and plastic materials - a little less. The panels do not accumulate dust and are easy to clean with wet cleaning.
The disadvantages include:
- the space between the base and the slatted covering is a convenient place for mold to develop;
- the height of the room decreases;
- relative high cost of materials.
The space near the ceiling must be ventilated. This will protect the walls from mold. The height of the room is reduced by at least 5 cm. When installing lighting equipment - even more.
Assembling a suspended ceiling from plasterboard
Installation of plasterboard sheets onto a prepared frame takes place in five main stages.
Step 1. If necessary, you need to cut the finishing material to the required size. To do this, you need to put it on the floor and mark it with a pencil. Having made the necessary measurements and drawn a line along which the cutting will be done, you need to attach a metal ruler to this line and, holding it firmly with your hand free from the mounting knife, place the tip of the knife on the line. It is not necessary to use a metal ruler; any substitute with a sharp edge will do. Being careful, you need to cut the cardboard exactly along the line. After this, you only need to trim it at the bend.
After this, you only need to trim it at the bend.
The cut sheet is bent and finally cut at the fracture site
Step 2. Drywall must be attached to the frame using special screws. They should be placed at a distance of 20 cm from one another.
Step 3. After all the panels are installed, they must be covered with primer.
Step 4. When the primer dries, you need to seal all seams, joints along the walls and places where self-tapping screws entered the plasterboard sheets with putty.
Prices for jigsaws
jigsaw
Installation of drywall sheets
The final steps are leveling the ceiling if necessary, painting and gluing the ceiling plinth.
Installation of plasterboard sheets
To cut sheets of moisture-resistant drywall, it is recommended to use an electric jigsaw with a metal file. The cutting process is accompanied by the release of a large amount of gypsum dust, so it is very important to carry out such activities in rooms with good ventilation.
Fixation of gypsum boards is carried out using special self-tapping screws, which have an oxidized coating, a double-start thread, notches for countersinking and a countersunk head. The pitch between fasteners should be 25-40 cm.
The final stage of installing a suspended ceiling in a bathroom from sheets of moisture-resistant plasterboard in the bathroom is treatment with putty. For flawless operation of the ceiling in extreme conditions, it is necessary to use moisture-resistant compounds. It is recommended to apply putty to the surface using a rubber or metal spatula. The joints of plasterboard sheets should be taped with sickle tape. The applied layer of putty must be thoroughly dried, after which you can begin sanding the treated surface and finishing it.
Installation of cassette suspended ceiling
Once the frame is assembled, installing the cassette ceiling is very simple. If you have chosen a ceiling with an open frame, the cassettes must be placed on top in the cells. If necessary, they must first be cut to the required size: mineral ones can be cut with a jigsaw, glass or mirror ones can be cut with a glass cutter soaked in kerosene.
Cassette suspended ceiling
Another option for a cassette ceiling in the bathroom
White cassette ceiling
Suspended cassette ceiling
For ceilings with a hidden frame, aluminum or steel cassettes are usually used. There are special fasteners on their sides with which they are snapped to the bottom of the frame. You need to start with the outermost row, and then add subsequent rows one by one.
How to attach PVC panels to the ceiling?
You will find detailed instructions here. You will also probably be interested in an article about the technical characteristics of the Armstrong suspended ceiling.
At first glance, it may seem that installing a suspended ceiling is a complex and time-consuming process, but in reality this is not the case. You just need to start by purchasing the necessary materials and making markings on the ceiling, and then do all the work step by step, avoiding unnecessary haste and following the correct technology. If you do not have experience installing such a ceiling, it can really take quite a lot of time, but you will certainly like the result - a new beautiful ceiling will be pleasing to the eye and will serve you for many years.
Fastening guide profiles
Installing guide profiles to create a suspended ceiling in the bathroom with your own hands is also a crucial moment. Before installation, the level at which it is planned to place the suspended ceiling system is marked on the walls around the perimeter of the room.
Metal guide profiles are attached using similar technology and using the same tools as for installing hangers. The lower edge of the metal profile should be located on the line that determines the level of the future structure. When installing guide profiles, their side shelves should be turned inward.
How to disassemble a slatted ceiling
Sometimes it is necessary to dismantle a ceiling assembled from slats. This happens when the panels are damaged. It's easy to disassemble. This will require an hour of time and a simple tool:
- knife;
- wrench;
- screwdriver;
- screwdriver
First, the lamps are removed and the wires are insulated. The corner is removed from under the flooring. The inserts and slats are removed using a wide knife. This is done carefully so as not to damage the parts. If necessary, remove the hangers using a screwdriver. Damaged panels are replaced and the disassembled part of the ceiling is reassembled.
Assembling the frame base
We fix the base profiles on the walls with self-tapping screws. We attach hangers to the ceiling slabs. We bend their side parts down vertically. We attach the sheathing profiles to the base profile and hangers. For a small area, two or three planks are enough. Installing cross bars will give the frame additional strength. Then, using a level, you need to check the horizontalness of the base. If there are no deviations, you can proceed to the next stage.
Installation of a slatted ceiling in a bathroom
Sheathing with plasterboard
First you need to cut the sheathing parts of the required size from plasterboard sheets. To cut the sheet, you need to make a shallow cut with a cutter along a ruler, cutting through only the top cardboard layer. Then bend the sheet, breaking it along the cut line and cut through the bottom cardboard layer. It is better to immediately clean the cut area using a plane. Holes for spotlights are made using a drill and a crown of the required size.
The plasterboard is attached to the frame with self-tapping screws 25 mm long. They must be screwed in with a screwdriver so that the caps remain on the surface and do not break through the cardboard. Having completed the complete covering, it is necessary to perform additional surface finishing. Why seal the seams between the sheets and all the screw heads with putty. After it is completely dry, it is sanded so that the base becomes perfectly smooth. Coating the surface with an acrylic primer allows you to create additional protection from moisture. To paint the ceiling in the bathroom, use interior paint. It holds up well in high humidity conditions.