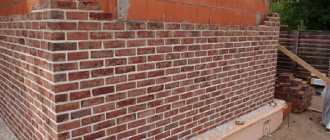
How many bricks are needed for a 2m fence post?
How many bricks do you need for a 2 meter high fence post?
A fence post 2 meters high can use a different number of bricks, it all depends on the size of the material, the thickness of the seam (horizontal seam is taken into account) is on average 12 mm. For 1000 mm of height, on average, 13 rows of single bricks with a height of 65 mm or 10 rows of thickened bricks with a height of 88 mm are required. For a fence post, there must be at least 4 bricks in one row. As a result, we get that for a two-meter pole it will go:
- single - 104 pcs.;
- or thickened 80 pcs.
It is most acceptable to make such a 2-meter column of bricks, lining a vertically placed metal pipe securely fixed in concrete. The brick lining goes like this:
Here it is important to maintain the same seam gap between the bricks, which is achieved using metal rods (5-8 mm), and it is also necessary (after laying the first layer) to use a level and carefully check the horizontal position. The gap between the pipe and the bricks is filled with concrete.
Accordingly, counting the number of bricks is simple; the main thing is to know the thickness of the brick and take into account the error in laying the mortar - at two meters a certain thickness will “drip”.
Let's turn to the GOST we need:
There is a corresponding table for sizes:
From the table data we find that the thickness will range from 55 to 88 mm. One row is laid out of 4 bricks, for convenience in calculations we take a thickness of 65 mm. The thickness of the seam is usually from 8 to 12 mm (depending on the type of mortar), let’s take the average - 10 mm. Total: brick with mortar -75 mm. Now we divide 2000 (conversion of 2 meters to mm) by 75. We get 26.7 - round down, because at the very top a solution (10 mm) is not needed. Now all that remains is 26 (number of rows) multiplied by 4 (number of pieces in a row). The final figure is 104 pieces.
In my case, and I installed fence posts using the very minimum version of 2x1.5 bricks, with a brick thickness of 65 millimeters and a joint thickness of 10 millimeters, 84 bricks were needed for each linear meter of the fence, that’s 14 rows of brickwork.
For the same 2-meter fence, it will take approximately 162-168 bricks (let me remind you that my brick was 6.5 centimeters thick.
But it is better not to use this figure, since the quantity is influenced by factors such as:
1) Laying option, and in the standard there are 3 options - 2x1.5; 2x2; 2x2.5.
When laying out 2x1.5, the number of bricks per row of masonry is 6 pieces
When laying out 2x2, the number of bricks per row of masonry is 8 pieces
When laying out 2x2.5, the number of bricks per row of masonry is 10 pieces
There are also other options where 4 bricks or even 18 pieces are involved, as well as options when the pillar is not solid, but simply lined with brick, and inside there is, for example, a pipe.
2) The thickness of the masonry joint, which can be from about 5 millimeters and reach 30 millimeters, and this is an average difference from 7 to 30 centimeters per meter of pillar, which can equal from 1 to 5 bricks.
3) Size of brick used. This factor can bring down all of the above, since the thickness of the brick varies from 5 to 15 centimeters, i.e. 3 times.
In order not to make a mistake when buying bricks, you need to create a formula:
Calculation of a brick fence
Instructions for the brick fence calculator
Specify the parameters of the fence section and fill in the dimensions in millimeters:
X – The span length is selected as a multiple of the brick length within the range of 2500-6000 mm.
H – The height of the post is determined based on the overall design of the fence.
T – Pole laying. Here you should choose one of the proposed masonry options 1.5x1.5, 1.5x2 or 2x2.
Y – The height of the fence is selected taking into account the recommendations of SNIP 30-02-97 * “Planning and development of territories of gardening associations of citizens, buildings and structures” (as amended from 03/12/2001). The height of the fence on the side of the street and public areas should not exceed 2200 mm to ensure normal illumination of streets, driveways, and sidewalks. For fences in adjacent areas, the maximum fence height is 1500 mm. Fence height standards may also be set by the local administration of your region. In any case, a fence that is too high can cause inconvenience to neighbors, even if they did not show dissatisfaction at the stage of its construction; it is better to agree on everything in advance (in paper form, if possible).
Z – The thickness of the fence depends on the method of laying (120-500 mm).
S - The height of the base is chosen based more on aesthetic considerations.
W – The thickness of the base is selected at the marking stage and is equal to the thickness of the pillar, depending on the type of its masonry.
N – Foundation width: determined by the width of the pillar.
P - The depth of the foundation depends on the type of soil, its bearing capacity, and the height of the fence. To prevent heaving forces, the foundation depth is often chosen below the soil freezing level, but this is quite expensive and does not guarantee the longevity of your fence. A shallow strip foundation ( P = 150-400) is considered optimal, which can be arranged in the presence of good soil with a low groundwater level, having previously prepared the base from sand and crushed stone.
с*2000/(a+b)
In which all calculations are made in millimeters
2000 is the height of the fence post
a - brick thickness
c is the number of bricks in one row.
There is a brick 71 millimeters thick, we chose a 10 millimeter seam between the bricks, a 2x2 masonry option, i.e. 8 pieces in a row.
Let's put everything into the formula
Since the number 197 is not an integer, but only approximate, it must be divided by the number of integer rows obtained from the segment of the formula (2000/(71+10)), which in our case is equal to 24.
So, 24 rows of 8 bricks per row, in total we get that a fence post 2 meters high will include 192 whole bricks.
It should be taken into account that in order for the fence to be exactly 2 meters, you will have to increase the seam between the bricks, or make a cement cap on top.
Material calculation
Let's figure out how to correctly calculate a brick for a fence post. First we need to decide on the height of our support. The higher the column, the greater the required number of bricks will be. Another value that you will need to decide on is the perimeter. Typically, the cross-sectional size when laying columns is 1.5-2 bricks. We have decided on the height and perimeter of the column, now we need to calculate the amount of material required for laying one support. For a pillar 380x380 mm made of facing brick, the size of which is 250x120x65 mm, when laying one and a half bricks per row, 4 pieces are needed. We divide the height of the pillar by the height of the brick and get the number of rows in our support. We know how many pieces are needed per row, we multiply this quantity by the number of rows and get how many we need per column. Having received the number we need, it is important not to forget to add a margin to it, because the brick may be broken. So, we found out how much material we need per pillar.
The complete fence looks very massive and is very expensive. Therefore, at present, an alternative to this structure is to use supports made of this building material in the form of columns, and the gaps between them are filled with another material. For example, fences made of corrugated sheets in combination with brick posts are very popular - this is an attractive and economical option. First of all, let's look at what a brick pillar is. This is a metal pipe that is lined with brick. All such supports must have a core for strength. Accordingly, the materials we will need are brick, steel pipe, and reinforcement (for reinforcing the pillar). To prepare a concrete solution, you will need cement, sand, crushed stone, or you can purchase a ready-made special mixture intended for laying bricks.
How to calculate a brick for a fence
How to calculate bricks for a fence, examples, tips, calculations.
To protect their territory from animals or thieves, people have been using fences since ancient times. In addition, it is also, one might say, the calling card of a private house, plot, cottage or hacienda.
The modern market is ready to provide a variety of materials for fencing construction:
- stone,
- tree,
- siding,
- Rabitz,
- corrugated sheets and more.
However, brick is most in demand. After all, in general, this is a universal material with high wear resistance. A variety of shapes and installation methods allow you to create a unique architectural ensemble that will fit into any area and look good with any buildings.
In addition, the fence can be entirely brick or, for example, have brick posts in combination with other building materials. Depending on which option was chosen as the project, you will need to figure out the amount of material needed to construct the fence.
In this article you can learn how to calculate bricks for a fence.
Brick fence calculator
A brick fence can rightfully be called the standard of strength, reliability and durability.
It is ideal if you want to protect your countryside or garden plot as much as possible. Such fences can be “deaf” or “semi-deaf”. There are many design solutions, since bricks of various colors and sizes are used in the construction of structures; it is also possible to use individual decorative elements, several technologies and masonry options. The cost of such fences is high, this is due to the labor intensity of their construction and the prices of materials. At “Fences for You” you can order the production of fencing on acceptable terms.
How to calculate the cost of a brick fence using a calculator?
The price of a brick fence can vary widely; it directly depends on the size of the structure, the masonry technology used, as well as the design. You can determine the approximate cost using a special program on the website. To do this, enter the following parameters into the calculator form:
- height of the structure;
- fence length;
- number of wickets and gates.
To calculate the exact price and place an order, contact a specialist by phone. The manager will answer your questions, set approximate deadlines and provide professional advice.
Cost from 9000 per m/p
| Call any of the numbers listed: | ||
| +7 | +7 | |
| +7 +7 | ||
All texts published on this website are the property of Fences for You LLC. Please note that this website is for informational purposes only and under no circumstances constitutes a public offer as defined by the provisions of Article 437(2) of the Civil Code of the Russian Federation.
- home
- Our works
- About company
- Reviews about us
- Guarantees
- Calculator
- Measurer
- Contacts
- Metal picket fence
- European picket fences
- Corrugated fences
- Prices for a European picket fence
- Prices for monolithic strip foundation
- Fences with brick pillars
- Fences on a strip foundation
© 2006 - 2021 Fences for You LLC Address: Russia, 117216, Moscow, st. Starokachalovskaya, 16
What affects the amount of materials required
In order to calculate the brick for the fence, as well as the approximate amount of other additional materials, it is worth considering several important points:
- Height of the fence.
- Use of additional materials (siding, chain-link mesh, etc.).
- Type of foundation.
- What will be used as a material to fill voids in a brick column. That is, you need to choose which pipes will be used: rod or longitudinal.
- How many columns and spans will there be in the fence?
- Seam thickness.
- What kind of reinforcement will be used - mesh or rods.
- The nature of brickwork and seam dressing.
Is it possible to save money?
Quite a few factors influence how many bricks are needed per fence post if you plan to build a full-fledged brick fence or in combination with other building materials.
- Type, height and length of fence.
- Step between columns.
- How many gates and gates are planned to be installed?
In particular, how many bricks are needed for a fence post is influenced by its type, installation method and the nature of the masonry. This is where you can save a little money. How to do it?
So, in order to calculate the amount of bricks per fence post, it is worth remembering that the support posts must be reinforced. Otherwise, you may end up with unwanted material overruns.
To obtain a stronger brick pillar, it is best to place rod or tubular type reinforcement in the middle of the support. The best option is to place them below the soil freezing level and concrete them.
Carrying out calculations
Now let's move on to what you need to know to calculate the number of bricks per fence. So, first you will need to take measurements of the site boundary (perimeter). To calculate it, add the length of each side of the plot.
After calculating the perimeter, it is worth deciding on the desired height of the fence and posts. Next, depending on the complexity of constructing the future fence, a sketch or schematic drawing is created, indicating all dimensions and distances.
Materials and equipment
Of the construction tools we will need: a level, a trowel, a trowel (with its help it is good to apply and remove excess mortar). Gloves are required, as cement is harmful to the skin of your hands. We will also need shovels, preferably shovels and bayonets. They will be needed when filling up bulk materials, preparing mortar for laying bricks and for excavation work when preparing trenches for pouring the foundation. We also need a container for preparing concrete mortar. If you have a concrete mixer, this will make your work much easier. If not, you can use an old bathtub or make a container yourself. You will also need buckets to carry the solution to the masonry site. If the column is high, then scaffolding will be needed to carry out the masonry at the required height.
Design and calculation of material quantities
At the design stage, it is necessary to determine the location of the columns and thus find out their number. This data will help you calculate how much brick is needed to build a fence. It is better to carry out planning directly on the site and here is what they do for this:
- At the corners of the fenced area, wooden pegs or metal pins are driven into the ground.
- A cord is pulled between the pegs, which will mark the outline of the future fence.
- Pegs are installed along the cord, indicating brick pillars for gates and gates.
- From the range of 2–2.5 m, choose a length of spans such that a whole number of them fit in the spaces between the already installed pegs.
Brick fence calculator
Each homeowner must be able to independently calculate the required amount of building materials during the construction of any suburban real estate project. Only then will it be possible to protect yourself from deception by an unscrupulous contractor. Although a school course in exact sciences is sufficient for this, it is better to calculate bricks for a fence online using the calculator on the website. The main thing in this matter is to scrupulously enter all the necessary information. We will look at which ones in more detail in this article.
Online calculator for calculating a brick fence
Before you calculate the number of bricks for a fence using an online calculator, you need to clearly define its parameters. You will need to know the height of the spans and pillars along with the base, the number of brick rows for the construction of the fence. The calculator will help determine the volume of each pillar and calculate how many bricks will be needed to build a support. With its help, the width of the span between the pillars and the number of bricks for this fencing element are specified. Also in the calculation you need to indicate the height of the foundation, the number (n) of rows in it.
When you manage to calculate the amount of bricks using a calculator, it is recommended to make a small reserve (about 10%) in addition to the obtained value, since the product may have defects due to production reasons, and damage is inevitable during unloading. Although it is quite difficult to build a brick structure on your own, knowing clearly how much is needed and what to purchase, it is easy to do.
General rules for calculating bricks for a fence
What exactly do you need to know in order to correctly calculate everything that is required to build a brick fence? First you need to measure the dimensions of the site (its perimeter). To calculate the desired value, add the lengths of the sides together.
Once the perimeter has been calculated, the desired height of the fence and posts should be determined. Then draw a sketch or diagram of the structure, indicating all the distances and dimensions on it.
Attention! Don't forget about the space for the gate with a wicket.
Separately, you need to calculate the pillars. If the design assumes their dimensions are 38*38 cm, and the building material will be used with dimensions of 25*12*88 cm, then the minimum number of calculated materials for one row is 4 pieces. Finding out the number of bricks per column is simple: just divide its height by the number of rows, taking into account the size of the seam. When the height of the column is 2.2 m, we divide this value by the height of the brick (8.8 cm), obtaining the number 25. That is how many rows there will be in each column. All that remains is to find out how many pieces will go to each support column. To do this, multiply the number of rows by the resulting value of bricks for each row. The result will allow you to understand how many of them will be used for support. The final stage of this calculation is to determine the number of pillars. This is not difficult - the measured perimeter must be divided by the width of the span.
If you decide to have fence walls lined with just such products, you need to separately calculate how many of them will be used for spans. By analogy with the previous calculation, you must first find out the quantity per row of span, and then calculate the rows. By multiplying the number of rows by the number of pieces in each of them and the total height of the span, we get a value that determines how many pieces of product will be needed to construct the section between the pillars. The final touch will be to find out the number of sections: you need to subtract the width of all pillars, gates and wickets from the perimeter of the site, and then divide the result by the planned width of each span.
Foundation
At the design stage, you need to consider the design of the foundation for a fence made of brick pillars. It must be present, in the minimum design - columnar. That is, brick columns must at least rest on and be connected to separate buried concrete supports. This, firstly, will make it impossible for them to tip over, and secondly, it will ensure support on stable ground. It is clear that the top layer, which constantly gets wet and freezes, is not like that.
When building on ordinary soil, the foundation under brick fence posts should be deepened 15–20 cm below the soil freezing depth typical for a given region (can be found in SNiP for construction climatology). If the soil, due to the absence of clay inclusions, has good drainage properties (sandy or rocky), a depth of 80 cm will be sufficient.
To make the support more stable, it can be made expanding downward. In this case, the linear size of the sole is doubled compared to the size of the upper platform, which is the base of the brick pillars for the fence. This technique will be especially appropriate in the case of columns intended for attaching a wicket or gate leaf.
If significant wind loads are expected or sections of the fence will have a relatively large weight, it is advisable to lay a shallow strip foundation 20–30 cm deep under them. For the sections attached to it, it will act as a reliable ballast, and in addition, it will connect the separate foundations for the pillars into a single structure.
Well, under a heavy stone or brick fence you need to build a strip foundation with full depth (below the freezing depth). Posts for a fence made of brick or stone are erected according to the same rules as for lighter canvases.
Having decided on the design of the foundation, it will not be difficult to calculate the volume of concrete required for its production.
Please note the following:
- All foundation elements should be placed on gravel or crushed stone pads 10–15 cm thick.
- A strip foundation must have a reinforcement cage inside.
- Concrete located in the ground must be protected from moisture with two layers of roofing material.
The connection between the fence post and the concrete support is ensured by a steel core that penetrates both elements. For this role, you need to prepare a pipe or 80th channel, sections of which will be welded in pairs into a box. The core must penetrate the foundation almost completely - here it also performs the function of reinforcement.
As for brick pillars, in those of them on which the wicket and gate will be attached, the core must reach the very top; in all other cases it can be 40–50 cm lower than the brickwork of the pillars.
Construction of formwork and pouring the foundation
The foundation is constructed according to the following scheme:
- A hole or trench (for a strip foundation) of sufficient depth is dug.
- Gravel or crushed stone is poured into the bottom and compacted thoroughly (layer thickness is 10–15 cm).
- Board formwork is installed, which needs to be sheathed from the inside with two layers of roofing material.
- A knitted reinforcement frame is installed in the formwork for a strip foundation, and for a foundation under brick columns, a steel pipe or other core is installed plumb to a vertical position. For more reliable fixation in concrete, the core can be equipped with a thrust bearing made of crossed corners or a plate.
- Concrete is poured into the formwork and into the core. If you decide to prepare it yourself, try to rent a small concrete mixer - the work will be much easier. Concrete can also be ordered from the reinforced concrete plant - it will be delivered by automixer. It is better to pour the foundation entirely in one approach.
Freshly poured concrete is pierced over the entire area with a shovel or reinforcement in order to remove air bubbles. After this, the structure is left to mature for 20–28 days, keeping it under polyethylene and periodically watering it with water. The formwork can be dismantled after 10 days.
Advice. If it is decided to make the foundation for a brick pillar without widening, it is easier to make a recess for it using a garden drill. With this tool, 4 or more wells are made, located in a square-cluster manner, and the remaining walls between them are collapsed and compacted.
In this case, you won’t have to bother with the formwork: this function will be performed by roofing material rolled into a box and inserted into the recess.
Construction of pillars
Laying brick pillars begins with laying waterproofing on the foundation. The best protection against moisture is provided by built-up roll waterproofing glued with bitumen mastic. Traditional roofing felt (laid in 2-3 layers) is considered less effective, but will cost less.
Now you need to prepare a cement-sand mortar. It is very important to achieve optimal consistency, for which water is added gradually to the mixture of sand and cement (remember that their ratio is 5:1 or 6:1). The solution should be plastic and at the same time keep its shape well. You can do this test:
- Place a portion of the mixture on any flat surface.
- A trowel is used to make a pattern in the form of a cross.
- Next, this portion of the solution is taken onto a trowel. Normally, the cross-shaped pattern should remain unchanged.
Advice. A little trick will help make the solution more plastic: add 20–30 g of dishwashing liquid or liquid soap to it.
It is highly desirable that the dimensions of the bricks for the fence posts (especially the height) differ by no more than 1–2 mm. If the spread in the batch is too great, it would be good to carry out a selection, that is, select blocks of approximately equal dimensions for each pillar.
False - pillars
Today you can also imitate brickwork. To do this, it is worth purchasing special finishing panels - “pix panels”.
Their advantages:
- Convenient options. The weight of one panel is 500 grams. Dimensions (cm): 38 x 15 x 30.
- Highest resistance to weathering, sunlight and fading
- Huge range of colors and shades.
- Ease of installation.
- Huge savings in finance, time and effort.
- Operating temperature range: - 40 to +60C.
- The minimum service life is 5 years.
Minuses:
- Weak resistance to mechanical stress.
- Lack of products for corner posts. It is required to trim the panels at an angle of 45 degrees and join them along the installation site using strips.
Preparation
Such panels can be mounted to the fence on one or both sides. They can only be used to decorate the front part.
To work you need:
- Corners. Parameters: 2 x 2 x 0.1 cm. The length is affected by the height of the fence.
- Screw screws (for one panel - 4 pieces).
- A screwdriver for screwing them in.
- Construction tape.
The work starts with marking the installation areas for the pillars themselves. Their distance from each other is 3 m. Place two corners there with an external dimension equal to the width of the panel.
Installation
- The corners are attached to the fence canvas (screws are used) and to wooden posts.
- A decorative canopy is placed on the top panel. This panel is attached to the corners located along the height of the fence.
- When gradually lowering down, connect other elements with special locks, and fasten them to the corners with self-tapping screws.
- Wipe the panels with a damp cloth.
1decor.org
How many bricks do you need for a fence post?

