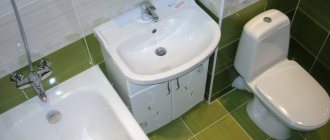
Despite its apparent simplicity, repairing a bathroom in houses of the pre-Khrushchev period is the most difficult and protracted stage of updating the entire housing. And the point here is not even in the sophistication of design or financial problems, but in the minuscule dimensions of the room itself, studded with communications and corners. In order for a “Stalin” bathroom to become close to ideal, a lot of time and effort is spent on preparatory work, or, more precisely, on bringing the pipes into working and divine condition.
Yes, it sounds scary. In practice, a modern, multifunctional and stylish bathtub in a “Stalin” style truly becomes the result of large-scale and high-quality preparatory work. They, and more, will be discussed in this publication.
Work plan
First you need to carefully assess the condition of the bathroom and draw up a renovation plan. The main and most expensive item is replacing plumbing and sewer pipes. Over the years of operation, the pipes rusted and became clogged, the paint peeled off, and indelible rust stains appeared around the risers. Dismantling cast iron elements will require a lot of effort and time, and care must be taken not to disrupt the general sewage system in the house.
Assessing the condition of the walls is very simple: if the surface has minor defects, small cracks or chips, but the finish is holding strong, this means that cosmetic repairs can be done. If the cracks in the walls are deep, the finishing is falling off in large pieces, or there are noticeable irregularities, then more serious measures will be required. You also need to carefully examine the condition of the floor in the room.
Bathroom layout drawing.
It is not necessary to change a durable and even coating; it is enough to update it with paint. Major repairs and complete replacement of the covering are necessary where the floor creaks heavily underfoot, the cladding is only partially present, or there are deep gouges and cracks. Very often it is necessary not only to change the coating, but also to make a new screed, otherwise the new floor will quickly become unusable.
Ceiling decoration has its own nuances. Since Stalinka has ceilings of at least 3 meters high, any surface defects can be covered with plasterboard or a tensile structure. When choosing finishing materials, it is important to take into account the high humidity of the room, so that later you do not have to redo everything again. Drywall, putty, paint, primer - all this should be as waterproof as possible.
Use of liquefied gas
If you have any questions, you can consult for free via chat with a lawyer at the bottom of the screen or call by phone (consultation is free), we work around the clock.
“Problems” with project documentation are not required in the case of using not natural, but liquefied “ballooned” gas. However, in this case the column must have an appropriate design - burners for natural and liquefied gas have different diameters of injector nozzles. Although such equipment is produced by many manufacturers, it is quite rare on sale and is demanding in terms of gas quality.
Preparing the premises
After drawing up the plan, they proceed directly to dismantling. First, turn off the water in the system, take out the bathtub and, using a welding machine or grinder, cut off all the pipes and risers that have become unusable. Do not knock out the remains of pipes from the walls and floor too intensively, so as not to damage the communications in the house. Having closed the sewer holes to prevent debris from entering, remove the old finish from the ceiling, walls and floor. It is recommended to clean the surfaces down to the concrete base, then the new finish will stick much more reliably. Layers of paint and plaster are removed with a metal brush; tiles and ceramic tiles are easier to remove using a hammer drill. To reduce the amount of dust, the walls and ceiling need to be moistened.
If a complete replacement of communications is being carried out, you should decide in advance how the pipes will be attached. Most often, longitudinal grooves are punched into the walls, in which the pipeline will be located. There is another way: the riser pipes are transferred from the bathroom to the plumbing area of the toilet, then there is no need to punch grooves in the walls. When the surfaces are cleaned, you can begin the main process - leveling the floor and walls.
Technology for repairing bathrooms with a geyser
The most important point is the initial installation of the equipment; it is necessary to comply with the requirements specified in the regulatory documents in order to avoid dismantling and for your own safety:
- It is prohibited to place the equipment on a surface covered with flammable material.
- The distance to the side walls must be at least 150 mm
- When installing equipment in a closed type, it is required to be equipped with a recovery pipe
It is impossible to hide a gas water heater technologically; it is permissible to use special niches that visually make it possible to hide the equipment, thereby ensuring a favorable perception of the room as a whole.
Waterproofing and screed
Bathroom waterproofing diagram.
The bathroom floor needs better waterproofing than all other rooms. This will not help avoid flooding, but will reduce damage to a minimum. Waterproofing is laid before the floor is poured with mortar, directly onto the floor slabs. To work you will need:
- putty or tile adhesive;
- primer;
- waterproofing material;
- putty knife.
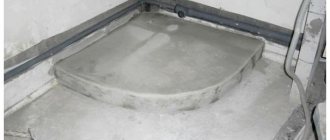
You need to start work by cleaning the surface from dust and sealing the joints. Mix the putty and fill it with all existing cracks, gaps between the slabs and near the walls. Instead of putty, you can use tile adhesive: it firmly adheres to the surface and prevents cracks from expanding. When the putty has dried, the base is coated with a primer. Now you need to cover the floor with waterproofing film. It is laid so that it completely covers the floor and extends onto the walls by about 20 cm around the entire perimeter. Since Stalinka bathrooms are spacious, a whole piece of film may not be enough, and you will have to add another piece. The material must be overlapped and the seam taped.
There is a more effective and durable method of waterproofing - coating the base with a special mixture. To do this, the joints between the slabs and along the perimeter of the room are taped with waterproofing tape, and the base is primed. The dry mixture is diluted with water in a 1:1 ratio, stirred thoroughly and spread over the floor in a not too thin layer. The walls are also covered by 10-15 cm, trying not to leave gaps. After 6 hours, the coating is repeated. You can start making the screed only after a day, when the waterproofing is completely dry.
For screed in the bathroom you should prepare:
Bathroom floor screed diagram.
- solution container;
- cement M 400;
- sand;
- drill with attachment;
- level;
- rule;
- slats for lighthouses.
To prepare a high-quality solution, you need to pour 1 part of cement into a container, add 3 parts of sand, stir well and add water in small portions. Using a drill, knead the mixture until smooth and creamy. Before pouring the mortar, beacons are installed on the floor, securing them with a small amount of mortar with alabaster. The distance between the slats should not exceed 1 m; the slats are installed so that they are in the same horizontal plane.
The solution is poured onto the floor between the beacons and leveled with a rule so that it reaches the top edge of the slats. The recommended thickness of the screed is about 4-5 cm; When pouring, it is necessary to distribute the mixture evenly over the entire area, avoiding the formation of voids.
While the screed is standing and compacting, it should be periodically moistened to avoid cracking.
You can walk on it within a day, but it is better not to put any load on the base for at least 3-4 days. It is recommended to lay the topcoat after 28 days.
Restoration of ceiling and walls
Bathroom ceiling primer scheme.
While the base of the floor dries, you can continue renovating the bathroom. It is necessary to start from the ceiling, otherwise it is easy to damage the coating on the walls. The ceiling has already been cleaned down to the concrete base, so now you need to remove dust, seal cracks, prime and putty the surface. The primer for these purposes is of deep penetration with a water-repellent effect; the putty must also be water-resistant. If the ceiling is covered with plasterboard, after sealing the cracks, the entire surface is primed and covered with one layer of putty. After this, markings are made for the profiles and drywall is attached.
If the ceiling is not planned to be covered with anything, the surface treatment is carried out more carefully. The first layer of putty should be sanded with sandpaper and primed again. Next, apply finishing putty, sand again and prime the surface. You can start painting after the initial finishing of the walls, then you won’t have to wash the ceiling of dust and plaster.
In Stalin, the walls were made primarily of brick, but the internal partitions consisted of boards. When renovating a bathroom, you should replace rotten wood structures with plasterboard partitions. Load-bearing walls should be leveled with cement-based plaster and then covered with tiles, decorative plaster or simply painted. But all finishing work should be carried out only after new communications have been laid. So, first the wall is leveled with mortar, dried, and then the excess plaster is removed and primed. While the ceiling and walls were being put in order, the screed had time to set well, so it was time to pull out the beacons and rub the seams with mortar.
Room decoration
You can decorate the interior of a Stalinka bathroom in different styles, although experts always advise not to get too carried away and try to preserve the atmosphere characteristic of this type of housing. Before starting renovations, you should look at the finished projects in the photo. These can be either Internet resources or the work of design specialists.
Plumbing installation
Bathroom pipe installation diagram.
Now the bathroom is ready for finishing, it’s time to start arranging communications. The hot water supply riser in a Stalin apartment usually passes through the bathroom from the upper apartment to the lower one, which is not very convenient for residents. Cold water pipes are walled up in the wall behind the toilet, at the location of the plumbing closet. For convenience, you can move the riser from the bathroom to the technical area by replacing cast iron pipes with plastic ones. When cutting the riser, pieces of pipe up to 4 cm high are left under the ceiling and above the floor. Special corners are welded to them, in which new pipes are attached. After this, the wiring is connected in the plumbing cabinet and closed.
If moving the riser is not planned, the pipes are simply replaced with new ones and secured in prepared grooves on the walls.
You can strengthen communications using clamps. If the old pipes are in good condition, there is no need to increase repair costs and replace them. In this case, it is enough to clean them with a wire brush, prime and paint.
Then all that remains is to bring in the bathtub and install it correctly, and then connect all the necessary systems.
Useful decoration
The most functional decoration is mirrors, which play a double role, fulfilling their intended purpose and also creating a mysterious atmosphere. The amazing ability of mirrors to immerse us in another world can also be useful in Stalin.
Despite the large area, mirrors will help expand the room even more. Using a mosaic with a mirror surface, you can scatter the tiles across the walls like diamonds. By equipping the appropriate lighting, you will get a precious interior.
Hangers are also necessary, and they must be mounted in close proximity to the bathtub or shower stall. It is advisable to match them to the faucets and door handles to maintain overall harmony. Not only that, the hooks must match the chosen style. If this is a romantic style, then the hooks are ornate. If high-tech, then smooth and angular.