- Why make a podium
- Raising the shower drain level
- Relationship between podium height and unpleasant odor
- How to make a foundation
- Design solutions
- Leak control
A podium for a shower stall, in other words, a foundation, is required in many cases. But most of them relate to the desire to strengthen weak drainage. In addition, there may be a need to strengthen a weak pallet or insulate it. This also becomes a reason to think about how to make a podium for a shower stall with your own hands.
For the most part, manufacturing companies have already realized Russian realities, and each pallet is equipped with legs that allow the product to be leveled. For the reason that most of the population still lives in apartments, within the boundaries of large cities. And he doesn’t want to build anything with his own hands, including the podium. But the height of the legs usually cannot give much gain, and for better drainage you still have to look for at least some kind of stand.
Shower cabin with legs
Podium for shower cabin
How nice it is to take a cool shower on a hot day! And after a hard day at work, relax under a warm stream of water! Shower cabins are a good opportunity to experience such pleasant moments. I must say that this is also an alternative option for many. Some people, in principle, do not accept a bath; for others, the space does not allow them to have one, but a cubicle is quite appropriate. Other reasons also allow the general public to have this miracle of nature - a shower stall. There are so many models! Both with hydromassage and steam functions. Yes, this is no longer a shower cabin at all, but a hydromassage and a steam room! You can even find out the latest news while basking under the running water and turning on the built-in FM receiver.
But now let’s pay attention to installing this device in your apartment
and, in particular, for a situation where the sewer outlet is located quite high and in order for there to be normal flow into the sewer, it is necessary to raise the cabin well above the floor level.
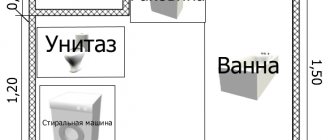
Firstly, why would this happen? The passion for redevelopment, which has literally flooded the minds of many homeowners, leads to the fact that this device for taking a shower and listening to the news can gradually move further and further away from the sewer riser. This means that in order to have a good drainage, the outlet for the sewerage for the shower stall needs to be raised higher and higher. Well, and the cabin itself, respectively.
Another reason is that such booths are installed in places for which they are not intended at all. For example, in many corridor-type dormitories that existed in Soviet times, now they are no longer inhabited by residents with temporary registration, but by owners who managed to privatize the rooms. And the amenities are in the hallway. Some, however, strive to extend water supply pipes and sewerage into their room. Then the issue of personal hygiene can be resolved without going out into the corridor. A shower will help. Yes, a long sewer line again requires an additional rise of such a cabin above sea level.
So, it doesn’t matter why, it’s still important what to do if you need to raise the shower stall above the floor level. A common option when people build a podium for a shower stall
But it's not always that simple
The usual option is when people build a podium for a shower stall. But it's not always that simple.
- firstly - labor costs,
- secondly, an additional headache.
If there is a podium, which one? What it will look like, what shape it will be, and so on. Design, you know, is not an easy thing.
There is also a reason to be wary of this option, since for various reasons such podiums had to be dismantled over time
How to raise a shower stall? What's the alternative?
She is. True, it is not suitable for all models, but for those in which the tray is installed on a metal frame. Such a frame made of a profile pipe has screwed-in legs in the form of studs, that is, threaded rods. These legs, by rotating, can, to some extent, adjust the installation height of the pallet and, accordingly, the cabin itself. But the height changes slightly. Your version requires more. A simple solution looks like this. Buy a stud of the same diameter and with the same thread.
Use a hacksaw to cut the studs to the length you need. Now you throw out the legs that were included and screw in your own.
Of course, leave the rubber supports that fit on the heels and stand on the floor and put them on the new legs. That's all!
The positive thing is speed and pressure! Now you don’t need any podium for your shower stall!
The negative point is that a wonderful gap appears between the pallet and the floor. But it must be said that for many, convenience and simplicity cover up the emerging shortcomings. And if you don’t find fault, then the space between the floor and the pallet can even look quite natural.
It's as if it was meant to be! A design step, you know. What do you think?
Advantages of pedestals for sinks
Despite the simplicity of the design, washbasins on a pedestal look very stylish and beautiful. The main advantages of sink columns include:
- variety of modifications. Today we offer a huge selection of consoles of various designs, colors, shapes and sizes. This opens up wide opportunities for the implementation of any ideas in the design of the room. With such an accessory, the interior will become more refined and sophisticated. A washbasin on a pedestal will fit perfectly into a decor with elements of modern, high-tech, classic, chalet, etc.;
- compactness - the leg takes up little space without cluttering up the usable space of the bathroom. If desired, you can additionally place a couple of shelves for detergents next to the sink support;
- aesthetics - pedestals give a finished look to the washbasin and the entire bathroom interior, hiding service communications from view;
- practicality - less dust accumulates on the water pipes leading to the bowl, splashes of water and other contaminants do not fall on them;
- quick installation - work can be done alone if the weight of the structure allows.
The tulip sink has virtually no flaws. The main thing is to choose the right height and shape of the stand, and then install the product efficiently.
Concrete podium
Sometimes it is best to make a structure out of concrete. This strong, durable material is not subject to deformation and the destructive influence of time. Before developing a concrete elevation, we need to place a pallet in its place, outline its contours with a marker, adding a couple of centimeters on all sides, remove the pallet and start diluting the concrete composition.
Before pouring the solution, you should remove the tiles in the height setting area, if there are any, install a waterproofing layer, make a frame of iron reinforcement and formwork. Then the concrete will take the required shape and cracks will not appear on its surface. Then a place for the upcoming drain is selected.
For the solution, take one part cement, three parts sand and three parts crushed stone. Water at room temperature is added there until the consistency of sour cream is thick. The prepared system for elevation is filled with solvent, taking into account the space for the tiles and how the surface will be laid out. You will need to leave approximately 25 centimeters for it. After pouring the mixture, the layer on top is leveled.
Now is the time to wait 2-3 weeks so that the podium under the shower stall is ready for subsequent work, such as installing a drain system, sealing joints and cracks. Then the drain structure is checked and the tiles are laid. The drain must ultimately be located at the level of the built elevation. When the work is completed, you can install the shower stall.
DIY making
No professional builder is required to make the stand . Before you begin, determine the main and accompanying materials for production. Algorithm of actions:
- Calculate the height of the elevation to avoid stagnation of water in the pan.
- Use a shower tray for measurement. It should be located at a distance of 25 cm from each wall, therefore, the podium is made 25 cm larger on each side.
- Lay the brick stand on the cement mortar and consider the finishing as you wish.
- Made of wood: pre-treat with antiseptics to increase the service life of the material, install a podium, impregnate with drying oil.
- From cement: preliminary work consists of creating plank formwork according to the future size of the podium, install a frame made of reinforcement, fill it with mortar ( cement, sand, crushed stone 1:3:3 ), with a consistency slightly thicker than sour cream, leave to completely harden . Finishing with tiles or mosaics.
- Install the shower using the manufacturer's instructions.
Recommendations for installing a podium under a new shower stall
The comfort and convenience created by installing a shower stall are undeniable.
To construct the podium you will need:
- install the pallet;
- connect it to the drain channel;
- connect the shower to the water supply;
- carry out the necessary electrical wiring;
- install the walls and ceiling panel of the cabin;
- install the doors provided for this purpose;
- secure handles, mirrors and other decorative fittings;
- seal all seams.
However, in the process of implementing such an idea, as a rule, a number of certain difficulties arise. Everything is determined by the fact that the tee, which is used in the sewer system, is often installed high (about 10-16 cm above floor level). In order to obtain a good drainage of water, it is recommended to adhere to the angle of inclination (we are talking about a horizontal section) within 3° and no less. So, using the construction of a special podium is an original and beautiful solution to this issue
At the time of technical calculation of the podium structure, it is worth paying attention to the fact that the length of the gap between its surface and the drain pipe should reach 6-7 cm and no more
Raise the shower stall
The height of the installed shower stall is not enough (the drain “slows down”), so as not to change the studs. Is it possible to place something under the feet of the same height? Do you have scraps of imported non-slip tiles on hand - if you have a couple of pieces about 10x10 cm, will they not roll away over time? And if it’s on tiles, do you need to put it on glue or will it not slide off? Or are there easier ways? Thank you all in advance for your advice.
Had the same problem. I even attached a pump for washing machines to drain. Alas, it didn’t work well—it became airy. The pump did not catch low water levels in the sump. I had to remove the pump, put the cabin on bricks and decorate the front ones. But it became possible to clean under the cabin.
2novosiBEERets Whatever. You practically answered your own question. Glue the tile. Or better yet, like ZeleBoba did.
The brick is flat around the perimeter of the shower stall. Plaster it and cover it with tiles. Put a cabin on this thing.
Brick around the perimeter (podium) - the cabin needs to be removed/disassembled. There is no particular desire to do this. That's why I just want to raise all 5 legs evenly. No additional finishing is required - there is an “apron”. What's the point of gluing tiles? Will it slip? Did anyone have any precedents?
NovosiBEERets wrote: Brick around the perimeter (podium) - the cabin needs to be removed/disassembled.
Then place something of the same thickness under the legs, but it won’t look very good.
Yuri-Electr wrote: Then put something of the same thickness under the legs, but it won’t look very good.
This is the option I am leaning towards. Nothing will be visible under the “apron” - the main thing is that there is no slipping. I tried rubbing two tiles against each other, but they didn’t seem to slide. The floor is similarly non-slippery. As they say, “cheap and cheerful” - don’t buy anything and the labor costs are minuscule, but throwing away tiles and fencing the podium means extra costs and not only time. The main thing now is to find out: has anyone heard about the negative aspects of this method?
How to fix a bathtub on a tiled floor with legs with an adhesive backing
Read the attached instructions and make sure all elements are complete and in good working order. Check the condition of the flooring using one of the methods described above. This type of bathtub can be mounted on both concrete and wooden supporting structures.
Step 1.
Turn the bathtub upside down, make sure that the distance to the drain hole will provide a good connection with the sewer pipe.
Step 2.
Degrease the bottom of the bathtub where the double-sided tape is located. It is better to degrease with special solvents; if they are not available, you can use alcohol or vodka. After vodka, the surfaces must be thoroughly dried. The locations for gluing the tape are marked on the bottom of the bathtub.
Step 3.
Remove the protective oiled paper from the tape on the legs. Carefully place them along the lines and press firmly. Take your time, work with utmost care. If you make a mistake, tearing off the legs will be problematic. In addition, the adhesive surface will significantly deteriorate its original properties and the fixation will be unreliable. You will have to change double-sided tape, but it is quite difficult to find high-quality tape in stores, and you will have to waste a lot of time searching.
Step 4.
Screw the adjusting bolts on the legs until they stop and check their position with a level. They should lie in the same horizontal plane, if this is not the case, then adjust them.
Step 5.
Assemble and install a siphon on the bathtub; the specific algorithm of work depends on the design features of the equipment.
Step 6.
Measure the distance from the legs to the sides, it is needed to mark the location of the side stops of the bathtub.
We have already mentioned that light steel and acrylic bathtubs cannot be attached to the floor with legs alone. This is due to the fact that such structures are very unstable; during use they can tip over or slide on smooth ceramic tiles. It is possible to specifically fix the legs to the floor with anchors only in certain cases for bathtubs installed in the middle of the premises. And it is not recommended to do such work for two reasons: you need a lot of practical experience in installing bathtubs and you have to drill holes in the tiles.
If there is a need to replace or move the bathtub to another location, the drilled tiles must be replaced. This is quite difficult for two reasons. Firstly, most often you will not be able to buy exactly the same tiles to replace; there will be traces of replacement on the floor. Secondly, it is difficult to dismantle well-laid tiles from the base; there is a high risk of damaging nearby ones.
Step 7
On the walls of the room under the level, draw lines at the height of the sides. Make sure all angles are 90°.
Step 8
Temporarily place the bathtub in place and mark the fixation points for the side supports. Move the tub aside and drill holes for the dowels.
Step 9
Apply a layer of silicone sealant along the drawn lines and install the bathtub on the hangers. The thickness of the sealant should be such that all irregularities in the tile are covered. The squeezed-out excess material should be leveled and removed.
Step 10
Finally align the legs and attach them to the floor. If it is made of wood, then just tighten the screws. If the floor is made of ceramic tiles, then for fixation you should first drill holes for dowels and, after installing the bathtub, drive dowel-nails into the plastic parts.
Step 11
Check the tightness of the siphon connection. This can be done under pressure using special equipment or by gravity. Fill the bathtub before the water begins to overflow, place sheets of paper under all pipe connections. Open the valve and wait until the water drains completely. Take out the paper; if there have been minor leaks, wet spots will appear on it. If problems are discovered, they must be corrected immediately.
The final step is installing a decorative screen. It can be made from masonry materials or panels, covered with ceramic tiles or using plastic panels.
Design features of shower cabins
The assembly of the shower cabin itself (the lessons will help you understand the process) is largely predetermined by the type and features of different cabin models.
Main components of shower cabins:
- Pallet (usually equipped with a special frame).
- Doors (check for special fasteners and rollers).
- Cabin cover (also called a ceiling panel; it is not always included in the equipment package).
- Side panels and cabin wall (also depends on the model configuration).
General assembly diagram
The simplest installation of shower cabins, models of which do not have walls or panels (this is the minimum configuration).
To install such a cabin, you will need two walls and a corner in the bathroom - they will serve as the walls of the shower cabin.
All other models of shower cabins are much more difficult to install. Instructions for installing a shower cabin are usually developed by each manufacturer.
But if you purchase a budget model made in China, you cannot count on a detailed description. Therefore, we will use the advice of experienced craftsmen.
A little advice: do the “pre-assembly” in a large room (for example, in a room), where it will be convenient to lay out and assemble everything.
“Preliminary” assembly of the shower cabin with your own hands will help you figure out all the components (it may happen that they are missing, then you will have to buy more), determine the dimensions of the equipment and view their actual location in a permanent place.
Only after you have “tested” everything with your own hands can you begin to install the shower stall in a permanent place.
Photo examples
Photo 1. Shower tray in the bathroom, raised a short distance from the floor.
Photo 2. An example of lifting a shower stall a long distance from the floor level using a brick.
Photo 3. The average height of the podium installed and secured in the corner of the room reserved for the bathroom.
Essential requirements for installing an elevation
Before making a shower stall podium, you need to consider certain points. First of all, you should calculate the distance from the plane of the future structure to the drain pipe. It does not have to be more than 6 centimeters. The height of the elevation must be necessary to ensure that water leaves through the sewer; otherwise, stagnation cannot be avoided
It is also important to leave enough free space between the shower ceiling and the shower stall.
Whether the podium will be closely adjacent to the wall depends on the version and type of cabin model, and the specifics of the room where the system is installed. A weighty device will then be placed on its surface, and therefore the podium must be strong. It is better to cover the part on top with tiles to avoid damage and scratches on the surface of the tray and shower cabin.
Pedestal and half-pedestal - what is the difference
The main difference between these plumbing items is the size. Otherwise, their functions and characteristics are identical. The classic stand looks like a C- or U-shaped column and is used in cases where drain pipes are oriented to the floor.
So-called semi-pedestals are installed under sinks, the communications of which go into the wall. Their length is half that of a conventional console, while the siphon and pipes are also closed. There is free space under the sink that can be occupied by a small laundry basket, shelves for cosmetics, towels, cleaning products and other accessories.
In addition, it takes less time to care for the semi-pedestal. Installation of a bowl with a half-console is possible at any height, which is often used when arranging a bathroom for children or people with disabilities.
When choosing a leg for a sink, you should first of all focus on the style of the plumbing itself:
- for a washbasin with smooth oval shapes, it is better to choose a semicircular console with smooth or embossed walls;
- with a cubic bowl, a rectangular pedestal will look more harmonious;
- triangular models are ideal for corner washbasins.
Pedestal AM.PM Spirit
The average height of the leg is 65-75 cm. Before purchasing an accessory, you should measure the distance from the floor to the base of the washbasin so that the purchased product fits exactly, and the total height of the sink on the support is no more than 85-90 cm - otherwise the plumbing fixtures will be inconvenient to use.
Necessary raw materials and supplies to create a podium
In the process of constructing a podium, you cannot do without the following types of materials:
- appropriate type of brick,
- iron fittings,
- wood in the form of boards for formwork,
- metallic profile,
- beams
- tes,
- construction level,
- yardstick,
- yellow sand,
- crushed stone and silicone sealant,
- markers (black or colored),
- tile.
Wood blocks are an excellent option for building a podium. It is recommended to install a shower stall on them. The space between the floor and the pallet should be covered with plastic. Despite all its simplicity and efficiency, this solution has one significant drawback, the essence of which is the need to constantly treat the wood with an antiseptic. A humid environment has an adverse effect on this type of material during its operation.
Installing a shower drain
The drain is built into the cement podium itself for the shower stall, for which all contours, according to the project, are transferred to the floor and walls, respectively. If necessary, tiles are removed. After completing this procedure, waterproofing is carried out by installing formwork and a metal frame to prevent cracking of the cement. To successfully install the drain, it is recommended to provide space for its installation in advance.
Preparing the solution for pouring
To prepare the mortar for pouring, you need to evenly mix 1 part of cement with 3 parts of fine crushed stone and 3 parts of yellow sand. In this case, water is added gradually so as not to miss the moment of obtaining the consistency of non-liquid sour cream. The condition for correct filling of the prepared solution is also important, i.e. maintain a distance of 25 mm below the level of laying ceramic tiles. To ensure the correct horizontal position, it is checked using a special level.
Once this solution has hardened (about 2 weeks), a drain system is installed and all joints are sealed. It is best to test the functioning of the drain structure before laying tiles on the podium.
Masonry methods
The most common and popular today is the construction of a podium for a shower stall using brickwork. Cost-effectiveness and beautiful outline are the main distinguishing features of this method, which are especially noticeable with a large number of bends in the podium structure. As a rule, a podium of stepped shape and architecture is made for these purposes.
When using and installing a brick structure, it is also recommended to provide for the creation of a drain channel in advance to avoid unpleasant situations. In this case, the brick is laid out over the entire area of the structure. And only after a thorough check and testing of functional readiness are the tiles laid.
It should be noted that at the time of final installation, it is recommended to reliably connect all input and output nodes to certain structural parts, and check the correct functioning of the electrical network.
In addition, assembling the shower cabin on your own must fully comply with the rules and regulations for safe work. And especially when it comes to a hydromassage shower cabin, since both pumps and corresponding compressors are used here. The shower stall must be grounded and equipped with devices for protective shutdown of the electrical network.
Construction of a pallet
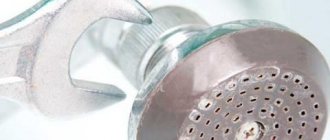
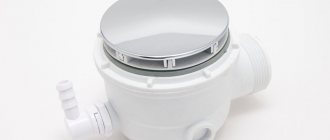
Any pallet, regardless of its manufacturer, consists of such parts as a siphon, outlet, screed and waterproofing. This is required to ensure that there is no effect of constant stagnation of water and rapid clogging of the drain.
In addition, do not forget about the minimum distance to the ceiling. The construction of such a structure should guarantee a retreat of about 20 cm. At the same time, the distance to the wall should be maintained in accordance with the structural requirements of the cabin itself. They are usually indicated in the corresponding instructions for assembling the shower cabin. In accordance with these indicators, the characteristics of the podium are calculated, including its design solution.
Since the load on the podium itself under the shower cabin will be quite serious, since it includes the weight of the shower cabin, the weight of a person and the water used in the tray, the design of the tray should be strong and stable.
In this case, tiles for the podium surface are the most suitable material option.
When installing a podium under a shower stall on your own, you should use such available tools as:
- wooden blocks and plastic;
- concrete solution;
- brickwork.