Can reinforcement be used as vertical grounding conductors?
Where in the PUE does it say that reinforcement can be used as vertical grounding conductors?
PUE, clause 1.7.109. The following can be used as natural grounding conductors: 1) metal and reinforced concrete structures of buildings and structures in contact with the ground, including reinforced concrete foundations of buildings and structures that have protective waterproofing coatings in non-aggressive, slightly aggressive and moderately aggressive environments
;
2) metal water pipes laid in the ground; 3) casing pipes of boreholes; 4) metal sheet piles of hydraulic structures, water conduits, embedded parts of valves, etc.; 5) rail tracks of main non-electrified railways and access roads if there is a deliberate arrangement of jumpers between the rails; 6) other metal structures and structures located in the ground
; 7) metal shells of armored cables laid in the ground. Cable sheaths can serve as the only grounding conductors when there are at least two cables. Aluminum cable sheaths are not allowed to be used as grounding conductors.
GOST R 50571.5.54-2013/IEC 60364-5-54:2011 Low-voltage electrical installations. Part 5-54. Grounding devices, protective conductors and protective potential equalization conductors
INSTEAD GOST R 50571.5.54-2011/IEC 60364-5-54:2002 542.1.4 The following requirements are imposed on grounding devices intended for use in the ground: - they must reliably ensure the protection requirements of the installation; — the flow of ground fault currents and protective conductor currents to ground should not create a danger from heating, thermomechanical and electromechanical effects and the danger of electric shock; — if necessary, they must satisfy functional requirements; — be suitable for external influences (see IEC 60364-5-51), for example mechanical stress and corrosion. 542.2 Grounding Electrodes (Ground Electrodes) 542.2.1 The types, materials and sizes of grounding electrodes shall provide corrosion resistance and the required mechanical strength for the entire service life. NOTE 1 From a corrosion perspective, the following factors may be considered: soil pH, soil resistivity, soil moisture, AC and DC stray and leakage currents, chemical contamination and proximity of incompatible materials. The minimum dimensions of grounding electrodes made of the most common materials in terms of corrosion and mechanical resistance, laid in the ground and embedded in concrete are given in Table 54.1. Note 2—The minimum thickness of the protective coating should be greater for vertical ground electrodes than for horizontal ground electrodes due to the greater mechanical stress when they are buried. Table 54.1 - Minimum dimensions of grounding electrodes laid in the ground from the most common materials in terms of corrosion and mechanical resistance
542.2.3 The following can be used as grounding electrodes: - foundation grounding electrodes embedded in concrete; Note - For further information see Annex C; — foundation grounding electrodes buried in the ground; — metal electrodes buried directly into the ground vertically or horizontally (for example, rods, wire, tape, pipes or strips); — metal sheaths or other metal coverings of cables in accordance with local conditions or requirements; - other buried metal products in accordance with local conditions or requirements. - metal reinforcement of reinforced concrete (with the exception of stressed reinforced concrete) located in the ground.
I will continue this topic a little. After reading various sites and returning here, it became clear to me that the proposals widespread on the Internet for burying triangles with vertical pins on ferrous metal welding do not meet the requirements for ensuring normal grounding due to corrosion. However, there are a number of companies offering “do-it-yourself kits” - a rod system, the total depth of which is increased by screwing new rods onto those already driven into the ground. The rods are made from various materials, for example, stainless steel or copper-plated metal, etc., and have a diameter of 14-16 mm. They write that the system is guaranteed to work for up to 100 years. I just have a question: have you come across this product? I don’t really believe that one such rod, even driven six meters deep, will provide good grounding. Moreover, I did not find information on these sites at what distance from the building it is generally proposed to hammer this work. Please share your thoughts and experiences.
You are talking about a modular-pin grounding system. Electrodes are manufactured in accordance with the requirements of GOST, which is given in the previous message.
This type of grounding is installed quickly and does not require large labor costs for excavation work. Service life of at least 30 years. They lied to you about a hundred years.
The current spreading resistance of the grounding device is standardized and should be equal to a value not exceeding 10 Ohms when the object is powered from an overhead line. The length and number of electrodes are calculated and control measurements are taken during installation. In this case, the grounding device will be guaranteed to perform its function. The distance of the grounding device from the house is not standardized. The grounding loop is installed as close as possible to the separation point of the PEN conductor, which must be made in the ASU panel.
Why you can’t make grounding from reinforcement
Grounding from fittings - can it be done or not?
The grounding device consists of metal rods buried in the ground to a depth of 3 meters. The number of rods depends on many factors, but usually there are 3 of them, and they are connected to each other using a metal strip.
The most effective ways of arranging electrodes are considered to be a “triangle” scheme and a design where the ground electrodes are located in one line. As for materials, a metal corner or rods with a depleted surface are used for grounding conductors.
It is not recommended to use fittings or cast iron products for these purposes.
Where in the PUE does it say that reinforcement can be used as vertical grounding conductors?
PUE, clause 1.7.109. The following can be used as natural grounding conductors: 1) metal and reinforced concrete structures of buildings and structures in contact with the ground, including reinforced concrete foundations of buildings and structures that have protective waterproofing coatings in non-aggressive, slightly aggressive and moderately aggressive environments
;
2) metal water pipes laid in the ground; 3) casing pipes of boreholes; 4) metal sheet piles of hydraulic structures, water conduits, embedded parts of valves, etc.; 5) rail tracks of main non-electrified railways and access roads if there is a deliberate arrangement of jumpers between the rails; 6) other metal structures and structures located in the ground
; 7) metal shells of armored cables laid in the ground. Cable sheaths can serve as the only grounding conductors when there are at least two cables. Aluminum cable sheaths are not allowed to be used as grounding conductors.
GOST R 50571.5.54-2013/IEC 60364-5-54:2011 Low-voltage electrical installations. Part 5-54. Grounding devices, protective conductors and protective potential equalization conductors
INSTEAD GOST R 50571.5.54-2011/IEC 60364-5-54:2002 542.1.4 The following requirements are imposed on grounding devices intended for use in the ground: - they must reliably ensure the protection requirements of the installation; — the flow of ground fault currents and protective conductor currents to ground should not create a danger from heating, thermomechanical and electromechanical effects and the danger of electric shock; — if necessary, they must satisfy functional requirements; — be suitable for external influences (see IEC 60364-5-51), for example mechanical stress and corrosion. 542.2 Grounding Electrodes (Ground Electrodes) 542.2.1 The types, materials and sizes of grounding electrodes shall provide corrosion resistance and the required mechanical strength for the entire service life. NOTE 1 From a corrosion perspective, the following factors may be considered: soil pH, soil resistivity, soil moisture, AC and DC stray and leakage currents, chemical contamination and proximity of incompatible materials. The minimum dimensions of grounding electrodes made of the most common materials in terms of corrosion and mechanical resistance, laid in the ground and embedded in concrete are given in Table 54.1. Note 2—The minimum thickness of the protective coating should be greater for vertical ground electrodes than for horizontal ground electrodes due to the greater mechanical stress when they are buried. Table 54.1 - Minimum dimensions of grounding electrodes laid in the ground from the most common materials in terms of corrosion and mechanical resistance
Basic issues of grounding device
The grounding device requires basic knowledge and an understanding of basic concepts. So:
What is the difference between protective and working grounding?
Grounding (protective grounding) is the connection of non-current-carrying parts of electrical appliances to the ground or its equivalent. When a short circuit occurs, current passes through the human body, saving him and the switched-on equipment, but the entire system stops working.
Working grounding also plays a protective role and controls the normal operation of electrical appliances. This is exactly what is provided in Euro sockets. Permanent working grounding is practically not used in everyday life, but for some electrical appliances it is simply necessary.
What and how to ground?
First group . On the back wall of these devices you can find a special terminal, usually a screw terminal, for separate (direct) grounding of the housing.
But despite this, many manufacturers place it on:
- Washing machine (sometimes dishwasher). It definitely needs to be grounded through a Euro socket, since it has a large electrical capacity and is most often installed in a damp room.
- Microwave. The working source of wave radiation in it is a powerful magnetron, and even with minor wiring defects or poor contact in the socket, it is capable of breaking through.
It is not necessary to trust the installation and connection of a power outlet for an electric stove to specialists; the main thing is to have detailed instructions on hand that will help you figure out what and how to do.
You can learn more about installing and connecting an electric meter by reading this article. After this, you can connect an electric meter with one or three headlights yourself.
Second group . For safety reasons, it is advisable to ground them.
- Induction hob (electric hob) and electric oven. The internal wiring in them operates at high temperatures, and the power is quite high.
- Desktop computer. If you ground the computer's power supply directly (at any screw on the rear panel), this will eliminate not only periodically occurring floating potentials, but also some “glitches” of the computer. Even the Internet speed may increase.
- Hydromassage boxes (especially with steam generators). Manufacturers from China did not bother to worry about safety, so it must be grounded directly from any metal fastening under the pallet.
How many grounding conductors are needed?
Accurate data on the length of grounding conductors and their number require calculations. But one grounding is usually not enough, so you should play it safe and install at least two systemically.
The earth is not a linear conductor, which means that the distance between the ground electrodes must be included in the potential action zone, then their efficiency will increase significantly.
It is impossible to space the grounding electrodes far from each other (or they will work separately from each other), but moving them too close is pointless. The ideal distance between two ground electrodes located at a depth of up to 1.5 meters is approximately 1 - 2 meters.
What is best to use for ground electrodes
Steel and copper pins with a diameter of 16 mm or more have proven themselves to be the best grounding conductors. Such pins are driven into the ground at a certain distance from each other, but not less than their length.
There may be several pins; here everything largely depends on the grounding scheme. If this is a “triangle”, one of the most effective grounding systems, then three ground electrodes will be needed, which are driven into the ground in the shape of a triangle. As a rule, the pins are buried in the ground to no less than the depth of soil freezing.
Also used for arranging grounding systems:
- Metal corner;
- Steel rod;
- Pipes.
Rolled cast iron is not suitable for making grounding. It is better to abandon the idea of using cast iron water pipes as grounding conductors.
How to make a ground loop correctly: design elements
For a private house, the grounding structure traditionally looks like this: several vertical grounding conductors dug into the ground, which are connected to each other by horizontal grounding conductors or contact conductors, and they, in turn, connect the entire grounding loop to the electrical panel and, accordingly, to the devices.
The residual current device is designed to protect against electric shock to a person. How it works and how to choose an RCD for your house or apartment can be found in the article “The principle of operation of an RCD.”
If you are used to doing everything yourself, then you can find out how to make a sewer system in your dacha yourself from this article.
And this material provides a detailed analysis of water supply pipes. After all, if we talk about a country house, then this is quite a serious investment, and everything must be done reliably and “to last forever.”
- The vertical ground electrode is a prefabricated (welded) structure: a conventional metal corner 2 to 3 m long (50 × 50 x 5 mm) and a welded equilateral triangle made of steel strip (40 × 4 mm) with a long side of 1.2 m.
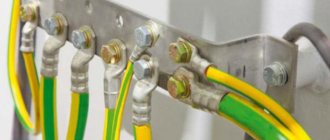
- A horizontal grounding conductor (metal connection) is a steel strip (40 × 4 mm) or round steel (8 - 10 mm2), which is connected to the upper ends of the vertical grounding conductors and inserted into the house in the form of a grounding bus. There may be several input grounding bars into a house, but one must go to the switchboard (VShch, ASU).
The final grounding is a single rigid structure with underground and above-ground parts.
How to make grounding in a private house
In the modern world of electricity, you simply cannot do without grounding, and if it is not there, then this is a cause for concern. The question of the legality of self-installation of grounding in a private house should not cause claims in the form of fines from power engineers, but it is better to clarify this issue. Let's figure out what types of grounding there are, why it is necessary, and how to make grounding in a private house or country house.
Basic issues of grounding device
The grounding device requires basic knowledge and an understanding of basic concepts. So:
What is the difference between protective and working grounding?
Grounding (protective grounding) is the connection of non-current-carrying parts of electrical appliances to the ground or its equivalent. When a short circuit occurs, current passes through the human body, saving him and the switched-on equipment, but the entire system stops working.
Working grounding also plays a protective role and controls the normal operation of electrical appliances. This is exactly what is provided in Euro sockets. Permanent working grounding is practically not used in everyday life, but for some electrical appliances it is simply necessary.
What and how to ground?
First group. On the back wall of these devices you can find a special terminal, usually a screw terminal, for separate (direct) grounding of the housing.
Most likely, there will be no mention of it in the instructions for electrical appliances, since its presence automatically transfers the device from the class of household to industrial devices.
But despite this, many manufacturers place it on:
- Washing machine (sometimes dishwasher). It definitely needs to be grounded through a Euro socket, since it has a large electrical capacity and is most often installed in a damp room.
- Microwave. The working source of wave radiation in it is a powerful magnetron, and even with minor wiring defects or poor contact in the socket, it is capable of breaking through.
It is not necessary to trust the installation and connection of a power outlet for an electric stove to specialists; the main thing is to have detailed instructions on hand that will help you figure out what and how to do.
You can learn more about installing and connecting an electric meter by reading this article. After this, you can connect an electric meter with one or three headlights yourself.
Second group. For safety reasons, it is advisable to ground them.
- Induction hob (electric hob) and electric oven. The internal wiring in them operates at high temperatures, and the power is quite high.
- Desktop computer. If you ground the computer's power supply directly (at any screw on the rear panel), this will eliminate not only periodically occurring floating potentials, but also some “glitches” of the computer. Even the Internet speed may increase.
- Hydromassage boxes (especially with steam generators). Manufacturers from China did not bother to worry about safety, so it must be grounded directly from any metal fastening under the pallet.
How many grounding conductors are needed?
Accurate data on the length of grounding conductors and their number require calculations. But one grounding is usually not enough, so you should play it safe and install at least two systemically.
The earth is not a linear conductor, which means that the distance between the ground electrodes must be included in the potential action zone, then their efficiency will increase significantly.
It is impossible to space the grounding electrodes far from each other (or they will work separately from each other), but moving them too close is pointless. The ideal distance between two ground electrodes located at a depth of up to 1.5 meters is approximately 1 - 2 meters.
How to make a ground loop correctly: design elements
For a private house, the grounding structure traditionally looks like this: several vertical grounding conductors dug into the ground, which are connected to each other by horizontal grounding conductors or contact conductors, and they, in turn, connect the entire grounding loop to the electrical panel and, accordingly, to the devices.
The residual current device is designed to protect against electric shock to a person. How it works and how to choose an RCD for your house or apartment can be found in the article “The principle of operation of an RCD.”
If you are used to doing everything yourself, then you can find out how to make a sewer system in your dacha yourself from this article.
And this material provides a detailed analysis of water supply pipes. After all, if we talk about a country house, then this is quite a serious investment, and everything must be done reliably and “to last forever.”
Now element by element:
- The vertical ground electrode is a prefabricated (welded) structure: a conventional metal corner 2 to 3 m long (50 × 50 x 5 mm) and a welded equilateral triangle made of steel strip (40 × 4 mm) with a long side of 1.2 m.
- A horizontal grounding conductor (metal connection) is a steel strip (40 × 4 mm) or round steel (8 - 10 mm2), which is connected to the upper ends of the vertical grounding conductors and inserted into the house in the form of a grounding bus. There may be several input grounding bars into a house, but one must go to the switchboard (VShch, ASU).
DO NOT: use fittings for grounding.
The final grounding is a single rigid structure with underground and above-ground parts.
Step-by-step instructions for installing grounding yourself
- The underground part of the ground electrode must be located at a distance of more than one meter from the foundation of capital buildings.
- The vertical ground electrode must be dug into the soil to a depth below the level of soil freezing or the level of soil drying (for southern latitudes), that is, to a depth where a constant level of humidity is maintained.
- To bury the ground electrode, it is necessary to dig a trench (triangular) and convenient holes (0.5 - 0.7 m) at the locations of the vertices of the triangle for its installation and scalding.
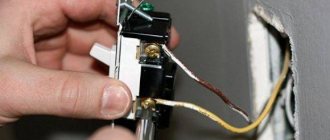
- Now we drive metal corners into the ground along the vertices of the dug triangle. This work will be greatly simplified if the lower part of the corner is first sharpened. Above the surface we leave the edge of the corner 25 - 30 cm long.
- After all (3 pieces) of the corners have been driven in, they are connected to each other, forming a triangle, or the finished triangle is welded at its vertices to the hammered corners.
- All welded areas should be treated with a primer to create an anti-corrosion layer.
- A trench is dug from the triangle to the point where the tire is inserted into the house. A horizontal grounding conductor is installed in it.
- In front of the electrical panel, an M5 or M8 bolt is welded to the end of the bus (round wire or strip) for convenient fastening of the ground wire and connecting it to the panel.
- All trenches are covered with earth.
Further connection of the ground loop to the electrical wiring of the house must be carried out according to a clearly developed diagram and a specific connection system.
www.komfortek.com
Step-by-step instructions for installing grounding yourself
- The underground part of the ground electrode must be located at a distance of more than one meter from the foundation of capital buildings.
- The vertical ground electrode must be dug into the soil to a depth below the level of soil freezing or the level of soil drying (for southern latitudes), that is, to a depth where a constant level of humidity is maintained.
- To bury the ground electrode, it is necessary to dig a trench (triangular) and convenient holes (0.5 - 0.7 m) at the locations of the vertices of the triangle for its installation and scalding.
- Now we drive metal corners into the ground along the vertices of the dug triangle. This work will be greatly simplified if the lower part of the corner is first sharpened. Above the surface we leave the edge of the corner 25 - 30 cm long.
- After all (3 pieces) of the corners have been driven in, they are connected to each other, forming a triangle, or the finished triangle is welded at its vertices to the hammered corners.
- All welded areas should be treated with a primer to create an anti-corrosion layer.
- A trench is dug from the triangle to the point where the tire is inserted into the house. A horizontal grounding conductor is installed in it.
- In front of the electrical panel, an M5 or M8 bolt is welded to the end of the bus (round wire or strip) for convenient fastening of the ground wire and connecting it to the panel.
- All trenches are covered with earth.
Further connection of the ground loop to the electrical wiring of the house must be carried out according to a clearly developed diagram and a specific connection system.
Grounding in a private house made of smooth reinforcement and steel strip.
Smooth steel reinforcement, angle and strip are quite suitable materials for the manufacture of the main ground loop.
Practice shows that for the manufacture of a grounding loop in a private house, a linear grounding scheme and a triangular grounding scheme using three vertical grounding electrodes are quite suitable.
A linear grounding scheme is usually used when there is not enough space (territory) to place a triangular grounding loop near a private house, but no further than 10 meters from the object.
The electrical characteristics of both circuits are almost identical, and depend to a large extent on the properties of the soil of your land.
Horizontal and vertical grounding conductors must be made of black or galvanized steel or copper. Due to their high cost, copper grounding conductors are, as a rule, not used. Also, grounding conductors should not be made from corrugated reinforcement - the outer layer of the reinforcement is hardened, which disrupts the distribution of current across its cross-section, and it is more susceptible to corrosion.
It is recommended to use smooth, unpainted reinforcement with a cross-section of at least 1.5 sq cm, that is, A1 (smooth) reinforcement with a diameter of 16 mm is quite suitable for grounding the electrical installation system of a private household.
Take the length of the grounding electrodes 3 meters, the distance between them is 2.5 - 3 meters, you can’t go wrong.
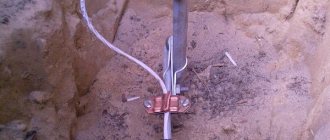
From this reinforcement it will be possible to make vertical electrodes with connections to the house, to the exit to the house (attached to the foundation). Weld a bolt D 8-10 mm to the end of the reinforcement, and insert a copper cable crimped with copper lugs into the house to the switchboard.
The resistance of the manufactured ground loop for a private home should be 10 ohms and below.
Step-by-step instructions for installing grounding yourself
- The underground part of the ground electrode must be located at a distance of more than one meter from the foundation of capital buildings.
- The vertical ground electrode must be dug into the soil to a depth below the level of soil freezing or the level of soil drying (for southern latitudes), that is, to a depth where a constant level of humidity is maintained.
- To bury the ground electrode, it is necessary to dig a trench (triangular) and convenient holes (0.5 - 0.7 m) at the locations of the vertices of the triangle for its installation and scalding.
- Now we drive metal reinforcement bars or steel angles into the ground along the vertices of the dug triangle. This work will be greatly simplified if the lower part of the corner or fitting is pre-sharpened. Above the surface we leave the edges 25 - 30 cm long.
- After all 3 electrodes are driven in, they are connected to each other, forming a triangle, or the finished triangle is welded at the tops to the driven corners.
- All welded areas should be treated with a primer to create an anti-corrosion layer.
- A trench is dug from the triangle to the point where the tire is inserted into the house. A horizontal grounding conductor is installed in it.
- In front of the electrical panel, an M5 or M8 bolt is welded to the end of the bus (round wire or strip) for convenient fastening of the ground wire and connecting it to the panel.
- All trenches are covered with earth.
Further connection of the ground loop to the electrical wiring of the house must be carried out according to a clearly developed diagram and a specific connection system.
Grounding a private home performs two important functions:
- protecting people from electric shock;
- protection of new generation household appliances (with microprocessor control) from emergency conditions in the electrical network.
The occurrence of emergency modes, in part, can be provoked by the presence in everyday life of modern powerful equipment that increases the load on electrical networks, the quality of which does not meet modern operating conditions.
The grounding function is especially important in dacha settlements and villages, where power supply problems are most pronounced. The real risk of using powerful household appliances is present in rooms with high humidity. Heating electrical appliances can only be used if there is a complete grounding loop.
Why is it not possible to ground from fittings?
The situation is this: I live in a concrete 10-story building, can I connect to the reinforcement from the wall as grounding?
Even if the fittings do not have contact with the ground, then it will be radio engineering ground, which is also not bad. Alexander!
If possible, comment on this idea - https://forum.cqham.ru/viewtopic.php?p=1809 04&highlight=#180904
The situation is this: I live in a concrete 10-story building, can I connect to the reinforcement from the wall as grounding? Yes and no, but it’s better not if you don’t know which building. We learn PUE. https://el-line.ru/articles_zazemliteli_pue.shtml
In general, I realized that if I claw at the reinforcement, it definitely won’t be WORSE.
i.e. you can safely cling