( 3 votes, average: 4.00 out of 5)
Over time, the tiles in the bathroom fade, the grout loses its color and stains appear on the walls, which are difficult to get rid of. But you can transform your bathroom design without much expense or effort if you know how to update old tiles.
Painting bathroom tiles is easy ↑
When you want to decorate those boring tiled walls, the simplest thing your imagination suggests is to paint them! Of course, you can just take and paint the tiles in the bathroom, or you can do it beautifully and highly artistically. For example, you can paint not the entire tile, but in parts. Your tile was white, but now it’s multi-colored. Look how unusually the walls of the bathroom are painted.
Coloring tiles in a checkerboard pattern
This is not just a checkerboard arrangement of colors, this is surrealism on the wall! It's not difficult to do this. First, choose the paint colors you want. The paint should be for tiles or glass, otherwise your artwork will quickly come off the surface of the tile. Before painting, the tiles must be degreased and dust free. That's all, actually. Next, you paint the tiles with a brush, sponge, roller - whatever is more convenient for you. To make the lines smoother, apply masking tape.
Technique for painting tiles with masking tape
But why is strict geometry necessary? You can draw whatever you want. All you need is imagination, paint and a brush. The technique is the same: degrease the surface and paint with tile paint or acrylic.
Painting on tiles with a brush
You can create such beauty in an Asian style in your bathroom using paint and brushes.
Drawing on tiles covering the entire wall
Painting tiles with your own hands: video ↑
Full painting
If you follow the installation instructions, you can completely replace the old tiles. But such a process is labor-intensive and financially expensive, especially since today there are easier ways to update a bathroom. For example, completely paint the tiles in an identical or different color.
Before applying paint to old tiles, the surface must be thoroughly washed and dried. Afterwards, the tile must be sanded, otherwise the paint simply will not adhere to the surface. Before painting, prime the surface and allow time to dry completely.
The paint should be applied in an even layer, carefully treat the seams, and draw the contours with a brush. It is also better to apply the paint in two layers, after each one we give time to dry thoroughly.
Important! Do not paint tiles in areas that frequently come into contact with water. Over time, the paint will begin to peel and fall off.
Vinyl stickers and stencil ↑
One way to “revive” cold tiles is to use stickers (vinyl stickers). The choice is wide: you can purchase stickers of any shape, color and size in a specialized store. Along with them, the tube contains instructions and the tools necessary for gluing.
These stickers are resistant to moisture and detergents. Images of dolphins, sea turtles, swans, mermaids and decorative fish can transform a bathroom beyond recognition.
Durable plastic stencils will be a worthy addition to stickers. They are placed tightly against the wall and painted over with moisture-resistant paint using a sponge. The pattern of seaweed and wave scallops will harmonize perfectly with sea-themed stickers.
This is important to know: before applying stickers or applying a pattern with paint, the tiles must be degreased.
Colored stickers bring ceramic tiles to life
Laying method as a type of decor
Finishing a bathroom with tiles can be done in different ways, so the appearance of the finished tiling result depends on the technology of laying the elements. Correctly select the method in which it is advisable to cover the walls or floor, based on the shape and size of the tiles, taking into account the geometry of the room. There are the following methods for laying ceramic tiles:
- Row method. This technology consists in laying tiles on the floor or walls in even rows without displacement, as a result of which peculiar cells are formed. This installation method is suitable for rectangular and square tiles, however, it requires perfectly level walls.
Row method
- With offset. This laying technology means that when gluing tiles of one row, each element is shifted by half its width. The result of this cladding is a pattern that immigrates to the brickwork. This masonry option is also suitable for tiles of any shape and size.
Laying tiles with offset
- Diagonal. The diagonal cladding method means that when gluing the tiles, they are not placed straight, but at an angle of 90 degrees, as a result of which they take on a diamond shape.
Diagonal laying method
- Herringbone. Herringbone laying is only suitable for rectangular tiles. The tile elements should be narrow and long to create a parka-like pattern. This installation method is used to tile the bathroom floor.
Herringbone method
Important! The installation method affects the visual perception of the room. If finishing a bathtub with tiles using the row method draws attention to the slightest irregularities in the walls, then the technology of gluing tiles with offset, on the contrary, conceals cladding defects.
Decorating using decoupage technique ↑
Today this technique is very popular. It consists of using three-layer napkins to create decorative elements. The process can be presented step by step as follows.
- Using scissors, cut out the decor (usually a plant element) from a napkin.
- We remove the two lower layers and apply them to the tiles under the ceiling (do not go lower: there is a high probability of damage), after which we apply PVA glue on top of the element with a brush. The formation of air bubbles and folds should be avoided.
- After the glue has dried, we apply moisture-resistant acrylic varnish on top of the decor.
Despite the protective layer of varnish, this decor will not last long in an aggressive, humid environment. This allows you to change it periodically and thereby add variety to the interior.
Video instruction
The best posts
- What tools are needed to install self-leveling floors?
- What tools are needed to install self-leveling floors?
- 25 of the most original mirrors
- Which gas heater is best for a summer house, owner reviews
- Do-it-yourself ceiling made of plastic panels - instructions (photos and videos)
- Plastering a brick wall with your own hands
- Do-it-yourself ceiling made of plastic panels - instructions (photos and videos)
- How to make TRX sports loops with your own hands
Related article: Self-milling of wood and timber
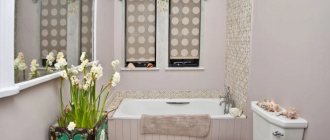
Filling the room with interesting accessories ↑
The bathroom can be equipped with unusually shaped towel holders, stands for soap and toothbrushes. In a plumbing store, you can choose models that match the style and color of the tile, successfully harmonizing with the ornament on it.
Decorating the bathroom with paintings and mosaics is a great way to make the interior elegant
Curtains with a thematic pattern can also serve as a decorative element. A large mirror with a beautiful frame will make the room bright. The frame can be decorated with decoupage elements. The tiles will sparkle with new colors if you hang pictures on the walls and complement the interior with shelves with flowers.
Preparatory stage
The renovation begins with preparation for updating the kitchen tiles. First of all, inspect the surface that requires restoration for abrasions, cracks, chips, etc. Find out how serious the repairs are needed and which upgrade option to choose.
Renovation work begins when the kitchen is ready for it. Depending on what surface you have to work with, you need to rid the kitchen of everything that might interfere - when repairing wall tiles, remove all elements located directly on the tiles or nearby; when repairing floor tiles - completely remove furniture and interior items.
We use seashells ↑
Marine style is the most popular in bathroom interior design. You can decorate tiles with natural or plastic shells using hot glue: by gluing these decorative elements next to stenciled images of seaweed or simply around the perimeter of the room or on the frame of a mirror, you can create a unique interior design. To make the shells even more original, you can decorate them with acrylic paints.
Decorating tiles with shells is a great idea for creating a “sea” landscape
Replacing individual tiles
To give a new look to the bathroom, you can partially replace the tiles. To do this, you can buy the same tiles or choose them by size and color.
This is very easy to do; to do this, follow the instructions for laying tiles.
- We make a couple of holes in the center of the tile, for this we take a drill and a drill bit. This is necessary in order to carefully dismantle the tiles without damaging the adjacent ones.
- From the area where the holes were drilled, we begin to carefully knock down the old tiles with a chisel.
- Be sure to clean the surface of old glue and prime it.
- We make an adhesive solution and glue new tiles to the wall.
- We rub the seams.
Which replacement elements to use depends on your imagination, but many people prefer seascapes.
Mosaic for bathroom decor ↑
Stores that sell ceramic tiles always have discounted broken tiles on sale. There you can always choose several interesting specimens for making mosaics, which you can use to decorate your bathroom, replacing an expensive border. To do this, perform the following steps:
- Using a marker on the tile, we outline the geometric shapes that will need to be cut out;
- Using a glass cutter and special wire cutters, we cut out the intended elements;
- Using waterproof glue, we attach the tile fragments to a nylon mesh, laying out a pattern invented in advance;
- We attach the made mosaic to the wall using tile adhesive;
- After drying, use colored grout to seal the seams.
Panel on the wall made of broken tiles
Renewing seams
The seams between the tiles prevent the appearance of fungus in the bathroom and also improve the appearance of the room. Over time, they lose their original appearance, become dark and dirty, which spoils the appearance of the entire wall. Of course, you can paint over the seams with a marker, but this will last for a maximum of two weeks, so you should choose another method and thereby update the old tiles.
Also read: How to hide pipes in the bathroom under tiles with your own hands
Before you fix such a defect between the tiles, you need to know how to properly clean the damaged areas.
- Using a spatula, we remove the old grout, doing everything carefully so as not to split the tile itself.
- It is not always possible to completely remove the remaining grout along the edges, even with a sharp object, so it is better to use sandpaper here.
- We clean out all the dust with a vacuum cleaner, wash the tiles and seams, and leave until completely dry.
- Apply new grout with a spatula.
Advice! If the old grout is cement-based, then to speed up the process it is better to use cleaners that contain acid
Decorating old tiles ↑
There are ways to decorate the interior of a bathroom not only by tiling with new tiles and decorating it with decorative elements. Old tiles can also be restored to their original attractive appearance. To do this, carefully, using a slightly blunt tool (so as not to damage the enamel), clean the seams. Mold often appears in these places, so treatment with an antiseptic composition is necessary. The cracked tiles need to be removed and replaced with a homemade mosaic.
To remove the tiles, use a chisel, hammer, or chisel. In order for such mosaic inserts to look logical, it is necessary to sacrifice several whole tiles, arranged in a checkerboard pattern, but with some randomness. We also fill the vacant spaces with mosaics.
Mosaics made from broken tiles may look better than store-bought ones
You can decorate old tiles using another type of mosaic, which is obtained using a stencil and paint. For this use:
- acetone;
- sandpaper No. 100;
- level;
- roulette;
- breadboard knife;
- brush or foam swab;
- masking tape;
- epoxy gloss paint;
- strengthening primer.
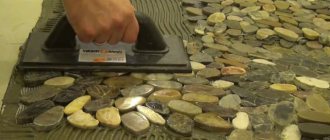
Mosaic from broken dishes
You will also need protective equipment: gloves, mask, goggles. Old tiles in places where decor is applied must be degreased and lightly sanded with sandpaper. Then, using a level, you need to stick masking tape onto the tiles in several rows. Using a simple pencil we apply geometric (it’s easier) patterns. Using a breadboard knife, cut them out, and degrease the free areas again with acetone.
Using a foam rubber swab and acrylic paint of different colors, fill the cut out areas. After the paint has dried, the masking tape must be completely removed. Using these simple methods, you can transform the tiles in the bathroom, spending a minimum of money. You can combine various design techniques, but it is important not to overdo it: everything should look harmonious. And then your bathroom will look no worse than those for which expensive materials were used.
Decorating ceramic tiles
To make this decorative element we will need:
- Ceramic tiles are white, preferably matte.
- Water-based ceramic paints for firing.
- Primer paint for ceramics, or white acrylic paint (if necessary).
- Alcohol for degreasing.
- Wide brush for applying primer, synthetic (if necessary).
- Brushes for painting made of natural hair (squirrel, kolinsky).
- Carbon paper (carbon paper).
- Picture, illustration, photograph...
- Pencil, soft (for example 6B).
- Cotton pad and cotton swab.
- Oven (oven).
So let's get started.
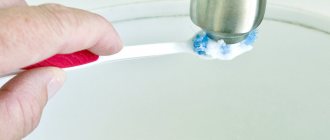
First of all, carefully degrease the surface of the tile to be decorated. To do this, you can use alcohol or ordinary vodka. If you use alcohol, do not forget to dilute it with water in a 1:1 ratio.
Take a cotton pad, soak it in vodka and wipe the tiles.
We wait until the vodka evaporates and the surface becomes dry and clean, or wipe it dry with a clean kitchen towel.
When painting with ceramic paints on highly glossy tiles, the brush will seem to glide over the surface, creating the “effect of an oil paint stroke.” If you want to get a denser coating and softer, barely noticeable strokes, then before painting, cover the tiles with ceramic primer or simple white acrylic paint.
Let the layer dry thoroughly.
If you doubt that you can immediately draw the desired image on the tile, don’t worry, there is a way out. You and I will use carbon paper. The generally accepted name, familiar to us from school times, is a carbon copy!
We take a tile and put carbon paper on it. Be sure to check that the copy side is located correctly! And then we put the picture you prepared in advance on a carbon copy. It could be an illustration from a book, a photo, a napkin... and much more. In this case, I'm using a pre-printed copy of the illustration from the book.
We outline the picture with a pencil. I recommend using soft pencils. This will allow you to make changes to the resulting image directly on the tile in the future. A hard pencil will glide across the surface rather than draw.
This is what we should get.
If we are satisfied with the result, we proceed directly to painting.
We start from the top, from right to left, and gradually go down. This way will prevent us from accidentally smearing the paint on a finished area of the drawing. Of course, this condition works for those who write with their right hand. For lefties, the opposite is true.
During the painting process, I realized that the original did not have enough color for my idea, it was a little cloudy. After all, the Mediterranean simply has to be bright and sunny. It was enough to remove some details and introduce brighter and richer colors. And everything is completely different now!
Let the paint dry overnight.
Now we need to record the result so that this decorative element can be used in the future for its intended purpose. To do this, put the tiles in the oven. The oven heating time and temperature are always indicated on the paint can. In our case, we “burn” the tile for 40 minutes. At a temperature of 150C.
To prevent the tile from cracking, it is better to remove it from a cooled oven.
Don’t be afraid to experiment, change the color of the paint, add in, or, conversely, exclude details, and then every thing you make will be truly unique.
Headboard tiles
The wall is a fairly common location for tiles, but not in the bedroom. However, why not? Instead of a bulky headboard, photo panels or paintings, behind the headboard there can be a spectacular and colorful wall of patterned tiles. To prevent the design from being too colorful, it is better to choose tiles with no more than two shades. For example, the classic, refreshing Gzhel duet of white and blue. But remember that with such a wall background, everything else in the bedroom should be calm, neutral tones, otherwise “ripples in the eyes” will prevent you from falling asleep.
Vinyl decoupage
You can also update tiles using vinyl. Stores sell special interior stickers made from this material. These stickers have images on them. This material is quite resistant to mechanical stress and has excellent water resistance. Vinyl film can also be used to decorate ceramic tiles in any room.
Interior stickers can be purchased at hardware stores; If they are not there, then you can try to make a purchase online. There is a large selection of similar stickers with a wide variety of designs.
The film glued to the wall is also varnished. Be sure to ensure that there are no air bubbles left under the film after gluing. But if they still remain, then pierce them with a needle. There will be no traces left of this, and the air will escape.
Accessories for a snow-white room
Accessories of any color will look beautiful among light walls. However, rich tones look most impressive. You can use ultramarine or even neon paints. The brighter the tone, the less of it there should be in the room. Otherwise, it won’t be very pleasant to be in it. It is enough to lay down an ultramarine colored rug to create a color accent.
There may be more accessories in moderate tones. The snow-white interior will be decorated with towels, a bath curtain and a rug in lavender or deep pink colors.
Chrome, brass and bronze accessories stand out against a white background. Taps, faucets, shower systems, door and furniture handles, as well as coat hooks and heated towel rails must be made in the same style.
You can install a bathtub with bronze legs to complement the design. It is important to observe moderation. If the emphasis is on metal accessories, towels, curtains and rugs should be in moderate shades.
Do not dilute white with more than two additional colors. A combination of three different bright shades looks appropriate in a children's room, but in the bathroom it will look vulgar.
Indoor flowers look great in a white room. They not only decorate the room, but also fill it with oxygen and deodorize.
Orchid, fern, Decembrist, bamboo, yucca, coconut palm, spathiphyllum, chamedorea palm and Lucky bamboo dracaena will feel good in a bathroom with a window.
You can decorate a room without a window with fresh flowers. In such conditions, ferns, ficuses, aroid plants, cyclamens, chlorophytums, dieffenbachias, Usambara violets, Decembrists, philodendrons, chrysanthemums and calatheas are able to develop safely.
To ensure that plants receive the required amount of light, fluorescent lamps or special phytolamps are installed in the bathroom. At the same time, you need to choose a place for vegetation that is remote from sources of heat and water.
If you don’t want to care for plants, you can buy artificial flowers that imitate living plants.
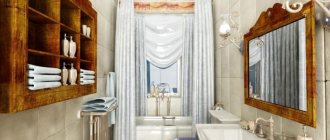
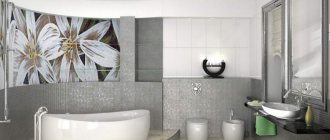
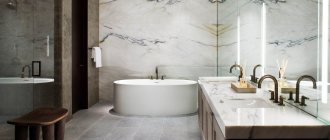
White bathroom tile design
In the collections of any brand you can find many options for white tiles:
- White boar tiles are an all-time classic.
- Mosaic tiles create a beautiful play of light, enlivening the room.
- Marble-like tiles - with barely noticeable veins in gray, blue or beige shades - look noble and elegant.
- Glossy – perfectly reflects light, visually enlarging the space. To highlight individual areas, combine it with matte.
- Textured and with a three-dimensional pattern - imitating mosaic, waves, brickwork.
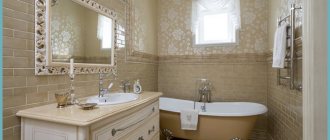
Furniture and sanitary ware for the bathroom in white
White furniture will successfully complement the interior of an elegant room. For a small room, it is better to choose models of traditional rectangular shapes with a laconic design. The decor is minimal so as not to clutter up the cramped space.
You can order furniture with a small floral pattern in pastel colors on the doors or with an unusual surface texture. Light wood cabinets will add coziness.
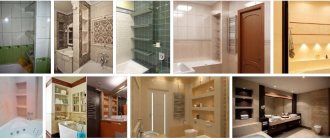
Photos of a snow-white bathroom in a classic style:
An example of furniture arrangement in a white Scandinavian-style bathroom:
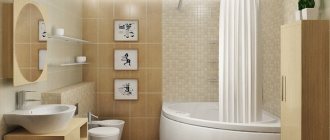
Arrangement of furniture and plumbing in a bathroom with an area of 4 square meters:
To prevent the plumbing from looking boring, it is recommended to select bathtubs and sinks of non-standard curved shapes. A glass bathtub with transparent walls, reminiscent of an aquarium, looks stunning in a white bathroom. A white sink can be mounted into a countertop in a contrasting bright shade.
Coating repair
How to update old tiles if they have become deformed in some places? Defects will be noticeable and will spoil the appearance. Local repairs will help you.
For example, the tile is cracked, chips are visible along the edges, or the enamel is cracked. It can be replaced; to do this, do the following:
- remove the grout in the place where the deformed tiles are found;
- moisten the joints generously with water and leave to soak;
- carefully pry the edge of the tile with a spatula (you can use a screwdriver) and remove it;
- If you are going to lay old tiles, then first clean them of glue. And also remove the solution from the wall;
- prepare glue and treat new tiles with it;
- having placed it in the right place, press it, check it with a level, process the seams, tap it with a mallet;
- After waiting for the glue to dry, seal the seams.
Repair and care of an outdated surface includes not only priming and local replacement of damaged tiles. You can stick another tile with a pattern to dilute the existing wall ambience. Also treat the replacement areas with an antifungal agent.
How to choose grout for white tiles?
The color of the grout can change the shade and perception of the tile:
- White will visually expand a small bathroom, distract attention from simple-shaped tiles, and soften the boundaries. Important: over time, the white grout may darken and the difference between the floor and the lower part of the walls and the rest of the surface will be visible.
- Colored grout will emphasize the features of the layout and support the color of the walls during partial laying of tiles.
- A soft gray color several tones darker than the background will emphasize the styling method without excessive contrast, while black, on the contrary, will focus attention on it.
- Dark grout is suitable for accenting.
Preparation
Before the renovation procedure, prepare the walls:
- Grade. Inspect the tiled walls carefully, noting any defects identified. Select solutions. Imagine a new room design.
- Cleaning seams. The intertile surface becomes dirty and darkens over time. Clean - remove accumulated dirt, dark spots, and remove fungus. Remove the top layer of old grout.
- Removing dirt. After cleaning, greasy stains, stains and dirt remain. Wash it off naturally.
- Degreasing. Take thinner or rubbing alcohol. Treat the surface, removing invisible greasy film.
- Grinding. Its need is assessed individually. You clean off the old top layer from the surface of the tile, removing uneven spots and old stains.
- Primer. The last preparatory procedure before painting.
Act consistently, having prepared the necessary compounds and tools in advance.