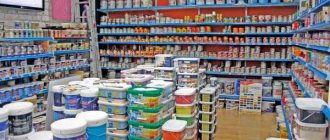
Concrete putties today are presented on the market in a wide variety and are used to protect and repair the base. The concrete surface is quite dense, but under the influence of external negative factors and time it tends to become deformed and become covered with a network of cracks. To avoid this effect and significantly extend the life of the concrete surface, it is protected with various compounds, one of which is putty.
The main functions of concrete putty:
- Restoration of the monolith, elimination of defects and protection from further destruction.
- Heat/sound insulation of the room.
- Leveling the surface before finishing.
- Reliable protection of concrete from various aggressive influences (both outside and indoors).
There are different putties for concrete - there are both universal compositions and special substances designed to perform a specific function. When choosing, you should focus on operating conditions, main tasks, features of the concrete surface, etc. But there are some requirements that all types of putties must meet.
The main requirements for concrete putty:
- Thixotropy - the composition must liquefy during use (so that working with it is comfortable and it is possible to create the highest quality coating) and become viscous as it hardens.
- Moisture resistance - this property is important for a composition that is planned to be used outside or in rooms with high levels of humidity (kitchen, bathroom, toilet).
- Elasticity - thanks to this characteristic, the putty can penetrate the pores of the concrete surface and seal them, preventing external negative factors from affecting them.
- Resistance to sudden temperature changes and low/high temperatures is important for putty that is planned to be used for exterior finishing.
Standard characteristics of concrete putty:
- Complete drying time can vary from 4 hours to 5 days (it all depends on the specific type of substance).
- Waterproofing of concrete surface is about 98%.
- Frost resistance – up to 35 freeze/thaw cycles.
- The time for using the dry composition after it has been diluted according to the instructions is about 2 hours.
Regardless of which putty you choose for concrete walls, it is important to pay attention only to high-quality products from well-known manufacturers, who guarantee that the composition meets all requirements and provides detailed instructions for its use.
Features of the base
Monolithic concrete has certain properties, which is why putty for finishing surfaces of this type must be selected taking into account the characteristics of the material. The main feature of concrete is low water absorption (hygroscopicity), which reduces adhesion with building mixtures (including putties and plasters).
The mechanism for applying such mixtures involves the penetration of the binder into the unevenness and pores of the surface on which they are applied. And in heavy concrete, the pore size is minimal, so the mixtures do not adhere very well to the surface. To solve this problem, quartz primers are used, which are made from fine river sand and a polymer binder. After the binder has set, the surface of the concrete becomes rougher and more effectively accepts the putty.
The problem can also be solved by first gluing a plaster fiberglass mesh to the surface. But in order to completely hide its texture, putty is applied to the concrete monolith in a layer of at least 2-3 millimeters, or even more.
It is also important to select the correct putty compositions for concrete, which will provide maximum adhesion, protection and durability of the finish.
Famous brands
Prospectors
The final façade putty “Starateli” contains an impeccably white tone and is produced on the basis of white cement, including additives.
Using the substance, finishing of concrete facades is carried out, for external final finishing, and also for the purpose of sealing cracks. The walls become smooth and perfect white, which is necessary when painting.
It is necessary to observe the temperature regime - it is best to apply the putty at room temperature, but not less than 10oC and not more than 30oC.
Facade putty “Starateli” is packaged in bags weighing 20 kg. Before use, it must be diluted with water. Here's how to dilute putty.
When dry, the mixture does not form chips and is not afraid of precipitation. You can buy facade putty “Prospectors” at an affordable price that will suit any buyer.
Technical characteristics of façade putty “Starateli”:
- white color;
- application layer up to 2 mm;
- costs for a cover of 0.5 mm to 0.9 kg per 1 m2;
- Drying period – 4 hours at 0.5 mm layer thickness.
For more information about Prospector putty, watch the video:
Knauf
Knauf polymer façade putty for exterior use is considered the most modern coating option and is used exclusively for indoor work. Here is its consumption per 1 m2.
When it is necessary to prepare a double volume frame for painting, then it must be used.
The price for Knauf façade putty varies from 300 to 400 rubles per package.
Characteristics of the composition of Knauf façade putty:
- stability to external hostile influences;
- smoothness (absolute absence of graininess);
- reliability;
- flexibility.
Bolars
Facade putty of the “Bolars” brand provides a wide range of building materials, which includes putty and plaster, primer and adhesive consistencies, as well as a variety of varnish materials.
The putty consistencies of this manufacturer are reproduced using high-quality German equipment.
Facade putty “Bolars” is supplied in bags of 25 kg per 20 m² with a layer thickness of 1 mm.
Ceresit
Facade putty “Ceresit” specializes in the final processing of surfaces and filling minor imperfections on concrete, sand and lime bases, on walls and ceilings.
Facade putty “Ceresit” for exterior use is suitable for exterior use. And also indoors.
Vetonit
One of the most well-known companies for the production of facade waterproof putties is Vetonit, the prices of which are quite lenient and vary depending on the type of product. Putties are made on a cement and gypsum base. Here is the consumption per 1 m2.
Cement based substances are used when working with dry surfaces, while gypsum and organic based products are used in buildings with a high degree of moisture.
Before using “Vetonit” facade putty on the walls, you should first clean their surface from dirt.
Properly made putty ensures the quality of facing work. Weber white façade putty is practical for final leveling and has only positive reviews.
Founds
Facade finishing putty “Osnovit” is engaged in the development and delivery of non-hazardous building compounds. It is recommended to purchase the product in cases where final puttying of surfaces is performed.
The material is used for leveling ceilings and walls with varying degrees of moisture, and in addition for the purpose of external treatment of facades and plinths of various objects.
VGT facade putty is also considered a popular company; it is known for its excellent quality and is used mainly for interior decoration.
Facade putty is applied to a variety of surfaces, including brick, concrete, stone, and also previously treated walls. Here is the putty consumption per 1 m2 of wall.
The mixture is used in rooms with low temperatures. Waterproof facade putty VGT helps to level the coating, and its price will pleasantly please every buyer.
This façade putty prepares the surface for decorative finishing.
By the way! It will be interesting to know: Concrete varnish
By foam plastic
Perfecta “Glide Premium”
Perfecta “Glide Premium” white cement putty is effective for the final leveling of building facades with different moisture levels.
The mixture is easily applied , contains a high adhesive coefficient, and forms a perfectly flat plane. Main characteristics: concrete, structures made of cellular concrete, cement particle board, STL.
Acrylic Putz
Properties of façade putty “Acrylic Putz”:
- product ready for use;
- homogeneous structure after drying;
- good adhesion.
In some cases, it is necessary to treat the surface while maintaining the pattern.
Bark beetle
Facade finishing putty “Bark beetle” includes marble chips or sand particles, which adds volume. Here is the consumption of finishing material per 1 m2.
The product is called “Bark Beetle” because the image looks like beetle tracks.
There is an extensive list of such mixtures in building materials stores.
The advantage of the coating is that no further application of paints or wallpaper is required.
Dulux trade
Finishing putty Dulux Trade contains the following advantages:
One of the important aspects of home renovation work is the design of the walls.
When selecting materials for painting, it is recommended to buy mixtures for indoor renovation work that are more environmentally friendly.
Leroy Merlin
Facade putty at Leroy Merlin is presented in the following segments:
- for walls and ceilings (over 70 options);
- for the floor, both traditional red-brown tone and silver colors;
- decorative plasters , allowing you to create convex surfaces;
Vapor permeability
It is very important that the putty meets the requirements for vapor permeability. The general rule is this: the vapor permeability of any building structure should increase from the inside to the outside. Only in this case will it be possible to remove excess moisture from the room through the walls, preventing condensation from accumulating inside the room or in the finishing.
What happens if the exterior finish exhibits less permeability:
- Steam is filtered faster through the inner layers of walls than through the outer ones.
- The humidity inside the material from which the walls are built begins to rise.
- Humidification reduces the thermal insulation properties of walls and leads to condensation accumulation.
- In winter, the dew point moves inside the house, as a result of which the wall begins to freeze.
All this leads to the appearance of fungus, mold, deterioration of the indoor microclimate and other problems that can lead to deformation and destruction of the building, as well as problems with people’s health and well-being. The water freezing inside expands and tears the wall material from the inside, causing early deformations and the spread of cracks.
Due to such features, for internal work you need to choose a putty with low vapor permeability, for external work - with high one. Here you need to take into account all the materials that are used in the construction and decoration of walls in order to follow the general rule.
Varieties
Puttying of concrete surfaces can be carried out using various compositions, which are classified according to several criteria. Craftsmen usually select materials according to the order of application - starting, finishing, universal. The starting composition is used to eliminate defects and smooth out sharp transitions. Finishing putties are useful for leveling the surface for finishing. Universal views can be used in any format.
Types of putty for concrete according to composition:
- Cement mixtures are very popular, suitable for indoor/outdoor use. The main advantage is low cost, the disadvantage is shrinkage, which can lead to surface deformation and the appearance of defects.
- Gypsum compositions - used for interior work, are not suitable for exterior finishing and where there is high humidity.
- Acrylic putties are universal compounds that are suitable for any application conditions and different types of substrate.
- Epoxy - demonstrate increased strength and drying speed, but have the only drawback in the form of high cost.
According to the degree of readiness of concrete putties, there are:
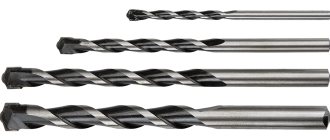
- Dry mixtures - before use, the composition must be diluted with water according to the instructions. To mix a high-quality solution, it is advisable to use a drill with a special mixer attachment. Beginning craftsmen are not always able to mix putty correctly.
- Ready-made mixtures - they can be used immediately after opening the package. Putties are usually easy to apply and good for beginners, but are more expensive.
Types of putty
Before choosing a material for outdoor work, you need to understand the varieties of this substance available for purchase. In practice, the following mixture options are found:
- leveling compound, which is used to eliminate unevenness present on the coating;
- finishing components that have the necessary decorative effect;
- a universal variety that is used as leveling of structures and for finishing at the same time.
In practice, it is also possible to distribute mixtures into ready-made and dry. All prepared options are already ready for use; in turn, the dry putty must be diluted with water and can only be worked with with a spatula.
Surfaces and materials
Before choosing a putty for concrete, you need to analyze the main selection criteria - which surfaces need to be puttied (floor, ceiling, walls, etc.), whether you plan to carry out work inside/outside, what finish the concrete monolith is being leveled for, what is the purpose premises, etc. Today in Moscow and the regions you can find a variety of formulations at excellent prices, so you should choose carefully.
Walls outside
If you need to putty the wall outside the house, then choose cement facade compositions, which are characterized by moisture resistance and high mechanical strength, resistance to sudden temperature changes. The separating layer between the monolithic/panel wall and the finishing can be a layer of adhesive primer (for example, Osnovit T-55).
Cement plaster is usually used as a starting coating, but it is advisable to use an acrylic composition for the finishing (it can also act as a decorative coating).
When choosing an adhesive primer, you need to look at its purpose and the types of compounds under which it can be applied. Most often, exterior finishing is carried out simultaneously with wall insulation.
What the façade structure looks like:
- Monolithic wall made of reinforced concrete or reinforced concrete panels.
- A layer of insulation (expanded polystyrene or mineral wool), mounted on disc dowels and cement glue.
- A layer of cement putty reinforced with fiberglass mesh.
- Decorative plaster or facade paint.
Walls from the inside
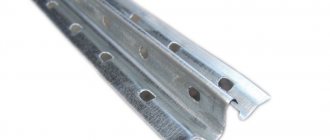
The inner layer of finishing can be done only with putty, without plaster, but provided that there are irregularities on the surface of a maximum of 2-4 millimeters, and all defects can be removed with putty. If the size of the defects is greater, then first the wall is plastered along the beacons (if there are irregularities up to 5 centimeters) or leveled with plasterboard over a frame made of galvanized profile (if there are defects more than 5 centimeters).
Main features of choosing and using putty indoors:
- For dry rooms (corridors, bedrooms, living rooms), gypsum compositions are chosen, which are inexpensive and easy to apply and process.
- For the bathroom and kitchen it is better to buy a cement composition.
- Acrylic putty is suitable for finishing rooms with high and low humidity; it can be used without a starting layer (but with a primer required), as it evens out small wall defects and is easy to apply.
- Gypsum putty can be used in conditions of high humidity, if the room is well ventilated, the top layer is covered with a waterproof finish.
So, in addition to waterproof paint, gypsum putty can be covered with vinyl wallpaper, but in a damp room they are glued to waterproof PVA (and not regular glue), which is applied to the wall and strip of wallpaper.
Ceiling
Finishing the ceiling is not much different from the treatment of other internal surfaces. The rules are the same: minor repairs can be done using acrylic putty, which provides an important advantage: by maintaining a white color after setting/drying, it avoids the need for painting.
A universal mixture or a gypsum finishing mixture with preliminary priming with concrete contact may also be suitable.
Floor
To eliminate cracks and potholes, use cement putty or ordinary cement-sand mortar (mixed in a ratio of 1:2, 1:3). The cracks are opened in advance (widened with a chisel or a light pick), all potholes are deepened, dust is removed, and they are primed with an acrylic penetrating compound.
To level the floor under the finishing coating, polymer-cement building mixtures are used. Self-leveling self-leveling floors are evenly distributed over the surface (including potholes, cracks), the substance is very fluid and creates an ideal horizontal surface.
Basic leveling is also carried out using a cement mixture, but it is better to use a composition based on the same binder on which the future self-leveling floor is made (polyurethane, epoxy). Both types of binders demonstrate a high level of adhesion, adhere well to the finishing coating and seal defects.
Windowsill
Concrete window sills are usually leveled for painting. Minor irregularities can be eliminated with acrylic-based façade putty after thorough priming with a penetrating compound. Here you can do without an adhesive primer, since acrylic adheres well to a concrete monolith after impregnation with a primer based on the same acrylic resins.
If there are serious defects on the surface of the window sill, it is leveled with facade cement putty with preliminary reinforcement with fiberglass mesh. It is advisable to reinforce the edges with a galvanized corner profile.
And in order to achieve maximum strength, the surfaces are ironed - carefully rubbed with cement without adding sand, diluted to the consistency of sour cream.
Tips for choosing
The sizes of filler fractions determine the minimum thickness of the layer of applied material. During initial puttying, the presence of particles up to 0.5 mm in size (for example, sand) is allowed in the mixture. It is better to create the final layer with compositions with a filler fraction of up to 0.2 mm (marshalite, microcalcite) and less (thin polymer compositions). Starting cement putties are more adhesive, durable, easy to process, provide a single layer height of up to 2 cm. Finishing ones are always more liquid, applied in a layer of up to 0.4 cm, inferior in strength and adhesion to the starting ones, but are easy to sand.
Silicate, acrylic-siloxane mixtures perform well at low temperatures.
A significant difference between ready-to-use products and dry mixtures is that they are produced under technical process conditions. The use of such putties will require strict adherence to the manufacturers' recommendations. In this sense, dry putty products are less demanding. So, cement mortars, for example, should not be applied at wall and air temperatures of 0 degrees and below. However, such a dried finish is reliable, resistant to temperature changes, moisture-proof, and has a certain variety of color shades (yellowish, beige, gray).
This is an inexpensive material. When purchasing, you should pay attention to the brand of cement and its compressive strength. However, there are disadvantages - the need to mix and quickly produce a ready-made solution (maximum 1 hour), the possibility of shrinkage and the appearance of cracks. Both cement and polymer bases of putty materials contribute to reliable installation in conditions of high humidity both inside and outside buildings.
At low temperatures, silicate and acrylic-siloxane mixtures perform well. Their main advantage is longer high ductility (compared to cement-based mixtures), as well as: durability, lack of shrinkage, strength (in frosts and high humidity), environmental friendliness, abrasion resistance, compatibility with finishing materials and quick setting. Such paste-like composite compositions are extremely easy to handle and use, and remain ready for use for a long time. The height of the layer of applied material should not exceed 3 mm, and the surface must be primed. Dry acrylic powders are created using cement, polymer and mineral additives, and marble “flour”.
Like ready-to-use acrylate, dry mixtures can be stored for a long time (guarantee up to 1 year), and retain plasticity after dilution with water for up to 3 hours.
For application, the consistency of “thick sour cream” is used. The color palette of materials is quite diverse. The disadvantages are the forced need to putty in 2 or more layers (for significant unevenness), the use of respiratory protection when performing grinding work, and the relatively high cost. At the same time, when selecting materials, it is never a bad idea to study the manufacturer’s recommendations on the packaging.
Return to contents
Consumption
The consumption of putty depends on the substance itself and many factors - on the conditions under which the work is performed, the condition of the surface, preparation, layer thickness, etc. Exact numbers are always presented on the product packaging. But on average, the consumption is 0.7-1.5 kilograms of substance per square centimeter, provided that a layer 1 millimeter thick is made. To obtain accurate values, the indicator is multiplied by the layer thickness, defects are taken into account, etc.
You can make putty for concrete with your own hands - some craftsmen do just that. For concrete, the most suitable composition is considered to be a gypsum-chalk composition, which can be used in rooms with an optimal level of humidity.
What you will need to make your own putty:
- Chalk powder – 2-3 kilograms.
- Plaster – 1 kilogram.
- 5% solution of wood glue - usually determined approximately.
How to prepare the material: place the glue in a container, pour plaster and chalk into a separate container, stir thoroughly. Then pour the dry powder mixture into a container with glue, mix thoroughly using a construction mixer or drill with a special attachment. The finished product should be used within 20-25 minutes, as after a longer period of time it begins to dry out.
Putty for exterior facade work - application technology step by step
DIY façade putty
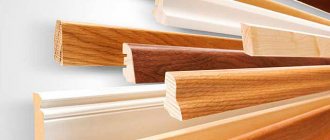
Classification by purpose
Fine-dispersed facade finishing materials, depending on their purpose, can be represented by compositions of different size fractions and consistencies:
Putties differ in composition and characteristics
The base and finishing mixture can be waterproof, frost-resistant and heat-resistant:
Putties not only hide unevenness, but also perform protective functions for the facade
Using putty - photo
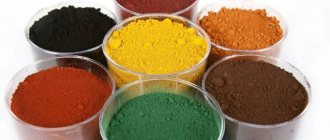
Classification by composition
Each putty mixture is characterized by a composition strictly established by production technology, the main component of which allows us to distinguish several varieties that have certain advantages and disadvantages.
Application technology
Applying putty on concrete is quite simple. The main thing is to take into account the characteristics of the surface, choose the right composition in accordance with the size of the defects and the desired result. The work is carried out in several stages, each of which is important.
The process of applying putty to concrete:
- Surface preparation is mandatory; it involves thoroughly cleaning the base from the old coating, degreasing (gasoline, acetone or white spirit are suitable). Oil stains are treated twice. Then the base is brushed, washed with water, and allowed to dry.
- Priming - a primer is used to improve the adhesion of materials if mesh reinforcement is not intended. The primer is applied with a roller, brush or spray gun in two layers with a technological break for each of them to dry.
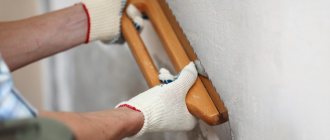
- Reinforcement - often used when puttingtying walls, when a special fiberglass mesh is used instead of a primer. The material is pressed against the wall, PVA glue is applied on top, it is allowed to dry and they begin to putty.
- The putty is applied as follows: sealing cracks and defects with the compound, applying the starting putty with a wide spatula, waiting for the drying time (it can be found on the packaging), cleaning the surface using P80 sandpaper, removing dust from the base, treating with a primer, applying the finishing putty, waiting time drying, sanding the material with P120 sandpaper. Next, two layers of primer are placed on the base, allowing each of them to dry thoroughly, and finishing is performed.
Technologies
- How to prepare a concrete surface for priming and puttying?
Instructions - general for floors, ceilings, walls and other surfaces:
- Layers of paint, peeling putty and plaster are removed from the base;
- It removes grease and oil stains;
- The surface is thoroughly dust-free.
Now - a little more detail about each point.
Alkyd, oil and nitro paints are removed with a steel spatula after softening with a universal remover. The remover is applied in small areas 10 minutes before stripping.
Softened and swollen paint can be easily removed with a spatula.
Instead of a wash, you can use a construction hair dryer: the surface is heated to 250-300C, after which the softened paint is removed with the same spatula.
Avoid heating one area for too long. Due to temperature changes, concrete can crack.
Water-based paints can only be removed by sanding. For cleaning, you can use a soft metal brush attachment for a drill or grinder.
In the picture, a grinder with a petal wheel is used to remove paint.
Lime and cement plaster are removed with a hard spatula after abundant moistening two to three times. You can wet the base with a wide soft brush or a flower care sprayer.
For convenience, the sprayer can be screwed to a plastic bottle. The pitch and diameter of the threads are the same.
To degrease concrete, use gasoline, acetone, solvent or white spirit. The oil stain is generously moistened with solvent and wiped off with a rag. If necessary, degreasing is repeated 2-3 times.
Any organic solvent is suitable for degreasing concrete.
You can remove dust from the surface with an industrial vacuum cleaner or, in its absence, with a regular broom brush. In the latter case, dust residues will be glued to the base during priming.
Do not use a household vacuum cleaner for dust removal if you intend to use it in the future for its intended purpose. Concrete dust has excellent abrasive properties: passing through the vacuum cleaner filter and reaching the motor shaft and impeller, it causes accelerated wear.
Domestic industrial vacuum cleaner from the Interskol company.
- How to prime a concrete base?
Penetrating primer is applied with a long-haired roller or brush. The treatment is repeated twice without a pause for drying: this ensures maximum penetration depth of the primer.
Priming a concrete floor with penetrating primer.
The adhesive primer is applied after thorough mixing throughout the entire package. The tool is the same - a roller or brush. Usually the base is primed in one layer; After the soil has dried, it should be uniformly rough to the touch.
Ceiling treatment with Betokontakt.
- How to attach reinforcing fiberglass mesh or fiberglass to a wall or ceiling?
The material is glued with thick PVA glue. It can be applied with a brush directly through the cells of the mesh pressed to the surface. With fiberglass it is a little more complicated: in its case, glue is applied to both the base and the reinforcing material, after which it is pressed to the surface and smoothed out.
Fiberglass with glue applied to it.
The strips of reinforcing material must overlap each other by at least 50 mm.
- How to putty a concrete wall or ceiling with your own hands?
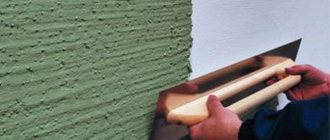
Minor defects embroidered and treated with penetrating primer are filled with putty using a spatula 10-12 cm wide; then the surface is leveled with a wide spatula (30-35 cm).
It is customary to putty the entire surface with a wide spatula, onto which the construction mixture is applied across its entire width with a narrower (10-12 cm) tool.
The main tool for puttying is a wide spatula.
The putty is applied using sliding movements with moderate pressure. When puttying in several layers, the direction of the strokes in each subsequent layer changes to perpendicular.
It is easier to apply gypsum putty in two or three layers as thin as possible (“scrape off”). Each of them, with a thickness of about 0.5 mm, dries no more than 1.5-2 hours.
It is advisable to carry out all work in bright side lighting. It will highlight the slightest irregularities and grooves from the spatula, allowing you to immediately correct the defect.
Oblique lighting will highlight unevenness with shadows.
It is useful to know a few more subtleties:
- Add the dry mixture to the water not by eye, but using a measuring cup and in accordance with the manufacturer’s recommendations. Putty that is too dry will fall off the wall, and putty that is too liquid will slide down it;
For most gypsum mixtures, the recommended proportion is 1.6 kg of dry mixture per liter of water.
- Cement putty that has set but not completely dried can be rubbed with a wooden or polyurethane float, removing the stripes from the spatula. On plaster finishes they will have to be removed by sanding;
Grouting with cement putty.
- When mixing cement putty, water and dry mixture can be added to the bowl in any order. When preparing a gypsum-based composition, water is first poured into the container, and only then the dry mixture is added. Otherwise, lumps of gypsum will remain at the bottom, which will be almost impossible to break during mixing;
The dry gypsum mixture is poured into a container with already collected water.
- Both the mixing container and the spatulas should be washed immediately after the next portion of putty is used up. Lumps of the set mixture, falling under the spatula during puttying, will leave deep grooves in the finish;
The photograph shows a groove stretching behind the spatula, left by a lump of set plaster.
- For mixing, it is better to use not a spatula, but a construction mixer or a drill with a whisk clamped into the chuck;
- After mixing, cement putty usually lasts no more than an hour, gypsum putty - from half an hour to 45 minutes. Therefore, the size of a single portion should not exceed 3-4 liters when puttingtying a surface and 1 liter when filling minor defects.
Prepare the putty in small portions.
- How to remove putty from a concrete wall during the next renovation?
Unless the finish is flaking or has major unevenness, it does not need to be stripped completely. It is enough to clean areas with cracks and potholes.
If the thickness of the putty layer does not exceed 3-5 millimeters, it is removed after soaking with water. I have already described the technology above: the surface is generously wetted 2-3 times and cleaned with a hard spatula.
In this case, the soaked finish can also be removed with a regular spatula.
An aqueous solution of starch softens cement putty more effectively. It is applied with a brush or spray.
Starch solution is more effective than pure water.
What to do if a durable putty is laid in a layer of such great thickness that it is impossible to soak it throughout the entire volume?
Arm yourself with a chisel and hammer or hammer drill and take drastic measures. The chisel is installed at an angle of 45 degrees to the surface plane; the putty is chipped off in strips, after which the remaining irregularities are smoothed out using the method described above - with a spatula after soaking.
When nothing else helps.
So, now we know what putties are used on concrete and how to use them correctly. The video in this article will help you learn more about puttying walls and ceilings. Feel free to share your own finishing experience in the comments. Good luck, comrades!