Is it possible to plaster polystyrene foam and why is it done?
Polystyrene foam is popular not only because of its low cost, but also because it can retain its performance properties for a long time. It is not afraid of temperature changes and easily interacts with precipitation.
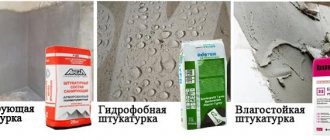
But with regular interaction with the environment, the process of destruction of the structure begins, as the material dries out. Therefore, plastering foam plastic will help solve a number of the following problematic issues:
- Protection. An additional outer layer is created, which will be the first to take on all mechanical damage. The plaster will also act as a barrier to the destructive effects of ultraviolet radiation.
- Obstacle to moisture. Despite the fact that polystyrene foam is not afraid of water, it takes a long time to dry. In addition, dampness significantly lowers the thermal insulation threshold and makes it more fragile.
- Increases the level of fire safety. Modern plaster has such a composition that in the event of a fire it will not become “food” for fire, which means that the fire will not spread.
Creating the final drawing
All these issues can be easily resolved by plastering the foam. But you must first decide on the mixture in order to get the proper result.
Plaster for the facade: make the right choice
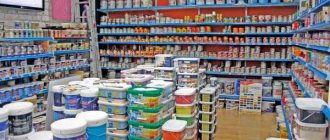
General characteristics of the market offer
You can use different materials to finish the walls. This can be facade facing tiles, textured paint. The most popular among the population is decorative plastering of surfaces. When choosing any of the options, you need to remember that working with insulation has significant differences from traditional plastering. The polystyrene base of the boards requires the use of special mixtures, with characteristics adapted to the heat insulator, ensuring stable adhesion at the time of application and surface strength.
Note: as a rule, universal plaster is used both for fixing reinforcing mesh on foam plastic slabs and for insulating walls. This explains the economy of its use. On average, it is believed that for reliable fixation of the reinforcing sheet, about 4.0 kg of plaster mortar per unit area is required and about 6 kg/m2 only for leveling the facade walls.
Some manufacturers produce a separate fixing solution for the mesh and a mixture for facing. In this regard, it would be correct to use plaster products of one brand for the improvement of a specific building. And the technology for working with a specific material will be indicated on the packaging.
Overview from the point of view of practical application
Before plastering the façade of a polystyrene foam house, you need to decide on the choice of finishing material.
- The best option in terms of price-quality ratio is mineral compositions containing pure river sand, cement and water in the preparation recipe. As an option, acrylic plaster cladding. Its main component is acrylic resins. It is impossible to give an unambiguous answer about the preference of one type of composition over another: each of them has both its positive aspects and disadvantages.
- On the one hand, one can hear complaints about cement-sand mortar that it does not have the necessary plasticity, as a result of which cracks appear on the facade during the operation of the building. This happens quite often also because the affordable, inexpensive composition, its simple preparation and simple application have made this type of cladding accessible to anyone who wants to try their hand at construction.
Important! Often an unprofessional approach and ignorance of how to plaster polystyrene foam affects the quality of the plastered surface. A significant drawback is the inability to decorate the facade in a given color: colors are not added to the traditional mixture. To give the finished surface the required shade, you only need to paint it.
- On the other hand, while noting the positive aspects, it must be recognized that natural plaster is capable of allowing air to pass through without clogging the structure of the material. High vapor permeability promotes “breathing” of the walls. And it is much more economical to plaster a house with a sand-cement composition, especially since if the work technology is followed, the coating turns out to be quite durable and reliable.
- The disadvantage of mineral mixtures is that insufficient elasticity is completely absent in the acrylic analogue. Although it is more expensive, the color of the surface loses its freshness over time, but working with plaster based on acrylic resins is a pleasure. Foam plastic on the facade with such a top layer of any color and shade will serve faithfully for at least a quarter of a century.
Selection of plaster
After you have figured out whether it is possible to putty polystyrene foam, it is time to proceed directly to the selection of the mixture itself. The protective coating for foam plastic must have good density and resistance to mechanical stress. The plaster mixture must have a high level of adhesion, since the foam itself has a fairly smooth surface. But the vapor permeability parameter does not play a special role here, since the insulation itself has a low indicator for this property.
There are several types of plasters - for attaching insulation, leveling and universal. If all the work is done with your own hands, then it is better to stop at the last option. Universal mixtures can be used at any stage of finishing. If two separate mixtures are purchased, then the following proportions must be observed: glue - 4 kg per 1 sq.m., plaster - 6 kg per 1 sq.m.
You can also putty with a cement-sand mixture, but it will only partially protect the foam. Therefore, it is better not to save money, but to choose more expensive compounds that will not crack in 2-3 years. Among the special plasters there are those that contain certain additives. It is best to opt for:
- Mineral plasters. The base consists of white cement, lime hydrate and mineral chips. Dry powder is available for sale and must be diluted with water. This type is characterized by good resistance to precipitation, temperature changes, and good adhesion to the surface. But for the sake of fairness, it is worth saying that these plasters have a service life of up to 10 years, after which they require updating.
- Acrylic plasters. This is a plastic mixture that is created on the basis of acrylic resin. The composition also includes mineral binder additives, which significantly increase the performance properties of the coating. This option, due to its plasticity, is not afraid of cracking, is not afraid of seasonal changes in temperature, and also easily absorbs moisture. Depending on the manufacturer, acrylic plaster can last from 15 to 25 years, so it is recommended to be used for exterior work. But among the disadvantages, it is worth noting not only the high cost, but also the tendency to burn out.
Among professional builders, such companies as Ceresit, Stolit, Osnovit, Knauf, and Ecomix are especially popular.
Mineral and acrylic plaster
Main article: how and with what to paint polystyrene foam?
Advice! To plaster polystyrene foam, you need to use two types of mixture - an adhesive mixture, which will become a reinforcing layer, and a leveling one. It is recommended to use products from the same manufacturer. This ensures uniform coverage and equal service life.
When choosing color and material, it is worth considering some features:
- plaster should have a higher vapor permeability than polystyrene foam;
- to treat areas of the house that bear a higher load (eaves, plinth, parapet, areas of elevation changes, etc.), a mixture with enhanced water-repellent properties will be required;
- The more saturated the color, the higher the likelihood that it will quickly fade when exposed to sunlight.
All these points must be taken into account when selecting plaster.
Other gluing methods
Some craftsmen try to use “homemade” methods for attaching polystyrene boards using other methods. This is not always reasonable.
Polyurethane foam
Foam is used to fasten any surface, including EPS. The cost of foam is often cheaper than similar glue in cans. But the disadvantages of this method are obvious:
- slow setting with the base - slabs lying vertically will constantly slide;
- the glue contains special adhesion-improving additives, which makes it more reliable for tearing than foam;
- polyurethane foam tends to grow in volume, and when constructing polystyrene foam this can play a bad role;
- foam peels off the wall faster than glue.
We recommend: Primer for oil paint - preparation and application
The advantage of foam is the ability to fill the seams between the slabs, so it can also be useful in installation.
Hot melt adhesive
Thermoplastic adhesives include special substances based on polyamide, ethylene vinyl acetate, which become liquid when heated. As they cool, they harden. Such products are suitable for working with extruded polystyrene foam, but their cost per 1 kg can be up to 1,500 rubles. The price of the work, therefore, will not be the lowest. It is more expedient to buy suitable specialized glue and carry out repairs economically, efficiently and reliably.
Types of plaster for foam plastic
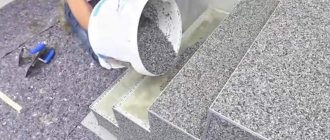
Dry mixtures must be mixed yourself.
Styrofoam plaster differs from standard compositions. The finishing mixture is sold dry in paper bags. Prepare wall plaster over polystyrene foam by diluting the dry mixture with water.
Finishing mixtures are divided into two types according to their purpose:
- façade;
- for interior work.
Facade
For exterior plastering of polystyrene foam, special compositions are used, which include various frost-resistant and moisture-proof additives. Foam plaster for facades is divided into two types:
- mineral;
- acrylic.
Mineral
The basis of the mineral mixture is cement, gypsum and sand.
This composition for external use is attractive due to its fairly low price.
It should be noted that with the slightest deviation from the coating technology, the plaster may crack and collapse in places after 2-3 years.
Acrylic
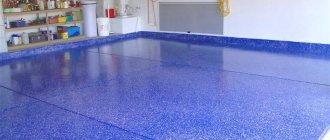
Acrylic mixtures are suitable for creating decorative finishes.
Acrylic coating for foam has high adhesive and protective properties. Decorative coatings are formed based on the acrylic mixture.
Finishing mixtures are well painted in different colors, which allows you to decorate building facades in a wide range of colors.
Plaster for interior finishing of foam plastic
The coating for interior work does not require the addition of frost-resistant and especially moisture-resistant ingredients, so the mixture is much cheaper than the façade coating.
Just like facade finishing, interior plaster has a mineral and acrylic base.
If suddenly plastering of polystyrene foam inside the room was done with a facade composition, then this will not cause harm. Otherwise, when the plastered walls are coated with a product for interior work, the finishing layer will quickly collapse.
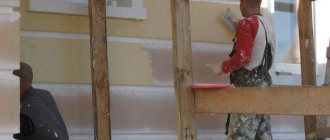
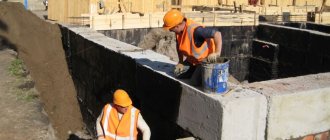
Technology of façade finishing with polystyrene foam plaster
The last finishing stage is the application of a leveling layer.
Here the contractor should be as responsible and attentive as possible, since the leveling layer must hide all defects in the reinforcing coating and prepare the basis for the final finishing of the walls - painting or covering with decorative putty.
In fact, this work is not particularly different from plastering walls made of concrete or brick.
It is worth using a standard spatula and applying the plaster in a thin layer.
IMPORTANT!
An important point that must be taken into account when finishing is that the joints of the sections should be mixed relative to the joints of the mesh. In other words, the seams should not overlap each other.
The finishing must be especially careful and careful when it comes to subsequent painting, since all the unevenness in the future will only be emphasized by the paint and the walls will not take on a very aesthetic appearance.
To ensure that the surface is perfectly smooth, after the coating has dried, it is recommended to sand it using sandpaper or a special mesh. It is important to grout in the first 3-4 days, otherwise in the future the composition will harden greatly and it will be extremely difficult to sand it.
The exception in this case is textured finishing plaster, however, here everything depends on the grain size.
Basic materials and accessories
Work related to construction and finishing is constantly accompanied by quite serious financial costs. It is quite difficult to calculate and purchase exactly according to the estimate several types of plaster mixtures and adhesive compositions at the same time, as is done by professional builders. This gives rise to an irresistible desire to simplify the process by laying façade plaster over foam plastic.
The building materials market today offers consumers a huge number of adhesive mixtures. Well-known manufacturers produce not only universal compositions, but also special mixtures based on acrylic and cement. The first option is cheaper, but it is not recommended to use it. As a rule, the following building materials are purchased as plaster for exterior use for finishing polystyrene foam:
- glue for constructing a reinforcing base on polystyrene foam. The material is special and is not suitable for fixing ceramics or foam;
- a mesh made of fiberglass material, the density of which is 150 - 160 g per square meter, used in an alkaline environment. It has a special coating that improves the adhesion of glue and fibers.
Types and properties of facade plaster
To perform such work, various plasters from manufacturers are used:
- Ceresite;
- Ecomics;
- Stolit and many others.
At the same time, it is worth remembering that among the many offers on the building materials market, you need to figure out what kind of façade foam plaster is needed specifically for you.
An important point is that you cannot use facade plaster on polystyrene foam of different brands for work; if you start working with materials, for example, Ceresit, then under no circumstances should you use Ekomix. This is due to the fact that the mixtures can be universal or only for gluing foam to the base or for a protective layer.
Facade plaster Ecomix
Which material to choose is up to you to decide. But it is very important to take into account the opinions of specialists, as well as sales consultants, who will help you choose the optimal solution exactly according to your financial capabilities. When purchasing façade plaster over polystyrene foam, carefully read who the developer is.
When purchasing, pay attention to:
- manufacturer;
- price, which does not always reflect real quality;
- advice from experts.
In order to apply the material correctly, no matter how experienced a specialist you are, always take into account the recommendations from the manufacturer that are on the packaging. This is especially true when you start cooking.
It is worth considering that preparation is one of the most critical stages of work, since it determines how it will stay on the wall, appearance, and resistance to weather conditions.
Advantages and disadvantages of polystyrene foam when insulating a house
In polystyrene foam, the bulk of the material is gas. This determines its main advantages: light weight and good thermal insulation properties. Polystyrene foam is also a good sound insulator, since its structure dampens sound vibrations. In addition, the advantages of the material include:
- environmental friendliness - complies with environmental standards and does not harm humans and the environment;
- durability - resistant to mold, rot and corrosion;
- light weight - easy to transport, no additional load on the foundation;
- ease of processing and installation;
- affordable price.
In addition to the advantages, there are also disadvantages:
- Low strength. This is the main reason why the insulation layer is covered with additional material, since under mechanical stress its structure is easily damaged and it loses its thermal insulation qualities.
- Incompatibility with nitro-based paints and varnishes. These substances can corrode the foam mass.
- Does not allow air to pass through. Poor vapor permeability does not allow its use in interior decoration of residential premises. Without good ventilation, the house turns into a thermos.
- Rodents and insects are partial to foam that is not protected by plaster or a durable finish.
- Fire hazard - burns and releases hazardous substances.
The need for plastering foam plastic
Polymer materials have a long service life. Foam plastic is no exception. Experts conducted tests and subjected the foam to conditions simulating 80 cycles of temperature changes. The results met the expectations of the technologists - the foam did not lose its technical characteristics.
How is this possible? After all, many claim that “foamed” insulation is a short-lived material. Indeed, under mechanical influence and direct exposure to ultraviolet rays, the foam dries out and collapses. Using polystyrene foam as thermal insulation, you need to plaster it - this will solve a number of problems:
- Protection from mechanical damage. Polystyrene foam is a fragile material and can cause a hole if hit. Plaster will protect the insulation from the formation of dents and other damage.
- The plaster protects the foam from moisture penetration. The insulation does not absorb moisture well and takes a very long time to dry. Prolonged exposure to dampness reduces the thermal insulation properties of the material and makes it more fragile.
- Foam plaster protects the surface of the material from sunlight.
- Increased fire safety. The plaster will become a kind of shield in the path of fire and prevent the foam from burning.
Why is finishing necessary?
The material is created by foaming polystyrene and adding binders that hold the granules together. Unfortunately, these bonds are not very strong and are destroyed when exposed to factors such as:
- solar radiation;
- some service life;
- Atmosphere pressure.
Even new material is very fragile. If you hit an unprotected slab, a dent will form, and the corners are already easily broken.
This is why polystyrene foam requires protection. Plastering is often used as a protective layer, since it is an affordable way to decorate the facade.
This is interesting: Mineral wool is the secret of its demand in professional construction
Why is polystyrene foam plastered?
Plastering the facade will protect the material from mechanical damage.
Finishing polymer coating solves a number of problems:
- Protects the insulation surface from accidental mechanical impacts.
- The finish acts as a barrier to moisture penetration into the polymer. When left in a humid environment for a long time, the foam, saturated with moisture, loses its thermal insulation qualities.
- The finishing blocks access to ultraviolet rays to the surface of the polymer. Under the influence of UV radiation, the structure of the material is destroyed.
- In the event of a fire, the foam becomes an obstacle to the further spread of fire. The polymer burns only when exposed to very high temperatures.
Characteristics, scope and price
Its price depends on the density of the material. The following brands of foam plastic are produced in Russia.
- PSB-S 15 . Density 8-13 kg/m3. Insulation of walls, floors, non-load-bearing roofs. Price from 1300 RUR/m3.
- PSB-S 25 . Density 15-22 kg/m3. More dense and durable than C 15. The areas of application are the same. Price from 2100 RUR/m3.
- PSB-S 35 . Density 25-30 kg/m3. Durable and cheap material. Can already be used for thermal insulation of a loaded roof. Price from 3600 RUR/m3.
- PSBS 50 - Density 35-37 kg/m3. Highly durable. It has high density and strength. It is used to insulate the foundations of industrial and residential buildings and loaded roofs. Prevents soil freezing and swelling. Price from 4700 RUR/m3.
All brands of polystyrene foam contain a fire retardant, which promotes self-extinguishing. But despite this, the material still belongs to the fire resistance class G4 - highly flammable.
Choosing plaster for the facade
The choice of external finishing must be approached seriously, because the service life of the insulation depends on it. Plaster allows you to solve the following problems :
- Protection from mechanical damage . Fragile polystyrene foam easily crumbles and dents, so it must be protected from impacts.
- Waterproofing . Expanded polystyrene, although poorly, still absorbs moisture (up to 2% by volume when fully immersed). At the same time, it takes a very long time to dry. Wet foam retains heat much worse. Its strength decreases.
- Sun protection . Ultraviolet rays dry the foam. Over time, it begins to crumble.
- Improving fire safety . The plaster layer will protect the insulation from fire.
To finish external walls insulated with foam plastic, you will need 2 or 3 types of mixtures, depending on the final finish:
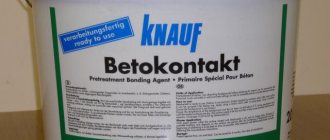
1. Adhesive solution based on cement, sand and polymer additives. It is used when installing insulation sheets to street walls and to create a base layer with reinforcing mesh. Decorative finishing will already be applied on top of it. You can use, for example, Ceresit CT 83, Weber.Therm S100, Unis Warm Adhesive, Knauf Sevener (universal adhesive mixture).
2. Cement-sand mortar . It will protect the foam from damage. Finishing decorative plaster or facade paint .
You can prepare this mixture yourself using a mixer. The proportions of materials will be different depending on the brand of cement. For example, for the M400 brand, take 4 parts of sifted dry sand for 1 part. For plasticity, lime and surfactants are added. Mixing it yourself helps you save a lot when plastering.
Ready-made CPU mixtures are available in almost every hardware store. Here are several popular brands: Knauf Unterputz, Forman No. 61, Osnovit Startwell PC2, Volma Aquaslayer, etc. The price of ready-made mixtures is around 200-300 rubles per 25 kg, depending on the manufacturer.
mixing the solution
3. Decorative plaster . It has different binding bases: acrylic, silicone, silicate, etc. Since polystyrene foam has low vapor permeability and is also covered with a layer of cement plaster, you can choose any decorative composition. All that matters is the price and customer preferences.
How to plaster: choosing a mixture
For plastering PPS, you cannot immediately use ordinary cement-sand mortars. They will quickly peel off from the surface of the slabs. Therefore, the first layer is applied with special polystyrene foam plasters. In addition to cement and fine sand, they contain glue and other additives that ensure strong adhesion of the mixture to the walls. After applying the foam glue, you can already create a base plaster layer using a cement-sand mixture.
Adhesive plaster is intended for attaching PPS and some other types of insulation to various mineral substrates.
Several popular brands of adhesive plasters for polystyrene foam:
- Ceresite ST 85. Compressive strength (a parameter indicating the ability of the material to withstand destruction and mechanical loads) - 8 MPa. Frost resistance 100 freeze-thaw cycles.
- Knauf Sevener. Plaster of this brand has all the characteristics of Ceresit ST 85, differing only in slightly lower compressive strength (7.5 MPa) and frost resistance (75 cycles).
- Founds Coverplix C117. Plaster-adhesive mixtures of this series have high compressive strength - 10 MPa, frost resistance of 75 cycles. The series includes several special types of plaster: winter, high-strength, reinforced, etc.
- UNIS Thermal adhesive for insulation materials. Its main characteristics: frost resistance of 100 cycles, high vapor permeability, suitable for machine application.
- Adhesive plaster for polystyrene foam Dali. It is based on cement. The mixture is elastic and has increased compressive strength.
The presence of reinforcing microfibers in the plaster mixture does not eliminate the need to use reinforcing mesh. Therefore, a fiberglass construction mesh must be attached to the polystyrene foam underneath the plaster.
To create a base (not decorative) layer, you can use ready-made cement-sand mixtures . They are available in almost every hardware store.
To independently prepare a C-P solution, use cement grade M400 or M500. Its ratio with sand will be from 1:4 to 1:5. River sand is cleaner and contains no clay impurities. But quarry sand has better grip because its edges are sharper.
The proportion Water/CPS = 0.8-1.2, depends on the moisture content of the sand.
To finish the external walls of a building, special decorative plasters are used, for example:
- Ceresit ST 60, 63, 64. These are decorative pebble acrylic plasters, recommended by the manufacturer, including for coating polystyrene boards. Apply over base coat. Ceresit ST series 60 is the basis for tinting. Color at customer's choice.
- Ceresite ST 35, ST 137. These are mineral mixtures. ST35 gives the surface a “bark beetle” texture, ST 137 pebble. There are three versions in stock: white, painted and “Winter”. Winter version suitable for work at temperatures from 0 C.
- Ceresit ST 174, 175. Plasters in this series are made on a silicate-silicone base. ST 174 pebble and ST 175 “bark beetle” are the base for tinting.
- Knauf Diamond. This is a mineral structural decorative plaster. Suitable for painting. Compressive strength 3.5 MPa, frost resistance 50 cycles. Best used in combination with a base coat of Knauf Sevener.
- Stolit AF. The plaster mixture of this brand is classified as structural acrylic and gives the surface a “lamb” relief.
When choosing a finishing decorative coating for polystyrene foam, you need to take into account that acrylic plasters are more resistant to atmospheric influences.
DIY plastering
Now let’s take a closer look at how to properly plaster polystyrene foam. The algorithm is as follows:
- preparation of the base;
- fastening the reinforcing mesh is the first adhesive layer;
- applying a base leveling layer;
- finishing mixture.
Tools you will need:
- mixer;
- container for mixing;
- reinforcing mesh;
- sandpaper for rubbing;
- putty knife;
- building level;
- adhesive solution and mixture for plastering (rough and decorative);
- primer.
Preparation of the working area
As soon as the work on covering the facade walls is completed, carefully inspect the entire area, identify and eliminate small defects. Empty areas in the seams are filled with foam for installation work, excess adhesive solution is cut off with a sharp blade, and the joints are cleaned with sandpaper.
The result should be a smooth surface, free of protrusions and depressions, free of dirt and dust.
If polystyrene foam boards are excessively smooth, experts advise treating them with a little sandpaper or rolling them with a roller with a special needle nozzle.
Such measures will increase the percentage of adhesion of the plaster layer to the insulating surface, after which the hardened solution will be firmly fixed.
How to plaster correctly
All work begins with cutting the mesh for the corners. If slopes are to be processed, then the length of the mesh should correspond to the length of the slope, the width being 30 cm. For the corners of the house, 1 meter will be measured.
It's much easier to work with such a long one. The width is the same as for slopes.
Having prepared the solution according to the recipe indicated on the package, you can begin plastering.
Plastering polystyrene foam with your own hands starts from the corner, and so let’s get started:
- Using a small spatula, apply the solution onto a large spatula. Then the solution is applied to the wall. The length of the strip must correspond to the length of the reinforcing mesh. How to properly plaster a wall using polystyrene foam video? The width on one wall will be equal to half the width of the mesh plus 5-10 cm.
- The reinforcing mesh is bent in half along the width and applied to the solution.
- We take a wide spatula and, smoothing the mesh, immerse it in the solution. The reinforcing element must completely penetrate the plaster solution. If the previously applied layer is not enough, then additionally apply it on top of the mesh. The spatula needs to be moved from top to bottom and from the corner. This will create a smoother surface.
- Next, apply another solution to the wall, which will be slightly larger in size than the next piece of mesh.
- Each subsequent section of the reinforcing mesh overlaps the previous one by 5 cm.
- Everything is leveled and smoothed with a wide spatula. This is done throughout the entire area.
Plastering technology
It's time to talk about how to plaster polystyrene foam. Due to the hardening conditions required for plaster compositions, work with plaster is carried out at humidity up to 60%!, temperatures not higher than +30°C, not lower than +5°C. If facades are being plastered, choose windless, dry weather.
The surface to be plastered is shaded and covered from rain with a canopy. When working indoors, sockets and switches on the wall being plastered are de-energized. Do not use heaters or fans to dry the wall being plastered.
During work, use protective equipment.
Plastering stages:
- Measurements are taken and the need for materials is calculated (safety factor - 1.2).
- Materials are purchased: primer, plaster mixture, reinforcing elements.
- Prepare tools and devices.
- Prepare the surface.
- Prepare a solution.
- Install polystyrene foam.
- The plaster (adhesive) composition is applied and the reinforcing elements are attached.
- Apply a leveling plaster layer.
- Rubbed out.
- Putty.
- Prepare the surface for finishing.
- Finishing is carried out with decorative compounds.
- Painted.
It is advisable for a beginner to learn how to use a spatula with both hands. In this case, you can change your hand when it gets tired, without taking breaks from working. When applying the solution, keep the spatula at an angle to the wall, without pressing too hard. The thickness of the mixture layer depends on the pressing force. The solution is applied to the middle of the working surface with a narrow spatula. They also use a wide spatula to remove residues or excess mixture removed from the wall.
When working with decorative plasters, the working surfaces of the spatula and trowel are regularly cleaned of remnants of the plaster mixture and wiped with a damp cloth. This prevents the formation of seized lumps and the resulting banding of the smear. Many decorative compositions do not tolerate excess mortar removed from the wall being thrown into them, since the excess becomes the center of accelerated crystallization of the plaster mixture. The excess is either immediately applied to the wall where there is not enough mixture, or thrown away.
Tools and materials for work
You should prepare in advance:
- short-haired roller (needed for priming);
- construction mixer;
- spatulas with a metal plate;
- trowel or trowel;
- plastic grater with sandpaper attached;
- plastic corners with reinforcing mesh;
- notched spatula;
- scissors for cutting mesh;
- level;
- containers for solution and water;
- brush;
- plaster mixture (or several types);
- primer;
- fiberglass mesh;
- masking tape.
Plastering materials are purchased in a volume sufficient to carry out the entire work (with a reserve). You should purchase products from the same company, preferably from the same batch (this is especially important for decorative color compositions).
It is better to take a trowel and spatula with rounded corners. This is especially important for applying decorative plasters.
Preparing the mixture
Usually, the process of preparing the solution is described in sufficient detail by the manufacturer himself on the product packaging. The solution is prepared from the dry mixture before application.
Stages:
- pour all the powder that is in the package into a container filled with cold water (so that all batches have the same content of components);
- mix the mass with a mixer until a homogeneous dough is formed;
- cover, leave to brew for 5-15 minutes (after this, neither liquid nor dry substances can be added);
- mix again.
Before plastering on foam plastic, the finished mixture should also be stirred to lift the settled heavy particles.
If, when mixing the solution in a container with a mixer, splashes scatter around the sides, you can change the direction of rotation of the mixer nozzle by switching the mode. Then the mixture will lean towards the center of the container.
Preparing the base
Responsible stage. The evenness and service life of the plaster “shell” depend on the quality of the work performed.
Before gluing the insulation sheets, the wall is prepared as usual:
- remove unusable old coating, knock down large protrusions;
- chips and cracks are “healed”;
- clean the base from stains of various origins (wash with water, dry, treat with special means);
- Dust is removed from the surface, remaining metal objects are insulated with oil paint;
- install the base profile according to the level;
- install foam sheets (using glue and fastening with dowels).
Sequence of preparation of the foam base:
- check the evenness of the entire surface (joining sheets of PPS must be at the same level) by running a rule along the wall;
- the protrusions are carefully cut off, the joints are cleaned with sandpaper;
- remove dirt and dust from the surface;
- To increase adhesion, the top of the foam plastic is rolled with a needle roller (the solution will penetrate into the holes formed during plastering).
Beginners often wonder: is it necessary to prime the foam before plastering? If plastering is done with special mixtures for PPS or mixtures from Knauf, then no primer is required.
But where mechanical loads can be increased (to the height of a person’s height), a primer for foam plastic will not be superfluous. You can cover the walls themselves with concrete contact or Ceresite. After plastering (for finishing), the insulated wall is primed.
Closing seams
The seams between the EPS sheets must be filled with polyurethane foam to prevent the formation of cold bridges. If the mounting foam at the joints protrudes above the EPS, it is cut off (the seams must be completely filled). If the seams are large, they are filled with strips of polystyrene foam of the required width, placed on the foam.
Selection and fastening of reinforcing mesh
The integrity and durability of the plaster shell is ensured by the reinforcing mesh. Strictly speaking, the reinforcing mesh is only needed to increase the physical strength of the plaster shell. Moreover, exactly where mechanical shocks are possible. This is the area of the wall up to a height of 1.5-2 m from the surface of the ground (on the facade) or the floor (indoors). Above this, it is irrational to use reinforcing mesh, since it is an unnecessary waste of time, effort and money.
The plaster itself is capable of holding tenaciously, protecting the PPS from UV rays and pecking by birds. But in a problem area, where human activity can lead to damage to the plaster layer, a mesh is a necessity.
An ordinary serpyanka is not suitable here. Metal meshes are also not used, since due to their rigidity it is impossible to level them, as a result the thickness of the plaster layer increases. For reinforcement, fiberglass mesh fabric of different densities is used (depending on the size of the cells and the thickness of the threads).
More often, a fabric with a density of ≥ 150 g/m2 is chosen, but not too dense.
Before installing the mesh, all dowels with caps that secure the PPS ("parachutes") are recessed so that the foam surface has no protrusions. After recessing, the recesses are sealed with an adhesive solution. Another subtlety - before starting work, a line is drawn on the wall indicating the installation height of the mesh reinforcement. They do this to save the adhesive mixture.
We recommend: Chemistry at our home
It is more practical to apply the mixture with a spatula. The wider the spatula, the smoother the applied strip of mortar.
Reinforcement begins with the installation of perforated corners with a mesh at the corners of the building, and also reinforces areas with complex geometry.
Stages of work:
- Prepare the corners (cut to length).
- Prepare the solution.
- Using a spatula or trowel, apply a continuous strip of solution to the corner on both sides (do not level it). Apply a corner, press lightly, check verticality with a level. Press the corner into the solution, trimming it, and smooth the mesh along its sides with a spatula (downwards and from the corner to the sides). Make sure that the corner and the adjacent mesh are evenly deepened into the solution (the solution is added where necessary), and remove excess plaster mixture.
- Having processed the corners, they take up the reinforcement of the slopes - measure and cut the corners to the required size. If the width of the slopes is correct, they are reinforced as described above. Otherwise, the corners are applied separately (similarly to that described for the solution with vertical alignment), and the mesh is cut into a strip 1-1.5 cm narrower than the slope. “Glue” onto the solution, not reaching 5-7 mm to the corner edge. The mesh strip is smoothed lengthwise, then from the center.
- Flat sections of the wall are reinforced last. Since it is difficult to glue and level large panels, the mesh is cut into strips a meter and a half long. It is easier for beginners to work with small canvases, then they have time to apply and smooth the mesh before the solution dries. If you act slowly, the solution will dry out and you will have to remove it and apply a new one. A continuous strip of mortar is applied to the wall, starting from the corner (from the drawn line down). The dimensions of the strip are the same as that of the mesh fabric. The thickness of the plaster layer is ~ 2-3 mm. A grid is applied to the solution, guided by the line drawn on the PPS and the vertical angle.
Press the mesh with your hands to the solution in several places and check the correctness of its position. After this, using a spatula, the panel is pressed against the insulation. They begin to press down the first panel from the center down and in both directions. This is done so that the solution protrudes through the cells above the mesh. When smoothing the mesh with a spatula, make sure that it is completely immersed in the solution. Where the plaster is not enough, apply a little mortar with a spatula on top of the mesh so that it is completely hidden.Some craftsmen advise not to immediately glue the edges of the mesh at the junction of the panels (the recommended overlap is 10 cm). This only complicates the reinforcement. Glue the entire mesh. Then you won’t have to crush it, and the next layer of solution will lay down without any problems. This will increase speed and improve accuracy of work.
- The next canvas is applied in the same way, only its edge is moved so that it overlaps the edge of the previous canvas with an overlap. Align the bottom sheet with the top sheet. When smoothing the mesh, make sure that there are no sagging, depressions, or stripes. The surface must be flat. The excess mixture is removed.
- Having glued the bottom mesh, the excess lower part of the canvas is trimmed. The ends of the mesh should be covered with mortar. Then the coating will look neat.
Fastening corners Reinforcing slopes Reinforcing flat areas of the wall Gluing the next layer of mesh with an overlap
It is necessary to calculate the location of the mesh so that its joints do not fall on the PPS seams.
It is impossible to leave sections of the mesh under which there is no solution or protruding above it (not recessed).
Grouting the surface
After attaching the mesh, give the layer a day to dry. Then the surface is rubbed, but not in the same way as after applying leveling plaster, which is done on a barely set layer. There is no need to wet the wall. You just need to sand down the sharp protrusions so that they do not interfere with further finishing.
For this purpose, use a grater with sandpaper attached.
The grain size is selected according to the type of future coating:
- for decorative structural plaster - coarse-grain sandpaper;
- for painting, wallpaper and thin-layer plaster coating - fine-grained.
The grater is placed flat on the wall, pressed a little and moved in a circle with even pressure, without staying in one place for long. After finishing grouting the entire surface, remove dust from the wall.
Final alignment
For this operation, the solution is mixed thinner. Apply an even layer of up to 3 mm to the wall using a wide spatula. When application is complete, the layer is dried and rubbed over again. Then the dust is removed.
Preparation before applying the decorative layer
Apply the primer with a roller, and where it is inconvenient to work with a roller, use a brush. There can be one or two layers of primer. This depends on the severity of climatic conditions. Each layer of primer is dried for at least 24 hours. The primer composition is selected according to the mixture used for plastering and the material of the finishing coating.
Finishing on such a thin layer of plaster cannot be done with paint compounds that can destroy the foam.
Colorful compositions containing:
- benzene;
- toluene;
- drying oil;
- acetone;
- xylene;
- coal or polyester tars;
- gasoline or kerosene.
Is reinforcing mesh necessary?
Even if the foam is prepared for applying the solution using a primer, the plaster mixture is still not applied directly to it. In order to obtain a more reliable coating, a fiberglass reinforcing mesh is used.
It is optimal to choose a mesh with a density of 130/160 g/m2. Foam plaster will work well on such a reinforcing fabric, but it is difficult to work with when finishing corners.
Tools and materials for work
To paint polystyrene foam, you need a mesh, a spatula and the plaster itself. If you want to create some patterns, you can use a coloring pigment in the plaster to create a special appeal and style.
If we consider more precisely the issue of tools and consumables, we can highlight the following components:
- Fiberglass mesh with a density of 140-160 g/m2.
- Primer to create a leveling layer.
- Short-haired roller for priming.
- Metal spatulas of different sizes.
- Construction mixer for mixing material.
- Plastic corners for mounting reinforcing mesh.
- Plastic float for processing plastered surfaces.
Properly selected tools for the job allow you to quickly and efficiently cope with plastering foam in accordance with established requirements.
Plastering doorways and slopes
After replacing window or door frames, the best insulation of the openings formed between the frames and the facade will be to make slopes made of foam plastic with plastering. You can make slopes as soon as the polyurethane foam has dried.
The simplicity of the work is similar to installing drywall. Blanks are cut out of PPS sheets and glued to the wall along the perimeter of the frame (foam plastic also needs to be mounted under the window sill. When the glue dries, dowels with fungus are installed. Plastering the foam is done in the same way as described above (corners are placed on the mortar, strips of reinforcing mesh are attached, etc. .d.).
In order not to stain the frames, they are covered with masking tape before starting foam plastic work.
Consumption of façade plaster on polystyrene foam
If styrofoam plastering is done with a universal facade mixture, then the consumption per square meter will be 10 kg. Using two types - adhesive and leveling plaster, prepare 4 and 6 kg per square, respectively. The same consumption - 9-10 kg will be if a polymer composition is used. Of these, 3.5-4 kg will be needed for gluing the insulation, the rest will be needed for plastering on foam plastic. An online calculator will help you calculate the consumption of leveling plaster.
Insulating a house with polystyrene foam is becoming more popular every year. Having familiarized yourself with how to plaster polystyrene foam, what materials are better to purchase for the facade, which façade insulation is preferable to room insulation, you can easily solve many problems that arise during repairs or construction. Plastered thermal insulation will last longer if it is promptly tinted and repaired if the integrity of the “shell” is damaged. Your home will be safer, and you will be warmer and more comfortable in it.