The modern construction industry provides apartment owners with a variety of ways to finish the walls in the bathroom. Among them: moisture-resistant wallpaper, PVC panels, decorative plaster, etc. However, despite the large selection of options, wall painting and tiling remain the most popular. And here, those who do the work with their own hands have a lot of questions: is it necessary to plaster the walls under the tiles, what plaster to use in the bathroom for painting, and which one to use under the tiles? Below we will try to give answers to the questions posed.
Which plaster to choose for the bathroom
There is no clear answer to this question, because the purposes for using the plaster composition may be different.
Plastering walls in the bathroom is performed for:
- leveling wall surfaces for subsequent finishing;
- creating a finishing coating.
These purposes correspond to compositions whose properties differ. In the first case, when asked about how to level the walls in the bathroom, a number of plasters intended for technical finishing will be offered. For example, a popular, accessible, inexpensive cement-sand mixture (CSM). The variety of types of plaster compositions for finishing is even greater.
For example, facade compositions are suitable for use in a bathroom. They easily cope with high humidity, temperature changes and are resistant to chemically aggressive atmospheric substances.
Manufacturers also produce moisture-resistant plaster for the bathroom, special sanitizing mixtures, as well as waterproofing plaster.
For rooms where humidity is high, three types of compositions are used:
- moisture-resistant (those that can withstand a high percentage of moisture in the air);
- hydrophobic (water-repellent compounds that, when hardened, form a hydrophobic film on their surface);
- sanitizing (unidirectionally passing water from the base to the outside).
What conditions must the plaster mixture meet?
Qualities of plaster mixtures:
- ability not to let water through;
- vapor permeability (important, since there is no free air circulation in the bathrooms);
- unattractiveness to fungus, microorganisms, mold (heat and humidity conditions here are favorable for the creation of their colonies);
- durability;
- strength;
- adhesiveness;
- plastic;
- maintainability;
- environmental friendliness;
- possibility of repeated washing
- affordable price;
- decorative (for finishing compositions).
The plastering materials described below meet these conditions.
Cement plaster for bathroom
Cement plasters for bathrooms are traditional. Simple mortars are made on a cement base, the filler of which is sand. As a rule, this is a leveling mixture. The finishing touches for her have always been oil paints and tiles.
Ready-made SS (dry mixes) are produced by many companies. It is also possible to compose and prepare solutions yourself.
Less commonly, cement-lime and cement-polymer mixtures are used for the base.
Can I use gypsum plaster in the bathroom?
When planning a renovation or intending to start decorating a new home, beginners ask themselves: is it possible to plaster the walls and ceiling in the bathroom with a gypsum mixture? Gypsum compositions are very easy to apply, durable, easy to install and tenacious. The catch is that gypsum is a substance that actively absorbs water from the environment.
Once saturated with water, gypsum loses strength. Therefore, while gypsum-based compositions were widely used for interior decoration, they were not used for bathrooms. In the Technical Recommendations for Moscow, only cements are indicated as plaster binders for bathrooms.
This situation has changed with the development of building materials, and gypsum plaster in the bathroom is now more common.
Therefore, to the question “can I use gypsum plaster?” – the answer is ambiguous. For leveling (followed by a hydrophobic coating), gypsum with modifying additives is suitable. For heavy tiled cladding – no.
If you decide to use a gypsum composition, then it is better to purchase gypsum plaster for the bathroom from leading brands, for example, Rotband from Knauf or Unis Teplon.
Silicone plaster in the bathroom
Silicone mixture is good as a decorative cladding. It is hydrophobic, durable, adheres well to any type of coating, and is “long-lasting” (operation lasts up to 60 years). The silicone composition is not favored by bioaggressors (mold, fungi). The silicone-based plaster coating is easy to clean. Ready-made mixtures are easy to tint, and the choice of colors for the compositions offered by manufacturers is varied. Disadvantage: high cost, unsuitable for leveling.
Sanitation mixtures
Vapor-permeable, but low-porous sanitizing compounds are capable of retaining salts that easily come out of wall materials along with water moving through the capillaries. Thus, they protect wall materials from leaching and prevent the appearance of efflorescence on the surface. They also make a good waterproof plaster for bathroom walls.
They are applied for leveling and sanitizing walls. Sanitation mixtures are elastic. If you apply this material in a thick layer, it will not crack when it dries. The downside is that it takes a long time to gain strength. The finishing coat can be applied to the sanitizing coating only 7 days after plastering.
Suitable types of decorative plaster
For decorative plaster of walls in the bathroom, the choice of compositions is large, since many decorative mixtures are produced on silicone, acrylic, silicate, cement and polymer bases. All of them are not afraid of high humidity and direct contact with water. So there are all conditions to create any design style.
But there are some restrictions. For example, there is no need to make an excessively textured coating in the bathroom. Moisture that accumulates in the depressions can attract many germs and other microorganisms. In addition, walls that are too “furrowed”, for example, bark beetles, are very inconvenient to wash. But such “flat” finishes as Venetian or Moroccan seem to have been specially invented for bathrooms. Even bathrooms, sinks, and shelves are made from real Moroccan plaster.
Features of the material
The widespread use of plastering work is due to the fact that most finishing materials require leveling surfaces before installation, rather than simply repairing defects. This must be done during further painting, wallpapering, or applying decorative compounds. Much attention is paid to the quality of plastering: if the base is not leveled well enough, then all surface defects will be visible through the decorative finishing coating.
Regarding tiles, a question may arise: is it necessary to plaster the walls before laying the tiles? To get an answer to it, you need to start from the degree of their unevenness:
- when the deviation from the level in the working plane exceeds 3 cm, then you will need to install beacons and use a leveling solution;
- if there are significant cracks or many small ones, then plaster must also be applied;
- If the existing coating peels off, it should also be replaced with a new one.
Whether it is necessary to plaster the walls under the tiles if the discrepancies from the plane are less than 3 cm depends on the professionalism of the specialist carrying out the finishing. Only craftsmen can lay ceramic tiles with high quality, because working with tiles on an uneven base requires experience and practical skills.
Of course, if you perform preliminary plastering, tiling will be much easier, and the created coating will additionally reinforce the base.
Waterproofing compounds
By introducing water repellents into plaster compositions, 100% waterproof coatings are achieved.
The following types of plaster compositions are used as waterproofing for bathrooms:
- cement-sand;
- cement with liquid glass;
- cement-latex;
- asphalt.
Waterproofing coatings are especially good for covering gypsum tongue-and-groove boards (gypsum tongue-and-groove boards), from which partitions separating bathrooms are often made.
Making your own solution
Today there is a large selection of plaster mixtures on the construction market. Many masters prefer to make the compositions themselves. So the total cost of components is almost several times cheaper. Even a beginner can handle the preparation of simple cement compositions. To do this, you will need to prepare the components and follow the dosage, as well as the sequence of mixing the solution.
The volume ratio of the cement-sand mixture for cement grade 400 or 500 is taken to be 1:3 or 1:4 (respectively). Sand from a quarry is preferable. However, river sand is also suitable. To increase plasticity, detergent/liquid soap is added to the water used to prepare the composition.
If the solution is prepared in a mortar mixer, then most of the required water is poured into a rotating container. Then add liquid soap and add sand with a shovel. Then cement is poured. The rest of the water is added in small doses, monitoring the consistency of the plaster dough. As soon as the dough reaches the desired consistency, stop adding water.
If the solution is prepared manually, then sand and cement (dry components) are first mixed. After obtaining a homogeneous mixture, stirring and adding water (with a plasticizing additive) until the desired consistency is obtained. For mixing, use a trowel or mixer (depending on the volume).
Criterias of choice
Among the key points when choosing plaster products for the bathroom are:
- hydrophobicity parameters of the solution. For rooms with special microclimate conditions, exclusively waterproof finishing options are used;
- The composition for plastering walls is selected depending on the base material. For example, when arranging wall blocks, the priority is a solution with a filler made of fine sand; in the case of brickwork, preference is given to the version made from coarse sand;
- it is necessary to make sure that the shelf life of the product corresponds, check the storage conditions, otherwise it is difficult to predict the results of finishing work.
When choosing plaster for a bathroom, you need to take into account the parameters of hydrophobicity.
Priority is given to offers from well-known brands in a competitive environment. Waterproof plaster for the bathroom in Moscow and other regions is represented by a number of domestic and foreign manufacturers. It is worth remembering that purchasing relatively inexpensive products from new companies risks questionable quality of the product, the need for new repairs and additional investments.
Installation of beacons
The walls of the bathroom must be made with high quality, since all their unevenness and curvature will affect the quality of laying the tile cladding and will greatly complicate work in the future. To level the walls in the bathroom, plastering is carried out along the beacons. They can be made from the mortar that they plan to use to plaster the room. Beacons made of metal or plastic are also used.
Installation is carried out in the following sequence:
- Examine the geometry of the walls.
- Mark the installation location of the beacon strips (the distance between the strips is from 100 to 150 cm).
- Along the line of beacons, dotted “patches” of gypsum dough are applied to the wall.
- Beacons are attached to the wall using plaster “slaps” at a level, creating a vertical plane for the future surface of the plaster coating.
- Clean the upper surface of the planks from dried deposits of gypsum with a spatula (while moving, place the sharp edge forward).
Checking wall geometry
Spot application of solution
Beacon markings
Installation of a level beacon
Removing excess plaster
Control inspection before applying tiles
Before starting finishing work, you need to once again check the geometric dimensions of the room and make sure that the walls are really vertical and rectangular. This is necessary so that the tiles fit correctly in the corners of the walls, as well as to avoid gaps between the bathtub and the walls.
Checking the geometric dimensions of the room
It is convenient to check the quality of plaster using a rule. A perfectly smooth surface is not needed here; the deviation from the plane should not exceed 0.5 mm. Remove any existing solution build-up. If depressions larger than 0.5 mm are found, it is better to level them, otherwise count on increased overuse of tile adhesive.
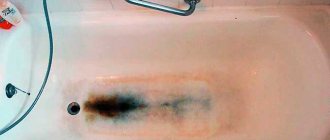
Defects in future tiles due to uneven walls
Plaster leveling technology
Typically, renovations are carried out in old houses where the bathroom walls require alignment. Collapsed or crooked walls can often be found in new buildings. Therefore, leveling the walls in the bathroom is a “popular” task, which can be solved in different ways. Easier - plastering.
Tools used:
- Ladle;
- Master OK;
- rule;
- putty knife;
- level;
- mixer;
- grater;
- chisel;
- perforator;
- capacity;
- Personal protective equipment.
Plastering is carried out in stages:
- Preparing the wall surface for plastering.
- Installation of beacons.
- Preparing the dough.
- Applying plaster mortar.
- Grout.
- Drying.
Stages of plastering work
Conditions of work:
- temperature +5 – +35оС;
- humidity not more than 60%.
Preparing walls for work
- Leveling plaster in the bathroom, intended for tiled cladding, will not adhere to oil paint or whitewash. Old, peeling or crumbling plaster is also unreliable. All this is removed by cleaning the walls down to the concrete or brick base.
- Brickwork (old or new) will hold the plaster coating better if the joints are deepened by 1 cm and the surface is cleaned with a wire brush.
- Protrusions on the concrete base are knocked down. Large cracks are opened, dust is removed, moistened, and filled with solution. For reliability, as well as to prevent cracking of the finish in the future, a reinforcing mesh is attached over the cracks. Large chips are covered with a solution, which must dry well before plastering. Notches are applied to smooth concrete surfaces.
- Stains of various origins (oil, grease, bitumen, mold, rust, efflorescence) are cleaned with appropriate means or chipped off to clean wall material.
- Remove excess metal objects (nails, dowels, staples). The remaining parts are covered with insulating agents.
- The openings for communications are completely cleared of the solution, dust is removed, and they are moistened. Too large gaps are filled by laying pieces of broken bricks with cement mortar. Cover the top with cement paste.
- Communication terminals are protected from contact with solution. They are wrapped with masking tape.
- The surface of the base is primed (some bases are primed twice). Dry it.
The quality and durability of the entire finish depends on the quality of preparation.
Preparation of the solution
The technology for preparing cement-based plaster dough is described above. If you decide to use a ready-made gypsum mixture, then you need to dilute it strictly according to the instructions. This also applies to ready-made dry mixes on other bases. Before applying to the wall, ready-made commercial mixtures are mixed to lift the settled heavy components. If the composition is thickened, add a little water or another diluent (as prescribed in the instructions).
The leveling plastering itself is carried out in layers: spray, primer, covering. Separate solutions are used for each layer. For spraying, a solution of cement and sand is made thinner. The solution for the primer (base layer) is made of normal fat content and viscosity. For covering, use fine sand grain size (up to 1.5 mm) or a little more cement for fat content. The covering is applied provided that the finishing is made of paint or thin-layer decorative plaster.
Applying spray and base coat
General comment. The number of layers to be laid during plastering depends on how uneven the wall is.
The base layers of cement plaster do not exceed 1 cm. Therefore, where the distance between the wall and the surface of the beacons is more than 15 mm, there may be two or more base layers. Each subsequent layer can be applied after the previous one has begun to set. If this moment is missed and the laid layer has set, then it is given a day to dry. Before applying the next layer, it is moistened.
When applying cement mortar, the wall must be sprayed (this is not necessary for gypsum mortar). The spray is thrown onto the wall with a ladle or trowel, spreading the solution spot to spot, leaving no gaps, moving from bottom to top. The thickness of the spray layer is about 5 mm. It is not leveled for better adhesion to the subsequent layer of soil. After application, allow the layer approximately 2-3 hours to cure.
The crumbling wall needs to be strengthened. Strengthening is carried out with a reinforcing mesh, which is attached to the wall and sealed with the first layer of plaster mortar.
A base layer – primer (layer 10 mm) is applied on top of the spray. This is done with a trowel or spatula. Application is carried out between beacons in areas up to 120 mm high. If the layer rises above the beacons, then level the solution using the rule, pressing it against the beacons and moving it upward. At the same time, the rule is to make zigzag movements.
The excess composition that has accumulated on the rule is thrown into a container or transferred with a spatula to the wall where the solution is missing. Having carried out the rule 2-3 times from bottom to top, once from top to bottom. In this way, the mortar is prevented from sliding off the wall.
If the wall is too littered, then the soil is made multi-layered. The first layer is leveled immediately after application. After waiting for the setting to begin, apply the next layer. The top layer of soil is leveled along the beacons, which are removed after the solution begins to set. The resulting groove is filled with solution. The solution is leveled with a grater or spatula.
According to classical technology, each layer of soil is dried for at least 24 hours. In this case, for better adhesion, the surface of the laid layer is marked with a sharp corner of a spatula. The more lines (horizontal or diagonal), the better. For this technique, it is more rational to use beacons made of solution or stainless steel beacons, which do not need to be removed.
Gypsum plaster allows the application of 1 layer up to 1.5 cm.
Leveling the surface
For painting, the standard requires special smoothness and evenness of the plaster of the walls in the bathroom for painting. The same surface quality is needed for the Venetian. Therefore, they perform the covering. Then the plastered surface is rubbed, smoothed and sanded.
The coating solution is applied with a spatula or trowel in a thin (2-3 mm) layer, holding the tool at an angle of 15-20 degrees. When the covering has hardened slightly, it is leveled with a grater, making circular movements. The convex places are pressed in by pressing the moving grater harder. The grater is not pressed over the indentations, but not removed. This operation is called “circular” grouting. The solution accumulated on the grater is cleaned off regularly.
Covering and grouting plaster
Immediately after the circular grouting, grouting is carried out “in acceleration”. These are straight up and down movements of the grater without pressure. For a “shine-chic” look, you can also smooth it out. Use a grater made of stainless steel, rubber or felt wrapped. The movements are the same as when grouting “in acceleration”. However, you can skip this step.
Finishing
This stage is started only after the rough finish has completely dried, so that moisture not used for chemical reactions can find its way out.
The simplest, most budget-friendly finishing option is painting. You can paint the walls and ceiling. You can decorate the room with tiles (craftsmen advise waiting 3 weeks for the cement to gain strength). A more complex and expensive option is finishing with decorative plaster.
The most exquisite bathroom finish is Venetian, which can be made from moisture-resistant plaster.
Preparatory stage
First of all, you should determine whether the old coating needs to be removed. Plaster cannot be applied to whitewash and paint, as the mortar may peel off after cladding. For the same reason, you cannot plaster loose, crumbling surfaces, areas with traces of bitumen, oil stains or covered with mold. All this must be cleaned down to the concrete base, and for convenience and speeding up the process, it is best to use a grinder with an appropriate attachment.
Removing paint using a grinder with a mechanical brush
After this, the surface is cleaned of dust, oil stains are treated with a solvent, and mold stains are treated with antifungal agents.
Wall treatment
If the walls are covered with cement plaster and it adheres tightly, there is no need to remove it. To ensure the quality of the coating, you need to tap the walls with a hammer - the sound should be equally clear over the entire area. Where the knocking is dull, you need to knock down the plaster - voids will probably form underneath it.
If you hear a dull sound, it means the plaster is holding weakly.
Detected cracks must be expanded and removed from dust, and through holes around communications must be thoroughly cleaned.
Sealing cracks and crevices in walls
To seal gaps and cracks, cement mortar (part cement to 3 parts sand) or epoxy resin is used, which is injected into the cracks using plastic nozzles. When sealing large cracks, fiberglass reinforcing tape is additionally used.
Repairing cracks in the wall
Expert opinion
Roman Vasiliev
Builder, repairman
Advice. New concrete walls are too smooth for plastering, so it is advisable to apply small notches to them with a chisel to a depth of 2-3 mm. The more notches, the better; on average, there should be about 250-300 notches per m2 of wall. In new brickwork, it is enough to deepen the seams a little by scratching them with something sharp. Finally, sweep off the dust with a brush and treat the surface with a primer, for example, Betokontakt Knauf or Ceresit.
Notches on the wall
Material calculation
To calculate the amount of plaster, you need to find out the thickness of the application layer. To do this, measure the differences in the heights of vertical planes at several points by applying a rule or a flat rod to the wall.
Determining the evenness of walls
Expert opinion
Roman Vasiliev
Builder, repairman
The more such points, the more correct the calculation will be. Next, the obtained values are summed up and divided by the number of points at which measurements were taken.
For example, measurements were taken at 5 points and the deviations were 1, 2, 2.5, 2.7 and 3 cm. In total we get 11.2 cm. Divide by 5 and we get 2.24 cm - this is the average thickness of the plaster layer .
Permissible thickness of plaster layer
The packaging of the mixture always indicates the consumption of plaster per m2 at a certain layer thickness, most often 10 mm. For example, the consumption of Profit Hydrophobe is 15 kg/m2. We multiply by the thickness of the layer we get: 15 x 2.24 = 33.6 kg. That is, per meter of area we will need 33.6 kg of plaster. To find out the total quantity, all that remains is to calculate the area of the walls and multiply the values.
For example, the total area is 20 m2, then 33.6 x 20 = 672 kg. The mixture is usually packaged in bags of 25 or 30 kg, and to calculate the number of bags, we divide the total consumption by the volume of one package: 672/30 = 22.4.
Water-repellent plaster Profit Hydrophobe
Round up to the nearest whole number and get 23 bags. It is impossible to calculate exactly down to the gram the consumption of the mixture, so you always need to round up so that there is some reserve just in case.
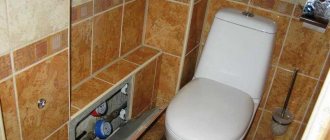
Plaster in the bathroom
The toilet room is not as damp as the bathroom. However, condensation may accumulate on the pipes. Plastering a toilet is a difficult task. Finishing with other materials is much easier. However, it allows you to maintain more comfortable conditions.
The walls and ceiling of the bathroom are covered with a sanitizing solution. After which the bathroom is primed and plastered with decorative moisture-resistant plaster compounds. You can also apply water-repellent wax in areas of possible contact with water.
Expert advice
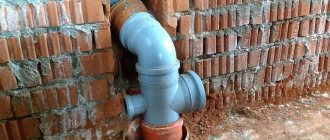
The joints of different materials (concrete and brick) are additionally reinforced with a plaster mesh extending 10 cm on each side. In order for the plaster to adhere better, special primers are used that create a protective film. If this is not done, the walls will draw moisture out of the plaster before it dries and gains strength. The surface treated with primer is first dried well and only then plastered.
For novice craftsmen, when making repairs with their own hands, it is better not to take on the task of applying a finish in the form of Venetian plaster on their own, but to opt for any other type, since all other finishes are much easier to work with. When choosing a textured mixture for the bathroom, you should avoid surfaces with deep grooves and sinks - condensation collects in them, microorganisms breed and mold gradually forms.