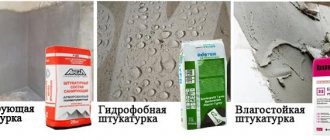
Filling the floor screed in the bathroom allows you to level the surface of the floor slabs, correctly distribute the load on it, improve thermal, noise and waterproofing, lay utility lines, and base heating systems. For work, dry and wet mixtures and means for arranging self-leveling floors are used.
Features of bathroom floors
Diagram of a bathroom floor
If you decide to make a bathroom floor with your own hands, then you should understand how it differs from similar structures in other rooms:
- Since in this place there is a high probability of a large amount of water getting on the floor, the layers of the cake must be reliably protected from the penetration of moisture into the thickness of the structure, and even more so to the interfloor ceilings.
- Due to the fact that there is constant high humidity in the room, the best flooring would be ceramic tiles. When installing the screed, it is necessary to take into account the requirements for the bases for the tiles.
- Engineering communications very often pass through the thickness of the floor and interfloor ceilings in the bathroom, so when installing a screed with your own hands, it is necessary to isolate this place from moisture penetration.
- The surface of the bathroom floor must be strong enough to support the weight of the sanitary equipment and sometimes the washing machine. In the latter case, the screed in the bathroom is subject to a certain vibration effect.
- When installing a screed in the bathroom with your own hands, keep in mind that the floor level in this room should be lower than in the entire apartment, so that in the event of a flood, water does not spread throughout the rooms.
- When laying the screed in the bathroom, it is worth making a slight slope towards the free area of the floor, so that when water spills, it is convenient to clean it up.
- Walking on cold ceramic tiles in winter is not very pleasant, so it is advisable to provide a heating system. The price of such a floor will be higher, but the comfort is worth it.
When installing bathroom floors with your own hands, it is better to use a cement-sand mortar for screeding. It is easy to prepare and has good moisture resistance due to its high cement content. Since it is necessary to provide waterproofing in this room, it is better to make a screed under the tiles that is not connected to the base. The price of such a floor will be quite reasonable. And modern materials and types of waterproofing the floor under the tiles in the bathroom will create reliable protection.
Waterproofing
Since in the bathroom there is a possibility of leaks and large amounts of water getting onto the floor, pay great attention to waterproofing. It should protect the reinforced concrete floor and lower floors from moisture.
Roll insulation made of roofing felt or membrane, or coating insulation with compounds based on bitumen, rubber or acrylic, are suitable for this;
Roll insulation
We carry out the work after the primer has completely dried in the following sequence:
- We cover the surface with bitumen mastic, carefully treating the joints, corners and abutments.
- We coat the junctions of the walls to a height of 10-15 centimeters.
- After the mastic has dried, we lay the rolled material:
Figure 1. Waterproofing device made of self-adhesive and regular roofing felt.
- We lay the self-adhesive roofing felt by removing the protective film from the adhesive layer and rolling it with a roller, carefully pressing it in the corners and junctions;
- We glue ordinary roofing felt by heating the layer with the applied mastic with a burner and rolling it to the base.
Helpful advice! We glue the roofing felt with the sheets overlapping by 12-15 centimeters, placing it on the walls 3-5 centimeters above the level of the screed.
Coating waterproofing
To perform waterproofing in the bathroom, there are many materials based on polymer and bitumen compositions and emulsions:
- bitumen is the most common and cheapest material;
- liquid membrane is a reliable, high-quality material based on compositions of different materials: bitumen and latex, vinyl, plastic, artificial rubber. When applied, it forms an elastic, durable membrane;
Figure 2. Coating waterproofing.
- polymer mastic is particularly durable and has increased adhesion to concrete;
- acrylic waterproofing emulsion is reliable and durable.
We carry out the work in the following order:
- We apply the composition to the junctions of walls and concrete foundations, to a height of up to 15 centimeters.
- We coat the places where pipes or sleeves pass with a coating compound and seal them with sealing tape.
- We apply waterproofing evenly to the entire surface of the floor.
- After a few hours, we re-apply the composition to the entire surface of the base.
Helpful advice! Prepare and apply coating compounds in strict accordance with the instructions on the packaging.
Along the perimeter of the bathroom we install a compensating damper tape covering the entire thickness of the screed.
The screed can be installed after the waterproofing has dried, but not earlier than 24 hours.
Purpose of floor screed
The main function of the screed is to level the surface of floors made of concrete slabs. Elimination of defects in the base of the floor makes it possible to correctly distribute the operational load, lay the tiles efficiently, and reduce to a minimum the consumption of expensive adhesive composition.
Defects in the concrete base
The screed device also allows:
- create a base for tiling over wooden floors, insulation, and soundproofing mats;
- hide utility lines;
- raise the floor level in the bathroom (taking into account the final coating) to the required height;
- install a heated floor system.
Installation technology and budget depend on the type of screed chosen. Doing the work yourself makes it possible to reduce costs.
Installation of heat and waterproofing layers
Before screeding the floor in the bathroom, it is very important to create a reliable thermal insulation layer, since the bathroom involves the use of cold flooring. However, the problem can be solved if the owner decides to install a heated floor system.
Various materials are used as insulation: expanded clay, expanded polystyrene boards or others with sufficient rigidity.
The waterproofing layer in the case of a bathroom is more important, since the air humidity in the room is constantly high and there is a risk of liquid getting into the ceilings.
Therefore, laying this layer is extremely important. In this case, dense polyethylene, various rolled materials, as well as coating and painting compositions should be used.
More reliable in this case are the so-called weldable materials, which have increased strength, do not rot, repel moisture well, and also have an extremely long service life.
They are made from fiberglass, polyester or fiberglass. Popular varieties are: aquaizol, bicroizol, krembit and others.
Sheet waterproofing should be laid with an overlap of at least 15 centimeters, as well as with an overlap of 10-25 centimeters on the walls of the premises. The pipes and the thermal insulation layer must be coated with mastic or sealant. After laying and surface treatment of the layer, 1-2 days should pass until the mixtures dry completely.
Selection of filling material
Concrete is a popular material for a reason. It's all about its versatility. This is due to the fact that repairs using this material are possible in premises for various purposes.
The choice of material for pouring the floor in the toilet, shower and bathtub depends on the compressive strength. The most acceptable option for filling the floor is cement with a strength grade of M200. The service life of such a floor can reach several decades.
Before pouring the concrete floor in the bathroom, the shower needs to properly prepare the solution. To prepare, you need to know how many components you will need:
- sand;
- cement;
- crushed stone;
- water.
When mixed with cement and subsequent drying, water forms a stone surface, but without supplementing this mixture with crushed stone or expanded clay, as well as sand, it will easily succumb to deformation and shrinkage. Depending on the choice of proportions, the properties of the prepared solution change significantly. As the cement content increases, the strength of the composition approximately doubles. To prepare lightweight concrete in a solution, crushed stone is replaced with expanded clay.
To speed up the hardening process, various additional elements, such as granite, limestone or gravel, can be added to the liquid solution. You can use a self-leveling solution.
Which technology to choose
When choosing a base leveling method, the following are taken into account:
- type of floors (concrete, wood);
- the presence of living quarters below - to prevent moisture from damaging the finishing of the ceilings, it is necessary to pay special attention to waterproofing or abandon wet technologies;
- the presence of communications that need to be hidden (pipes of hot and cold water supply systems, sewerage systems), underfloor heating systems;
- floor level in the room adjacent to the bathroom (including finishing);
- height difference of the base - for small values it is enough to use a self-leveling floor.
Hidden pipe laying
The budget for repairs is also taken into account. For dry screed, manufacturers offer ready-made solutions - these are self-leveling floors. You can prepare a solution for cement screed yourself.
Types of floor screed
The floor screed in the bathroom is nothing more than a cement mortar with the addition of sand and crushed stone. In some cases, expanded clay granules are added to the structure. Thus, the most common materials are used for floor screeding. Their use will be described below. There are only three types of screeds: dry, semi-dry and wet screeds. Let's consider each type of screed separately.
Wet screed
The simplest option is a wet screed. It is performed by pouring cement-sand mortar. The idea is to pour the mixture onto the subfloor and level the resulting layer. The disadvantage is that such a screed takes a very long time to dry.
There are several types of wet screed:
- knitted - pouring is done directly onto the floor slab and is most often done in dry rooms;
- on waterproofing - this option is ideal for rooms with high humidity, since the screed is created on top of the waterproofing material (more details: “Waterproofing screed - how to do it correctly, choosing a floor option”);
- on thermal insulation - pouring is done over special materials that hold back cold air masses. Intended for rooms on the lower levels of the building, which are located above cold basements or cellars;
- with an additional leveling layer - used in cases where the surface is supposed to be covered with laminate or linoleum, since these materials do not allow the presence of defects on the base.
Dry screed
A prefabricated dry screed in a bathroom is a unique design consisting of several layers that are assembled sequentially. In this case, the first layer is represented by expanded clay or crushed stone. Sheets of plasterboard are laid on top of it.
The advantage of such a screed is that it can be installed within one working day, but the lack of strength is obvious, since it does not contain fastening components, as is the case with a wet or semi-dry screed.
Many coatings simply cannot be applied if a dry screed is used in the bathroom, because... even the load created by ceramic tiles can cause deformation of the base.
Solid screed
The design of a continuous screed involves pouring one or more layers of the mixture. The determining factor in this case is the required thickness of the screed.
However, there are options when the screed is built up by creating layers of different materials. The selection of these materials should be made with an emphasis on the components included in the composition.
The following types of binder components are distinguished:
- cement;
- gypsum;
- cement-polymer;
- gypsum-polymer.
Don't miss: Suspended ceilings
If the owner plans to organize a screed in several layers of different materials, then you should adhere to a number of rules:
- if the bottom layer is made of a cement-sand mixture, and the next one is made of gypsum, then between them there should be a dense layer of primer that will protect the gypsum from leaching;
- the gypsum layer cannot be located below the cement layer, since before the cement hardens, the liquid in its composition will soak the gypsum;
- if you have a small budget, it is best to use one material to fill several layers, since priming also costs money, and a lot of it;
- Cement mortar is subject to shrinkage during drying, which is why cracks may form during thorough drying. To avoid this, it is recommended to add as many plasticizers and polymers as possible;
- The gypsum mixture is environmentally cleaner, more elastic, which protects against the formation of cracks, and has better vapor permeability. This base is great for wood floors, but it is absolutely not intended for use in the bathroom. Even an increase in the amount of plasticizers and polymers in the composition will not allow the use of gypsum screed in wet rooms.
Today, cement-sand screed is losing its popularity, since its creation time is very long and its characteristics are inferior to many modern materials for creating a foundation.
Many of the existing ready-mixes have better characteristics, and the hardening process takes no more than 1-3 days.
Prefabricated screed
The prefabricated screed justifies itself by its name, since you can make a floor screed in the bathroom by assembling the purchased components into a single multilayer system.
The most popular system is one containing the following layers:
- waterproofing made of thick polyethylene;
- dry backfill;
- substrate made of high-quality filler: polystyrene foam, mineral wool, etc.;
- gypsum fiber sheets;
- tape for gluing joints and edges.
In turn, prefabricated screeds are classified depending on how the screed is applied:
- directly onto the base (tied) - such a structure can easily withstand heavy loads, but is subject to shrinkage with subsequent formation of cracks;
- on the separating layer - waterproofing material on a paper basis or polyethylene with a thickness of at least 3 centimeters;
- onto the insulating layer (“floating”).
Floating screed
This type of screed is performed on any insulating layer with the function of protection from thermal energy and noise: mineral wool, cork sheet material, etc.
The thickness of the entire structure should not be less than 5 centimeters, which takes up a significant part of the height of the room.
The strength of such a screed is not very high and cannot be used without additional reinforcement.
Do-it-yourself draining
Preparation for laying a quality floor should include a reliable drainage that will allow water not to linger on the surface. The drain will keep the bathroom dry and protected from mold and mildew.
Self-installation of a drain is a quick and uncomplicated process; it can be performed by a person who is not involved in professional repairs. In order for the arrangement to take a minimum of time and the drain to last a long time, you need to strictly follow the tips and recommendations, maintaining the sequence of actions:
- floor preparation before installation of the structure. First you need to make a tray. To do this, use a puncher to make a small hole in the screed and treat everything with a liquid waterproofing agent;
- arrangement of a drain ladder - for its installation there is no need to use waterproofing material. It simply collects from the floor and drains the remaining moisture to the sewer pipe. The drain consists of a funnel-shaped body that is attached to the floor surface. The next component is a pipe, which has different lengths depending on the installation conditions;
- After installing the drain, there should be a common threshold for draining water. This device consists of the following parts: the base of the coating, a waterproofing layer, a second layer of waterproofing, which is more airtight than the layer below, a concrete screed, which is 4 centimeters lower on the side where the drain is located, a finishing layer;
- This completes the preparation and you can begin installing the drain. It is worth marking the drain with a simple pencil, and then connecting it to the sewer socket. The joints are treated with a sealant, the composition of which is silicone;
- Place polystyrene foam 5 centimeters thick on the floor surface so that it does not fit snugly against the ladder. To create deformed seams, slats are installed near the walls. After this, cement mortar is poured onto the site, which will tightly secure the ladder and smooth out all defects;
- when the concrete is completely dry, the next layer of waterproofing is laid, and then a siphon with a grate is inserted into the drain and secured at an angle using wooden guides;
- The second layer of cement mortar is laid out at the level of the guides, and after it has dried, you can begin finishing the surface.
Floor with drain
Draining yourself is the key to a dry and safe bathroom. It helps prevent the appearance of dampness in the bathroom, thereby preventing the formation of fungus and mold. A properly made drain will serve well and for a very long time.
Preparing the base for pouring the floor
The thickness of the screed for tiles, in accordance with the standards SP 29.13330, ranges from 10 to 120 mm. depending on the facing material (tiles, porcelain stoneware), the quality of the base, the need for hidden installation of engineering systems. It is laid according to the principle that the strength of the base should be higher than the newly formed layer.
At the preparatory stage you need:
- dismantle the old flooring and screed (if the work is not being carried out in a new building);
- clean floors from debris and dust;
- assess the condition of the ceiling - concrete strength, presence of height differences;
- remove loose layers of concrete and fragments protruding above the plane, seal cracks and crevices;
- prime the surface cleaned of contaminants to improve adhesion to the leveling layer;
- determine the required thickness of the screed layer and apply markings to the walls;
- if necessary, install communications.
Base primer Note! If it is necessary to raise the floor level to a significant height, pour a layer of sand or expanded clay up to 100 mm thick. The layer is carefully compacted.
Waterproofing and thermal insulation layers
The quality of the subsequent coating directly depends on the quality of waterproofing. You can use various modern materials, such as roofing felt in rolls or a special membrane. You can use regular polyethylene film. If there is not enough material for a continuous application, then all resulting cracks and joints must be sealed with adhesive tape.
For the bathroom it is also worth using coating waterproofing, the materials for which can be purchased ready-made. When carrying out work, special attention should be paid to the corners.
Thermal insulation can be made with expanded clay or perlite. You can use polystyrene foam or basalt wool. Let's take a closer look at expanded clay insulation.
It is important to insulate with expanded clay on the waterproofing layer, since due to its porous structure it absorbs moisture, and this can negatively affect the structure. To make the insulating layer with expanded clay, it is necessary to align the guide pendulums. When insulating with expanded clay, it is imperative to ensure that the granules of this material are of different sizes, so that smaller particles fill the space between the larger expanded clay.
Waterproofing
Waterproofing is carried out using film, roll, coating and liquid materials on top after the solution has completely dried. The choice depends on the screed installation technology. The waterproofing is a separating layer, so the screed on top of it has no adhesion to the base. Therefore, it is treated with waterproofing material immediately before laying the tiles. In addition to dry screed, since this method uses bulk material. On a note! PVC film is suitable only for arranging a dry screed - upon contact with cement, the material gradually collapses and loses its insulating properties.
Waterproofing under dry screed
Rolled bitumen-based waterproofing is laid in two layers with the strips offset by 15-20 cm to avoid through joints. The material must extend onto the walls at least 20 cm. To securely connect the strips, bitumen mastic is used. The floor surface is pre-treated with a bitumen primer.
Laying roll waterproofing
Coating and painting waterproofing is applied to pipes where they pass through floors and walls at low heights. The same materials can be used to protect the entire surface of the base and the lower part of the walls. For application, brushes of suitable width and a roller are used.
Painting waterproofing
Reinforcement process
To make the floor more durable, it is necessary to perform reinforcement. For this, a mesh made of metal or plastic is often used; you can also make your own base from reinforcement.
If the filling layer is provided with a thickness of 30-50 mm, then for reinforcement it is better to use a metal reinforcing mesh, the thickness of the rod in which is 5 mm, and the dimensions of the square cells are 80-100 mm. The reinforcing belt should fit the thickness of the screed, for which it is best to place the mesh on pads made of concrete or old tiles.
For a thin fill layer, you can use a fiberglass mesh called serpyanka. To ensure that this layer is of high quality, installation is carried out on small elevations.
Beacon distribution
With the help of beacons, the filling is much smoother. The guides can be made from profiles or round pipes. The entire area of the future floor is divided into segments, the width of which does not exceed two meters, which will prevent the solution from spreading during pouring. The distance from the beacon to the nearest wall should not exceed 250-300 mm.
It is very important that the height of the screed under the tiles should not exceed 5 cm. This fact must be taken into account when performing installation work for beacons. But making it too thin is also dangerous. If after some time the concrete cracks, it means that the screed was made incorrectly or too thin.
Don't miss: Construction of a subfloor made of chipboard, OSB, plywood
To install beacons, you should not use screws or studs screwed into the floor, as they can damage the integrity of the waterproofing. Wooden slats, which can decompose over time, should not be used as guides.
Installation of guides is carried out on elevations made of sand concrete. Guides are pressed into these elevations. The top point of the beacons should be flush with the line made earlier.
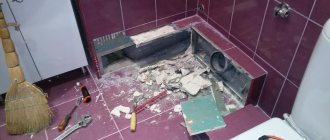
Preparing the premises
First of all, it is necessary to prepare the room and foundation for work. All equipment is removed from the bathroom. The floor surface must be free of any furniture. In an old bathroom, the floor structure must be completely dismantled, and not just the floor covering. This is explained by the fact that:
- Hidden and obvious defects must have appeared in the old leveling layer during its service;
- it is unknown how high quality and what material the old screed is made of;
- it is necessary to inspect the floor slab (sometimes it needs repair, mold removal, strengthening or drying);
- if you do waterproofing yourself, you can be confident in its reliability;
- When filling a bathroom using an old screed, you will in any case raise the floor level above normal.
Primer of the subfloor before laying waterproofing
To dismantle the old leveling layer, it is better to use a hammer drill. Try not to violate the integrity of the floor slab. After this, they begin to prepare the base in the following sequence:
- The surface is cleaned of debris, dust and inspected.
- All gaps between the slabs and walls, cracks, gaps where the liner passes through the ceilings, as well as gaps between the slabs are carefully sealed. To do this, they are cleared of debris, treated with a primer and sealed with a cement composition.
- Now the base surface is primed. This is best done using antiseptic impregnating compounds to prevent the formation of mold and mildew.
After the primer has dried, you can do the most important stage of work - waterproofing.
Installation technology
When mixing the components, a drill with a special attachment will help to achieve homogeneity of the mixture. The screed composition is diluted with water, stirred and left for 10 minutes, after which it is mixed again.
Water is added to the dry mixture
Mixing the solution
The system installation process must be completed in one go. The cement base begins to harden after 40-60 minutes, when adding polymers - after 3 hours.
The cement-sand mortar is mixed 1:3. Plasticizers or tile adhesive will allow you to make a better composition.
Rule
Filling begins from a remote corner from the entrance to the room. The solution is placed 0.5-1 cm above the beacons, compacted and leveled using the rule. The ends of the tool are directed towards the beacons, close to the wall and, moving to the sides, moved forward. The resulting excess composition is used for the next strip.
Rule movement direction
The process of pouring concrete mixture
To release air, the screed must be pierced with wire in several places.
When using wet or semi-dry types of screed, the structure is rubbed down after pouring the floor. This will give a smooth surface without defects. The work is done manually or by machine. The area is slightly moistened with water using a roller or spray bottle.
After grouting, the floor is checked with a level for uniformity. The fresh screed is covered with film for 14 days. The humidity level in the room is maintained: temperature 20-25 °C, no heating or drafts.
The final drying of the screed takes up to a month. If there are protruding parts of the insulation, they are cut off at the level of the structure.
If you need to walk on a fresh screed to pull out the beacons, then OSB (particle board) panels are laid on the base so as not to break the floor.
Beacons can be removed or left if they are treated with an anti-corrosion compound
Flooded screed
Installing screed on wooden floors
- prepare a solution of cement, sand, plasticizer;
- fill existing potholes and cracks with putty with an epoxy base, seal the joints with silicone;
- Apply a moisture-resistant primer to the coating, which has been previously cleaned of old cladding and debris;
- place thick polyethylene on the base, the film should cover the wall 7 cm from the floor;
- seal the joints with tape;
- set up beacons;
- lay reinforced expanded mesh;
- pour the prepared solution and distribute it over the entire surface (the thickness of the screed should be at least 50 mm).
ATTENTION! Waterproof a wooden floor by laying 2-3 layers of polyethylene or other moisture-resistant material.
Choose the screed installation option, taking into account future loads on the floor, humidity and temperature fluctuations in the room and the environmental friendliness of the materials used, especially when it comes to renovations in a children's room.
Self-leveling floor
This type is very popular nowadays. It allows you to create an unusually beautiful design. And thanks to its smooth mirror surface, it visually enlarges the room.
- To prepare the base, it must be carefully primed, the surface should be slightly rough, the filling will lie better.
- Then, if desired, a special 3D pattern is attached, and the mixture is poured onto it in thin layers (you should start from the highest point of the floor, so the composition will be evenly distributed over the entire surface).
- After finishing filling the floor, go over it with a roller with needles to remove air bubbles. After drying, the floor can be used.
How to make electric floors
To make a heated floor with your own hands, the thickness of the screed must be at least 5 cm. The mixture contains sand and cement. Additional elements are: plasticizer (it will prevent cracking of the layer after heating) and small crushed stone. There should not be a lot of the second component so that voids do not form in the solution. You can turn on the electric floor after a month.
Final procedures
The dried screed must be sanded to eliminate any defects and prepare it for laying flooring and other work.
It is advisable to use a grinding machine to smooth only defective areas that are visible upon visual inspection. Only in the case of linoleum, as a particularly demanding material, is it necessary to treat the entire site.
The following can be used as bathroom flooring:
- Self-leveling floors;
- moisture-resistant types of linoleum or laminate;
- sheets of cork material or plank flooring;
- ceramic tiles (tiles) are the best and most popular option. This coating has optimal characteristics and looks very beautiful. When using it, bathroom floors are not embarrassing to post in photos on social networks or present to guests.
Bottom line
Having studied in detail the instructions for creating a screed in the bathroom, you can carry out all stages of the work yourself. If difficulties arise, you can always contact specialists who will take responsibility for all stages: from the selection of materials and preparation of the premises to finishing.
Professional builders can also provide a guarantee on the work performed, which is extremely appreciated by many owners who prefer to invest their money wisely.
Preparatory stage
All of the above points, up to pouring, can be combined into a single category - the preparatory stage. Naturally, you need to start by calculating the floor area in order to understand how much and approximately how much time will be spent on pouring.
If we are talking about how to properly fill a floor in a private house, then the calculation of purchased materials is made according to the following scheme (using the example of a room measuring 5x5 meters):
- The floor area is calculated using the standard formula: length multiplied by width (5x5=25 square meters);
- the volume of the solution to be poured is calculated by multiplying the floor area by the estimated thickness of the screed. Based on a layer of 10 centimeters: 25 square meters multiplied by 10 centimeters - 2.5 cubic meters of screed.
Taking into account the calculations made, materials should also be purchased.
For a high-quality screed you will need the following components:
- ordinary quarry sand;
- cement grade of at least M150;
- medium-sized crushed stone;
- mesh for reinforcing screeds with a cell size of 5 to 10 square centimeters;
- metal profiles for display as beacons.
From all of the above, we can conclude that before properly pouring floors in a private house, it is necessary to purchase the main components for pouring the screed in accordance with the calculations made. Regarding the height of the floor, it is necessary to know the thickness of not only the screed and bulk layers, but also all the materials being laid: steam, hydro and thermal insulation.
Pouring floors in a private house begins with cleaning the workspace. Naturally, it is necessary to remove dust, dirt, and debris from the subfloor using a broom, or even better, a powerful household or industrial vacuum cleaner. After cleaning, you can begin a process such as filling the floor in the house with your own hands, which is not the easiest.
It is worth considering the difficulty of creating the required amount of solution. If you knead manually, it will take a lot of time to prepare one portion. It is best to use a concrete mixer with a large capacity. Only with automatic mixing can a correct, uninterrupted supply of solution to the floor be ensured.
If we are talking about how to properly fill the floor in a house, then the worker should have the following tools with him:
- a long measuring device (a tape measure is best);
- building level, long wooden strip (rule);
- shovel and trowel;
- circular electric saw (grinder);
- large volume concrete mixer.
Strengthening the structure
Concrete floors with topping
You can make the base more stable with the help of topping - a special solution applied on top of the screed to make it stronger. The mixture is made with a filler of quartz or metal.
The composition is applied to the screed over its entire surface. The use of topping is necessary if the final covering will not be installed in the future: tiles or other material.
Marking
Before you start pouring the solution, make markings.
Using a hydraulic level or laser level, mark a line at a height of half a meter from the floor. We take measurements from this line and find the minimum distance to the base.
From this point we subtract the thickness of the screed and mark the line of the screed surface. We transfer the line of the screed surface along the entire perimeter of the bathroom.
The minimum thickness of the screed must be at least 30 millimeters.
When marking the screed in the bathroom, it is necessary to take into account that the floor here should be lower than in other rooms, in order to prevent water from entering other rooms in case of accidental leaks.
Common mistakes and recommendations
- Laying the semi-dry mixture in the space between the beacons without compacting the surface.
- Failure to maintain the correct ratio of cement and liquid when preparing the mixture.
- Ignoring the procedure for rolling self-leveling floors with a spiked roller.
- Application of a screed layer provided that the thickness is lower than acceptable.
- Application of waterproofing coatings before pouring semi-dry and wet screeds.
- With the dry laying method, not small, but large expanded clay granules are taken.
- Connecting the heated floor system to operation until the screed layer reaches maximum strength.
- While the composition was gaining strength, drafts were allowed.
- Poor level of base preparation (poor cleaning or neglect of priming).
Expansion seams
Photo of expansion joint
When making a concrete floor screed, attention is drawn to an important point: as it hardens, the solution presses on the walls and the fragile screed begins to deform. To avoid cracks, special seams are cut. They are made around the perimeter of the room.
Construction of expansion joints
There are several cutting methods:
- a seam is laid on the “raw” base using a forming strip;
- lines are executed after the initial hardening of the composition.
The seam width is about 2 mm, the depth is 1/3 of the thickness of the screed. If the base does crack when the concrete hardens, this will happen only near the drawn stripes.
The lines are closed after the screed has dried: a special cord is placed in the groove, and the gap is filled with sealant.
Bathroom floor screed is the main and labor-intensive part of the floor renovation job. But if you take into account all the subtleties and nuances, then the implementation of the design will not become an obstacle to self-repair.
Basic mistakes
In the absence of specialized education, a home craftsman makes mistakes when making screeds on his own:
- laying semi-dry mortar between the beacons without compacting with trowel blows;
- non-compliance with the water-cement ratio when mixing the solution;
- ignoring rolling the self-leveling floor with a spiked roller;
- the layer thickness is less than the minimum value for the screed material used;
- waterproofing under wet and semi-dry screeds;
- the use of a large fraction of expanded clay in the bottom layer of the dry screed;
- turning on the heated floor before the screed has reached its full strength;
- drafts during drying;
- poor preparation of the base (removal of loose areas, dust removal, priming).
Consequences of technology violations.
When using large, light fractions of ready-mixed concrete filler (crushed stone, granite, perlite, expanded clay, expanded polystyrene chips), it is almost impossible to ensure a smooth surface of the leveling layer. Additional surface putty is required. Such problems do not arise with dry, semi-dry screeds or self-leveling floors.
Advice! If you need bathroom renovation specialists, there is a very convenient service for selecting specialists from PROFI.RU. Just fill out the order details, the experts will respond and you can choose who to collaborate with. Each specialist in the system has a rating, reviews and examples of work, which will help with the choice. Looks like a mini tender. Placing an application is FREE and does not oblige you to anything. Works in almost all cities of Russia.
If you are a master, follow this link, register in the system and be able to accept orders.