Instead of the usual sand-cement screeds for leveling the floor, self-leveling floors are increasingly being used, which are self-leveling mixtures that are poured over the surface of the base in a continuous layer. After the solution has set, the self-leveling floor in the bathroom forms a continuous, seamless coating with ideal horizontal lines, which is suitable for laying any floor covering. Depending on the type of composition, this technology allows you to perfectly level the base, as well as create a topcoat with a pattern or 3D effect.
We create a self-leveling floor ourselves
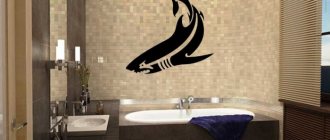
The photo of the self-leveling floor in the bathroom shows how ideal this coating looks. In addition, it is not subject to mechanical damage. 3D self-leveling floors look especially interesting.
Self-leveling floors of any type can be installed in a matter of hours, and they will serve faithfully for many years.
Main advantages
Self-leveling bathroom flooring has its own positive features, which is why it is gaining immense popularity. These include:
- Low layer height. At the same time, all characteristics of self-leveling floor technology are maintained at the highest level. This type of floor can withstand a load of 10 MPa. At a minimum, a filled bathtub will look easy on the frozen solution.
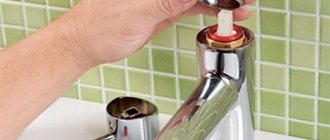
- It can even be arranged over old tiles if it is difficult to remove. The main thing is that the surface is carefully prepared for installation. It is very important to coat the base with a primer before pouring the self-leveling floor to increase the level of adhesion.
- It is not uncommon to have a “warm floor” in the bathroom. It is sometimes difficult to hide it. But a self-leveling floor for a bathroom is perfect for these purposes. According to the technology of laying tiles, it is allowed to cover the heated floor immediately with tile adhesive. But subsequently, the spatula used in the work can damage the entire structure. Even minor damage to the cable will lead to failure of the entire system.
Layer of screed on a warm floor
But these are only some of the positive qualities characteristic of a room such as a bathroom. In general, self-leveling flooring has a large number of advantages, due to which it is in demand on the market among construction companies and customers.
Types of mixtures
There are only a few options among the types of self-leveling floors in the bathroom. This is 3D and a standard fill. But among the materials from which these floors are made, there are a lot of product lines.
The catalog of beautiful self-leveling floors contains a huge number of options, but the implementation of ideas depends on the type and brand of the chosen solution.
Types of self-leveling surfaces according to manufacturing technology
Despite the variety of coatings made from various polymer materials, the technology for pouring liquid floors is identical. The main differences relate to the composition, recipe for preparing the liquid mixture and drying time.
Let's look at the main types of self-leveling floors (each of them has varieties).
Polyurethane
Compositions based on polyurethane are used everywhere: in production workshops, in children's public institutions, and in private homes. They work well with cement-concrete screeds and adapted finishing varnishes.
The advantage of the coating is that, regardless of the coverage area, it has no seams and is a single durable monolith. It is logical that polyurethane is also suitable for the bathroom, but not any kind. The fact is that there are two types of material:
- thin-layer;
- highly filled.
Thin-layer coatings have a thickness of no more than 0.4 mm and can easily withstand medium-intensity loads. They can withstand light impacts and recover quickly if necessary, but are not suitable for the bathroom.
High humidity leads to delamination of the material, and constant repairs in a room that is used regularly are uncomfortable.
Professionals recommend highly filled liquid floors consisting of at least 2 components. The thickness of the main layer reaches 25 mm, that is, they are stronger than thin-layer analogues.
Such qualities as wear resistance and resistance to temperature changes are also higher.
For a bathroom, water resistance comes first, thanks to which a beautiful decorative coating in the bathroom will last 10 or even 15 years without repair
If you follow the pouring instructions, observe the time intervals for drying and do not start using the floor ahead of time, the strength will reach a level where abrasive powders, sharp objects and aggressive chemical environments are not scary.
This means that accidentally spilled bleach will not harm the decorative coating, and dropped scissors will not leave scratches.
Methyl methacrylate
Polymethylmethacrylate, more commonly known as plexiglass, has been improved and is successfully used as a liquid floor. At first glance, you cannot find a better material for a bathroom - it lasts up to 40 years, and is considered the most wear-resistant of self-leveling coatings.
Its strength is such that this material is chosen for the construction of garages, workshops, and warehouses. It can easily withstand heavy loads and is not afraid of any influence: chemical, temperature, ultraviolet.
A property that will appeal to those who like quick repairs: the pre-hardening process lasts only 2 hours - the material dries so quickly (subject to the pouring conditions)
It would seem that the solution is simply ideal! However, not all so simple. There are a number of technological subtleties, without knowledge of which it is impossible to begin repairs:
- professional skills in installing a self-leveling floor are required, since the pouring must take place quickly and without flaws (due to rapid drying);
- good ventilation in the bathroom is necessary - the chemical smell is not only unpleasant, but also harmful to health (for the same reason, the mandatory use of special clothing and a respirator);
- There are about 30 primary colors, plus tinting with color and chips, but still, in terms of the variety of the palette and the possibility of decoration, methyl methacrylate flooring is inferior to its analogues.
It turns out that for industrial use there is no better option, and in domestic conditions only specialists should deal with methyl methacrylate.
For those who decide to experiment, a little advice on choosing a material: by purchasing components from a domestic manufacturer, you will spend 3-4 times less money. For composites and dry mixes manufactured in Russia, the components are purchased abroad, so they are not inferior in quality to their foreign analogues.
Epoxy
The technology for pouring epoxy floors is no different from previous ones, the only difference is in the components. The resin hardens under the influence of the hardener and forms a very durable seamless layer. The solution is usually prepared in small portions, since within an hour the finished mixture must be distributed over the planned area.
Drying time depends on temperature, humidity, set of components and texture of the base.
A pattern or drawing is obtained as follows: the finished image is placed on the bottom base layer, then filled with a transparent or translucent quickly hardening solution
In terms of strength and wear resistance, epoxy coatings are not inferior to polyurethane coatings, however, crystallized epoxy resin is inherent in some fragility. For this reason, floors of this category are not used, for example, in rooms where heavy equipment operates.
The option is suitable for the bathroom, since the surface of the epoxy layer does not react to chemicals and is resistant to moisture.
If you like to experiment with decor, then epoxy resin coatings are a real find. With their help you can implement a wide variety of designs:
- monochrome contrasting patterns;
- 3D coatings with images of sea animals, flower cascades;
- imitation of a cliff, waterfall, cloudy sky;
- jewelry macro decor;
- colored fills with chips;
- neutral glossy and matte finishes.
The variety of shades is reflected in color cards and RAL tables, which in the form of folders and fans are attached to the products of a particular manufacturer.
Approximately 15-30 colors are usually stated as standard, but by mixing the base with the color you can achieve exactly the shade you need
Mineral mixtures
Produced in accordance with GOST, they consist of sand, cement, and fillers that improve the properties of the material. Mineral mixtures are divided into subtypes:
- Basic – used to form a base for floors. These can be used to fill up to 10 cm thick. The price of such material is the lowest.
- A thin layer under the finishing coating or under warm floors is formed by mixtures with reduced heat conductivity.
- Finishing mixtures. They are the most liquid, since when completing floor repairs, the most thorough leveling of the coating is necessary.
Mineral mixtures provide a durable coating, but they are no better than those created on a polymer base.
However, experts recommend using mineral structures to fill bathroom floors, since such materials best withstand moisture and temperature changes.
Preparing the floor for pouring the mixture
Work on the foundation must be carried out in 3 stages:
First of all, the surface is cleaned of debris and dust; a vacuum cleaner is perfect for this operation.
Then you need to inspect the concrete base for defects, chips and cracks. If there are deep cracks, they should be eliminated first.
You can fill the cracks with two-component epoxy resin, in which case moisture will not get inside and the surface will be smooth.
A primer layer is created, it will create a strong base for the self-leveling floor. If the entire surface of the base has defects and other roughness, then in this case you will need a composition with high permeability.
What principles should be followed when choosing a material?
When choosing mixtures for filling the floor, it is advisable to be guided by the opinions of experts and give preference to well-known, proven brands. It’s worth remembering: you won’t be able to create a high-quality, durable floor with a cheap mixture.
Surface decoration
Surface decoration is performed on a hardened polymer base layer.
There are 2 options:
- The image is painted with acrylic paints. You can invite an artist to paint a picture. The cost of work increases significantly. That's why many people buy a patterned stencil.
- A less expensive option is to order a photo printout from a printing house in the required size on banner fabric. It is glued with an additional thin layer of base polymer and leveled with a dry roller.
Using a rule and a needle roller, a transparent polymer solution is applied to the drawing in a layer of at least 3 mm. The greater the thickness, the longer the drying time. It varies from 1 to 3 weeks. Then the floor is covered with a special protective varnish.
Work step by step
After the old covering is dismantled, the floor must be covered with a soil mixture. This is necessary to better set the base material and facilitate the leveling process.
It is known that the mixture for forming a self-leveling floor hardens relatively quickly and you may not have time to level the surface well enough. The primer promotes optimal leveling.
Application of the 3D method when installing floor coverings
3D design differs from others in one small point: in its installation there is an intermediate point - photo printing sticker. This method brings a touch of creativity and individuality to the interior. The top layer of the self-leveling floor is covered with transparent resin, which makes the strength indicators lower.
It is important that the image on the floor is in harmony with the rest of the bathroom
Preparing the mixture
After priming, prepare the mixture according to the recipe indicated on the package. According to the rules, water is always initially poured into the container, and then the contents for the self-leveling floor are added. You need to mix with a mixer, doing it very carefully.
It is necessary to prepare the entire volume of the mixture at once. It is important to remember that the hardening process begins immediately after mixing, on average it takes up to 50 minutes, depending on the brand of material.
The solution must be left for 5 minutes to better mix the components as a result of the resulting chemical reactions, and then begin pouring work.
Tiles for the bathroom on the walls - step-by-step installation instructions. Basics and tips for masters (130 photos + video)
Finishing a bathroom with tiles is a stylish and practical solution for a modern interior, recommendations and tips in examples and photos.
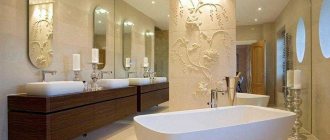
Bathroom design - from classic to modern and loft, examples of design and technological innovations in bathroom equipment. ( Photo and video )
According to standards, the floor level in the bathroom is required to be a couple of centimeters lower than in other rooms.
It is necessary to insulate pipes and other communications. You can use construction tape for this. The mixture is poured slowly. You should start from the far corner of the room. The solution must be distributed evenly.
Necessary materials
In order to carry out work on the construction of a floor for a shower stall, you will need not only certain materials, but also some skills and accuracy.
A room with high humidity requires a special approach to installation, since the slightest neglect can lead to a lot of trouble for residents and neighbors of the lower floors during constant use of the cabin. To carry out the work you will need the following tools:
- building level;
- roulette;
- water-based markers;
- trowel;
- container for diluting concrete mortar;
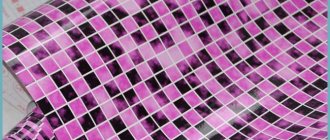
- tile cutter (if mosaic cladding is planned, then this item is skipped).
This is just a list of necessary tools, without which work would not be possible.
Also interesting: How to quickly remove whitewash from the ceiling?
In addition, you will need the building materials themselves, which must be moisture resistant and suitable for the climatic conditions of the bathroom:
- waterproofing mastic (preferably bitumen);
- roofing felt;
- siphon;
- plastic pipes necessary for connecting the drain and sewer;
- expanded polystyrene sheets with a thickness of at least 50 mm;
- dry mixes for cement mortar (cement and sand without impurities);
- waterproofing tape;
- waterproof tile adhesive;
- tile grout;
- spatula and rubber sponges;
- silicone sealant.
A specific quantity designation will not be given in the list, since the designed designs of shower cabins are different for everyone, and material costs will be calculated based on these features.
The only thing you need to know is the scheme for introducing cement mortar. To do this, you will need to take 4 parts sand to 1 part dry cement and dilute with water until a thick mixture is formed.
It takes at least 3-4 days for the solution to completely harden, but it must be prepared immediately before starting work.
Important!
Silicone sealant is required to seal seams and joints to ensure waterproofing. In any case, you will get a sealed and reliable structure, but it is better to protect yourself and play it safe.
When can you step on the floor?
This can be done based on the data in the instructions for the mixture, allowing some more time. The strength of the floor can first be checked by palpation, carefully, trying not to damage it if the surface is not frozen.
An important rule: during the hardening period of the floor, it is necessary to avoid drafts. It is advisable to close doors and windows throughout the apartment.
Advantages and disadvantages of coating
Experience in operating and performing polymer self-leveling coatings has revealed numerous advantages and some disadvantages of this type of flooring.
The advantages include:
- a wide variety of colors;
- resistance to mechanical stress and ultraviolet sunlight;
- low coefficient of expansion under the influence of underfloor heating elements;
- high degree of adhesion to the concrete surface;
- abrasion resistance (no more than 0.025 mm per year);
- fire safety: flammability class G1 (lowly flammable), flammability B2 (moderately flammable), D2 (moderate smoke generation), combustion toxicity - from T2 (moderately dangerous) to T4 (highly dangerous);
- inertness to most chemical compounds - solvents (gasoline, xylene, toluene, butyl alcohol, acetone, glycerin, caustic soda (30%), butyl acetate, etc.);
- the ability to repair cuts and deep scratches with special compounds;
- ease of cleaning from dirt;
- waterproofness (an important indicator for a bathroom);
- long service life (over 10 years).
There are fewer disadvantages, but they are there:
- slight release of unsafe substances from the surface (toluene, formaldehyde, phenol), necessitating regular ventilation;
- multi-layer laying of the base, including insulation under the screed and sound insulation;
- quick drying, which can create unevenness if applied unevenly by a novice master;
- difficult dismantling;
- high cost (taking into account all layers - from 5 to 6 thousand rubles per 1 m²).
Photo of self-leveling floor in the bathroom
Tell your friends