Expanded clay consumption per 1m2 of floor screed
Expanded clay is a material of natural origin.
It is often used in construction. An exception is not the floor screed, during the installation of which expanded clay is also used. Floor screed is the leveling of its surface, strengthening and insulation. In modern construction, decorative flooring is laid exclusively on a pre-made screed, not only in private homes, but also in apartments and commercial premises. Using expanded clay, you can make both a dry screed and a mortar of cement and sand. In both cases, it is important to know how to correctly calculate expanded clay for floor screed. In addition, the easiest way to level the floor in a room is to screed using expanded clay. After all, this material is excellent for almost all mixtures that are used to level the floor. Let's look at the options for floor screed using it, in what proportion the material is taken, and how to calculate its consumption. But first you should pay attention to the advantages of this material:
- ease;
- environmental friendliness;
- practicality;
- High degree of insulation from noise and temperature changes.
In addition, expanded clay is quite resistant to moisture absorption and heating, and is not afraid of low temperatures. It has anti-shrink properties, which makes this material ideal for backfilling.
Filling methods
There are three methods of screeding using expanded clay. It is necessary to analyze the method of use and the advantages of each of them in more detail.
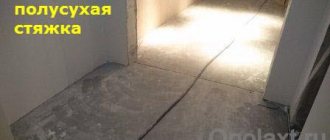
Semi-dry screed with expanded clay
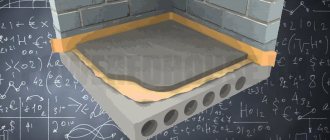
This method is used in cases where it is necessary to both raise and insulate the floors in the room. To achieve thermal insulation, the expanded clay layer must be at least 10 cm. Here it is important to take a large fraction of the backfill - at least 20 mm. If it is important for you only to raise the floor to the required level, you can use smaller particles. In this case, waterproofing is necessary in order to protect the expanded clay layer from moisture. Beacons are set to the required height, and expanded clay is backfilled. Walk over it with a rule to compact and level the layer.
After this, you should proceed to pouring the concrete screed. Cement-sand mortar or a special mixture can be used. For ease of work, it is better to first spill the expanded clay layer with a concrete mixture highly diluted with water - cement laitance. This will prevent the expanded clay grains from floating and make it easier to fill with the main solution. Laying a layer of granules with film may also be suitable for these purposes. Only in this case, installation must be done very carefully so that the film does not tear.
These two methods are also necessary to ensure that less moisture from the concrete layer escapes into the porous expanded clay granules. Then the coating will be more reliable and durable. To pour concrete mortar, you can use reinforcing mesh. This will make it easier to gradually fill the layer in sections and level it to obtain a smooth surface.
Expanded clay concrete
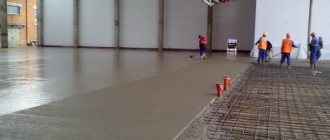
This is the so-called wet screed. In this case, it is necessary to carefully measure all the unevenness of the base and decide how thick the screed layer will be. This method is advantageous to use if you have to raise the floor level to a significant height, as well as to save concrete mixture. Expanded clay is combined with sand concrete, the resulting composition is carefully stirred and distributed over the floor. It is better to first soak the expanded clay granules with water so that later the consistency of the mixture does not turn out to be too dry. It is better to mix using a construction mixer, because no amount of spatulas or sticks can achieve a uniform consistency without clots and lumps.
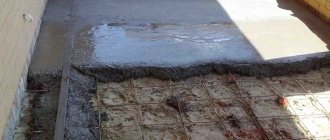
To strengthen the expanded clay concrete screed, you can use a reinforcing mesh, and any slats that are easiest to obtain can be used as beacons. The mesh should be a couple of centimeters short of the required height level. Next, distribute the solution evenly over the grid, leveling it with the rule. After finishing laying the mixture, do not wait for it to dry. Prepare a solution for the top leveling layer. This can be a cement-sand screed or self-leveling floor. It is applied to the zero mark, leveled with the rule and left to dry.
After about a day, you need to remove the beacons. Be sure to treat the openings with a primer and fill them with cement.
The advantage of expanded clay-cement screed is that it can be poured with your own hands without any problems; all proportions are done by eye until the required viscous consistency is obtained.
Such a screed can be part of a multi-level system and used as a rough screed for a self-leveling floor. It may also be sufficient for laying a finished surface that does not require a level base (for example, a tile floor).
Dry floor screed with expanded clay
If the semi-dry method is a combined screed, then filling with expanded clay granules does not require subsequent filling with any solutions. The base is prepared as usual, but it is necessary to exclude any possibility of moisture getting on the waterproofing layer. Beacons are set to the required level. The minimum thickness of the expanded clay layer with this technique is 5 cm. Granules need to be selected in small or medium sizes; it is advisable to combine different sizes to distribute the layer more evenly with fewer voids. There is no point in using small waste, because a huge amount of it will be required, but it will not create the desired thermal insulation effect.
We recommend: How to make heated floors in a private house
It is better to divide the surface into strips using wooden slats - this will make it easier to level the granular layer and lay the following materials. Do not compact the expanded clay, but carefully roll it out. Next, a layer of moisture-resistant drywall should be laid. If the sheets are thin, it is better to lay them in two layers, gluing them together, and the seams must be coated with putty. You can also use waterproofing mixtures. After completing the installation of drywall, it is necessary to cut off any protruding pieces of tape or film.
This type of screed has many advantages:
- The smooth surface is suitable for applying any type of finishing coating.
- The layer can withstand high loads.
- The floor covering is quite light, so it can be used on old, dilapidated floors without any risk.
- Thermal insulation is excellent. There is no need to install heated floors on an expanded clay cushion.
- The work can be completed very quickly, and immediately upon completion, proceed to the next stages of repair.
- Dry screed provides excellent sound insulation.
- The coating is not deformed.
Sometimes builders suggest using expanded clay for adding to the rough screed directly on the ground instead of sand or crushed stone. This can only be done if the groundwater level is low, otherwise increased humidity will lead to negative consequences for the entire climate in the house, and good heat conservation will no longer play a role here.
Floor screed with expanded clay
Work on installing a floor screed with expanded clay allows you to work both on a prepared surface and without preparation. The classic option for floor insulation with expanded clay is to lay a 25-30 cm thick layer of expanded clay on the surface of the floor slab or on a gravel bed.
Considering that it is imperative to put a layer of waterproofing under the expanded clay, it is recommended that such work be carried out with all the necessary tools. Expanded clay is leveled over the entire area without deflections or rises. In the process of insulating the floor with expanded clay, the expanded clay layer is compacted using a roller or tamper.
To strengthen the surface of the expanded clay layer, it is sometimes recommended to lightly brush the surface with cement and then moisten it with water, but when installing a floor screed with expanded clay and a layer of reinforcement, such an operation does not make sense. It is easier to cover the area with a polymer reinforcing mesh, on top of which to proceed with the installation of beacons and a metal frame.
To install a floor screed with expanded clay, when the screed is planned to be 5-7 cm, it is recommended to take 100 * 100 mm mesh cells, and with 10 cm, the reinforcement can be abandoned altogether. The finished solution is leveled over the entire area of the room and leveled using the rule.
Knauf dry screed calculator
Dry screeds, including Knauf, are often used in residential premises. Accurate calculation of the required materials will help significantly save your budget. Our online calculator will allow you to calculate the amount of dry backfill required, the number of required gypsum fiber board sheets, screws, vapor barrier and glue based on just two parameters: room area and screed thickness .
Screed calculator
The result obtained is based on the manufacturer's consumption recommendations, but is not the maximum. A difference in the levels of the floor base up or down, inaccurate calculations of the area of the room, etc. can play a role. Therefore, experts recommend purchasing materials with a margin of 10-20%.
How to calculate the amount of materials without a calculator
We need to calculate the amount of dry backfill and the number of fiberglass sheets.
We calculate the backfill based on the volume of material; to do this, the area of the room must be multiplied by the thickness of the screed layer. It is advisable to take all dimensions in meters, for example - 60 m2 (total area of our premises) * 0.08 m (layer thickness 8 centimeters) = 4.8 m3 of dry backfill. According to the manufacturer’s calculations, which can be found on the packaging itself, 475 kg of backfill is needed 1 m3 , and when packing a 24 kg bag - 20 bags. For the entire volume of our work we will need 95 bags .
GVL sheets are calculated based on area. In our example, the room has an area of 60 m2 , the sheet size is 2.5x1.2 meters, which is 3 m2. We divide the area of the room by the area of one sheet and get the required quantity, in our case 20 sheets (you need to allow for connecting seams and cutting sheets, plus 10-20%).
To connect gypsum fiber sheets we will need screws and glue. According to the manufacturer's recommendations, there are 100 screws per sheet. We take glue and calculate 400 grams per 1 sheet of GVL.
As a waterproofing or vapor barrier, we use plastic film for the total area of our premises. We take into account that the film comes in rolls 1.5 meters wide, so we make a reserve for the joints, approximately 10-15 cm. We will need 70-78 m2 of film.
To summarize, for a room with an area of 60 m2, with a screed thickness of 8 cm, we will have:
- Dry filling - 95 bags.
- GVL sheet - 24 pcs.
- Self-tapping screws - 240 pieces.
- Glue - 6 liters.
- Waterproofing - 78m2.
Use of alternative dry fills, quantity calculation
Knauf recommends using only its licensed dry fills. However, there are alternative options on the market that have gained popularity due to their low cost. You can also use construction expanded clay with a density of m500 (which is an analogue of Knauf backfill), fraction 5-30 mm. It is also necessary to calculate the amount of materials using the formula: volume of the room * thickness of the screed. Each manufacturer indicates the backfill consumption per m3 on the packaging.
The consumption of components for the manufacture of wet floor screed implies the following proportions: for one part of cement, three parts of sand and four parts of expanded clay are needed. As a result, it turns out that for 30 kg of cement-sand mixture you will need 25 kg of expanded clay. Before preparing the solution, the expanded clay should be filled with a small amount of water and left for a short period of time. This is necessary so that the material absorbs water. To make the calculation correctly, you need to consider it with an example.
We decide on the thickness of the layer. For example, it is planned to be 10 cm, the square area of the room where the solution will be poured is 16 m2. The weight of one bag of expanded clay for 0.05 m3 is in the range of 17-19 kg. The weight of one cubic meter of expanded clay is 400 kg. Calculation:
- 16 m2 x 0.1 m = 1.6 m3 of porous material;
- 1.6 m3 / 0.05 m3 = 32 bags.
When calculating material consumption, it is necessary to start from the fact that with a layer of expanded clay 1 cm thick, you need 0.01 m3 per 1 m2 of room area. Some stores sell porous material in bags, where the quantity is calculated in liters. In this case, with a layer thickness of 1 cm, 10 liters per 1 m2 are required. As you can see, when installing a wet screed using expanded clay, this material is calculated in the same way as when installing a dry screed - depending on the thickness of the layer. If we talk about apartments, then on the ground floor or in a room where the lower floor is not heated, the layer thickness should be at least 10 cm.
For flooring on the upper floors of a residential building, the limit is generally limited to 3-4 cm. It follows that to install a screed using expanded clay in an ordinary standard-sized apartment, you will need at least 0.03-0.04 m3 per 1 m2 or 20-40 liters Well, in order to calculate the total volume of material for a room, you need to multiply its area by its volume consumed per 1 m2. Let's look at another example: suppose that the area of the room is 20 m2, and the thickness of the expanded clay layer is 4 cm. Calculation:
- if counted in cubic meters: 20 m2 x 0.04 m3 = 0.8 m3;
- if you count in liters: 20 m2 x 40 liters = 800 liters or 16 bags of 50 liters each.
Count your expenses. All rates and costs are below:
How many cubes in a bag of dry cement or building mixture:
50kg - 0.038 m3
in 25kg - 0.019 m3
2. Cement-sand mortar for masonry:
For 1 m2 of brickwork with a masonry thickness of 1 brick, the amount of mortar approaches 75 liters of consumption per 1 m2. If the wall is made of brick with a thickness of 1.5 bricks, then the amount of mortar will correspond to the figure of 115 liters.
3. Proportions of cement mortar:
In order to prepare a mortar, you need: 1 part of a binder (cement) and 4 parts of filler.
4. Proportions of plaster mixture:
You will need 1 part binder (cement) and 3 parts aggregate.
5. Cement mortar for brick:
According to consumption standards, 400 pcs. bricks (more precisely 404) - 1 m3 of masonry. The solution consumption rate per 1 m3 is 0.23 m3 (in practice, 0.25 is accepted).
6. How to calculate the consumption of sand concrete M - 300 per screed?
The approximate density of the sand concrete mixture is 1.7-1.75 kg/cubic dm
For 1m/2 with a thickness of 1cm = 18-20 kg of mixture (sand concrete M300).
7. Tile adhesive:
The consumption of tile adhesive per 1 m2 of laid tiles is 10 kg. dry mixture with a layer thickness of the finished solution of 10 mm.
8. Adhesive for foam concrete blocks and gas silicate blocks:
The consumption of foam concrete adhesive per 1 m3 of laid foam concrete masonry is 40 kg. dry mixture
9. Self-leveling floors:
The consumption of self-leveling floors per 1 m2 of finished mortar is 6 kg. dry mixture, with a recommended layer thickness of 5 mm.
10. Plasters for walls:
The plaster consumption per 1 m2 of finished mortar is 10 kg. dry mixture, with a recommended layer thickness of 10 mm.
11. Wall putties:
The putty consumption per 1 m2 of finished solution is 0.9-1.0 kg. mixtures.
Kawabanga! Calculation of the composition and proportions of heavy concrete
12. Grout (tile joints):
The grout consumption per 1 m2 of laid tiles is 120 g, with a recommended joint thickness of 2 mm.
13. Universal mixture M −150:
The consumption of the universal mixture M-150 per 1 m3 of the finished solution is 450 kg. dry mixture.
14. Masonry mixture M-200:
The consumption of the M-200 masonry mixture per 1 m3 of masonry is 350 kg. dry masonry mixture.
15. Waterproofing material (penetrating layer):
Waterproofing consumption per 1 m2 of surface will require 700 g. dry mixture diluted to a sludge state for application with a brush (roller).
16. Paints:
Paint consumption per 1 m2 of walls or ceilings when first applied to a primed, flat surface is 0.3 liters, the second layer when applied correctly is 0.2 liters per 1 m2.
17. Polyurethane floors:
The consumption of polyurethane self-leveling floor when applied to a dust-removing primer is 1.5 kg per 1 m2 of concrete floor surface, with a thickness of 1 mm.
Amount of cement per masonry (cement consumption per bricklaying):
To prepare 1 m3 of cement mortar you need 8 50 kg bags of cement. and mixed with sand in a ratio of 1:4, where one part of sand is also equal to 50 kg.
19. The consumption of materials (excluding losses) for the construction of 1 m2 of the surface of a brick wall with a thickness of a quarter of a brick is:
cement (for mortar grade M-100) - 5 kg;
cement (for mortar grade M-75) - 4 kg;
cement (for mortar grade M-50) - 2.5 kg.
How much cement, sand, crushed stone in 1 m3 of concrete (how to prepare concrete - proportions):
a) For 1m3 M 150 concrete you will need: 220 kg of cement, 0.6 m3 of sand, 0.8 m3 of crushed stone.
b) For 1m3 M 200 concrete you will need: 280 kg of cement, 0.5 m3 of sand, 0.8 m3 of crushed stone.
c) For 1m3 M 250 concrete you will need: 330 kg of cement, 0.5 m3 of sand, 0.8 m3 of crushed stone.
d) For 1m3 M 300 concrete you will need: 380 kg of cement, 0.5 m3 of sand, 0.8 m3 of crushed stone.
21. Clay-sand mortar. How to cook:
Clay-sand mortar is a 1:3 proportion, where one part clay mortar and three parts vermiculite. The resulting solution is poured in a layer up to 50 mm
22. Proportion of concrete and foam chips:
In order to create such a solution, which is mainly used for insulating floors and ceilings of bathhouses, you need to mix 1 part of ordinary cement mortar (or ready-made concrete mortar) and 3 parts of foam chips.
23. How many blocks are there in 1 m3 of masonry?
Kawabanga! Online calculator for calculating a monolithic slab foundation (slabs, ushp)
Size 200×300×600 – 27 blocks per 1m3
Size 200(188)x200(188)x400 - 62 blocks per 1 m3
24. Secrets of brick or block facing masonry, masonry mortar + black seam:
Consumption - 1-1.5 buckets of solution per 1m2. Instead of an expensive plasticizer, 2 caps of cheap shampoo (for plasticity) per batch of 1/4, 1 liter. a jar of black pigment, and in order to avoid efflorescence, 200g. 9% vinegar solution.
25. Penetrating waterproofing penecrit and penetron:
Penecrete 150-200 grams per seam 25×25 mm per 1 linear meter of grooves
Penetron (for 2 layers according to technology) from 0.8 kg - 1.1 kg per 1 m2 depending on the looseness and unevenness of the surface
How many bricks are needed for 1m2 of masonry:
a) If the wall thickness is half a brick - 120 mm
- single brick - 61 pcs. excluding seam, 51 pcs. with seam
- one-and-a-half brick - 46 pcs. excluding seam, 39 pcs. with seam
- double brick - 30 pcs. excluding seam, 26 pcs. with seam
b) If the wall thickness is one brick - 250 mm
- single brick - 128 pcs. excluding seam, 102 pcs. with seam
- one-and-a-half brick - 95 pcs. excluding seam, 78 pcs. with seam
- double brick - 60 pcs. excluding seam, 52 pcs. with seam
c) If the wall thickness is one and a half bricks - 380 mm
- single brick - 189 pcs. excluding seam, 153 pcs. with seam
- one-and-a-half brick—140 pcs. excluding seam, 117 pcs. with seam
- double brick - 90 pcs. excluding seam, 78 pcs. with seam
d) If the wall thickness is two bricks - 510 mm
- single brick - 256 pcs. excluding seam, 204 pcs. with seam
- one-and-a-half brick - 190 pcs. excluding seam, 156 pcs. with seam
- double brick - 120 pcs without seam, 104 pcs with seam
e) If the wall thickness is two and a half bricks - 640 mm
- single brick - 317 pcs. excluding seam, 255 pieces with seam
- one-and-a-half brick - 235 pcs. excluding seam, 195 pieces with seam
- double brick - 150 pcs. excluding seam, 130 pcs. with seam
Expanded clay, its properties and applications
Expanded clay is a natural material
Expanded clay is a natural material that is widely used in construction work. Various building materials (blocks) are made from expanded clay, poured walls and “dry” and “wet” screeds are made. Using this material, the ceiling is leveled and the floor is insulated.
Expanded clay can be laid both on a rough concrete floor and on a wooden floor. It is often used to fill the gaps between lags or beacons.
Dry screed using expanded clay
Lay waterproofing material under expanded clay
When organizing a dry floor screed, before pouring out the expanded clay layer, lay a waterproofing film on the concrete floors, and it is recommended to lay roofing material on the wood.
Then expanded clay is poured onto the waterproofing to the required level. This level is determined by the method of finding the zero point. This method of leveling and insulation has gained popularity due to the following advantages:
- easy and quick installation;
- absence of various debris and dust;
- excellent thermal insulation;
- good soundproofing properties;
- After laying the subfloor, you can immediately lay the finishing flooring.
After laying the expanded clay using the dry method, sheets of OSB boards or chipboards are installed on top. Expanded clay, like every other material, has some disadvantages, the main one of which is its price.
It should be remembered that when organizing a dry floor screed using expanded clay, many builders do not agree on how the material in question should be laid, in plastic bags or not. Expanded clay packed into bags does not create waste.
Wet screed with expanded clay and material calculation
The use of expanded clay will improve the thermal insulation of the floor
Wet expanded clay screed is quite often used to level flooring both in private houses and in city apartments.
In fact, this is an ordinary cement-sand coating, but with the addition of expanded clay, which allows you to improve the heat-insulating and noise-absorbing properties of the apartment.
For 1 kg of cement take 4 kg of expanded clay
To organize the flooring in the form of a wet cement-sand screed with the addition of expanded clay, it is necessary to lay a mixture on a rough base in which 1 kg of cement will account for 3 kg of sand and 4 kg of expanded clay. Water is added to the composition according to appropriate calculations of the volume of the screed.
Therefore, when planning to organize one of the types of floor screeds, before starting work, it is worth calculating the backfill and finding out how much expanded clay is required for your work.
It should be remembered that after you have mixed all the components, to organize a “wet” screed, the entire mixture must be poured with a small amount of water so that the solution absorbs it into its composition.
The mixture should remain in this state for some period.
Practical recommendations for dry leveling of expanded clay backfill
First, we’ll talk about gross technological errors that cause the floor surface to sag.
Installation technology
Each of the listed three methods of floor thermal insulation using expanded clay has its own unique stages and features.
When installing a screed using the dry method, the sequence of actions is as follows:
- A vapor barrier film is laid overlapping on the prepared floor. The sheets should overlap each other by 20 cm, and on the edges of the walls - 6-7 cm. The film is connected to each other with masking tape. The edges of the material on the walls are covered with edge tape.
- Self-tapping screws are screwed into the upper points of the floor surface, their tops are covered with cement mortar. Its quantity should ensure an even position of the rack; for this they are checked with a level.
- Beacons are installed on self-tapping screws. They can serve as smooth wooden blocks of suitable size or a metal profile.
- A layer of expanded clay is poured into the prefabricated structure. It should not be less than 10 centimeters. The dry screed is leveled using the rule.
- The expanded clay layer is carefully compacted manually or using a vibrating machine.
- Compacted areas are covered with GVL slabs in two layers, as well as using penoplex. In some cases, the use of polystyrene foam is justified. You can fasten them together using glue or self-tapping screws. If self-tapping screws were used, then the holes from them and the seams are carefully puttied.
- The protruding edges of the film on the walls around the perimeter of the room are cut off. After this, you can begin installing the main floor.
When using the semi-dry method, the sequence of actions is as follows:
- Waterproofing is carried out using special materials or polyethylene film with a thickness of 2 mm. The joints are taped with masking tape. It is important that the edges of the waterproofing extend onto the wall by 10 cm or more. Beacons are installed using self-tapping screws, a level and wooden blocks.
- A layer of expanded clay is poured. At this stage, you should pay attention to uneven floor levels. If they exist, they will be eliminated later during the application of the finishing screed. It is important to ensure that everywhere the level of expanded clay backfill is 2 cm less than the beacons.
- Cement laitance is prepared. To prepare it, sand concrete is brought to a homogeneous liquid state with a consistency similar to milk. Pour the resulting mixture over a layer of dry expanded clay. After this, the surface is allowed to dry for 24 hours.
- After this, the subfloor is filled with screed. It consists of 3 parts sand, 1 part cement, water. The required amount of water is indicated on the packaging of the cement used.
- Concrete is leveled according to the rule. The screed level should run along the edge of the beacons.
- After the day required for the screed to set, the beacons are removed. The places where they were are filled with solution and leveled. After 14 days, the coating is ready for laying the main floor.
Despite the fact that after two weeks the screed is ready for installation of the finishing coating, it is not able to withstand constant loads. You can use the premises without danger, including installing furniture, only after 28 days.
With the wet method, the screed also has two layers. The stages of work when using expanded clay concrete consist of the following steps:
- After installing the waterproofing, beacons are set up.
- Expanded clay concrete solution is prepared. To do this, the following proportion is observed: to eight parts of expanded clay, three parts of sand, one part of cement and the required amount of water are added. All components are poured into a concrete mixer and mixed thoroughly.
- The resulting mixture is poured over the beacons. The “underfill” to the wall should be 2 centimeters.
- A day later, a finishing sand concrete screed is applied.
- After 2 days, the coating is ready for laying the main floor.
According to some technologies, you don’t have to wait for the expanded clay layer to set and immediately install the finishing screed.
What not to do
- Never use drywall. The fact is that this is the worst building material in terms of all physical characteristics. It has no strength, is afraid of water, does not hold hardware, etc. Even the so-called moisture-resistant board loses its properties after several hours of direct contact with water. If you don’t believe me, put a piece of it in a container of water. Such a practical experiment will allow you to clearly see false advertising by manufacturers. Another problem is that plasterboards laid flat bend under their own weight. Why is this material so often used by builders in various architectural structures? The explanation is simple - it is very easy to work with him, and this makes it possible to significantly increase salaries. In the case of expanded clay, it is difficult to achieve a perfectly flat surface; the slabs under the voids will certainly bend. As a result, you will have to redo the floors, and this is very time-consuming, labor-intensive, dusty and expensive.
We recommend: Underlay for carpet on concrete
2. When leveling expanded clay, do not make stationary beacons using cement-sand mortar. The fact is that expanded clay itself gives a slight additional shrinkage over time. Have you noticed how a initially large pile of sand decreases in height over time? Grains of sand gradually occupy free spaces, the size of the heap decreases, and this does not require rain. The same processes occur with bulk expanded clay, only on a smaller scale. The surface reduces the height, and the cement beacons always remain in a stable position. As a result, over time they rise above the plane of expanded clay, and tubercles and depressions appear on the dry screed.
The beacon profile on a gypsum slide is a weak point of the screed
How to level the base
The correct technology will cost you much more than other methods of leveling the base for the final floor covering. Keep this in mind before making your final decision.
- To level the surface of expanded clay, use special devices. This is a professional tool, consisting of two long aluminum slats and a rule that can be moved by it. As the work progresses, the tool is transferred to a new location, leaving behind perfectly flat surfaces, and there are no stationary beacons. It is not economically profitable for non-professionals to buy these tools; such devices significantly increase the estimated cost of the floor.
- You need to work with the laser constantly on; the beam continuously controls the horizontal plane of the expanded clay. Walking on an already prepared surface is strictly prohibited.
- Prepare the base in sections; immediately cover the prepared small areas with durable slabs of extruded polystyrene foam at least five centimeters thick. Why do you need additional insulation, since expanded clay itself is used as a heat insulator? The heat-saving properties of this material can only be considered more or less satisfactory when air movement completely stops. It should be noted that the bulk layer of large granules is well blown by air currents; due to the convention, warm masses rise upward, and cold masses take their place. Continuous movement occurs, the efficiency of heat conservation decreases sharply. If leveling is done using the wet method, the solution not only binds the moving granules, but also prevents the removal of heat.
Table of technical characteristics of extruded polystyrene foam
- Expanded polystyrene materials cannot support heavy loads; their surface must be protected. Cement-fiber boards (fiber cement) performed well. The addition of cement significantly increases strength indicators; a slab with a thickness of only one centimeter is capable of withstanding the maximum dynamic and static forces on floor coverings possible in residential premises. These materials are widely used and, in all technical parameters, are excellent for dry screed. If the floors are not loaded, then GVL can be used; they are cheaper, but in terms of physical properties they are noticeably inferior to their cement analogues. To increase the stability of the structure, the joints must be coated with a special glue - the entire surface becomes monolithic, the base does not sag.
- Expanded clay is afraid of getting wet, the consequences will always be very sad. Professional builders strongly recommend covering the surface of the dry screed with waterproofing material. It should be remembered that high-quality mastics are quite expensive. By the way, after pouring expanded clay with concrete mortar, there is no need to perform additional insulation measures.
Construction expanded clay
Expanded clay, its properties and applications
Expanded clay is a natural material
Expanded clay is a natural material that is widely used in construction work. Various building materials (blocks) are made from expanded clay, poured walls and “dry” and “wet” screeds are made. Using this material, the ceiling is leveled and the floor is insulated.
Expanded clay can be laid both on a rough concrete floor and on a wooden floor. It is often used to fill the gaps between lags or beacons.
Dry screed using expanded clay
Lay waterproofing material under expanded clay
When organizing a dry floor screed, before pouring out the expanded clay layer, lay a waterproofing film on the concrete floors, and it is recommended to lay roofing material on the wood.
Then expanded clay is poured onto the waterproofing to the required level. This level is determined by the method of finding the zero point. This method of leveling and insulation has gained popularity due to the following advantages:
- easy and quick installation;
- absence of various debris and dust;
- excellent thermal insulation;
- good soundproofing properties;
- After laying the subfloor, you can immediately lay the finishing flooring.
After laying the expanded clay using the dry method, sheets of OSB boards or chipboards are installed on top. Expanded clay, like every other material, has some disadvantages, the main one of which is its price.
It should be remembered that when organizing a dry floor screed using expanded clay, many builders do not agree on how the material in question should be laid, in plastic bags or not. Expanded clay packed into bags does not create waste.
Wet screed with expanded clay and material calculation
The use of expanded clay will improve the thermal insulation of the floor
Wet expanded clay screed is quite often used to level flooring both in private houses and in city apartments.
In fact, this is an ordinary cement-sand coating, but with the addition of expanded clay, which allows you to improve the heat-insulating and noise-absorbing properties of the apartment.
For 1 kg of cement take 4 kg of expanded clay
To organize the flooring in the form of a wet cement-sand screed with the addition of expanded clay, it is necessary to lay a mixture on a rough base in which 1 kg of cement will account for 3 kg of sand and 4 kg of expanded clay. Water is added to the composition according to appropriate calculations of the volume of the screed.
Therefore, when planning to organize one of the types of floor screeds, before starting work, it is worth calculating the backfill and finding out how much expanded clay is required for your work.
It should be remembered that after you have mixed all the components, to organize a “wet” screed, the entire mixture must be poured with a small amount of water so that the solution absorbs it into its composition.
The mixture should remain in this state for some period.
Expanded clay, its properties and applications
Expanded clay is a natural material that is widely used in construction work. Various building materials (blocks) are made from expanded clay, poured walls and “dry” and “wet” screeds are made. Using this material, the ceiling is leveled and the floor is insulated.
Expanded clay can be laid both on a rough concrete floor and on a wooden floor. It is often used to fill the gaps between lags or beacons.
Dry screed using expanded clay
When organizing a dry floor screed, before pouring out the expanded clay layer, lay a waterproofing film on the concrete floors, and it is recommended to lay roofing material on the wood.
Then expanded clay is poured onto the waterproofing to the required level. This level is determined by the method of finding the zero point. This method of leveling and insulation has gained popularity due to the following advantages:
- easy and quick installation;
- absence of various debris and dust;
- excellent thermal insulation;
- good soundproofing properties;
- After laying the subfloor, you can immediately lay the finishing flooring.
After laying the expanded clay using the dry method, sheets of OSB boards or chipboards are installed on top. Expanded clay, like every other material, has some disadvantages, the main one of which is its price.
It should be remembered that when organizing a dry floor screed using expanded clay, many builders do not agree on how the material in question should be laid, in plastic bags or not. Expanded clay packed into bags does not create waste.
Wet screed with expanded clay and material calculation
Wet expanded clay screed is quite often used to level flooring both in private houses and in city apartments.
How to properly screed a floor with expanded clay
The composition of the solution will be of the class of lightweight concrete, namely expanded clay concrete. Sand concrete M 300 and expanded clay will have the following proportions when preparing 1 m3:
- 20-25 bags of expanded clay of various fractions. The volume will be 0.7 m3;
- 12-14 bags of sand concrete, 50 kg each, grade M 300.
How much sand concrete is needed for expanded clay. More cement in the composition will add strength to the structure and increase thermal conductivity. In order to increase the thermal insulation qualities, it is recommended to use less cement. Private builders advise using the optimal ratio - 2 bags of expanded clay granules per 50 kg bag of sand concrete.
Calculation for a “wet” screed
Adding expanded clay instead of crushed stone to concrete has many advantages, the main of which are reducing the weight of the rough coating and increasing its thermal insulation characteristics. This is especially important for private houses with wooden floors that are not designed for high loads.
First of all, to determine the amount of all materials, you will need to know the thickness of the expanded clay concrete screed. It depends on the level differences across the entire area being poured, but should not be less than 40 mm, since a layer of less thickness often cracks.
On a note! If there is a cold subfloor or unheated basement under the floor of the first floor, it is advisable to increase the thickness of the screed to 8-10 cm.
In the expanded clay calculator for floor screed, in addition to the planned layer thickness, the area of the leveled surface and the fraction of the material used, you will need to enter additional parameters:
- brand of cement used;
- the required grade of concrete strength.
This data is necessary to produce a screed with certain strength characteristics, which requires precise adherence to the dosage of each component included in the solution.
In some programs, the calculation algorithm also includes other parameters, for example, the brand of plasticizer and other additives. Others additionally determine the consumption of accompanying materials, for example, metal mesh for screed reinforcement.
Note! Most online calculators calculate the consumption of expanded clay of a fraction of at least 10 mm. If you use expanded clay sand, which has a higher density, the automatic calculations may be incorrect.
The size of expanded clay sand granules is 0-5 mm
When making screeds yourself, they often use standard proportions of components without strictly following them to achieve the desired grade of concrete. In such cases, you can do without a calculator and do all the calculations yourself.
Let's give an example of how to determine the consumption of expanded clay per 1 m2 with a thickness of 5 cm.
- Let’s assume that to prepare a solution for 1 part of M400 cement, 4 parts of expanded clay and 3 parts of sand are required.
- There are 8 parts in total, half of which are expanded clay.
- The volume of the screed is 0.05 cubic meters.
- Half of this volume is 0.025 cubic meters.
Read other news: Secrets of construction tape that you most likely didn’t know about
Expanded clay bags usually indicate their bulk density, which allows further calculations to be made
If there are 250 kg of bulk material in one cube, then in 0.025 m3 there are 250 x 0.025 = 6.25 kg. This is exactly how much filler will be required to fill one square area. To find out the total consumption, the resulting figure is multiplied by the entire area of the screed and 5-10% is added.
How to do the calculations yourself?
Before starting work on the screed, the floor screed is calculated, namely the amount of mortar that will be required.
To calculate the required volume of the mixture, use the formula: Sxh=V.
- S – area of the room;
- H – height of the planned screed layer;
- V – volume, how much mixture is needed.
Using this formula, the volume of the dry mixture is calculated.
