Any major renovation of a room begins with a large amount of rough work. This includes removing old wallpaper from the walls, replacing windows and doors, and updating the flooring. In the latter case, it is often necessary to dismantle the screed, especially if it was filled in a long time ago and has already partially lost its performance characteristics. The work of removing it is quite labor-intensive and complicated, but you can handle it yourself if you wish. How to do this correctly, spending a minimum of money?
Dismantling the screed
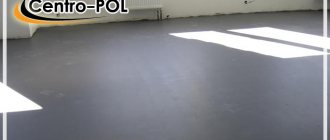
Floor screed and its main functions
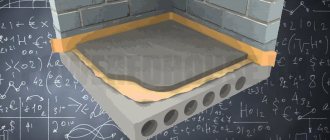
Before we talk about how to properly and efficiently remove the old screed, you should understand and understand what it is and why it is installed in residential and industrial premises. A screed is a base that is laid on a subfloor (for example, ceiling, soil, etc.), and the finishing floor covering is mounted on top of it. The screed allows you to level the surface of the subfloor layer or, conversely, give it a certain slope. This property is very important in relation to some floor coverings - among the variety of finishing materials, there are those that are very demanding on the evenness and cleanliness of the base, and it is precisely these qualities that can be achieved by laying a screed layer.
What types of floor screeds are there?
Also, all kinds of communications can be laid inside the created base - water supply and sewerage pipes, electrical wiring, ventilation, etc. The screed allows you to evenly distribute the load that the floor experiences daily over the entire surface. Also, thanks to it, it is possible to create good hydro-, heat- and sound-insulating layers.
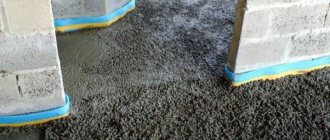
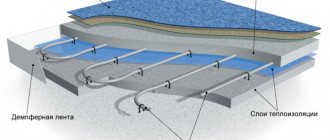
Floor screed device
On a note! The underfloor heating system, if it is represented by a water or electric cable, is also installed inside the screed.
On average, the thickness of the screed layer is small - about 4-10 cm, depending on how much it is necessary to level the rough base. There are thicker options, but this is rare.
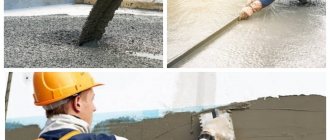
Cement consumption for screed
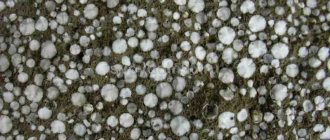
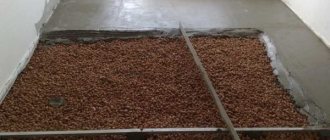
The screed can be monolithic , made from a building mixture based on cement, sand and water - concrete, as well as composite , which is a layer of gypsum materials and expanded clay. This layer acquires particular strength by placing a reinforcing mesh made of steel or polymer materials inside the screed - the result is a reinforced screed.
Reinforced concrete screed
The main advantages of the screed:
- long period of operation;
- excellent strength;
- the ability to provide thermal and waterproofing of the floor;
- resistance to various types of loads.
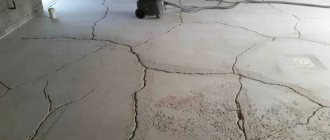
The disadvantages of the screed are its complex installation, long drying period, and significant cost of work. Yes, and dismantling it if necessary is not so easy.
Concrete screed restoration scheme
Dismantling floors, methods and prices
Any major renovation of a room begins with a large amount of rough work. This includes removing old wallpaper from the walls, replacing windows and doors, and updating the flooring.
In the latter case, it is often necessary to dismantle the screed, especially if it was filled in a long time ago and has already partially lost its performance characteristics.
The work of removing it is quite labor-intensive and complicated, but you can handle it yourself if you wish. How to do this correctly, spending a minimum of money?
Dismantling the screed
Before we talk about how to properly and efficiently remove the old screed, you should understand and understand what it is and why it is installed in residential and industrial premises. A screed is a base that is laid on a subfloor (for example, ceiling, soil, etc.), and the finishing floor covering is mounted on top of it.
The screed allows you to level the surface of the subfloor layer or, conversely, give it a certain slope. This property is very important in relation to some floor coverings - among the variety of finishing materials, there are those that are very demanding on the evenness and cleanliness of the base, and it is precisely these qualities that can be achieved by laying a screed layer.
What types of floor screeds are there?
Also, all kinds of communications can be laid inside the created base - water supply and sewerage pipes, electrical wiring, ventilation, etc. The screed allows you to evenly distribute the load that the floor experiences daily over the entire surface. Also, thanks to it, it is possible to create good hydro-, heat- and sound-insulating layers.
Floor screed device
On a note! The underfloor heating system, if it is represented by a water or electric cable, is also installed inside the screed.
On average, the thickness of the screed layer is small - about 4-10 cm, depending on how much it is necessary to level the rough base. There are thicker options, but this is rare.
READ MORE: How to varnish parquet flooring with your own hands, step-by-step instructions
Cement consumption for screed
The screed can be monolithic, made from a building mixture based on cement, sand and water - concrete, as well as composite, which is a layer of gypsum materials and expanded clay. This layer acquires particular strength by placing a reinforcing mesh made of steel or polymer materials inside the screed - the result is a reinforced screed.
Reinforced concrete screed
The main advantages of the screed:
- long period of operation;
- excellent strength;
- the ability to provide thermal and waterproofing of the floor;
- resistance to various types of loads.
The disadvantages of the screed are its complex installation, long drying period, and significant cost of work. Yes, and dismantling it if necessary is not so easy.
Concrete screed restoration scheme
If a screed is a strong and reliable foundation that can be used for a long time, then why does it have to be dismantled sometimes? Why do some property owners decide they need to remove that old foundation? The fact is that even the strongest and most reliable materials are destroyed and deformed over time. And the best option in this case is not to correct or repair the old screed, but to remove it and make a new base.
When is floor screed removal required?
In general, screed dismantling is carried out in the following cases:
- destruction and deformation of the old foundation;
- the appearance of a large number of cracks on the surface;
- incorrect installation;
- floor level reduction required;
- installation of heated floors;
- Repair of communications inside or under the screed is necessary;
- long term use of the old screed.
Dismantling the screed is not an easy process. It requires the use of certain equipment, and it is also advisable to have some experience in dismantling floors. However, not everyone has such knowledge, and therefore often you have to study everything on your own, based on the experience of other people. Fortunately, you can learn how to dismantle the screed yourself and carry out all the work without the help of specialists.
Dismantling the screed with a jackhammer
Attention! Sometimes a new screed is poured over the old one, but if the latter is quite thick, then a new layer cannot be poured on top of it. This will significantly increase the load on the foundation/floors, which can negatively affect the condition of the entire structure.
However, before you begin dismantling, it is important to make sure that the old screed is definitely no longer good for anything. When removing the old coating, you need to remember that there is a high risk of damaging the main floor, as well as disrupting the communications system. Therefore, it is important to carry out all work very carefully.
Dismantling the screed - photo
In general, the requirements for the screed layer are regulated by documents - SNiPs “Floors” and “Insulating and finishing coatings”. Also, in order to dismantle the base, in some cases it may be necessary to collect a certain package of documents.
Estimate the approximate amount of work to be done; for convenience, all points of subsequent actions can be written down on paper. Inspect the condition of the floor, the materials from which it is made, prepare the tools.
Removing the floor
Removing skirting boards
For the job you will need a nail puller, a hammer and a set of screwdrivers.
Start from the corner of the room. Otherwise, the baseboard will strain and most likely break. Insert the sharp end of the nail puller between the floor and the baseboard, and then, using the rule of leverage, separate them.
Having pulled out the first nail halfway, do the same with all the others. After this, return to the starting nail. A plinth secured with screws is easier to remove - you just need to unscrew the screws.
If the nails are hammered in properly, dismantle them in small steps.
Dismantling skirting boards
During the initial inspection, it may turn out that the baseboard coating will have to be damaged. Remove the top layer using a chisel. This will free up the nails and make them easy to remove.
Don't even try to tear off the entire baseboard.
It is possible that the plinth is covered with paint, which is an additional adhesive material. Place a piece of wood under the fulcrum of the nail puller. Lightly hit the nail gun with a hammer to drive it in. If the nails are long and the stroke of the nail puller is not enough, you need to place a block.
Removing the wooden floor plinth
When the paint layer is too thick, it is difficult to determine where the nails are located. To avoid breaking the plinth, go to the corner and step back 15 cm. Use the sharp end of a nail puller to find the first nail under the plinth. Having pulled it out, lift the plinth, and, guided by the bend, you will find the next one.
Removing old baseboard
IMPORTANT: most often the baseboards are nailed, and the paint is applied in two or three layers. The attachment points in these cases are most likely located at a distance of 50 to 65-70 centimeters. When working, shake the nail puller so that the putty comes off the nails - this makes it easier to pull it out without damaging the material.
If the baseboard is attached to the wall, insert the nail puller between them. The procedure for removing nails is the same as for baseboards.
Removing the floor
Removing old floor boards
Rotten flooring
Once you have removed all the baseboards, begin to disassemble the floorboards. The floor is laid from a board that faces the wall with a tenon, therefore, it must be removed starting from the reverse side. This way you can save the boards and use them in the future. If you have an already cut board, you need to start dismantling it from there.
There are no skirting boards anymore. Take the tools and pull out the end board
Floorboards secured with screws make the task several times easier. Unscrew the screws with a screwdriver, and then look for a board with a groove, remove it and remove the floor. If the floorboards are nailed, the technology will be as follows:
- find which side the last floorboard is on;
- drive a nail puller under it using a hammer;
- lift it 2 centimeters;
- step on the board - it will fall into place, and the nails will stick out;
- remove nails with a nail puller.
IMPORTANT: to avoid pushing through the board, place a wooden block under the tool.
To remove the end board, remove the nails and insert a chisel between the two floorboards. By widening the gap, you will reduce the risk of damage.
Dismantling the floor
If the top of the groove breaks for some reason, nail it in place with a small nail or use superglue. The appearance of the board will be ruined, but the functionality will be restored.
Sometimes the boards fit too tightly to the wall and the nail puller won’t fit. In this case, you will have to hammer it in with a hammer. Damaged areas can later be hidden under the baseboard. When you can’t get the nail puller through, even after knocking with a hammer, use a drill to drill through the floorboard, making room for the tool, or gouge out the wood near the nails, since the board is already damaged and there is no need to spare it.
The insulation between the joists must be removed. Carry out work strictly with gloves
All that remains is to remove the lags
The concrete floor may be covered with tiles, so we will consider the option of removing them.
Removing tiles
Removing tiles
If the tile is set on cement, it is impossible to remove it without damage. Using a jackhammer or chisel, hammer the tile until it is destroyed.
In this case, the concrete floor will likely be damaged and will have to be leveled by pouring cement into the deformed areas. The work is quite dusty and noisy.
Warn your neighbors that you are going to hammer the floor in your apartment, remove furniture and clean things, protect your eyes and respiratory organs.
Tile installed with glue is easier to remove. You will need a spatula, knife, chisel, hammer drill and water. Remove the seams between the tiles using any convenient method and moisten the resulting gap with water. Do not skimp on water; you need to pour as much of the coating under the tile as possible so that the glue dissolves.
Do-it-yourself tile removal
IMPORTANT: do not overdo it with too much water if you don’t want to flood your neighbors!
Carefully slide a spatula under the tile and remove the coating. If that doesn't work, use a chisel. By removing tile by tile, you will gradually clean the floor. Now proceed to remove the concrete screed. This is a complex job that can be entrusted to specialists, but we will consider the independent option.
Dismantling - relevance and features of implementation
If a screed is a strong and reliable foundation that can be used for a long time, then why does it have to be dismantled sometimes? Why do some property owners decide they need to remove that old foundation? The fact is that even the strongest and most reliable materials are destroyed and deformed over time. And the best option in this case is not to correct or repair the old screed, but to remove it and make a new base.
When is floor screed removal required?
In general, screed dismantling is carried out in the following cases:
- destruction and deformation of the old foundation;
- the appearance of a large number of cracks on the surface;
- incorrect installation;
- floor level reduction required;
- installation of heated floors;
- Repair of communications inside or under the screed is necessary;
- long term use of the old screed.
Dismantling the screed is not an easy process. It requires the use of certain equipment, and it is also advisable to have some experience in dismantling floors. However, not everyone has such knowledge, and therefore often you have to study everything on your own, based on the experience of other people. Fortunately, you can learn how to dismantle the screed yourself and carry out all the work without the help of specialists.
Dismantling the screed with a jackhammer
Attention! Sometimes a new screed is poured over the old one, but if the latter is quite thick, then a new layer cannot be poured on top of it. This will significantly increase the load on the foundation/floors, which can negatively affect the condition of the entire structure.
However, before you begin dismantling, it is important to make sure that the old screed is definitely no longer good for anything. When removing the old coating, you need to remember that there is a high risk of damaging the main floor, as well as disrupting the communications system. Therefore, it is important to carry out all work very carefully.
Dismantling the screed - photo
In general, the requirements for the screed layer are regulated by documents - SNiPs “Floors” and “Insulating and finishing coatings”. Also, in order to dismantle the base, in some cases it may be necessary to collect a certain package of documents.
SNiP 2.03.13-88. "Floors." Downloadable file (click the link to open the PDF in a new window).
SNiP 2.03.13-88
SNiP 3.04.01-87. "Insulating and finishing coatings." Downloadable file (click the link to open the PDF in a new window).
SNiP 3.04.01-87
All requirements for floor screed are regulated by relevant regulatory documents
Prices for popular models of jackhammers
jackhammers
Dismantling a concrete floor screed: overview of methods and costs
There are several options for getting rid of the old screed. They differ in the complexity of the work and the use of certain tools.
Screed dismantling diagram
Table. Types of dismantling work (screed).
| Type of method | Description |
| Shock | The most common and easiest way to get rid of an old screed. In this case, a jackhammer is used; a grinder and a hammer drill can also be used. However, you should work with a hammer very carefully and carefully - in some situations such a tool may be prohibited for use (for example, if the screed contains reinforcing elements). A very noisy and dusty method, but the cheapest. The productivity of the jackhammer is 50 sq. m. in 8 hours. |
| Drilling and cutting | The amount of dust when using this method is minimal. And the noise will be less disturbing for neighbors to lead a quiet life, which is important for apartment buildings. It is most often used when it is necessary to remove not all, but only a small section of the screed. The risk of ceiling destruction is minimal. |
| Diamond cutting | The method is suitable for dismantling screeds of any thickness and strength. It is also quite often used during dismantling in apartments. To carry out work using this technology, you will need a stable power source and access to a water supply system - water is needed to cool the equipment and reduce the amount of dust in the air. |
The screed can be dismantled either completely (cleanly removed from the floor) or partially (only a layer of a certain thickness is removed or a selected piece of screed is removed).
Also, dismantling is sometimes carried out using special robotic machines. Of course, the productivity and efficiency of the entire process increases significantly, but such machines can only be used to remove massive thick screeds that have a reinforcing layer and a thickness of at least 10 cm. In other cases, the use of robots is impractical.
Using a special robot to dismantle the screed
On a note! The productivity of 2 people who remove the screed with jackhammers is 100 m2 per day, and one robot is from 150 to 300 m2.
The cost of dismantling work by specialists depends on the following factors:
- thickness of the screed layer;
- the material from which the base is made;
- are there any communications, a reinforcing layer and additional elements inside the screed;
- dimensions of the room where the work is carried out.
Therefore, experts will be able to accurately answer the question only after assessing the entire scale of the work.
Table. Average prices for dismantling work (screed).
| Thickness, cm | Cost, rub./sq.m. |
| Up to 4 | 150-400 |
| 5-6 | 220-500 |
| 7-8 | 300-600 |
Debris after dismantling the screed
Based on this, we can conclude that dismantling the screed is a very expensive job if the room is large. That's why many people decide to do the work themselves. Especially when you consider that, as a rule, the reinforced screed has to be dismantled, about 50-100% of the cost is added to the final amount.
Diamond drilling
Dismantling the screed - rules for dismantling, main points
Along with other types of dismantling work, the dismantling of floor screed is no less popular. This process is quite labor-intensive, since it requires not only special equipment, but also certain experience. You can dismantle the floor screed yourself, but if you are unsure of your abilities, it is better to use the services of specialists.
Over time, the concrete screed tends to collapse and ceases to perform its direct functions. In case of renovation in the apartment, one way or another, it is necessary to remove the old screed.
It will be much cheaper to dismantle the concrete screed than to carry out repairs and restoration work later.
There are a number of signs by which you can determine the need to dismantle the old screed:
- The old screed is significantly cracked and cannot be restored. Removing it will not be difficult.
- It must be removed if the floor level is lowered.
- Dismantling is necessary in the case of any communications under the screed, or their repair or replacement, as well as in the case of a heated floor system.
- The old screed is in terrible condition and it is easier to remove it than to repair it.
It is dangerous to make a new screed without dismantling the old one, since the ceiling may not withstand it. In addition, using a jackhammer for dismantling is also dangerous due to the destruction of the ceiling.
In order to begin the difficult process of removing the old screed, it is necessary to perform a number of preparatory work and begin removing the concrete screed:
- It is necessary to remove all baseboards, dismantle the flooring (remove laminate, tiles, carpet, parquet, linoleum).
- Remove all furniture and dismantle all plumbing fixtures, if any, in the room.
- Concrete screed is usually removed by impact using power tools (jackhammers, hammer drills, etc.) or hand tools (hammer, chisel, sledgehammer, etc.). Therefore, it is necessary to prepare tools in advance, and if they are not available, you can rent them or invite specialists to remove the screed.
- If you need to dismantle a reinforced screed, you simply cannot do without good equipment (for example, without a joint cutter).
- The base of the floor must be disassembled into pieces starting from the corner along the entire perimeter of the floor using any tool.
- The resulting construction waste is collected in strong bags and removed.
READ MORE: Which floor screed in a new building is better than classic dry semi-dry
The least noisy method is to use drilling and cutting. During the cutting process, you can quickly cut out the required fragment of the concrete coating; besides, cutting and drilling cannot cause additional loads on the supporting structures. When using drilling and cutting, as much dust and dirt does not form as with others, since the tool is cooled with water during operation.
conclusions
If it is necessary to dismantle the old screed, you must have patience and personal protective equipment (working clothes, gloves, goggles, respirator), and also agree with your neighbors on the schedule for repair work. This is necessary in order not to receive unexpected guests from various authorities who were invited by neighbors.
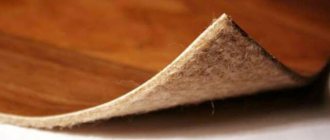
A floor screed is a small layer of durable material that is located on the main floor structure. The screed acts as an intermediate floor between the concrete base and the final floor covering.
The screed can be made monolithic or composite. In the first case, the screed is made from cement-sand mortar, and in the second case, it is made from several layers of gypsum cement or expanded clay concrete. To give maximum strength, the screed can be additionally reinforced with metal mesh.
The screed performs several functions, including:
- It levels the floor plane.
- Performs a protective function (from impacts, abrasion, various impacts) for covering.
- If the screed has built-in heating, it helps distribute the heat.
- The screed takes on the load of the supporting structures.
- It is the basis for further installation of heat and sound insulation, as well as for the finishing floor covering.
As a rule, the screed is performed directly on the concrete base to level the floor and lay the finishing coating.
Thanks to their impressive service life, few owners of premises with innovative finishes have encountered dismantling. There have not yet been official technological regulations on this matter.
However, craftsmen from the repair industry have their own ideas on how to remove self-leveling floors; they have proven methods and best practices.
There are many reasons for dismantling the self-leveling floor. Standard prerequisites include poor quality work, non-compliance with technology, and unauthorized changes in the composition of the mixture being poured.
The list of more impressive reasons is headed by the owners’ desire to install a “warm floor” system in rooms with low ceiling heights and similar compelling excuses for radical alterations.
The choice of method for removing self-leveling floors is influenced by:
- Composition of the solution used in filling. It is important that a polymer leveling solution or mixture based on cement or gypsum was used.
- The purpose of the fill. Mixtures with a cement or gypsum base solve the problems of leveling and forming a base for further laying of finishing materials. Polymer compositions serve as finishing coatings or substrates for the finishing decorative layer.
- Final thickness. Compositions with a cement or gypsum base are poured in a layer with a thickness of 1 cm to 8 cm. The optimal thickness of polymer floors is 2.5 mm. Maximum limit 5 mm. The minimum thickness may be 0.3 mm polyurethane coating and 1.0 mm methyl tetacrylate finish shell.
- Option for screed device. More precisely, the screed is connected to the base or there is an insulating layer between it and the base. Insulation prevents the diffusion of self-leveling floor and reinforced concrete base. If it is not there, then the molecules of the poured solution partially penetrate into the ceiling, which makes it much more difficult to remove.
- Technical condition. It is necessary to find out the location of the damage and decide on the feasibility of expensive dismantling.
The technical condition of the floor does not matter if major alterations or redevelopment are carried out in the room. The situation is completely different when defects spread over 10–20% of the total area.
It is not necessary to remove the screed or decorative finishing shell completely if it is possible to eliminate only the swollen or cracked areas.
The methods used today for dismantling self-leveling floors require impressive labor efforts and do not spare customers’ wallets or floor materials.
The costs can add up to a very significant amount.
Therefore, if it is possible not to resort to major transformations, it is better to carry out partial removal of the self-leveling floor or local repairs.
The work of completely removing the screed is often carried out much easier and faster than cutting out fragments or almost precision removal of surface convexities. However, it should be remembered that it is worth taking on them after carefully weighing the costs and the expected result.
An operation to completely remove the screed is performed in the following cases:
- Increasing the height of ceilings in rooms with multi-layer powerful screed.
- Preparing the base for installing a “warm floor” system, if the ceiling height does not allow reducing it by another 7–10 cm.
- Low adhesion of the screed to the base, if strong adhesion over the entire area was assumed.
- Deterioration of the old leveling layer, requiring major replacement.
- Cracking and dusting of the base floor, precluding further arrangement of the premises and living in it.
Dismantling is carried out by simply destroying the screed with a hammer drill. To make it easier to solve destructive problems, it is recommended to first cut the floor into segments with a grinder.
You need to use a diamond blade. You should cut carefully, being careful not to catch the ceiling or the bottom leveling layer. It is better not to go deep into the entire thickness, but to leave about a centimeter of the uncut layer. Otherwise, serious repairs will be required.
After the grinder divides the floor into sections, the hammer drill enters the fight to destroy the screed. To work with it you will need two attachments:
- Scarpel chisel. With its help, the bulk of the screed is crushed.
- Pike. With its help, work is carried out to separate the layer with high adhesion.
If the screed was designed according to the “floating” principle, there is no need to use a peak. The leveling layer is simply crushed into small pieces, collected in craft bags and transported to a disposal site.
If the floor was poured onto a concrete base so that the adhesion was maximum, then you must first act with a scarpel, then clean it with a lance.
The width of the scarpel can be different: from 3 to 10 cm or more. If it is necessary to remove a figuratively poured floor, it is worth using several similar devices.
Usually the largest scarpels are found in the most powerful hammer drills.
It was not in vain that we touched upon the issue of careful dismantling work.
It is possible to refuse complete dismantling only if there are no more than 20% defects in the subfloor, and it is also possible to restore the technical characteristics of the base through repairs.
Screeds made on a small area can be cleaned without a hammer drill. But more effort and time will be spent than renting a drilling machine.
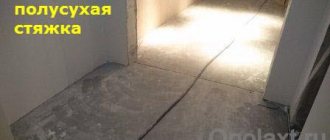
Thin screeds created by pouring mortar with a gypsum or cement base are much more difficult to remove than thicker leveling layers. They are rarely arranged according to a “floating” scheme.
Basically, it is poured to eliminate the relief of the concrete subfloor, with which the leveling screed should adhere as much as possible.
There are much fewer reasons for dismantling thin layers of leveling, these are:
- Partial detachment from the concrete base. Manifests itself in the form of “swelling” of individual sections. This happens due to the subfloor not being sufficiently dried before pouring, poor preparation for pouring, or the presence of oil stains on it.
- The appearance of cracks over a large area of the floor. Occurs due to violation of the proportions of the solution or instructions from the concrete mix manufacturer.
- The presence of bubbles and voids in the body of the fill and on the surface. The traditional result of non-compliance with technology is associated with a large number of air bubbles in the mixture being poured.
Features of dismantling floor screed
Dismantling a screed is literally breaking the coating into separate small pieces, which are then thrown away as construction waste. In this case, the process begins with a whole series of preparatory work, which will be discussed below.
Depending on the thickness of the screed and the material from which it is made, as well as the volume of work, the choice of technology for removing the base is made. These can be only hand tools (just a hammer and chisel) or, conversely, equipment (a jackhammer). Sometimes an ordinary hammer drill and a special shovel attachment for it are enough to cope with the base. However, the hammer drill can only be used in small areas.
How to properly dismantle a floor screed
All work will have to be coordinated with neighbors if it is carried out in an apartment building, since in the process of dismantling the screed in any case there will be a lot of dust, debris and, most importantly, noise. Not everyone is ready to endure the roar of equipment overhead. Therefore, even if the neighbors have given their consent to carry out the work, it is important to carry it out during the daytime on weekdays, when everyone is at work.
Attention! The noise of screed removal work will be heard on all floors of the house, so you will have to talk to the entire entrance, if not the whole house.
It’s good if, after laying the old screed, you managed to preserve its layout. The fact is that there may be communications inside the base and they are usually marked on the drawing, if one was created. By knowing where they lie, you can avoid damaging wires or pipes. It is also important not to overdo it and not damage the floor slabs and walls during the work.
Photo of the dismantling process
How much does it cost to remove a floor screed?
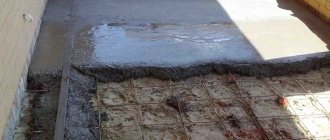
Concrete screed is a special coating that acts as an intermediate layer between a monolithic reinforced concrete slab and the finishing floor covering. With its help, the floor surface is leveled and the seams between the tiles are filled. The height of the screed may vary and, as a rule, varies from 3 to 5 cm. After some time, it can no longer perform its functions, since the concrete begins to crumble, peel off and become covered with cracks.
READ MORE: Do-it-yourself polymer self-leveling floors
To solve this problem, you need to dismantle the concrete floor. And below we will look at how much it costs to dismantle a floor screed, looking at the average prices on the market.
Floor screed and its main functions
The screed can be either monolithic, made from a cement-sand mixture, or composite, the base of which is a combination of several layers of gypsum cement or expanded clay concrete. For higher reliability, the base is additionally reinforced with steel mesh.
Among the main functions that fall on the floor screed, it is worth highlighting the following:
- floor leveling;
- protection of the ceiling from negative external influences;
- perception of load on supporting structures;
- basis for further installation of flooring;
- heat distribution in floors with built-in heating.
It is used when it is necessary to dismantle not the entire surface, but a certain section of the floor. Moreover, drilling is not such a noisy method and is therefore best suited for renovations in residential buildings.
Removal of the coating is done using an electric jackhammer, grinder or hammer drill. But this method can only be used if the concrete surface does not contain reinforced elements.
In most cases, diamond cutting is used, which is used to remove surfaces of any strength. In order to perform work with a diamond tool, you will need an uninterrupted water supply and power, which is necessary to reduce the concentration of dust in the room and constantly cool the equipment.
Why should you remove the screed?
It is worth considering that dismantling a floor screed, concrete or cement, is carried out if:
- A major renovation of a house or apartment is planned.
- A change in floor level or screed reinforcement is required.
- Repairing or installing pipes or cables in a concrete base.
- Irregularities have arisen.
- The floor tiles need to be replaced because there are voids underneath them.
- The characteristics deteriorated significantly and signs of breakdown appeared - cracks and delamination.
- Cement seeps through the seams of the finishing coat.
The main factors on which the price of the service depends:
- type of coating and its thickness;
- the amount of work required;
- complexity of the task;
- availability of additional services.
Therefore, it is possible to give an unambiguous answer to how much 1 m2 of dismantling costs only after analyzing the object, as well as studying its features.
Repairing the floor in an apartment is a complex technological process that requires technical and physical training, and therefore dismantling it yourself is highly not recommended. An inexperienced worker could flood neighbors and damage plumbing pipes or trip on electrical wiring, causing an accident or fire. Therefore, we recommend inviting professionals who have the necessary tools, experience and knowledge at their disposal.
The average cost of dismantling an old concrete floor is presented in the table
| Concrete screed thickness | Cost in rubles per 1 m2 |
| up to 40 mm | 250-300 |
| from 50 to 80 mm | 350-400 |
| from 90 to 140 mm | 450-500 |
| from 150 mm | 400-500 |
| Reinforced screed | from 500 |
Removing the old floor covering allows you to prepare the surface for a better and new base. Also, as noted above, the cost of demolition largely depends on the area of the room, the thickness of the floor, the material, the method of removal and the presence of a reinforced base.
Before proceeding with the dismantling of the old screed, the finishing coating is removed, which must be paid for separately. The price depends on what needs to be removed - linoleum, baseboards, laminate, parquet, tiles or carpet.
| Material | Price per 1 m2 |
| Carpet or linoleum | 65 |
| Hardboard or plywood | 65 |
| Laminate | 75 |
| Tile | 75 |
| Parquet | 120 |
| Ceramic skirting boards | 60 |
| Wooden or plastic skirting boards | 40 |
conclusions
It is worth recognizing that performing high-quality dismantling of screeds with your own hands is always very problematic. The procedure itself requires not only knowledge and experience, but also the availability of special tools and devices, the purchase of which can cost a decent amount of money.
Therefore, for such purposes, it is recommended to use the services of specialists - the cost of dismantling the screed is affordable, and their quality fully justifies the money spent.
Tools and protective equipment
Despite the complexity of the work performed, not such a large number of tools are needed to remove the screed. The list is below:
- depending on the chosen method - hammer drill, hammer or sledgehammer, jackhammer, grinder, etc.;
- grinder - for cutting reinforcing bars, if there are any inside the screed;
- vacuum cleaner - for collecting fine dust;
- large and durable bags for collecting and removing garbage.
Dismantling a floor screed with a jackhammer
It is also important to purchase personal protective equipment. These include gloves, a respirator, safety glasses, a work helmet, and headphones. The work ahead will be very dusty and dirty, so it is better to protect yourself as much as possible.
It is important to prepare the premises and foundation before starting work. To do this, initially all pieces of furniture and household items are moved to another room and covered with plastic film so that dust does not settle on them. And the latter will fly in large quantities throughout the apartment. Skirting boards, old flooring - laminate, fiberboard, linoleum, etc. are also removed. If the covering is to be used again, it should be removed very carefully. If it is very old, then you don’t have to try and completely destroy it and throw it away.
Dismantling the laminate
Removing the screed from the floor
Step 1. First of all, all the preparatory work is done. Garbage, furniture, old coverings are completely removed from the premises. The screed must be cleared of any objects standing on it.
Floor preparation
Step 2. The need for dismantling is assessed. In some cases, the screed can still be saved if it is not severely cracked and destroyed. Small cracks are repaired and the flooring can be laid again.
Sometimes an old screed can be saved
Step 3. Using a jackhammer, carefully open a small section of the screed. This is necessary in order to find out the final thickness of the base and see if there are communications inside it. All of them must be carefully avoided during the work process. Also at this stage, the possible amount of debris is assessed.
The thickness of the screed is determined
On a note! With a screed thickness of 6 cm, 1 m2 will produce about 120 kg of waste.
Step 4. The screed, in accordance with the locations of communications, is gradually destroyed in several places with a jackhammer. Work begins from the far wall opposite the exit from the room. The worker moves away from it towards the door, gradually destroying the screed. You need to work carefully so as not to damage the ceilings. To do this, you cannot go deeper into the layer than a certain thickness of the screed.
Breaking the screed with a jackhammer
Step 5. Pieces of concrete, so that they do not interfere, are gradually folded into strong bags and taken out.
Garbage is put into bags
Step 6. To remove garbage, due to its large volume and weight, you will need a truck.
You will need a truck to remove waste.
Step 7. The bare floor is completely cleared of pieces of concrete and small debris. It is ready for the new screed to be poured.
Cleaned floor