Why is garage floor insulation done?
Work on floor insulation increases the financial costs of construction or repair of an operating facility, but nevertheless, these costs are justified, because Floor insulation allows you to achieve the following results:
- The ability to maintain indoor temperature within the specified parameters with minimal heat loss through the floor surface;
- Creating comfortable conditions when repairing various types of equipment and performing other work;
- Maintaining an indoor microclimate that will be optimal for storing equipment, spare parts and other materials.
Many users think about how to make a warm floor in a garage, and depending on the design of the floor, there may be several options for such arrangement.
Why do you need to insulate your garage?
The temperature regime that has a positive effect on the condition of the car differs significantly from the one in which a person is comfortable. If in residential premises the standard is to maintain the air temperature at +20-22 degrees Celsius, then for storing a car +5 degrees is considered the most optimal. At this temperature, almost no condensation forms on metal parts, causing destructive corrosion.
Therefore, to create a microclimate suitable for technology in the garage, other approaches to insulation are used. After all, the desire to recreate room conditions in the garage using insulation and heating devices will harm the vehicle. For example, in winter, when entering a heated room from the cold, the car will instantly fog up, the air humidity will increase, and the car will sit in such a warm-humid fog all night.
How to properly insulate a garage? Let's figure it out.
Insulated floor design options
Insulation of the garage floor, depending on the materials used in its construction, can be done:
- For concrete floors using expanded clay, penoplex and other modern thermal insulation materials.
- For wooden floors using expanded clay or mineral wool.
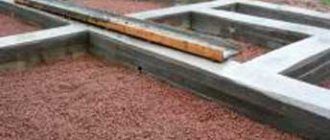
Insulation of a concrete floor in a garage with expanded clay
Expanded clay is a fairly common and inexpensive material for floor insulation.
If expanded clay is used as a material providing insulation, then the sequence of work is as follows:
- In accordance with the perimeter of the garage, a pit is dug, 0.4 - 0.5 meters deep;
- The bottom of the pit is compacted and a drainage layer is laid, using coarse sand.
- Waterproofing (roofing felt or other similar material) is laid on the drainage layer.
It is important to remember that in order to ensure waterproofing of the floor, it is necessary to glue the strips of roofing material together and the places where it adjoins the elements of the foundation or walls!
- To create the plane of the installed floor, according to its required level, beacons are set, in accordance with which the insulation is backfilled.
- Expanded clay is leveled, its top layer is spilled with a liquid solution of sand and cement.
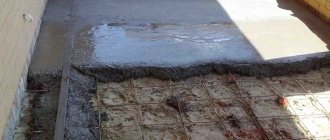
- A metal mesh is laid and secured.
- Concrete is poured in accordance with the required marks of the installed floor.
Advice from an expert: after pouring concrete, it is necessary to periodically wet it until it hardens completely, this will prevent the formation of cracks on the floor surface!
Insulation of a concrete floor with penoplex
Penoplex is a building material that has a gas-filled structure and is made from polystyrene.
Penoplex - a highly effective thermal insulator for floors
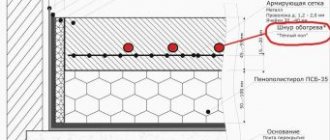
When using this material, insulation of a concrete floor in a garage is carried out as follows:
- The base is prepared, for this purpose the top layer of soil is removed to a depth of 5.0 - 10.0 cm, after which the prepared area is compacted.
- The beacons are set to the required floor level height.
- A rough screed up to 5.0 - 7.0 cm thick is poured onto the prepared base with cement mortar and time is given for it to harden.
- After the screed has hardened, waterproofing is laid over its surface. Roofing felt is used as this waterproofing layer. The joints of the sheets and the junctions with the garage foundation (walls) are glued.
- Penoplex is laid over a layer of roofing material. The sheets are glued together with special glue or foam.
- Another layer of waterproofing is laid. In this case, polyethylene is used, glued with tape.
- A reinforced mesh is placed on top of the second layer of waterproofing, which is attached to the load-bearing building structures.
- A concrete floor is poured along previously installed beacons.
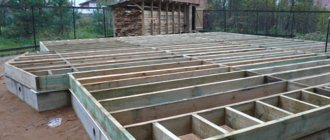
Insulation of a wooden floor with expanded clay
Due to the fact that expanded clay has a number of advantages and is a relatively inexpensive building material, it is often used for insulating garages when the floors are made of wood. In this case, the work is carried out similarly to the option with a concrete floor, but there are a number of differences that affect the process of work.
Expanded clay is poured into the space between wooden joists
Floor insulation is performed in the following sequence:
- A pit is dug, and its depth must correspond to the sum of the thickness of the rough screed, the joists on which the floor boards are laid and the thickness of these boards.
- The base of the pit is compacted and preparation (rough screed) is poured over its area.
- A layer of waterproofing is laid. For this, roofing felt is used, the joints of the sheets and the junctions with the walls and foundation are glued.
- Logs are laid over the waterproofing layer.
- Insulation is poured between the joists and aligned with the top mark of the joists.
- A wooden floor is laid.
Insulation of a wooden floor with mineral wool
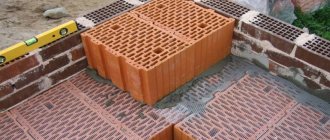
Another material that can be used to insulate a wooden floor is mineral wool.
Mineral wool is less popular for floor insulation, but effective
This building material has the ability to absorb moisture, which can adversely affect the condition of the flooring.
It is very important to pay attention to the tightness of the waterproofing layers, ensuring that moisture cannot penetrate into the thermal insulation layer!
In this case, the work is performed as follows:
- The base is prepared, the soil is leveled and compacted.
- The floor level is marked in relation to the building structures.
- The concrete is prepared (rough screed).
- Waterproofing made of roofing felt or similar material is laid over the rough screed layer.
- The joints of roofing felt sheets and the junction points are sealed.
- The logs are being laid. The pitch of laying the logs must correspond to the width of the sheet or roll of mineral wool.
- Mineral wool is placed between the laid logs, and the joints between the sheets are sealed with tape or adhesive tape.
- A second layer of waterproofing is laid, for this purpose polyethylene is used, the parts of which are also connected to each other using adhesive tape or adhesive tape.
- A wooden floor is laid along the previously installed joists.
Advantages and disadvantages of various materials used for floor insulation
Various materials that can be used to insulate a garage floor have their own inherent advantages and disadvantages, which determine the possibility and economic feasibility of their use.
Let's summarize the advantages and disadvantages of building materials in a table.
| dignity | flaws |
| Expanded clay | |
|
|
| Penoplex | |
|
|
| Mineral wool | |
|
|
How to insulate a garage floor if you have a cellar
Often in the garage, in addition to the fact that the vehicle is parked there, there is also a cellar in which vegetables and various preparations for the winter are stored. In this case, floor insulation work has some differences from those previously discussed.
The process of floor insulation itself, depending on the materials used, will be similar to the work options discussed above. The difference is that in order to achieve the required microclimate inside the garage, you will need to insulate and waterproof the walls and floor of the cellar itself.
Important: when constructing a cellar in the form of a caisson, no additional work is required!
Work on insulating the cellar is carried out during its construction. The materials used to perform this work may be the same as those used to insulate the garage floor. Particular attention is paid to waterproofing the walls of such premises and the junctions of various building elements.
The ceiling of the cellar is the floor of the garage, so the strength of this structure determines the service life and technical characteristics of the entire room. The most complex element of this design is the entrance to the cellar, which must also be thermally insulated and no cold bridges should form on its elements.
Rules for garage insulation
In our country, most garages are a metal structure, which is very difficult to warm up.
No matter how actively such a room is heated, its heat loss will be maximum. For such structures, it is necessary to carry out insulation work first. It may seem to an inexperienced person that the main goal of thermal insulation work in garages is to increase the temperature to room temperature (on average +20). But such an opinion can confidently be called erroneous. The temperature considered comfortable for humans is not suitable for equipment and cars. Sudden thermal changes, when a car drives from cold to warm, cause condensation to form. The resulting moisture settles on the car’s parts, which is critical for it. Therefore, experts concluded that the result of insulating the garage should be a temperature of +5 degrees. This indicator is considered as close as possible to the ideal storage conditions for the car.
Another misconception of car owners is that before insulating the garage from the inside, they seal all the holes and cracks in it into which air from the outside could penetrate. At first glance, this decision may seem correct, but this is only at first glance. In fact, in a garage, while driving and parking a car, quite a lot of harmful substances are produced that are considered dangerous to human health. The materials themselves used for thermal insulation of the garage can release the same substances. In addition, all moisture entering the room can only disappear through weathering. This state of affairs suggests that before insulating the garage with your own hands, it is necessary to build a decent ventilation system in it.
If we consider the question: “How to properly insulate a garage - from the outside or from the inside?”, then the correct answer would be “Outside!” The fact is that insulating a garage from the outside has a number of advantages over internal insulation:
- It does not steal extra centimeters of usable space;
- It completely eliminates the risk of room freezing;
- It is not fraught with the influence of harmful substances released by insulation in a closed space.
All these arguments speak in favor of external insulation of garage premises, but do not forget about the financial side of this issue - insulating the walls of the garage from the inside will cost a little less. However, in this situation, excessive savings will be unnecessary, since we are talking about human health. As mentioned above, before insulating the garage from the inside, it is necessary to provide ventilation. The second important issue is materials - you shouldn’t skimp on them either.
