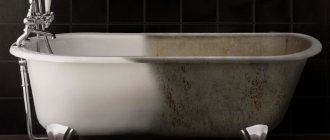
Just a couple of decades ago, there was a meager selection of building materials that would allow you to aesthetically design a bathroom. Sealing with cement mortar followed by application of enamel paint is the favorite method of the majority of the population in the recent past. An indispensable condition for long-term operation of the joint without destruction was the absence of the slightest vibration of the bath. The intensive development of the chemical industry and the improvement of technological processes have filled the market with a wide range of products that allow high-quality and elegant sealing of the joint between tiles and bathtubs.
Joint design options
In the process of equipping a bathroom, it is necessary to perform a number of sequential actions. Due to this, water will not get into the joint. Many experienced specialists offer many options for solving this problem in accordance with a specific situation.
You can completely prevent water from getting into the joint by installing a bathtub with one side walled directly into the wall. After sealing the bathtub into the wall, it is necessary to treat the joint with a special grout. The main advantage of this solution is the complete exclusion of moisture from entering the joint.
The bathtub is not always stationary. Therefore, the masonry at the junction may be damaged. Due to any unforeseen situation, tile repair may be necessary. It will need to be removed and reinstalled. It is not always possible to select tiles from a similar collection so that they look organic. For this reason, replacing tiles is often a rather painstaking and time-consuming task.
It is better not to mount the bathtub into the wall. To seal the joint between the bathtub and the tiles, you should use modern materials specially designed for this task. There are several popular options:
- tile grout;
- cement mortar;
- finishing the joint with foam;
- sealant;
- installation of curbs.
Each of these methods has its own advantages and disadvantages. They can be mutually exclusive with a certain combination of methods. If we consider the process of finishing the joint between in more detail, we can understand this situation better.
Bathtubs made of acrylic are lightweight, so disruption of the junction of the bathtub and tiles as a result of displacement of the structure is unlikely. The back walls of bathtubs are usually made flat, so there is no need to cut a groove in the wall for them.
To ensure high-quality sealing of the seams between the acrylic bathtub and the wall, it should be securely fixed at the installation site. To do this, the bathtub is glued to the floor with sealant.
How to properly install a cast iron bathtub?
Bathtubs are made from various materials such as steel, cast iron or acrylic.
Buying a steel bath bowl will be cheaper than others. But there is a large selection of different sizes, shapes and colors. This type of bathroom also attracts consumers with its ease of installation.
When bringing the pipes to the installation site of the mixer, you need to make two grooves in the wall to place the pipes in them. Then you need to assemble the bathtub legs, which are usually sold as a set. They need to be mounted on standard places on the bottom using mounting bolts.
The next step is to assemble the siphon and install it to the drain hole; the outlet is connected to the sewer pipe using a corrugated tube. Next comes installing the bathtub on its legs in the place where it will stand and adjusting the level using adjusting pins.
Choosing a cast iron bathtub will provide a number of other advantages: cast iron is durable and does not make noise when filled with water, it holds the water temperature well, but a significant drawback is, of course, the weight, which will not allow you to install it alone.
It also comes with legs, which are mounted strictly according to the instructions.
The legs must be strong and reliable.
Then, just like on a steel bathtub, a siphon is mounted. And it is adjustable by level.
Methods for sealing the seam between a bathtub and tiles
- Gap sizes: small - up to 1 cm, medium - from 1 to 3 cm and large - over 3 cm;
- Bathtub materials: metal, cast iron or acrylic. Depending on changes in temperature and load, they may be subject to deformation in different ways;
- Requirements for the final appearance.
Methods for sealing the joint between the bathtub and the tiles:
- Using grout. This is one of the most common methods for small seam sizes. The prepared mixture is carefully applied to the joint and leveled with a spatula. The most commonly used color is white, but you can also match the color of the seams between the tiles. To be on the safe side and prevent rust or mold from appearing in the seam area, the joint should be treated with a fugue gloss.
- Using cement mortar. This method is more often used in cases with large gaps. To prevent cement from falling through the slot onto the floor during work, you can make formwork from the bottom of the bathtub on the desired side - lay a horizontal board that will support the mortar. In turn, until the cement dries completely, the board can be supported with improvised vertical piles from below. After the work, the concrete must dry, and then apply the border tape.
Advice! This method allows you to make a joint at an angle to allow water to drain.
- Using polyurethane foam. For such work, only waterproof polyurethane foam is applicable. Before starting work, be sure to clean the edges and treat them with a degreaser. The can must be shaken before applying foam. This sealant must be applied carefully, as it is quite difficult to remove. Then, when the foam dries, cut it evenly using a stationery knife. The sealed seam on top can be decorated with a border or tiles.
- Using silicone sealant. The method is used for small gaps. To prevent mold from appearing in the seam area over time, it is better to use sanitary sealant. Silicone should be applied to the cleaned, grease-free surfaces of the edges of the bathtub and tiles, and use a spatula to shape the seam into the correct shape. Allow the sealant to dry, then remove the residue with a damp cotton cloth.
Important! During drying, the sealant releases harmful substances, so after repair work, the room must be ventilated.
- Using tape with sealant. A tape made of semi-plastic or semi-rubber perfectly performs a sealing and decorative function. They glue it with silicone. When the joint is treated with silicone and is ready for gluing, the protective film should be removed from the tape and heated slightly with a hairdryer. Then, focusing on the fold line, you need to attach it to the seam and press firmly.
- Using a curb. The border can be plastic or ceramic. The first is cut with a knife, the second with a grinder. The plastic border is fixed with glue, is inexpensive and quite convenient to use. The main thing is to take correct measurements and do the work carefully. To prevent glue from sticking out at the edges of the border, before starting work you can cover the borders with construction tape, which will be easy to remove. When fixing a ceramic border, you need to use special adhesive mixtures or cement mortar.
- Combined method. Here you can use foam, sealant and tape at the same time. After the foam has dried and been cut, its rough surface can be treated with a sealant, onto which tape is glued for decoration.
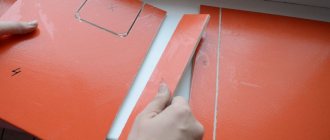
Flexible self-adhesive border
Self-adhesive borders are purchased in rolls, and the package often includes a plastic spatula.
The tape already contains a sealant, so this border is highly moisture resistant, but at the same time looks very aesthetically pleasing. Before gluing the border, the surfaces are thoroughly cleaned and dried.
The protective film is removed from the tape, after which the border is pressed against the joint with the adhesive side.
To form an angle, use a plastic spatula.
Ceramic tiles or ceramic border
With this method, the joint between the bathtub and the tiles can be sealed with the tiles themselves, including border tiles. As a result, you will get a monolithic connection, which is unlikely to please you much if you plan to change the bathtub in the near future.
Ceramic baseboards usually fit quite well into the bathroom, complementing its interior. Modern manufacturers allow you to match it to the tile or bathtub. The border is glued according to the same principle as the plastic one, but you will have to cut it with a grinder.
After completing the work, it is recommended to go over the joints with grout.
Plastic border
A plastic border is convenient because it has a relatively low price, but at the same time provides an aesthetic appearance. It is attached with glue, and at the final stage the corners are installed. The complexity of the process lies only in the measurements. To avoid staining the surfaces of the bathtub and tiles with glue, apply protective tape.
Types of grout mixtures
The modern market today offers three types of grout mixtures for grouting joints, which differ from each other in the main binding component. These are epoxy resin, cement and polymers.
Epoxy grouts
This is a two-component material in terms of the binding ingredient. To obtain it, epoxy resin and hardener are mixed in certain proportions. Both components are sold in separate jars. Sand is usually used as a filler, which is pre-painted with pigment. Hence the wide variety of design of tile joints.
The positive characteristics of epoxy grout include: high strength, inertness to acids and alkalis, which makes it possible to wash and clean tiles with any detergents, long-term operation.
Cement compositions
After applying inside the seam, within half an hour, the putty can be cleaned with a foam float and water. An indicator of readiness is a white coating at the joints of the tiles. After 3-4 hours, you need to repeat the procedure using a slightly damp, clean cloth. The grout in the joints between tiles on a tiled floor must be cleaned diagonally across the laid material.
If you have to seal the seams for the first time, then it is better to use this composition. It takes a long time to dry, so there is time to correct any flaws. The disadvantages include slight moisture absorption, which over time leads to cracking. But re-grinding the seams is not a problem.
Polymer mixtures
Polymer grout for tiles is a relatively new variety that has a large list of positive characteristics.
- Almost zero grout shrinkage when drying.
- High moisture resistance.
- Dirt does not collect on the surface of the composition.
- Easy to apply and high adhesive properties.
- Some solutions are classified as “frost-resistant”.
- This is a highly plastic material.
- The hardening process is not affected by temperature changes.
- After drying, the seams between the tiles do not become cracked.
- Huge variety of color designs.
The only negative: polymer grouts are inferior in strength to epoxy grouts
Therefore, when the question arises of which grout to choose, it is necessary to pay attention to the operating conditions of the tiled floor. For example, in showers it is better to cover the floor with epoxy; in bathrooms located in apartments, polymer or cement is suitable
Grout marker
A marker is usually used only if the old tile grout has become dull, cracked, or has yellow stains or chips on it. That is, it is used to repair the seams of ceramic floor tiles.
In this case, there is no need to dismantle the old compound, open the seams and fill them with new putty. It is very easy to seal joints this way. Simply run a pencil along the seam, which is coated with a new compound of small thickness.
Tile grout
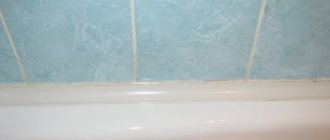
Connecting the bathtub close to the wall allows you to seal the joint with minimal effort and expense. Having ensured high-quality fixation of the bathtub, it is enough to seal the gap with white grout, or one that matches the shade of the tile. Long-term color retention and moisture resistance are the key advantages of the method. Additional treatment in the form of a fugue-gloss coating will significantly increase the level of protection against external contamination and rust. However, the conditions for a tight fit to the tile around the entire perimeter and stable fixation of the bathtub are not always feasible, so they resort to more reliable options.
Sequencing
- clean the joint from dirt
- for adhesion, lubricate the surfaces to be treated with water using a thin brush
Don't Miss: Kitchen Countertops
- prepare the mixture according to the instructions (but in the end the mixture should be thick)
- apply the grout with a rubber spatula, tamping it well
- remove excess grout with a spatula
- the next day, treat the seam with an antifungal agent
- can also be treated with a fugue-gloss to enhance waterproofing and protect the joint from yellowing
If the gap is large
A situation often occurs when the bathtub does not fit close to the walls, since it is smaller than the size of the room. If there is a space of 3 cm or more, then the above methods cannot be used to close it.
It is optimal to seal such a seam with tiles, having previously secured a support from below (a width profile, a piece of plywood or a board).
If the gap is 10 centimeters or more, you can build a frame from a gypsum board profile, cover it with plasterboard and tile it - you will get a convenient shelf for bath accessories.
The considered methods allow you to seal the cracks behind a bathtub of any size in the most aesthetically pleasing and neat way. In conclusion, here is a video about common mistakes made when installing a bathtub.
Advice! If you need bathroom renovation specialists, there is a very convenient service for selecting specialists from PROFI.RU. Just fill out the order details, the experts will respond and you can choose who to collaborate with. Each specialist in the system has a rating, reviews and examples of work, which will help with the choice. Looks like a mini tender. Placing an application is FREE and does not oblige you to anything. Works in almost all cities of Russia.
If you are a master, follow this link, register in the system and be able to accept orders.
Application of the solution
The traditional solution to seal the joint with a cement-based mortar has a right to exist. The cost-effectiveness of the long-known method ensures its continued popularity. To decorate the gap in the bathroom, you can use the remaining tile adhesive or apply a sand-cement mortar yourself. Sealing the joint with plaster is also appropriate. A sufficiently thick consistency of the solution is an essential condition for a high-quality result. The joint sealing process includes the following steps:
- The surface of the bathtub and adjacent tiles is thoroughly cleaned of dirt.
- The treated area is wetted with water to increase adhesion.
- A plastic mesh used for plastering or puttying corner surfaces, fixed at the junction of the tile and the bathtub, will help eliminate the possibility of the mortar falling under the bathtub. The absence of serpyanka can be successfully replaced by other available materials fixed under the edge of the bathtub.
- After applying a small amount of solution, tamp it down.
Warning
To increase the level of moisture resistance and give the bathroom interior an aesthetic appearance, the joint needs subsequent finishing. Experts suggest treating it with water-repellent impregnation or epoxy resin. The final design of the bath is done using tiles or self-adhesive tape.
Sequencing
- wash the side of the bathtub and the tiles
- attach sickle tape or plastic mesh along the seam for plastering the walls so that the mortar does not fall through
- prepare a thick solution
- moisten the side, tiles and mesh with water to increase adhesion
- apply a thick layer of mortar to the seam using a narrow spatula
- compact the solution
- wait for it to dry (usually a day)
- sand the surface using medium-grain sandpaper
- clean the seam from dust and debris
- for additional waterproofing, paint the seam with waterproof paint or treat it with epoxy or special impregnation
- for beauty, put a ceramic border, plastic plinth or self-adhesive tape on top (see below)
Method number 2. Painting seams
Painting the joints between the tiles is a more reliable way to update the surfaces in the bathroom (they will remain clean and fresh for about six months). The seams can be treated with ordinary lime, water-based paint, or you can choose a special composition in the store that is intended for these purposes.
Painting seams is not considered the most durable option; the effect of the result lasts for a maximum of six months
How to choose paint for seams?
To update the grout, you can choose a color similar to the shade of the old grout, or experiment with the palette. Light paint hides imperfections in the tiles and harmonizes with any shade of tile, while dark paint gives the room an original look. Some of the most well-known manufacturers that produce coloring compounds for seams include Edding 8200, Pufas Frische Fuge, Fuga Fresca.
- Edding A coloring composition designed to “refresh” the appearance of joints between tiles. For convenient use, it comes in the form of a marker; it can be black, white or gray.
Industrial marker Edding 8200, 2-4 mm, round tip, white (for tile joints)
Attention: when choosing a marker for painting seams, you should pay attention to the thickness of the line - if it is wider than the seams themselves, it will be inconvenient to work with the marker.
- Pufas Frische Fuge Komplettset. Inexpensive paint, which has one significant drawback - low durability. Usually has a white tint, but the addition of a tinting compound is allowed.
Pufas Frische Fuge Komplettset
- Fuga Fresca. A composition based on acrylic polymers that adheres well and fills the seams evenly. A wide range of colors allows you to choose any shade to suit your taste.
Mapei Fuga Fresca
Application of the product
It should be noted that when applying paint to a surface, the color may differ significantly from that declared by the manufacturer - especially if the shade of the new composition is much lighter than the shade of the old grout.
When choosing a paint composition, you should carefully read the instructions on the packaging - most products are not used for epoxy joints, as well as those filled with silicone or polyurethane sealants.
Step-by-step instructions for applying paint to seams
In order for the paint to lie evenly on the surface, and the result of the work to please the eye for a long time, you need to follow a few simple rules.
Step 1. Clean the surface between the tiles well (you can use the methods described above). If the dirt is strongly ingrained, you should use a mechanical cleaning method, and if there is mold and mildew, additionally treat them with an antiseptic.
Step 2. Wait for it to dry completely (paint cannot be applied to a wet surface, as the result will be unsatisfactory).
Step 3. The paint is applied with a thin brush, as carefully as possible, and special attention should be paid to vertical seams where the composition can flow down.
Applying paint
Any paint that gets on the tiles must be wiped off immediately, without waiting for it to dry, with a soft cloth, since it will be impossible to remove it later.
Wipe off excess paint with a rag
Step 4. Wait 24 hours until the composition is completely dry, then evaluate the result and, if necessary, apply another or more layers of paint.
After painting the seams, it is advisable to protect them with a special sealant compound, which will extend the service life of the composition.
Video - Change the grout color on the tiles
Video: Touching up tile seams
Silicone sealant
To seal a small gap between the tiles and the bathtub, silicone sealant is used as the main installation material. Gaps reaching sizes up to 3 cm require pre-treatment of the joint with polyurethane foam. Purchase a sanitary sealant that will prevent future mold from appearing in the bathroom . The sequence of work to seal the gap is as follows:
- The surfaces of the tiles and bathtubs adjacent to the joint are treated with a solvent for the purpose of degreasing.
- Paper tape pasted along the joint will prevent contamination of the bathroom and tiles.
- After making a hole in the tube, attach the supplied tip to it.
- Having secured the tube in a special gun, silicone-based sealant is carefully distributed over the joint.
- The designated area between the tiles and the bathtub is filled in a single movement. It is impossible to apply an additional layer to the frozen mass.
- Prepare a soap solution and a brush of suitable width.
- A brush dipped in a soapy solution is passed over the silicone joint to give it a smooth surface. Movements must have a strict direction. Chaotic strokes will lead to the formation of an uneven surface.
A rubber spatula can be used to notice the brush. As a last resort, you can smooth the seam between the tiles and the bathtub with your finger or spatula. After the silicone joint has dried, the paper tape is removed. If it is missing, remove excess installation material from the bathtub and tiles using a damp cloth. Important
Working with solvents requires that the room be well ventilated. A mask and gloves will protect against the negative effects of chemical fumes and prevent skin damage in case of contact with a caustic substance.
Sequencing
- clean surfaces
- degrease with solvent
- wait for it to dry (usually a day)
- stick masking tape or tape on the areas adjacent to the gap so as not to stain them
- make a hole in the cylinder, put on the tip and insert the sealant into the gun
- slowly and carefully seal the joint with sealant in one pass
- level the seam using a rubber spatula or a thin brush dipped in soapy water
- let dry (dries in about a day)
Sealing over long distances
If, when installing a container, an increased gap (more than 20-25 mm) remains between the side and the wall, then additional construction work will be required. Materials must be moisture-resistant and impregnated to prevent the formation of mold.
For sealing, cement mortars, various finishing materials or silicone sealant are used.
Wall shelf
To close the gap around the perimeter of the bathtub, you can build a frame from a metal profile or timber impregnated with antibacterial material. The structure must be attached to the wall with screws and then covered with plywood or plasterboard. Tiles are laid on top and the seams are grouted with a special paste with antibacterial additives. This flatness along the sides of the bathtub improves the aesthetic appearance of the room and can be used to store detergents or various accessories.
When installing a bathtub from the end edge, a gap of 400-600 mm long may remain. In this case, a screen frame is assembled from a steel profile connected to a frame for the future shelf. After installing the drywall and treating the surfaces with primer, lay the tiles and seal the joints. The shelf is used to store accessories or install a mixer.
Cement pouring
To make a monolithic cement structure, it is necessary to construct a formwork from wooden beams, plaster mesh or pieces of foam plastic that does not allow the solution to leak. The edges of the bathtub must be covered with masking tape. After the solution has hardened, the outer part of the formwork and the adhesive tape are removed, the surface is decorated with mosaics or tiles, followed by filling the gaps. The technology is characterized by increased labor intensity, but maintains the harmonious appearance of the bathroom and ensures long-term tightness of the joint.
Plumbing sealant
Sealing can be done using foam sealant or polyurethane foam. To protect surfaces, apply masking tape. The seam is carefully filled with material. Some craftsmen provide formwork to prevent sealant or foam from leaking out of the joint. During the polymerization process, the material expands and fills the voids; the excess is cut off with a knife. The surface is covered with a layer of enamel, tiles or mosaics with additional protection of the seams with silicone sealant or grout paste.
Using polyurethane foam
The use of polyurethane foam greatly simplifies the process of removing the joint between the bathtub and the wall. When purchasing a container with the composition, make sure that it has moisture-resistant properties. Before starting work, make sure to protect your hands with gloves. If there is no protective barrier and foam gets on the skin, thoroughly rinse the body area with water, preventing it from drying out. Similar to the grouting process, the surface of the tile and bathtub in the joint area is pre-cleaned. The key to a quality result is careful actions when applying the material. Avoid contact of foam with foreign areas. After it has completely dried, the excess from the bathtub and tiles is removed by cutting with a stationery knife. In conclusion, they resort to one of the most suitable finishing methods - tiles, tape or border.
Sequencing
- clean the area
- treat with an antiseptic and let dry
- sand the side of the bathtub with medium-grain sandpaper for better adhesion
- degrease the area with solvent
- seal the seam with polyurethane foam - work slowly, squeeze out a little at a time, as the foam increases
- after drying, trim off the excess with a utility knife
- paint with white nitro paint or to match the color of the tiles
- you can cover the joint with a tiled border or a plastic corner
Steps, boxes and podiums
With a combined bathroom size of 9 sq. m, bathroom from 6 sq. m, steps, podiums can be attached to the plumbing fixtures, horizontally oriented boxes with water supply and sewer pipes can be adjacent, transiting to the kitchen or connecting the bathtub with risers.
Steps are used to increase user comfort, making it easier for elderly people and children to step over the side of the bathtub. Usually one or two steps from the floor level are enough.
One step for easy entry into the sanitary bowl.
Or the level of the upper stage of the structure reaches the side of the bowl. This option is only suitable for large spacious rooms.
Operating the bathtub in pool mode.
In this case, the structures near the sanitary ware should be covered by analogy with the cladding of the stairs. The width of the horizontal box should be less than the same size of the ceramic cladding to ensure that the vertical joints between the tiles match.
The width of the box is less than the size of the tile.
The bowl of the sanitary ware can be partially built into the podium, as in the bottom photo.
Bathtub half built into the podium.
In any case, knowledge of standard layouts of tiles on walls/floors will allow you to ensure acceptable quality of interiors when decorating with your own hands.
Grouts and other sealing compounds
In order to seal the junction of the bathtub with the wall, various construction mixtures and solutions of liquid or paste consistency are often used. Such materials include:
- cement mortar;
- grout for tiles;
- polyurethane foam;
- silicone or acrylic sealant.
Important. Liquid or semi-liquid compositions are used only in cases where the distance between the bathtub and the adjacent wall is small.
- Cement mortar is the simplest option, which is used to quickly seal the joint between the bathtub and the tile. Before applying cement mortar, both surfaces must be thoroughly cleaned and degreased. Before application, the work area must be thoroughly wetted to ensure uniform drying and good contact of the cement with the surface. If the joint between the bathtub and the tiles is too wide, then you can use tow to pre-seal it so that the solution does not leak into the gap.
Important. The disadvantage of this method is that it is not aesthetically pleasing and cannot be used with acrylic bathtubs, since acrylic is deformed during operation, which causes cracking of the putty. This joint between tiles and bathtub can be used with cast iron bathtubs when the wall surface is planned for painting.
- Tile grout is used more often, but this method is only applicable in cases where the joint between the bathtub and the tiles is very small. The use of grout is also not recommended with acrylic bathtubs and is used in cases where the laying of tiles starts from the side of the bathtub.
- Polyurethane foam is used in the presence of very large gaps. Before using it, the surfaces must be thoroughly cleaned and degreased. After the foam has dried, the excess must be cut off with a stationery knife. This method can be used to seal the joint between an acrylic bathtub and tiles, since the foam is resistant to deformation, but this method also has its drawbacks. After the foam has dried and its excess has been removed, the composition has a porous structure that is capable of allowing moisture to pass through, and this joint between the bathtub and the wall must be additionally closed by painting or applying adhesive curb tape.
- Silicone or acrylic sealant is used most often today and is considered the most reliable and aesthetic type of seal. However, this method is only applicable to small gaps, the size of which ranges from 1 to 5 mm. Before sealing seams in the bathroom with sealants, it is necessary to thoroughly degrease and dry the surfaces, since sealants will not stick to a wet surface.
Important. For metal and acrylic bathtubs, the bathtub is insulated from the wall using silicone sealants, since after drying they remain elastic and withstand deformation. Acrylic compounds are used for cast-iron bathtubs, since acrylic hardens when dried, and a cast-iron bathtub does not deform under the influence of temperature.
Method number 3. Replacing grout joints
Replacing old grout is the most labor-intensive, but effective and reliable way to update your bathroom interior. To do this, you will have to remove the old grout and then cover the seams with fresh compound. This is a simple, but quite labor-intensive process that consists of several stages.
Note: if the seams are slightly “recessed” (that is, there is a gap of at least half a millimeter between their surface and the tile), and the old mortar is held firmly enough, you can do without removing it and apply a thin layer of grout on top.
Stage one. Removing old grout
Old grout must be removed mechanically - for this it is most convenient to use a special tool called a joint remover. You can take a regular spatula or other tool, but you should work very carefully so as not to damage the edges of the tile. If the tile has a raised surface, it is best to protect its surface with masking tape.
Removing old grout
Most often, old grout is easily removed, but in some cases (especially if a cement-based composition was used), you will have to use a special acid cleaner: for example, PUFAS CEMENT-EX or LITOCLEAN PLUS. It is applied with a thin brush to the seams, after which the composition is allowed to dry, and the softened grout is removed very easily.
Cement Residue Remover
FYI: There is no need to worry about the acidic cleaner getting on the tile surface. It is absolutely harmless for tiles, but it can be dangerous for the body, so you need to take care to protect the skin and mucous membranes.
To ensure that there are no small debris and crumbs left deep in the seams, you should go over the surfaces with a regular vacuum cleaner. After this, wash the seams with a regular detergent (non-aggressive) and leave to dry.
Stage two. Blend selection
Tile grout is a paste or powder that is mixed with liquid to the required consistency. The performance characteristics of the compositions depend on the base on which they are made: cement or resin.
| Type of mixture | Compound | Advantages | Flaws |
| Cement | Cement (Portland cement) with the addition of sand, polymers, etc. | The cheapest option for updating seams. The mixture is easy to use, does not harden for a long time and can be easily removed when replacement is necessary. | Cement grout tends to crack over time, causing dirt and dust to get into the cracks. In addition, it easily absorbs water and does not tolerate contact with aggressive agents. |
| Resin based | Epoxy or furan resin with hardeners | Moisture resistance, resistance to aggressive chemicals, temperature changes, long service life | Relatively high cost, difficult to work with - when preparing the mixture, it is necessary to strictly observe the proportions and lay the solution quickly enough, otherwise it will harden |
Another important criterion for choosing a composition is the width of the seam between the tiles. In stores there are compositions for grouting tiles with a seam width from 1 to 15, from 3 to 6 mm, etc. The most popular brands of such products include Ceresit, Litokol, Mapei.
Grout CERESIT CE 40
Grout for tiles Ceresit
Important: the amount of mortar depends on the size of the tiles, the width and depth of the joints: a bag of dry mixture weighing 25 kg is enough to treat 50-100 square meters of surface tiled with standard size (33x33 cm).
If necessary, you can prepare the mixture for updating the seams yourself, but its technical characteristics will be worse than those of the factory one. If the seam between the tiles is not too wide (less than 1.5 mm), you can mix Portland cement with special plasticizers, which are sold in specialized stores, and for seams wider than 1.5 mm, a solution of Portland cement with sand (proportions 1 to 1) is suitable.
How to prepare tile grout: various methods
How to choose a grout shade?
In order for the bathroom interior to be harmonious and attractive, when choosing a grout shade, you need to consider the following points:
- compositions of light shades allow you to create a holistic surface, visually enlarge the room and hide flaws in the cladding;
- dark grout is ideal for highlighting individual areas and creating original compositions;
- for flooring that is most exposed to contamination, it is recommended to use black or brown compounds;
- It is best to choose colored grout so that it harmonizes with the darkest or lightest shade that is present in the interior;
- bright compositions that stand out strongly against the general background can only be used on perfectly smooth surfaces, as they highlight all the defects in the cladding.
Tile grout colors
Stage three. Grouting joints
To apply new grout to cleaned and treated seams, you will need the following tools:
- perforator with a special nozzle for mixing solutions;
- grout float;
- rubber spatula;
- sponge and rags.
We prepare everything for work
The mixture is most often diluted with water, sometimes with liquid latex (this is indicated in the manufacturer’s instructions). Before performing work, the room should be well ventilated to reduce humidity to a minimum, and the grouting process itself is as follows.
Important: if the seams are well cleaned of old grout and deep enough, you can immediately begin applying the new compound. Otherwise, it is recommended to pre-treat the seams with a special primer (for example, Ceresit CT 99).
Antifungal agent
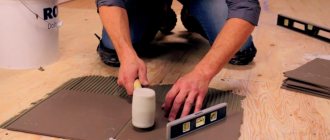
Step 1. Pour the composition into a suitable container, add liquid, lower the hammer drill with the appropriate attachment into it, set the speed to medium and mix. It is better to dilute the composition in parts, since it is quite difficult to use grout that has already “set”.
Grout preparation
Important: it is not recommended to re-dilute an already hardened mixture, as its performance characteristics may deteriorate.
Step 2. Leave the finished grout for 10 minutes so that it settles well.
Step 3. It is best to start work from the most noticeable corner and move from top to bottom so that lumps of mortar that accidentally fall from the tool do not spoil the finished seams.
Applying grout
Step 4. Take a little grout onto a spatula (hold the tool at an angle of 30 degrees to the tile) and apply it first across the seam, pressing the mixture into the depth, and then along. You should not save the solution - its excess can be removed with sandpaper.
It is better to remove the excess immediately with the same spatula.
Step 5. Go over the finished seam with a grout float, leveling and distributing the mixture. Any mixture that has got on the surface of the tile should be removed immediately, before it is completely dry - to do this, simply wipe the tile with a damp cloth.
Wipe the wall with a rag
After the solution has set slightly, you can joint it - take a piece of cable, press it a little into the seam, run it along the entire length and remove the excess. Upon completion of the work, you should wait until the grout has completely hardened (this will take from 24 to 48 hours) and treat the surface with fine sandpaper.
Tile seam
Decorative borders
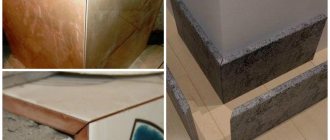
In order for the gap between the bathtub and the wall to look beautiful and at the same time effectively perform its function, today decorative borders are often used, which are made from materials such as:
- polyethylene;
- plastic;
- ceramics.
Don't miss: Where do you buy interior doors? The Magpie Doors online store is the best solution.
Each of these types of borders has its own characteristics and before sealing joints in the bathroom using them, it is necessary to study their properties and installation methods in detail. All these materials have a common feature: in order for the sealing of the junction of the bathtub and the wall to be high-quality, the surfaces must be thoroughly cleaned and degreased using solutions such as white spirit.
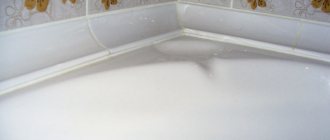
- Self-adhesive polyethylene tape is a common sealing option because it is easy to install and the fastest option. Very often, this tape comes with a plastic or rubber spatula to facilitate installation. This option is used if the joint between the bathtub and the wall does not exceed 3 mm.
Important. Before purchasing tape, make sure the packaging is sealed. Before isolating the bathtub from the wall with such tape, make sure that it has not expired, since the adhesive composition retains its characteristics for about two years.
- The plastic border is the most popular because the seam between the bathtub and the wall is very beautiful due to the decorative nature of the product. The material is not expensive, is quickly installed and does not require special tools or skills. In stores you can see a large number of decorative solutions and colors, which allows you to choose the ideal product for your interior. Before making corners in the bathroom from plastic, you need to purchase ready-made versions of the corners and make them butt-to-edge with straight elements. To install such corners, acrylic sealant or silicone is usually used, which also acts as glue.
Important. Finishing between the bathroom and the wall using plastic borders can be done in two ways, before finishing the main wall with tiles and after. In the first case, the corner is installed on the wall and tiles are laid on top of it. In the second case, the joint between the tile and the bathtub is sealed on top of the tile. For both options, different forms of borders are used and this must be taken into account before finishing the room.
- Ceramic borders are less popular due to the complexity of installation and time costs. However, this option looks very beautiful and perfectly complements the interior of the room. Today, there are a large number of options and colors that can be used to highlight the location of the edging in an original way. Before sealing the seams in the bathroom with such material, it is necessary to install and securely fasten the bathtub itself, then lay the ceramic border using tile adhesive, and only then install the ceramic tiles on the wall surface.
Important. The seal between the bathtub and the wall is carried out using moisture-resistant tile grout or sealant. This method is not recommended for use when installing acrylic bathtubs due to their deformation during operation. In order to avoid difficulties at corner joints, before sealing the corners, you need to purchase ready-made corner products, which usually come complete with straight modules and significantly speed up the installation process.
As you can see, each of the seam sealing options has its own characteristics, advantages and disadvantages, but the information we provide will help you choose the most suitable method for you. Shelf instead of border
You can find a compromise between aesthetics and functionality. Let's say you have a large gap between the bathtub and the wall. Repairing it takes a lot of work and money. And then you will also have to think about what decorative elements to cover it with.
You can get out of this position using a shelf. It is more functional, and for aesthetic reasons it can even surpass curb design. On one side it will rest on the side of the bathtub, and on the other – on the profile frame.
But you still need to remember the following details when arranging the shelf:
- Metal will not be the best choice for shelf material, as it is susceptible to rust and corrosion, despite careful surface treatment. It is better to select materials that will have high rigidity and moisture resistance.
- The shelf will still need to be lined, at least for waterproofing purposes. This will prevent moisture from getting into the cracks between the shelf and the bathtub or wall. For cladding, tiles that will withstand exposure to water are ideal.
How to prevent a gap from forming
If you think through all the stages of repair in advance, you can prevent the appearance of a gap. Technologically, it looks like this: first we install the bathtub, and then we lay the tiles. But this method is not suitable for acrylic bathtubs; it can only be used when installing cast iron and steel products. Let's look at several options and nuances of this method.
One option is laying tiles from the side of the bathtub . In this case, the wall behind the plumbing equipment is not lined, which has its advantages and disadvantages. In this case, the water flowing down the lining goes directly into the bathtub. Since the tiles are laid almost flush against the side (a gap of 1–2 mm is left), such a seam is usually filled with elastic, waterproof grout or sanitary sealant.
Another version of this technology is that the tiles are laid from the floor , and when they reach the height where the side of the bathtub will be located, a small indentation is made. After installing the bathtub, laying the tiles continues from the edge of the equipment. Thus, it turns out that the wall behind the bathtub is protected from dampness, but at the same time the side is recessed into the cladding. As in the previous case, the seam between the cladding and the edge of the equipment is filled with grout or silicone.
Note! It is not recommended to embed corner bathtubs, Jacuzzis or other equipment with additional functions into the tiled finish, or if the mixer is installed on the side. If it is necessary to access the flexible connection points, the bath will have to be moved away, which will cause damage to the lining.
When laying tiles from the edge, a plastic corner is sometimes installed, which with one of its edges is wrapped behind the tile. This design of the junction allows you to make the seam more attractive and “streamlined”, since the lower part of the plinth has a smooth bend for water drainage. This option is well suited for bathtubs with a wide side. But when choosing plastic, you need to take into account that if it turns yellow during operation, it can only be replaced by dismantling the bottom row of tiles.
You can also use a built-in ceramic border, which is glued above the side, and tiles begin to be laid from it and cover the upper edge of the border. Built-in borders often have a decorative design like marble, granite or a colored pattern, which allows you to beautifully design the junction, but there are also pure white products. The disadvantage of this option is the laboriousness of installation, as well as the fact that the border does not hide the unevenness of the edge of the bathtub and cannot be adjusted to this curvature.
How to choose the right method?
When choosing a method for sealing a joint or a combination of them, you should consider some nuances:
- When using cement mortar or polyurethane foam, some problems may arise, since a metal bath, for example, made of steel, changes slightly in size at different temperatures. Due to this, new gaps will form. But for bathtubs made of acrylic and cast iron, such methods are quite suitable;
- Self-adhesive border, despite all its good characteristics and low cost, does not have a very long service life. On average, it will have to be replaced within a year;
- Silicone sealant is the most reliable;
- The choice of method depends on the width of the gap.
In what case is it necessary to update the seams and why is it needed?
They need to be updated when they have changed their original color and the tiles have lost their attractive appearance. The simplest and cheapest method is to remove contaminants, but this method is not durable. Renewing the joints between the tiles in the bathroom will have to be repeated after a few months, because during this time they become dark in color and mold or mildew may appear in them.
Folk remedies
A good alternative is folk remedies. The quality of processing will be slightly inferior to professional mixtures, while minimizing contact with harmful chemicals, which is important for household use.
Cleaning tile grout with baking soda
Regular baking soda is used to clean various surfaces. It is safe for household use, has no odor or harmful fumes.
For the best effect and antibacterial effect, you need to prepare a paste of soda and pharmaceutical hydrogen peroxide.
It is applied using a small brush. The mixture must be left for at least an hour or two, then washed off with water and a sponge. If a layer of grease has accumulated between the tile joints, add dishwashing detergent, powder or soap to the paste.
This mixture discolors the surface, so it is usually used to clean light-colored surfaces.
Vinegar solution to get rid of fungus
Antibacterial treatment is carried out using table vinegar. Ordinary vinegar of minimum concentration (7-9%) is sprayed, and after drying, brushed and washed with water. If the seams are heavily soiled, you can prepare a solution of vinegar and ammonia, which are mixed in equal proportions.
If vinegar comes into contact with seams made with sealant, it can cause the layer to soften.
Soap and water solution
Using a soap solution is an easy way to remove dirt and antibacterial clean your bathroom. The recipe is very simple: take regular laundry soap, grate it and dilute it with water. The result is a thick paste, which is applied to the surface of the seams, carefully brushing hard-to-reach areas.
The soap solution is harmless to ceramics, but can damage painted surfaces.
Why renew the grout in the seams?
The accumulation of microbes in tile joints is facilitated by a constant level of humidity, which is always high in bathrooms. When performing hygienic cleaning of a room, many housewives clean the surface of the walls using detergents. Such methods do not guarantee complete elimination of germs, even with regular use.
In what cases is it necessary to update the tile grout:
- grooves appeared between the seams;
- the grout has dried out and is crumbling;
- Mold and dark spots are clearly visible between the seams.
The way out would be to completely or partially replace the tile joint, as well as apply a paint coating. The chosen method should ensure maximum hygiene and long-term operation of the cladding.
Household grout cleaners
If the condition is not so critical, you can clean the seam using household chemicals and traditional methods. Special mixtures are used to clean ceramics that do not contain abrasive materials. It is more convenient to remove dirt in hard-to-reach places with a toothbrush or a narrow brush with stiff bristles.
In this case, it will be necessary to use protective gloves to prevent burns when coming into contact with aggressive chemicals.
Important information: Cleaning the ceramic surface with a special steam cleaner works well. You can purchase it or make it yourself. Steam treatment helps get rid of harmful microorganisms and makes the cleaning process easier.
Powdered cleaning products
The basic rule when working with powdered products is to dilute with a small amount of water to obtain a paste-like consistency. In addition to an excellent cleaning effect, most modern mixtures have antibacterial protection, which increases their effectiveness.
Tile cleaning powders:
- Bref.
- Domestos.
- Pemo Lux.
- Comet.
It should be borne in mind that the composition of such cleaners is very aggressive, so it is imperative to protect the skin of your hands, as well as the respiratory system, from possible damage.
Gels for cleaning tile joints
Another popular form of production is gel. After thoroughly processing all the seams, the mixture is washed off after a while and removed with a soft sponge with plenty of water.
Popular bathroom cleaning gels:
- Rayen.
- H.G.
- Mellerud.
This category of products is professional, and therefore has a fairly high cost.
Bathroom cleaning gels will help with severe stains, when removing the grout joint and applying a new one is not possible.
Sprayers for renewing joints
Maximum ease of application with spray products. They can also be used for regular hygienic cleaning.
Compositions with sprayers:
- Tyron Power.
- Ecover.
- ValoClean.
The spray treatment process is extremely simple: apply a thin layer, leave for a while, then rinse with water and wipe with a soft cloth.
It is also advisable to dry the treatment areas well using a hairdryer or fan heater.