To ensure stable wired Internet in an apartment or office, you need to purchase and properly lay an Internet cable, as well as install a special computer socket. This device differs from a regular electrical device in that it has a connector for a twisted-pair connector - the cores of an Internet cable. The speed of the Internet connection largely depends on the connection diagram of the Internet outlet and the quality of the work performed.
What is an Internet socket
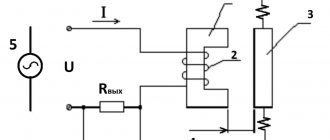
The main difference between an Internet outlet and a regular electrical outlet is that it has its own unique connector, which is connected to a special type of wiring called twisted pair. It is unique in that it contains 8 separate copper wires twisted together into 4 pairs. Thanks to this connection system, existing electromagnetic interference is leveled out, which ultimately ensures high data transfer rates (up to 1000 Mbit/s).
The response connector is called RJ-45/8p8c. It is mounted on the cable using a special tool, and the connector wires must be located in a strictly defined order.
Classification of Internet outlets
IT specialists classify Internet outlets according to their distinctive features:
- By the number of available connectors. There are single, double, and also terminal modifications (for 4–8 connectors). A separate subtype of terminal socket is a combined one (with additional types of connectors, for example, audio, USB, HDMI and others).
- According to the capacity of the information channel. They are divided into categories:
- UTP 3 – up to 100 Mbit/s;
- UTP 5e – up to 1000 Mbit/s;
- UTP 6 – up to 10 Gbit/s.
Why install internet sockets
Usually, when connecting the Internet to your computer in an apartment, the technician throws a long cable coming from the provider panel on the staircase. You will have to do it yourself when laying it around the apartment, but it is not always aesthetically pleasing.
As a rule, they simply throw the cable somewhere behind the closet or, in extreme cases, hide it under the baseboard.
This is if we are talking about one computer, but what if you want to connect several devices to the Internet via cable at once - computers, TV? Then you will have to surround the entire apartment with cables, which will completely ruin the appearance. Therefore, it is best to foresee this possibility in advance during the next renovation and make hidden wiring of Internet cables, running them inside the walls, and in each room make an exit in the form of a special RJ-45 socket.
Usually the router has 4 outputs for connecting LAN cables, respectively, lay 4 cables in the rooms, and bring their other ends to one place, next to the front door, where you can easily hang the router and connect the cables crimped with a connector to the LAN connectors of the router. And the cable from the provider, when connecting the Internet itself, can also be stretched literally a few centimeters to the place where the router is attached, which is very convenient, practical and aesthetically pleasing.
What types of devices are there?
The category to which this type belongs influences the determination of the distance to which a pure signal will fall, without distortion. It also affects how quickly data will be transferred. For most needs, the following socket models will be sufficient: RJ-45 Cat.5; RJ-Cat.5e; RJ-45 Cat6.
Computer sockets are characterized by several parameters that distinguish them. The installation method is one of the characteristics that you should pay attention to.
Computer sockets can be installed externally or internally.
External or surface-mounted computer sockets are ideal for placement on the wall. For such installation there is a special connector on the back side.
Internal sockets - they are installed inside the installation box. In this case, the socket must be deepened into the wall. This category has a removable connector. After installing the recessed socket box into the wall, it must be clamped with a screw.
For outdoor installation, the housing of the sockets must be made of durable technopolymer. It must be non-flammable and resistant to UV rays.
Application options for Internet sockets
In addition to “home” use projects, there are still a sufficient number of options where the installation of such sockets for the Internet will not only be relevant, but sometimes simply an original way out of a special, security-demanding situation, taking into account the technical conditions for providing access to the Internet.
Depending on the type and purpose of the building, technical requirements are put forward for the arrangement of apartments in such buildings. There are several main categories of such premises:
- offices, classrooms and server rooms;
- Internet clubs and electronic libraries;
- IT stores and computer equipment maintenance workshops;
- structures with increased protection against penetration.
For most offices and classrooms, in addition to having wireless Internet access points, it is mandatory to equip the walls and office furniture with RJ-45 sockets, which ensure the connection of “working” computer stations to the Internet, as well as to local networks.
Not a single server-type room can do without twisted pair connectors installed in/on the walls. This is a mandatory requirement of every IT engineer who has undertaken the construction of a “server room” or data warehouse.
The rapid development of technology affects all aspects of our lives and in particular education. Now it is very “hard” to imagine an educational institution of any level - from school to university - without the presence of auxiliary search tools (computers) that search for and provide the necessary information in a huge “knowledge bank” - an electronic library.
If you are a private entrepreneur or the owner of a business that is involved in the sale and/or repair of computer and office equipment, then the presence of socket structures is simply “vital” for the normal working conditions of your employees.
And another example of mandatory equipment with Internet sockets and structures is premises for corporate and government security services, banking and other storage facilities, with increased protection against penetration. They effectively prohibit any significant electromagnetic radiation or interception of packet information via wireless data transmission.
Connection standards
For any wired or wireless Internet equipment, a single standard for connecting to the system unit has been adopted. No matter how the Internet is supplied to the apartment, there is always a twisted pair cable - a cable used to connect the router and modem.
The network cable contains eight copper wires twisted into four pairs. They cancel out any electrical interference, providing impressive (up to 1000 Mbps) Internet speed. The twisted pair ends with a special connector called a “jack”. The housing of the 8P8C connector is transparent, and inside it there are wires of different colors.
Similar connectors are used on other connecting wires, for example, between the modem and the PC. The only difference is in the location or, in the terminology of computer scientists, in the pinout of the wires. Previously, to make a connection, some of the wires were crossed in a certain order, only in this case the equipment worked.
Since 2001, it was decided to introduce two main connection standards - TIA/EIA-568-B and TIA/EIA-568-A. Currently, the first standard (B) for connecting twisted pair wires is in use. This is what you need to remember. Two- and four-pair cables for networking are available.
For high-speed data transfer (1–10 Gb/s), a four-pair cable is recommended; for transfers up to 1 Gb/s, a two-pair cable is recommended.
Now lines with Internet speeds of up to 100 Mb/s are installed in the premises. Naturally, the quality and speed of data transfer will increase in the future. Therefore, with a view to the future, it is preferable to initially expand the network to four pairs, so as not to lay a new wire later. If the network is already connected with a two-pair wire, then the same connectors are used, but after the first three (see diagram above), two contacts are skipped, and the green one should be the sixth.
Wiring diagram by color
There are two connection schemes: T568A and T568B. The first option is not practiced here, and the connection is made according to scheme “B”. Therefore, you need to familiarize yourself with the arrangement of colors according to this scheme.
A very important point is the number of wires in a twisted pair. As a rule, cables with 2 pairs or 4 pairs of wires are used. 2-pair cables are used to transfer data at speeds up to 1 Gb/s, and 4-pair cables are used to transfer data at speeds from 1 to 10 Gb/s.
Internet cables are installed in private houses and apartments, where data transfer is carried out at speeds of up to 100 Mb/s. Despite this, there is a steady trend towards increasing the speed of transfer of Internet resources. Therefore, it is better to play it safe and install a 4-pair cable with the future in mind. Moreover, the connectors and sockets are produced for connecting 4-pair twisted pair cables.
When using a 2-pair cable, after laying the first 3 wires according to diagram “B”, the green wire is connected to the sixth contact, skipping two contacts. This can be seen in the corresponding photo.
RJ-45 connector crimping
The Internet cable entering an apartment or house, most often called twisted pair, often ends in a small plastic connector. This plastic device is a connector, usually RJ45. In professional jargon they are also called “Jack”.
This is what an RJ-45 connector looks like
Its body is transparent, so wires of different colors are visible. The same devices are used on connecting wires that connect computers to each other or to a modem. Only the order of arrangement (or, as computer scientists say, pinout) of the wires can differ. The same connector is inserted into a computer socket. If you understand how the wires are distributed in the connector, there will be no problems connecting the Internet outlet.
Internet cable connection diagram by color
There are two connection schemes: T568A and T568B. The first option - “A” is practically not used in our country, and everywhere the wires are arranged according to the “B” scheme. It is necessary to remember it, since it is what is required in most cases.
Internet cable connection diagrams by color (use option B)
To finally clarify all the issues, let's talk about the number of wires in a twisted pair. This Internet cable comes in 2-pair and 4-pair versions. To transfer data at speeds up to 1 Gb/s, 2-pair cables are used, from 1 to 10 Gb/s - 4-pair. Today, apartments and private houses are mostly supplied with flows of up to 100 Mb/s. But with the current pace of development of Internet technology, it is quite possible that in just a couple of years the speeds will be measured in Megabits. It is for this reason that it is better to immediately expand a network of eight rather than 4 conductors. Then when changing speed you won't have to redo anything. The equipment will simply use more conductors. The difference in cable price is small, and sockets and connectors for the Internet still use eight-pin ones.
If the network is already wired in two pairs, use the same connectors, only after the first three conductors laid according to scheme B, skip two contacts and place the green conductor in place of the sixth (see photo).
Connection diagram for 4-wire internet cable by color
Crimping a twisted pair cable into a connector
There are special pliers for crimping wires in the connector. They cost about $6-10 depending on the manufacturer. They are more convenient to work with, although you can get by with a regular screwdriver and wire cutters.
Connector crimping pliers (one option)
First, the insulation is removed from the twisted pair. It is removed at a distance of 7-8 cm from the end of the cable. Underneath there are four pairs of conductors of different colors, twisted in twos. Sometimes there is also a thin shielding wire; we just bend it to the side - we don’t need it. We untwist the pairs, align the wires, spreading them in different directions. Then fold according to pattern “B”.
The procedure for sealing the RJ-45 connector in the connector
We clamp the wires in the required order between the thumb and forefinger. We lay out the wires evenly, tightly to each other. Having aligned everything, we take wire cutters and cut off the excess length of the wires laid out in order: 10-12 mm should remain. If you attach the connector as in the photo, the insulation of the twisted pair should begin above the latch.
Cut it so that the wires remain 10-12 mm
We insert the twisted pair with the cut wires into the connector. Please note that you need to take it with the latch (protrusion on the lid) down.
We insert the wires into the connector
Each conductor must get into a special path. Insert the wires all the way - they should reach the edge of the connector. Holding the cable at the edge of the connector, insert it into the pliers. The handles of the pliers are brought together smoothly. If the body has become normal, no special effort is required. If you feel that it “doesn’t work”, double-check whether the RJ45 is installed correctly in the socket. If everything is fine, try again.
When pressed, the protrusions present in the pliers will move the conductors to the microknives, which will cut through the protective sheath and ensure contact.
How connector crimping pliers work
This connection is reliable and problems rarely arise with it. And if something happens, it’s easy to re-terminate the cable: cut it off and repeat the process with another “jack”.
Video tutorial: crimping an RJ-45 connector with pliers and a screwdriver
The procedure is simple and easy to repeat. Perhaps it will be easier for you to do everything after the video. It shows how to work with pliers, as well as how to do without them, and do everything with a regular straight screwdriver.
Algorithm for laying Internet cables in walls
The most correct, but at the same time difficult to implement solution for laying an Internet cable in a home (office) environment is to install it inside the walls. The advantages of such wiring are obvious: the cable does not get tangled underfoot and does not affect the decorative design of the room.
A significant disadvantage of in-wall installation is that in the future there may be problems with access to the cable for repair or maintenance.
But with proper cable routing along grooves in a corrugated PVC pipe, you can not only minimize the risk of a malfunction, but also provide relatively easy access to the twisted pair without complex dismantling work.
Before you start laying the Internet cable, it is worth marking the places where it will be located. Remember that unshielded twisted pair cable is made of copper, which is very sensitive to electromagnetic interference. Try to keep the distance between computer and electrical wiring at least 50 cm.
- We outline the route. When planning a place for a groove for future wiring, keep in mind that the Internet cable has a certain limitation on the bending radius. Specific values can be found in the specifications of the selected cable.
- Choosing a cable. The most significant quality characteristic of a twisted pair cable is reliability. Access to the cable after its installation will be significantly difficult, so it is advisable not to skimp on quality. To connect to the Internet, UTP of the fifth category and higher is most often used. You need to select a specific cable model based on its main technical characteristics:
- minimum permissible bending radius (the smaller it is, the easier it will be to install in the walls);
- maximum permissible tensile force (the higher this value, the easier it is to insert the cable into the corrugation, and in case of technical problems, subsequently remove it from the groove);
- warranty (for quality products the warranty period can be up to 25 years).
Tester is an excellent way to check
Using a tester is the best way to find out if there are cable breaks. Before starting the test, you should inspect the cable along its entire length, and especially pay attention to the quality of the crimp on the plug. If the crimp is bad, there will be problems with the contact of some wires. They can also be overlapped in a fixed position. This way they won't close themselves off. If a breakdown cannot be detected at first glance, then you can use a tester that will provide a quality check.
Important! Modern testers have great functionality and are easy to use thanks to their displays. They allow you to ring the cable and accurately determine the location of the break and short circuit. We can recommend the Tester MicroScanner Pro model.
This is one of the most popular devices on the market because it has many features, including:
- determining the degree of correctness of the wiring;
- determining the location of the breakdown;
- determination of the type of failure;
- determining the distance to the breakdown site;
- wire tracing product.
Such a device is good, but only if you have a multimeter or a regular pointer tester at hand. They will help you measure the resistance in the circuit, voltage and type of current. A multimeter may well be enough to analyze a twisted pair cable. To start the analysis, you need to turn on the resistance mode and bring the ends of the cable to one point. If this happens, then further verification is carried out in the following order:
- checking the integrity of all cable cores separately;
- testing each cable by color;
- checking for short circuits with adjacent conductors;
It often happens that it is impossible to make ends meet. Then the connector is either cut, or the wires at one end are stripped and connected to each other. After this, the pairs at the other end are probed with a multimeter.
Installation and connection of a power outlet
The twisted pair wire is laid in a cable channel or covered with a plinth. The free end is led out through the socket box (when installing a mortise model) or is left uncovered (if an overhead version is mounted). Its length is left sufficient to carry out the necessary work.
7-8 cm is removed from the very edge and the outer shell is removed from this area. The conductor pairs unwind, separate and straighten. Further steps are given in the instructions.
- The socket body is disassembled, the front part is disconnected and set aside.
- On the reverse side there is a color scheme for the connection, presented in two options: A and B. For correct switching, it is necessary that the cross-connection of the socket corresponds to the connection diagram of the connector, so if its installation was carried out by another specialist, you need to clarify how the wiring was made. In Russia, scheme “B” is usually used.
- Crimp the wires in the socket terminals according to the selected option (the color of the wire matches the color of the contact). For example, as shown in the picture, from left to right: brown, white-brown, green, white-green, orange, white-orange, blue, white-blue.
- Secure the wire with a clamp and carry out a preliminary check of signal transmission through the connector. To do this, connect the connector from your tablet, laptop or mobile phone to the disassembled device and make sure there is a connection to the Internet.
- Trim excess wires. Assemble the socket by connecting both parts. Fix it on the wall or in it (depending on the type of design) just like a regular electrical point. Upon completion, you must again check the functionality of the already assembled device by connecting a laptop or other gadget.
Connecting RJ-45 with two twisted pair wires
Preparatory actions in this case are carried out exactly as in the previous version. The only difference can be considered the connection itself. Instead of eight conductors, the four present in the wire are switched. The contacts corresponding to the color of the wires and corresponding to the selected scheme “A” or “B” are used. After this, the product is crimped, assembled and installed, and signal transmission is checked.
It should be remembered that a wire with two twisted pairs is used to transfer data at speeds of up to 1 Gb/sec. As the speed of the Internet signal increases, the wire will have to be replaced and all connections made on it will also have to be replaced.
Crimping wires on socket contacts
As stated above. When connecting wires to the terminals of the device, it is necessary to crimp them. The quality of operation of the entire system will depend on this procedure. There is no need to think that you need to scrupulously remove the sheath from each wire and then connect it to a bolted connection, as happens in conventional electrical sockets.
The contacts of system connectors are designed in such a way that when the conductor is inserted tightly onto them, they cut the insulating coating and provide switching with the copper conductor. There is no need to strip thin wires.
Such a high-quality and reliable connection is achieved when the wire enters the contact terminal all the way. You can use a knife or thin screwdriver for this. But you must act extremely carefully so as not to damage the wire.
How to connect an internet cable to a power outlet
Now we come directly to how to connect the Internet outlet. Let's start with the varieties. Like regular electrical sockets, information sockets come in two modifications:
- For indoor installation. A plastic mounting box is built into the wall. The contact part of the socket is then inserted and secured into it, and everything is covered with a plastic decorative panel on top.
- For outdoor installation. This type of socket is very similar in appearance to the usual telephone sockets: a small plastic case that is mounted on the wall. It also consists of several parts. First, the housing with the contact plate is mounted, then the wires are connected, and then everything is closed with a protective cap.
According to the number of connection points, there are single and double computer sockets. Although computer sockets differ in appearance, the principle of connecting conductors is the same. There are special contacts equipped with microknives. The protective sheath is cut through the inserted conductor. As a result, the metal of the microknife contacts fits tightly to the metal of the conductor.
How to connect a computer wall socket
Inside each outlet there is a hint on how to place the wires when connecting the Internet cable. Manufacturers stick on the color scheme that we saw when crimping the connector. There are also two options – “A” and “B”, and we also use option “B”.
The case is mounted on the wall, usually with the cable inlet up and the computer connector down. The next steps are simple:
- Remove the protective insulation from the twisted pair by about 5-7 cm. This must be done carefully so as not to damage the insulation of the conductors.
- In the photo you can see that there is a small plastic clamp on the board. A conductor is inserted into it and secured so that the piece stripped of insulation is below the clamp.
- On the case you see microknife contacts. Connect a wire of the desired color to them and insert it, trying to reach it to the very bottom of the contact group. When the conductor passes the knives, a click is heard. This means that it is in place and the insulation is cut through. If you fail to achieve a click, after everything has been routed to the contacts according to the colors, take a regular straight screwdriver with a thin blade and force the wires down. The same can be done with the back (non-sharp) side of the knife.
- After all the conductors have reached their place, the excess (protruding pieces) are cut off.
- Put on the lid.
Connecting a twisted pair cable to an outlet is really a simple procedure. Even the first time it will take a few minutes. You can see again what they do and how they do it in the video. It first shows the connection of an Internet cable with 4 wires, then with 8.
How to connect an internal Internet socket
We will not describe the installation of the plastic box - this is a different topic. Let's look at the features of connection and assembly. The main problem here is how to disassemble computer sockets.
When connecting conductors to them, you need to get to the contact part: a small ceramic or plastic case with built-in microknife contacts. The conductors are connected to this mounting plate, and then the housing is reassembled. And the whole problem is that different manufacturers assemble/disassemble them differently.
For example, from the popular manufacturer of computer sockets Legrand (LeGrand), in order to get to the connectors in the Legrand Valena RJ45 computer socket, you need to remove the front cover. Under it you will find a white plastic impeller (as in the photo), with an arrow on it.
You need to turn the impeller in the direction of the arrow, after which you will have the housing and the contact plate in your hands. It has color-coded conductors. The connection is no different, except that you first need to thread a twisted pair into the hole on the plate, and then separate the wires. Another popular manufacturer of such equipment is Lezard.
His system is different. The front panel and metal frame are fixed with small bolts. They are easy to unscrew, but the internal contact plate is held in place by clamps. When assembling and disassembling Lezard computer sockets, in the right places you need to press out the contacts with a screwdriver. To remove the plastic contact group from the housing, you need to press the latch located on the top. After which you will have a small box in your hands. But that's not all.
It is necessary to remove the plastic cover that covers and presses the conductors. Remove it by prying up the side petals with a screwdriver. The plastic is elastic and the effort required is quite decent. Just don't overdo it - it's still plastic. After that, the wiring is standard: according to the markings on the sides (do not forget that we are using diagram “B”).
How to connect a computer wall socket
Manufacturers produce information sockets with tips. They are placed inside the products. They allow you to learn how to connect an Internet cable to an outlet. Manufacturers place a colored sticker inside the product body with a diagram of how wires are connected to terminals according to standard “A” and “B”.
To connect an Internet outlet in Russia, scheme “B” is used. To begin with, the case is fixed to the wall so that a twisted pair can be inserted from below and a connector can be connected from above. Then perform the following actions:
- Insulation approximately 50-70 mm long is removed from the end of the Internet cable. In this case, you must not damage the protective layer on the conductors.
- The twisted pair is inserted into a plastic clamp and fixed so that only multi-colored wires remain below the fastening element. In this case, the cable is secured along the edge of the main insulation of the wire.
- Multi-colored conductors are connected to microknife contacts in accordance with the connection diagram of the Internet outlet. You need to try to reach each of the cores to the bottom of the contact. If you succeed in doing this, then you will hear a click. This sound means that the conductor is installed correctly and its insulation has cut through. If clicks are not heard, each multi-colored wire is forced down to the bottom of the contact assembly using a flat-head screwdriver. You can also use the non-sharp side of the knife.
- The protruding ends of the connected conductors are cut off.
- The internet socket cover is placed on a fixed base with a connected contact group.
Even an inexperienced person can connect an Internet outlet. The job is usually completed in a few minutes. Short video instruction:
Laying "twisted pair" in/on walls
Let's move from theory to practice. If we are talking about laying cables and wires in a new building, then no special questions should arise: we put the twisted pair next to the rest of the communications, usually in corrugated tubes, and them in the cut-out hollows. It is imperative to remember the number of wires inserted into the channel and their average diameter, and also take into account the channel diameter + 25% of the total sum of all cable diameters.
It’s another matter if we are renovating an existing room and creating new channels. It is necessary to take into account the material from which the walls are made: frame gypsum panels, brick, concrete, etc.
The hardest thing is to make channels in concrete/brick without damaging other communications. To detect wiring in walls, you can use any available building electromagnetic wiring detectors.
It should be noted that there will be a lot of dust if you work in concrete. As a result of gating, abrasive dust and small pebbles will cover everything in the room: walls, ceiling, floor, furniture, equipment. Therefore, you need to initially vacate the room or cover everything with plastic film. We strongly recommend that the master wear the following set:
- thick overalls (jacket/pants);
- headdress (you can have a swimming cap or bandana);
- glasses (we recommend ski glasses or others with protection for the temporal areas of the face);
- thin and comfortable gloves, boots, personal respiratory protection equipment (protective masks, respirators, bandages, etc.).
To create grooves (forming channels in foam concrete or brick walls), you need to use the following tools: wall chasers, wall chasers, furrow makers. As an option? It is still possible to use powerful grinders with diamond-coated cutting discs.
The cutting depth of the channel should be 30-35 mm, the width up to 25 mm exclusively for one or more twisted pair wires. Absolutely all channels and gutters must be made at right angles - this is a mandatory rule for any construction repair.
As for the cavities for sockets, they are made using a bolt, an electric hammer or a hammer drill with an attachment for the socket hole. But first you need to determine the approximate placement of Internet outlets in the premises.
As a rule, holes for RJ45 sockets are drilled at a height of 1000-1200 mm from the floor or 150-300 mm. For residential premises, one or two sockets on opposite walls of the room are sufficient. For offices, they usually place one outlet near the future workplace.
In server rooms and rooms with similar functions, a different strategy is used: make 3-4 holes for modular socket blocks, two blocks on one wall and one on all other walls.
And the last thing you need to pay attention to regarding the laying of wires is that sometimes it is possible to lay communications under the floor or in the ceiling of the room. In such a situation, the question of gating the walls does not arise; it is enough to run the wire under the floor or into the ceiling and bring it out in the area of the socket hole on the wall.
Connecting Legrand sockets
Now we come to the most important question. How to connect Legrand and Lexman computer sockets, and in general how to connect an Internet socket?
To do this, let's first look at the general principles of connecting information cables, and then the specifics of connecting them to different types of connectors.
To connect sockets and connectors of this type, a twisted pair cable is used, which has a strictly standardized color designation for each core. Based on this color designation, the connection is made.
Almost all modern local networks use an RJ-45 connector for connections. Although the official name of this connector is 8Р8С, which in deciphering the abbreviation means: 8 positions, 8 contacts. So:
- At the moment, there are two generally accepted connection standards: TIA/EIA-568A and TIA/EIA-568B. The difference between them is the location of the wires.
- For the TIA/EIA-568A standard, a green-white wire is connected to the first pin of the connector, then in ascending order: green, orange-white, blue, blue-white, orange, brown-white and brown. This connection method has become somewhat less widespread.
- For the TIA/EIA-568B standard, the wire rotation is as follows: orange-white, orange, green-white, blue, blue-white, orange, brown-white, brown. This type of connection is used much more often.
The connection diagram for a Legrand computer socket is no different from generally accepted standards. In this case, any outlet can be connected according to both standards. The corresponding color designation is available on the surface of the connector.
- First of all, we need to get to the connector. Different models may require you to disassemble the socket, but in most you can get to the connector without additional effort.
- Open the cover covering the contact part. To do this, using a screwdriver, insert it into the cable socket and pry the cover up.
- Now we cut the cable and lay the cable cores according to the color markings on the connector cover.
- Close the top cover with force. During this, the cable cores are crimped and reliable contact is ensured. After this, you can trim off the excess cable cores protruding beyond the cover.
- After this, you need to install the information socket in the socket and secure it with screws. The socket is ready for use.
Using verification software
Users often start searching for software online, but do not realize that they already have these programs as standard on their PC. This is not only a diagnosis of network errors, but also a program responsible for the Internet icon. If she detects its absence, then the picture changes to the appropriate one. This symbolizes problems associated with a broken or shorted twisted pair cable.
No program will show you exactly where the cable is damaged, but there are solutions that have more functionality than standard ones.
An example is a good software solution called Network Traffic Monitor. It is completely free and has wide functionality, including:
- Measuring network speed in case of problems and instabilities;
- Analysis of network speed changes;
- Saving all reports on your hard drive;
- Making deep settings;
- Possibility of using useful services;
- Many languages supported.
Installing the software doesn't take even a minute. All you need to do is run the EXE file and agree to the installation. After this, the program will install and be ready to use. Network Traffic Monitor is considered one of the best testing and diagnostic programs. This is evidenced by numerous user reviews.
Connecting a Schneider internet outlet
Internet sockets from the French manufacturer “Schneider” offers dual sockets for connecting to the World Wide Web. Their peculiarity is that you can connect more than one computer to one outlet.
To do this, it is designed to output two cables to the outlet at once. This is a convenient means, since there is no need, if there are two computer places, to throw in additional cables, which then need to be hidden, disrupting the design of the room.
To connect a paired socket for the Schneider Internet, you must:
- prepare a tool - pliers, a sharp stationery knife, a crimper;
- if two wires are taken out from the wall and put into a box, you need to pull them out;
- using a utility knife, you need to remove the top ball of insulation at a distance of about 4 centimeters from the end of the wire. The same operation must be done with the other cable;
- then the ends of the wires should be stripped on both cables. They need to be disconnected so that they have eight wires each;
- Now you need to connect the wires in turn to one and to the second terminal block. To do this, take one of the terminal blocks and insert wires of the corresponding color into it. Next, clamp the terminals. We do the same with the second cable;
- We mount the socket at the installation site and check the connection.
Installation yourself
Surely you have wondered how to connect a computer socket with your own hands. Believe me, it's much easier than you think.
Prepare a hammer drill (must have a crown of the required size), a cross-cutting knife used to remove insulation, screwdrivers and a tester.
Route the cable to the installation point. If necessary, make grooves and insert wires. Using a blade, remove the outer insulating layer. The tip of the wire should be approximately 6 centimeters. Be careful not to damage the insulation of the conductors.
Align each pair. All wires must be inserted into the clamp (according to the color). Secure with a clamping bolt. Trim off any protruding pieces. Check the connection is correct using a tester.
Connection errors
If, when checking the connection, there is no connection, it is possible that errors were made during the installation or connection of the twisted pair. Such cases include:
- For self-installation, type “B” is used, and the connector and modem were purchased already assembled. If you do not check the type of connection, it may turn out that the socket is connected to one type, and the wire to another - type “A”. Because of this, the connection will not occur. You need to look at how the connector is crossed, and then do the pinouts of the twisted pair.
- While installing the twisted pair into the terminals, an attempt to strip it with a knife damaged the wire sheath. In order to ensure switching, it is necessary to insert the contacts into the grooves and make the correct crimp.
- The wire was left too long. To connect the Internet socket, you need to leave no more than 20 cm. If the wire is left at 30-40 cm, the socket will dangle and you will have to shorten it. And to do this, you will have to repeat the entire installation procedure again.
- During installation, everything was done correctly, but the socket still does not work. This means, most likely, that a non-working device with a manufacturing defect was purchased. There are many well-known manufacturers of Internet sockets on the market who guarantee the quality of their products. Therefore, it is better to purchase such sockets.
Author: Sergey Vladimirovich, electrical engineer. More about the author.
Installation of the terminal block and mounting of the cover plate
After checking the signals, we move on to the final part of installing the Internet outlet.
To do this, carefully hide the rest of the wires and return the terminal block with the connected conductors back to the socket of the socket, tighten it with the fixing bolts to the built-in “glass”.
The terminal block should fit tightly in the socket, there should be no protruding or kinked wires.
If the terminal block does not fit into the recess of the wall, then you can cut out the back part of the mounting “glass”. Usually, when installing the terminal block, a couple of mm are missing
Once again, we check that the connection is correct; to do this, we connect a device, for example, a laptop, and see if it detects a connected local network or the Internet.
If there is no connection on the device, we return to the pinout point and re-check the correctness of the actions performed, as well as the quality of the compression. It often happens that one of the cables is simply not sufficiently pressed into the terminal block. To do this, you just need to recess the core clamp more tightly.
After an additional check of the network’s functionality, we trim off all remaining protruding wires and proceed to installing the cover plate. The cover is usually equipped with several plastic latches.
It is enough to accurately place it on the socket of the socket and press until you hear a clicking sound. That's it, the Internet socket is installed and ready for use.
If the signal does not pass through when checking the connection, you need to check the quality of the contact. It is possible that it is simply weakly clamped