Purpose
The inductive sensor is designed to control the movement of the working element without direct contact with it. The main areas of application for it are machine tools, precision medical devices, process automation systems, measurement and control of product shape. In accordance with the provisions of clause 2.1.1.1 of GOST R 50030.5.2-99, this is a sensor that creates an electromagnetic field in the sensitivity area and has a semiconductor switch.
The scope of application of inductive sensors is largely determined by their high reliability and resistance to external factors. Their readings and operation are not affected by many environmental factors: moisture, condensation, accumulation of dust and dirt, ingress of solid particles. Such features are provided by their design and design data.
Device
The development of the radio electronics segment has led not only to the improvement of the original mechanisms, but also to the emergence of fundamentally new inductive sensors. As an example, consider one of the simplest options (Figure 1):
Rice. 1. Inductive sensor device
As you can see in the figure, it includes:
- magnetic core or yoke (1) – designed to transmit the electromagnetic field from the generator to the sensitivity zone;
- inductor (2) – creates an alternating electromagnetic field when electric current flows through the turns;
- measurement object (3) – a metal armature inserted or moved into the sensitivity area; non-metallic objects are not capable of influencing the state of the electromagnetic field, therefore they are not used as a detector;
- the gap between the measurement object and the main magnetic circuit (4) – provides a measure of interaction as a magnetic dielectric; depending on the sensor model and the method of movement, it can remain unchanged or fluctuate within a given range;
- generator (5) - designed to generate an electrical voltage of a given frequency, which will create an alternating magnetic field in a given area.
Add a link to a discussion of the article on the forum
RadioKot >Circuits >Analog circuits >Measurements >
| Article tags: | Add a tag |
Induction Displacement Meter - Pressure Sensor
Author: Dutchman Published 09/19/2018 Created using KotoEd. Participant of the Competition “Congratulate the Cat as a Human 2021!”
Cat, I'll be brief...
13 years for a cat is like 40 for a man! Therefore, you refrain, and we will sip for you!!!!
I wish you as much more, and the tail with a pipe!!! Happy B-day!!!!
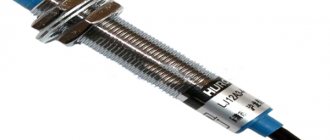
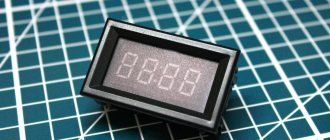
... the development appeared spontaneously and is a weekend (or two) day construction. The following made me take on the creation of this device. Once, while conducting sinister experiments in the field of valerian production, I needed a pressure sensor, something like MRKH***. Calling existing stores in the city did not yield any results, delivery times for orders were set at around a month, and it was necessary to wait even longer for a package from Ali. And I was very limited in time - everything depended on the mood of the yeast, which at that moment was quickly dismantling simple and complex sugars for spare parts. Then I remembered the article by N. Panov and A. Vishnitsky “Inductive displacement meter”, published in the magazine Radio No. 9 for 1988. and decided to repeat it with some modifications. Improvements were made to the power supply, and an instrumentation amplifier was added to convert the differential signal to voltage. The result is the following diagram. The part of the circuit to the left of microammeter P1 completely repeats the working part of the circuit of the authors of the article with a more modern element base. The power supply is made on TL431. Amplifiers A1-A3 are actually an instrumental amplifier. Amplifier A4 generates a bias voltage and protects this same reference voltage from interference. The bias voltage turns out to be very useful for our task, since the authors themselves note in their article that when the sensor armature is in zero position, the output current of the device is not zero, which is due to both the geometry of the sensor parts and the manufacturing technology of the coils. If necessary, by adjusting the offset you can easily compensate for both these errors and, if desired, make a device with a non-zero reference point. The sensor consists of two halves of a ferrite core of a transformer from a Chinese cell phone charger, each of which has a coil (L1 and L2) attached to it. Between these cores, a permalloy plate is attached to the membrane - an anchor. The displacement of the membrane together with the armature leads to an imbalance of the measuring bridge, which in turn entails a change in the voltage at the output of the device proportional to this displacement. The design of the sensor is approximately as follows. The cheeks are made of foil PCB. One of them has a stamp etched and installation done. On the second, a tube for connecting to the system being measured is soldered into the hole. Rings - in my case, two rings from a 40 megabyte hard drive from an IBM PC XT (!!!), the ones that stood between the pancakes, worked well. With a membrane everything is more complicated. Different applications require separate selection of materials. In my case (pressure from 0 to 200 cm of water column), a self-adhesive film was used in two layers - with the adhesive side facing each other. An anchor plate is glued between the layers. This whole sandwich is held together with glue. (tautotautotautology) There are no special requirements for coils. It is only necessary that the cores and the number of turns be the same. In my case, the ability to adjust the zero was very useful - when disassembling the core, one of the halves cracked. I glued it together with supermoment and used it for its intended purpose. The number of turns is not particularly critical, since the measuring generator operates at its own resonance frequency, given by the inductance of the coils L1, L2 and the capacitance of the capacitors C2, C3. I shook “as much as I can.” Fits 280 turns of PELSHO 0.08. I wound it immediately, impregnating it with epoxy. For winding, I made a winding machine along the way. In the photo, for a hint “what is it from,” there is an unfinished donor. Calibration should not cause any special issues. First, we determine whether the membrane is working in the wrong direction - we create pressure/vacuum. If not the right one, swap the coils. Next we set it to zero. Next, using the reference pressure, we set the output voltage (Suppose we connect a hose, pour water into it so that the water difference in the elbow is 200 cm, use R3 to set the output voltage to 2 volts. We get 1 mV/mm of water column). When developing a printed circuit board, it was possible to work with a dial microammeter. To connect it, contact pads are provided on the board. In this case, the LM324 with all the fittings does not need to be soldered. If the dial ammeter is not used, a 10-100 Ohm resistor (selectable) must be soldered in its place. This is what it looks like. Sorry, it looked clearer on the phone)))) That's all. Good luck to all!
Files:
ZIP archive
All questions in the Forum.
| What do you think of this article? | Did this device work for you? | |
| 28 | 10 | 2 |
Principle of operation
The principle of operation of an inductive sensor is the ability of the electromagnetic field to change its parameters, depending on the value of magnetic conductivity along the flow path. Its operation is based on the classic version of a coil wound on a core.
Rice. 2. Magnetic field at rest
When electric current I flows through the turns of this coil, a magnetic field is generated (see Figure 2), the resulting magnetic induction vector B of which is determined by the Right Hand Rule. When the magnetic field moves along the core, the ferromagnetic material provides maximum throughput. But as soon as the magnetic induction lines enter the airspace, the magnetic conductivity deteriorates significantly and part of the field is dissipated.
Rice. 3. Magnetic field when introducing a trigger object
When a triggering object (Figure 3) made of metal is brought into the field of action of an inductive sensor, the intensity of the induction lines changes sharply. As a result, the flux increases and its value changes, and this, in turn, leads to a change in the electrical value in the coil circuit due to the phenomenon of mutual induction. In practice, this signal is too small, so to expand the measurement limit of the inductive sensor, an amplifier is included in their circuit.
DIY capacitive sensor for an oscilloscope
So in the new year I decided to expand my diagnostic equipment. Now I have acquired a DISCO 2 USB oscilloscope.
What is it for?
For complete diagnostics of the sensors and ignition systems themselves.
After all, the ECU does not always sound the alarm and write an error that the sensor is not working properly. Personal example - Ignition coils Following the link, there is a blog entry about how my ignition coil was covered and as a result the car sputtered and did not drive.
There were no errors in the ECU and the diagnostics showed nothing. But now you can solve this problem in a couple of seconds, simply by bringing the oscilloscope to the coil or explosive wires. By the way, for more accurate diagnostics and obtaining oscillograms from explosives, two capacitive sensors were ordered:
I'm sure that most people still don't fully understand what all this electronic abundance is used for.