Bathroom renovation is an expensive undertaking that can make a big dent in the family budget. But if we are talking about tiles, then it is not at all necessary to completely dismantle the old finish and lay new tiles. Often it is enough just to update the joints between the tiles, and the bathroom will immediately take on a completely different look. There are several ways to do this, ranging from simple and cheap to labor-intensive, but at the same time more aesthetic and reliable.
How to update the grout between bathroom tiles
Preparatory work
Before starting restoration work, you should get rid of everything that could interfere with its implementation. For example, you will need to remove wall cabinets and any other elements that block access to the tiles. It wouldn’t hurt to take out the furniture, thereby freeing up the floor.
If we are talking about the kitchen, then it is better to dismantle the gas or electric stove. In the bathroom, you will have to remove the plumbing equipment, and perhaps even take out the bathtub for a while.
Now you need to think about personal protective equipment, without which it is highly not recommended to work with adhesive materials, acidic cleaning compounds and cement solutions. All work must be carried out wearing glasses and gloves.
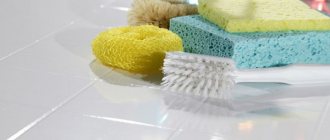
Necessary protective equipment
Return to content
Preparing the mixture for grouting
If you are grouting for the first time, take the ready-made mixture. If it does not suit you in composition or color, knead it yourself. Each manufacturer writes instructions on the packaging on how to prepare grout for joints, but there are general rules for this process.
The required amount of powder is poured into a clean container and diluted with water or hardener using a construction mixer. The resulting mass should be homogeneous, without lumps. The grout hardens quickly, so you need to dilute the grout in small portions. On average, cement mixtures are stored for 120 minutes, and epoxy mixtures - 30 minutes. After stirring, the cement mortar should sit for at least 10 minutes, during which time you should prepare the surface.
Important! If the grout begins to “set”, it cannot be diluted with water, otherwise the properties of the material will be impaired.
Painting and whitewashing seams
The easiest and almost instant way to update tile seams is to tint them. This method has one significant drawback - the effect will last no more than six months, after which the grout will need to be renewed again. Also, most paint compositions cannot be used in humid environments.
Another non-radical way to improve seams is to apply a new grout material on top of the old one. This operation is only possible if the seams are deep enough. New grout will need about two millimeters of depth.
All necessary consumables can be purchased at any hardware or hardware store.
If you decide to use paint compounds, then it is important to know that they can be used not only to renew seams, but also to restore damaged areas. That is, the paint can be applied not only over the old grout, but also used as a grouting material, only this will require applying a larger layer.
The paint is quite easy to use. The first step is to thoroughly clean the area from possible contaminants, for example, plaque or mold. Then you need to carefully apply the paint to the tile joint and wait for it to dry.
Painting seams
If you catch a tile during the touch-up process, you need to remove the excess with a rag. The time required for the composition to dry is indicated on its packaging. There you can also find some recommendations for its use.
Return to content
Traditional methods for renewing seams
These methods are the most inexpensive and often the components necessary for preparing solutions are on hand. These methods were also used by our grandparents - when household chemicals were not only not popular, they simply did not exist.
Before starting to prepare the solutions, we recommend wearing gloves - the solutions are caustic and can damage women’s delicate hands; prepare the bathroom for work in advance - take out everything unnecessary and remove the rugs.
Folk method No. 1
To prepare the solution you will need:
- container with a volume of at least 200 ml;
- bottles of hydrogen peroxide;
- baking soda;
- gloves.
Preparing the mixture
- soda is added to hydrogen peroxide in a ratio of 4 to 3, to 4 tablespoons of soda you need to add 3 tablespoons of hydrogen peroxide.
Usage
- you need to immediately stir the solution and apply it to the tile joints with a toothbrush, wait 2 hours and rinse the joints with warm, clean water.
Folk method No. 2
To prepare the solution you will need:
- container with a volume of at least 200 ml;
- white distilled vinegar;
- baking soda;
- lemon acid;
- gloves.
Preparing the mixture
- To 1 part white distilled vinegar add 1 part citric acid and 2 parts baking soda.
Usage
- you need to immediately stir the solution and apply it to the tile joints with a toothbrush, wait 20 - 30 minutes and rinse the joints with warm, clean water and a sponge.
Removing fresh grout
If the grouting material has not yet had time to set and harden, that is, no more than a day has passed since its use, but the need to replace it has already arisen, then you can simply wet it with water.
Half an hour after applying the new grout, you need to get rid of the excess on the tile itself, and also grout the joints. To do this, you should use a clean sponge; it is better to take a new one. If you often do construction work with tiles, then you probably have all the necessary tools; if not, then know that you can buy a special bucket with a sponge wringer. It will make the grouting process much faster.
Then you need to let the material dry and continue working only the next day. Now you need to remove the white residue using a felt-covered mitt. You can also use felt-lined floats, but they are not suitable for textured tiles.
Removing fresh grout
If during all the work you notice some defects, but the grout has already set, you should remove them using sandpaper rolled into a tube.
In some cases, tiles have a relief surface or a large number of decorative details, which significantly complicate the work. When grouting such tiles, it is better to cover its entire surface with polyethylene and masking tape to avoid contamination that is difficult to remove.
If the tile has already been contaminated with grouting material, then you can clean it with oil (even ordinary sunflower oil will do) and terry cloth.
Return to content
What grout color to choose
Having decided on the type of filler, you need to choose the appropriate shade: it is this moment that has a decisive impact on the visual beauty of the cladding.
To help resolve this issue, the following recommendations are offered:
- Dark tiles are well complemented by grout that is a shade darker.
Dark grout on dark tiles
- On the contrary, they try to decorate light-colored tiles
Light grout on light tiles
- Tile panels or mosaics are usually decorated with colorless aggregates.
Colorless grout
- If the goal is to visually combine tiles with different colors or patterns, buy a light mixture.
Light grout for tile patterns
- To achieve bright contrast and visual isolation of each element, dark shades are used.
Dark grout for contrast
- the most versatile . With its help, you can decorate the cladding of any shade and pattern.
White grout
- If you want to finish a multi-colored tile composition consisting of bright elements of different tones, the predominant color is selected for the filler.
Grout to match the predominant color
- the floor masonry with dark shades: they do not get dirty so quickly.
Dark grout for floor masonry
Removing old grout mechanically
Removing outdated grout material using this method is a radical remedy and should be used only when there are no other options left. This procedure requires the worker to be extremely careful and meticulous, since there is a fairly high probability of damaging the tile enamel.
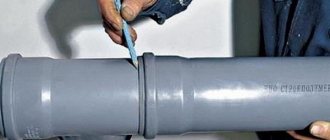
Ideally, to carry out this operation, you should purchase a special opener, which is a tool with a sharp blade and handle, but it can be quite successfully replaced with an ordinary sharpened knife.
Removing old grout
Before renewing the seams between the tiles in the bathroom, you need to run a knife along the tile seam straight, and then at an angle twice from different sides. Particular attention should be paid to the processing of seams in the corners of the tiles, since these elements are the most fragile and are very easy to damage.
By following the link https://vse-postroim-sami.ru/materials/8147_kak-vybrat-zatirku-dlya-plitki-sravnivaem-cementnyj-i-epoksidnyj-varianty/, you will learn about the advantages and disadvantages of different types of grout. In this article you will find information about laying floor tiles. You might also be interested in an article about how to seal a gap between a bathtub and a wall.
A chisel, drill, or electric drill with a thin drill is also perfect for this work. Mechanical removal of suture material can be carried out independently, since the procedure is quite simple and does not require much preparation.
It is important to know! If the tiles are quite old and do not adhere well to the walls, then it is better to dismantle them and replace them with new ones. The fact is that during mechanical influences, the material can simply crumble.
Return to content
Complete replacement of grout in seams
Removing the old compound and applying a new one is the most time-consuming, labor-intensive and dusty way to update tile joints. But the result will definitely be perfect - the surface will retain its fresh appearance for a long time. This method is the only one that can radically solve the problem of fungus and mold.
The work consists of several stages:
- Removing old mixture.
- Preparing the base for work.
- Applying a new layer.
- Protection from moisture.
To perform the procedure, you should provide protection for your eyes, respiratory organs and skin: wear goggles, a respirator and gloves.
Removing old grout
To work, you will need a special device - a scraper for tile seams with a pointed blade. To remove grout, run the tool first along the center of the seam, then from the edges at an angle from the tile. You need to work extremely carefully so as not to damage the surface of the tile.
Important! It is much faster to remove the compound with a power tool, but in this case there is a high risk of causing serious damage to the tiles, so it is better to use hand tools.
The sealant between plumbing fixtures and tiles is removed in a similar manner. It also often absorbs dirt and becomes moldy. It is almost impossible to clean the elastic composition, so it always has to be changed.
Surface preparation
It is necessary to remove pieces of grout and dust from the joint space; a vacuum cleaner with or without a crevice attachment is suitable for this. The seams should be thoroughly coated with an antiseptic primer, trying to get deep. Then ventilate and dry the room.
Choosing a grouting composition
The first criterion by which it is necessary to select the composition is the width of the space between the tiles. For joints of 1 mm and 15 mm, different mixtures are needed. The recommended scope of application of the composition is indicated on the grout packaging.
Mixtures vary in composition. The most common grouts are:
- Cement based. Inexpensive, easy to use, do not harden for a long time, there is time for adjustments, and are easily removed after the expiration of their service life. But they absorb moisture well and can crack over time. There are formulations with hydrophobic additives, it is better to use them.
- Based on epoxy resins. More professional modern mixtures. They cost many times more. They set quickly. Resistant to moisture, chemicals and mold. Due to their high cost, they are mainly used only in shower areas.
The grout can be produced in the form of a ready-to-use paste or a dry powder, which is diluted with water before use. When purchasing the second type, it is important to strictly follow the proportions recommended by the manufacturer.
Solid grout is not suitable for sealing joints between bathtubs, sinks and tiles. For this purpose you will need to purchase silicone sealant. Well-known manufacturers produce cement and silicone grouts in the same color range.
Grout consumption calculator
*Grout density:
- Ceresit CE33, CE40, CE43 — 1.75
- KERAKOLL Fugalite Eco - 1.55
- KESTO Kiilto - 1.6
- LITOKOL Litochrom — 1.9
- LITOKOL Litochrom Luxury — 1.9
- LITOKOL Starlike - 1.55
- MAPEI Ultracolor Plus - 1.6
- MAPEI Kerapoxy Design - 1.6
Applying a new layer of grout
The surface to apply a new layer of grout must be dry and clean. If dry powder is used, then it is better to prepare the mixture in small portions, since a composition that has already set is unsuitable for use and re-diluting with water is unacceptable. The finished grout should be left for 10 minutes, then you can begin to work.
To apply, you will need a rubber spatula, a float and a damp rag to remove excess. Application rules:
- It is recommended to start work from the corner, moving from top to bottom.
- The mixture must be scooped up with a rubber spatula and pressed deep into the seam, holding the tool at an angle of 30°.
- After 15-20 minutes, remove the remaining mixture from the tiles with a damp sponge.
- Dry the surface for 1-2 days.
- If defects are found, carefully rub them with fine sandpaper.
It is important to completely fill the joints between the tiles, otherwise voids or cracks may appear as they dry. Drying the grout with artificial heat sources is prohibited; uneven drying will affect the adhesion of the grout to the base and the integrity of the seam.
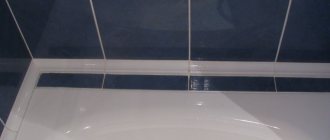
The joints between the bathtub and the tiles must be dried and degreased, apply silicone or other elastic sealant and lightly press it inside the seam, level the front surface and leave to dry.
Removing silicone grout
In some cases, mold appears on tile joints that have been treated with silicone grout. In most cases, this occurs due to insufficient ventilation of the room.
This material cannot be washed, so the only way out of this situation is to completely remove the silicone and replace it with a new grout material. Another reason for removing silicone-based grout is that it was not applied correctly the last time.
Such grouting material must be removed mechanically, using a sharp knife or a construction scraper. After removing the main part of the grout material, you need to go over the seams with a vacuum cleaner to completely remove it.
There are also special detergents that can dissolve and successfully remove old grout. As a rule, they need to be applied with a mounting gun in a small layer, and then left for about a day.
This time is required for the product to penetrate and dissolve the silicone. Then you just need to remove the dissolved silicone using a rag. After this, you should carefully wipe and remove fat from the surface of the seams so that the new layer of silicone adheres firmly.
Removing silicone grout
Before you renew the seams between the tiles, you need to seal their edges with adhesive tape to prevent silicone from getting on the enamel. Then you need to trim the tip of the silicone grout package so that the layer is sufficient to apply the material in one pass. Now you should apply silicone to the surface of the seams using a mounting gun.
After this, you need to quickly smooth out the seam before it sets. To do this, you need to use a special spatula with a rubber working area or use your fingers and soapy water. The masking tape can only be removed after the grout material has been smoothed.
Return to content
How to seal the seams between tiles?
Let's look at step-by-step instructions on how to use tile grout correctly:
- Using a thin brush, wet the gaps with water to ensure good adhesion to the mixture.
- Then you need to prepare a small portion of pasta.
- Now you can apply the mastic with a rubber spatula, or using a pastry bag, directly into the seam, tamping the material inward, filling all the voids.
- Excess grout is removed with a spatula and mixed again with the entire mass. The seams should not be convex.
- If the composition begins to dry out, you can add a little water.
At the same time, the grouting of tile joints on walls and floors has slight differences. The mixture is applied to the walls from top to bottom, and on the floor - from the far corner to the exit. Silicone grout for the corners is applied at the very end.
In wet rooms such as a bathroom and a bathroom, the next day, it is worth re-treating the grout joints with an antiseptic agent to reduce the possibility of mold and mildew appearing in them. In addition, there will always be humidity. Water will often flow through the seams, so experts recommend additionally covering them with epoxy resin.
At this point, grouting of all tile seams can be considered almost complete. But you still need to clean the tiles from the remaining grout mixture.
Acid cleaner
In some cases, especially in old buildings where Soviet-era repairs still remain, the seams between the tiles were grouted with a cement-based compound. In this case, it is quite difficult to get rid of a layer of old grout material without preliminary preparation.
Using an acid softener
For this operation, you need to purchase an acid-based cleaner and several brushes, and do not forget about rubber gloves. To remove cement grout, apply a layer of cleaner to the seams and wait until the product softens the grout. The waiting time is indicated on the packaging of the consumables. After some time, the product should be absorbed, and the grout should be very easy to remove.
It is important to know! Modern acid-based cleaning products are absolutely harmless to tiles, so you don’t have to bother with arranging protection for them. It is much more important to worry about protecting the skin and mucous membranes from substances getting into them.
Return to content
How to protect ceramics?
If you are the happy owner of ceramic tiles that have porosity, you should not use cement and plaster mortars; this will ruin the entire facing material.
You need to use special varnish-based compounds. After applying the varnish to the tile, it will form a protective, transparent, thin layer, preserving the entire structure. Such varnishes are often used in decoupage paper finishing.
Below are tile varnishes from the Yandex market that are perfect for protecting tiles.
Additional procedures
In some cases, after removing the old grout material, some additional operations may be required to completely clean the surface of the joints. For example, small fragments of old grout or small crumbs of broken tiles may remain in the seams. To remove them, just use an ordinary vacuum cleaner.
After cleaning the seams with a vacuum cleaner, you will need to rinse them. To do this, you need to make a solution based on soap or a non-aggressive detergent and carefully treat the seam surface with it, after which you will need to pause the process for up to a day to give time for the seams to dry.
After this, a layer of penetrating primer should be applied. Instructions for its application, as well as the drying time of the substance, are indicated on the packaging and may vary significantly depending on the manufacturer.
Return to content
How and when to wash tiles?
In order for the cladding of walls and floors with ceramic tiles to achieve their final appearance, it is necessary to clean them and remove traces of grout and other dirt. As a rule, I rub the seams twice - once the main time, and the next time when they sag after drying. The tile surface should be washed at the very end, 12-24 hours after finishing grouting.
To clean the tiles from mastic, you need to:
- wet a regular foam sponge with water and use it to rinse the tiles so that the remaining grout mixture on its surface becomes slightly wet.
- then, using a scraper or spatula, carefully remove the remaining grout, holding the tool perpendicular to the cladding;
- To wash corrugated or porous tiles, you can use a soft clothes brush or toothbrush;
- stains are wiped off with a soft dry or slightly damp cloth;
- After this, treat the tiles with glass cleaner and polish them well.
Keep in mind that you need to wash off excess grout before it dries completely, otherwise it will be very difficult to soften and remove it from the surface of the tile. In addition, scraping off the hardened mixture can easily damage the cladding, especially glossy ones.
Applying new grout
Speed is very important in this matter, so you will have to work quite intensively, ideally with an assistant. This rush is due to the fact that the compositions for treating tile joints dry out very quickly, so delay can lead to high consumption of these materials.
Applying new grout
The consistency of the resulting solution should be liquid so that the solution does not dry out too quickly. It is necessary to apply the grout using a rubber spatula. The material must be thoroughly rubbed in, filling the entire seam space. This way you can achieve much more efficient traction.
Don’t be afraid to go over the grout a little; after it dries, the excess can be removed with sandpaper, but a seam that is too small will very quickly require replacement.
In order to form a seam normally, it is better to use a construction tool. It can also be purchased at every hardware or hardware store at a very reasonable price. The set contains several attachments of different shapes that will help give the seams the appearance you need.
If you are not new to this business, but do not have such a tool at hand, then you can use a metal rod of the appropriate size with a rounded end. The use of sharp instruments is not permitted. You can also use the plastic handle of an old brush.
Applying grout
When forming seams, it is necessary to hold the tool in such a way that it touches the edges of the tiles that are laid nearby. After applying the grout material, it is necessary to remove excess from the surface of the tile. To do this, you can use a clean sponge, the same tool you used to apply the grout, or a simple rag.
Now you need to wait about a day and carefully examine the resulting seams. All irregularities can be sanded with sandpaper, after which you need to wash the tiles.
The main thing here is not to let the material dry out completely, since such grout is very difficult to remove from the surface of the tile material. To clean the tiles, use a damp cloth.
Now you know how to replace the grout between tiles and can handle this operation yourself.
Applying grout with a spatula
Return to content
Tools and materials needed for work
Of the entire renovation process involving laying tiles, filling the joints with grout is the simplest job, requiring only perseverance. For it you will need:
- ready or dry grout;
- construction mixer or drill with an attachment;
- container for preparing grout;
- rubber spatulas of different widths. If you intend to work using an epoxy compound, the tool should be made of hard rubber;
- paint brush;
- stationery knife;
- soft sponge;
- grout float.
There should be a container of clean water at hand. Due to the fact that grout mixtures consist of chemical components, it is necessary to work with them wearing rubber gloves and a respirator.
Tile cleaning products
Edding 8200 is a colorful composition for touching up joint surfaces. It contains waterproof ink. It is produced in the form of a marker for more convenient application. You can find white and black markers with a line thickness of no more than 0.4 centimeters.
Pufas cement-ex is a product for removing cement mortar from tiles. Can be used on regular tiles, clinker and terrace tiles. The product is also used as a bath and sink cleaner.
Colored stain remover is used to clean tiles from stains of varying severity and nature of formation. Also suitable for washing natural stone, porcelain stoneware and all types of marble.
Pufas frische fuge. This is a colorful composition for easy renovation of seams. Not recommended for regular use. It is produced exclusively in white colors, but the addition of color is allowed.
Kiilto clean is an aggressive cleaning agent based on various acids. It is used to clean tiles from serious stains, so you should not use it every day.
Return to content
How to update the grout between tiles
In this article we will consider only effective folk methods, modern ones using household chemicals and the method from sky-stroy54.
We classified the following as folk methods:
- a solution of hydrogen peroxide and soda;
- a solution of soda, vinegar and citric acid.
Modern methods include:
- marker for tile joints;
- the use of special gels and paints.
Our method:
- use of lime.
Marker
This method is distinguished by its simplicity, however, its weakness is its fragility. You can use the marker to update the grout in the bathroom, for example, before the arrival of guests or the arrival of distant relatives. But after some time, the seams between the ceramics will again return to their unsightly appearance. You need to wash the surface of the grout with ordinary soap and water, then remove the mold and restore areas where there is no mixture or it is cracked. We remove the excess, carefully clean it with sandpaper and draw the seams.
Marker
Must remember! The marker should be applied only to a dry surface, otherwise the result will remain zero.