Tiling a wall is a rather complicated process that requires careful adherence to the technology of the entire work. Leaving any of the stages unattended means that the finish will be of poor quality and, after a certain period of time, the repair work will need to be repeated. And this, in turn, will lead to additional costs of effort, time and material resources. Before laying tiles, you need to follow several rules that will help you carry out subsequent work correctly. It will also be explained whether it is necessary to prime the wall before laying tiles, in which rooms and why.
Features of tiles, characteristics and advantages
It should be understood that ceramic tiles are a finish used on floor and wall surfaces. However, this does not mean that these are two interchangeable materials, because unlike wall cladding, floor coverings must have greater strength and wear resistance. Considering that the bathroom is a room where there is water, and splashes inevitably fall on the floor, this means that another important property of the products should be anti-slip. This parameter is marked with the Latin letter “R” in combination with numbers from 9 to 13. The higher the value, the less slippery the wet surface will be. Experts advise using a type of tile such as porcelain stoneware or clinker as a floor finish.
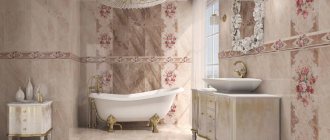
Wall tiles are also moisture-resistant and durable, but at the same time they can be perfectly smooth. In addition to practical properties, the high aesthetics of such products should also be mentioned. After all, if income allows, then even an ordinary bathroom can be turned into a real masterpiece of modern art. However, even a small budget allows you to choose the option that will help create the required coziness and comfort. Modern tiles are produced using pressing technology followed by firing. The finished product has:
- high strength;
- low water absorption;
- color depth;
- brightness of the picture;
- long service life.
The highest quality material is produced in factories in Spain, Italy, Poland and the Czech Republic. Imported collections are clearly selected in size and shade, and practically do not contain defective tiles, however, their cost is 1.5-2 times higher than domestic products. Russian, Ukrainian and Belarusian tiles are somewhat cheaper, but when purchasing, it is important to take into account the percentage of damaged products and include a slightly higher material consumption in the estimate.
Hiring a craftsman could be another cost point, but it’s quite possible to install such cladding yourself. To do this, just study the technology in detail and it will become clear how to lay tiles in the bathroom.
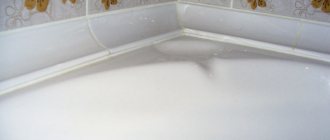
Causes of fungal growth
In any home there are microorganisms in the air that begin to multiply rapidly under favorable conditions. If you don’t start dealing with it in time, the stains will begin to grow quickly and spoil the finish. In addition, the fungus is a strong allergen.
Mold growth (small black or green specks) occurs in warm rooms with constant high humidity. And the bathroom here creates truly greenhouse conditions for a wide variety of fungi. It’s also good that the causes and methods of dealing with them are mostly the same.
Mold begins to grow in bathrooms with:
- poor ventilation due to insufficient exhaust;
- poor heating heated towel rail;
- leaks in pipelines and dripping plumbing;
- ceiling and walls made of porous finishing materials that accumulate moisture.
As a result, condensation forms in the bathroom and constantly maintains a high level of humidity. Even if there are no visible signs of the presence of fungus on the walls, its spores are still present in the room and are waiting for suitable conditions.
Therefore, firstly, measures should be taken to reduce humidity: check the pipes, install a hood and install a new heated towel rail. And secondly, before laying tiles and covering walls with PVC panels, you need to carefully treat all surfaces with antibacterial impregnation.
Stages of gluing tiles
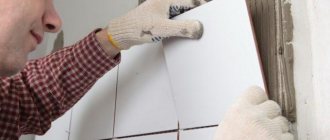
The tiles are applied to both the wall and the floor using an identical technological process, so we will consider in more detail the installation of tiles on a wall surface. And the first thing that is necessary is to purchase and prepare tools and materials. But before visiting the sales area, you should measure the surfaces to be finished in order to know exactly how much of a particular product you will need. The calculation is made based on the type of laying, in particular, with a diagonal arrangement or in the case of adjusting the pattern, more tiles will be needed than with direct laying.
How to properly glue bathroom tiles to the wall correctly
Finding out the quantity of required products is quite simple: just divide the width and length of each wall by the corresponding cladding parameters and round up, then multiply the vertical rows by the horizontal ones. It is important not to forget to add several products in case of defects or the need for adjustment, and also subtract the area of the doorway.
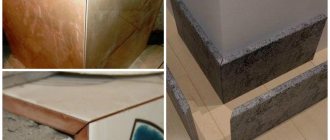
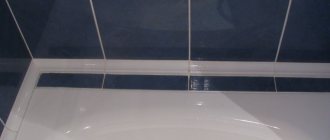
Grouting joints
To grout tile joints on bathroom walls, it is better to choose polymer-cement grout mixtures, the plasticity of which prevents the formation of cracks. Filling the seams with glue of the selected color (grout) is done with a rubber spatula. After an hour, excess glue is removed from the surface of the tile with damp foam rubber. After a day, the glue will completely harden.
Grouting the joints - the final stage of work
Required material and tools
Let's consider the standard set of required items:
- selected tiles for each surface or a selected collection that already includes background tiles, as well as borders and decor;
- tile adhesive - here it is important to understand that not all adhesive compositions are suitable for this procedure, that is, the solution must be moisture-resistant and elastic, and it can be in the form of a dry mixture based only on cement or with the addition of plasticizers, or in a paste state , for example, polyurethane or epoxy compounds; what to use to glue the tiles in the bathroom depends on the situation;
- a primer that helps increase the adhesion of the treated surface to the adhesive composition, and also reduces the hygroscopicity of walls;
- grout for joints, usually selected to match the tile;
- waterproofing compounds that protect surfaces from the penetration of moisture and water vapor, as well as prevent the formation of fungi;
- spacer crosses, their size can be different, in particular, for walls it is better to choose products of a smaller size than for the floor, but it all depends on personal preferences, in addition, in some cases they are not needed at all, for example, if the tiles are mounted as a continuous sheet ;
- a tool for cutting tiles, it can be a manual tile cutter or a grinder with a diamond blade, the choice is made based on personal capabilities;
- an electric drill with appropriate attachments (for mixing the adhesive composition, as well as for drilling holes in the tiles);
- spatulas - will be needed to decide what to use to glue the tiles in the bathroom, and it is recommended to stock up on several types of them, in particular, jagged metal ones for glue and small rubber ones for grouting;
- brush and roller for priming surfaces;
- container for mixing adhesive composition;
- a construction level or a special laser level, as well as a plumb line - these tools will help you lay the tiles as evenly as possible;
- pencil or marker;
- a rubber mallet for tapping tiles; an iron hammer is not used in this case, as it can damage the surface.
How to dilute glue
The composition of the glue can be of several types:
- having a cement base;
- two-component;
- paste-like, consisting of one component.
Mixing tile adhesive
Cement is diluted in accordance with the instructions on the package. The two-component product is mixed immediately before use and eliminates the need to use grout for joints. The paste can remain moist for a long time, which allows you to do the job without haste.
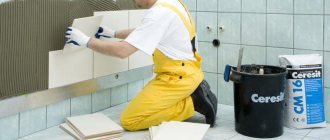
Ordinary cement, according to the instructions, is poured into a container with warm water, then stirred until smooth. To speed up the work, you can use a drill. Then the drill must be washed immediately so that the old solution does not get into the new one. Apply glue to a small area of the wall. Do not apply to the entire wall at once, because the glue dries quickly. Make sure that no voids or bubbles form after applying the glue. It is necessary that a solution be applied to every piece of the wall. In addition, the adhesive layer should not exceed 5 mm.
Preparatory activities
You can get a high-quality and durable result only with careful preparation of the base. This means that the walls should not only be cleaned of old materials and mortar, but also leveled, dried and degreased. And, then, you can begin to solve the problem of how to stick tiles in the bathroom. When starting repair work, it is necessary to dismantle the installed plumbing equipment, that is, to completely free up the space. Next, prepare the floor and walls, and, if necessary, the ceiling.
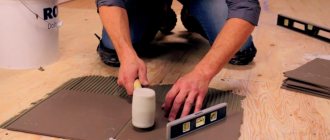
Marking tiles on the wall in the bathroom
The evenness of the base is checked by level and plumb, all differences are sealed with cement mortar or putty. After the mixture has dried, a primer is applied. Next, it’s time for waterproofing; it is recommended to purchase ready-made mixtures that are convenient to spread with a roller or brush. At this point, the preparation is considered complete and it is time for subsequent procedures.
Dismantling the old coating
Removal of old coating is done in different ways, depending on the material from which it is made. For example, if there is wooden shingles under a layer of plaster, then this layer is completely removed.
If there is brickwork at the base, then the plaster from it does not need to be removed. It will be enough to check its strength and integrity and clean the damaged areas. If necessary, a new layer of plaster is applied. In this case, special attention is paid to leveling the wall.
If the surface is tiled, then the tile must be completely removed and the wall must be cleaned of glue. To do this, you need to clean the seams well and moisten the surface generously. After a couple of hours, dismantling can begin. You need to pick up the end tile with a chisel, press the tool into the soft mixture with a hammer, and carefully remove the tile.
If there is no point in saving the old tiles entirely, then you can use a power tool with a chisel attachment.
The painted coating is cleaned completely to plaster using a sanding disc. If the paint is difficult to remove, you can use a special product to remove it. The whitewash is removed using a spray gun and a scraper. Decorative plaster can be removed using a power tool or manually.
The old wallpaper is completely removed, and the remaining adhesive is thoroughly cleaned off. Remaining paper reduces the durability of the finished tile covering.
After dismantling the old coating, the wall must be thoroughly sanded and polished if necessary. Next, the surface must be dedusted as much as possible (with a damp cloth), and after complete drying, a primer must be applied. Using a primer will help reduce the consumption of adhesive, strengthen its adhesion to the surface being treated, and also prevent the appearance of mold and mildew.
Laying tiles
So, let's move on to the question of how to glue bathroom tiles to the wall. First of all, you should understand that there are several options for laying out tiles, and by choosing the right one you can even visually change the geometry of the room. The arrangement of tiles in rows is also considered equally important. In particular, it is recommended not to use products whose width is less than half. This means that if it is not possible to place a whole tile along the entire horizontal row, then you should arrange the tiles so that cut products, the width of which is approximately 2/3 of the whole, fit at both ends of the row.
As for the vertical rows, here you can place cut tiles directly next to the floor, since most often this area is covered by a bathtub, other plumbing fixtures and furniture. Before you start gluing the tiles, it is worth making the first row. To do this, you will need to use a level and a rope with pigment, or install a laser marking that will show a perfectly straight line on the working surface.
Where to start gluing tiles in the bathroom
If the tile was chosen with a pattern or you plan to make inserts, then it is recommended to first lay out the products on the floor and make sure that the elements fit together exactly as intended. The most common layout options are:
- straight (straight seams);
- in a running start (similar to brickwork);
- diagonals (in the form of rhombuses).
The methods can be used in various combinations and the choice of a particular one in most cases depends on personal preferences.
How to glue tiles evenly in the bathroom
Marking
After determining the method of laying the tiles, markings are made using a tape measure, level, ruler and pencil:
- marking begins from the bottom row: even better - step back one row of tiles and start from the second. The bottom row is laid after the floor has been tiled;
- Using a pencil level, mark the location of the second row of tiles. Then a wooden strip is screwed in, which is necessary so that the tile does not move out;
- A diagram of the layout of the tiles with the location of all decorative elements is drawn with a pencil. This will serve as a hint when laying, so as to avoid mistakes and not have to redo it.
Marking walls before laying tiles
It is necessary to position the tiles so that the cut pieces are in the most inconspicuous corner. Therefore, it is better to start the calculation from the most noticeable angle.
Alignment of walls
Tile adhesive is at least twice as expensive as plaster. Therefore, it is cheaper for a home craftsman to level the walls with mixtures specially designed for this purpose, and then glue the cladding onto a thin layer. The speed of finishing work on a flat surface increases sharply, the seams are normally filled and even.
The classic option for leveling walls is plaster; boxes and false panels made of gypsum plasterboard are more convenient for the tiler. There are more exotic options, for example, flat slate or magnesite sheets are screwed onto wooden walls.
Plaster
The advantages of the plaster leveling layer are its low thickness and preservation of working space. There are significantly more disadvantages:
- wet solution makes the base wet;
- tiles cannot be laid until the leveling layer has completely dried;
- the load-bearing structures of the building are loaded;
- Highly qualified home craftsman is required.
The easiest way to plaster is on non-removable linear beacons made of galvanized profiles. To prevent cracks, lime is added to the cement-sand mortar. After the solution has dried, the wall surfaces need to be primed to increase adhesion to the glue.
Drywall
Immediately after its creation, domestic finishers called plasterboard “dry plaster,” which very accurately expresses the purpose of the sheet material. Due to the need to assemble the frame, gypsum boards “eat up” the working space of the bathroom. However, this is the only drawback of the material; there are many more advantages:
- reducing the labor intensity of work;
- ideal plane geometry;
- lack of wet technologies;
- low load on supporting structures;
- engineering systems completely hidden behind false panels and inside boxes.
In wet rooms, moisture-resistant plasterboard GKLV of light green color is used. The frame is assembled from a rack, guide and universal profile.
There is also a frameless technology for attaching drywall, but in this case the walls will have to be grooved for laying pipes.