The most common option for covering surfaces in the bathroom is ceramic tiles. It is resistant to moisture and household chemicals, does not change color over time and has a long service life. Even if the installation material underneath has delaminated, you can glue the bathroom tiles back onto the wall if they have fallen off. How to do this and what glue is suitable for this, we will consider below.
Reasons for tiles peeling off
The decorative coating falls off for the following reasons:
- Wrong technology. Some craftsmen, in order to save money, do not apply glue in a continuous layer, but in dots. When the product is evenly distributed, the tile adheres to the surface. If there are too few points, the tile will fall off after mechanical impact or spontaneously. The defect is identified by tapping. There should be no voids under the decorative coating.
- Insufficient preparation of the base. If the glue is applied in a continuous layer, but the tiles fall off, it means that the master laid the tiles on gypsum plaster. Such mixtures do not adhere to tile adhesive, so the cladding lasts no more than a year. To eliminate the defect, you need to clean the wall until the base layer appears. Partial restoration in this case is ineffective. All tiles are removed and reinstalled.
- Use of low-quality materials. Expired tile adhesive does not have good adhesion. Under the influence of its own weight, the tile begins to fall off. Solutions that were incorrectly diluted or stored after mixing should not be used. The defect is eliminated by dismantling the decorative coating and then laying tiles cleaned from the old mortar.
- Failure of tiles. The cladding elements, after gluing, fall off under the influence of high temperatures. The heat-resistant composition can withstand heat, but the ceramic itself begins to crack.
Removing cracked tiles.
Types of violation of the integrity of the finish and ceramic defects
- Separating a section of the facing coating together with the mortar from the base.
- Detachment of ceramics from the adhesive composition on the surface area.
- Failure of fastening and falling of a single tile.
- Cracks in firmly seated ceramics.
- Sinks and chips on the surface of the tiles.
To determine the reasons for the destruction of the finish, you need to inspect and analyze both the materials used in the repair and other factors that are not always noticeable at first glance.
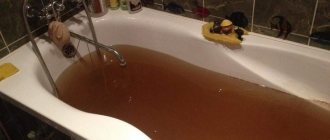
Both old and recently glued tiles can fall off
Possible causes of damage to ceramic finishes:
- incorrectly selected tile;
- incorrectly selected primer;
- deformation of the base under the ceramics;
- physical wear of the coating;
- base not primed before laying tiles;
- uneven base under the tiles;
- low-quality tile adhesive;
- incorrectly applied layer of adhesive solution;
- aggressive operating conditions (detonation);
- mechanical damage from impacts;
- sealing technological and installation holes.
Any of these factors or a combination of several circumstances may cause the destruction of a section of the facing coating or individual products.
Let's consider methods for repairing tiled surfaces depending on the type of damage.
How to glue the fallen part
To properly carry out the restoration, you need to purchase a high-quality adhesive composition.
A mixture of cement and sand
The solution can be prepared at home. PVA glue is added to the mixture of cement, sand and water to improve adhesion. The same solution can be used to pre-level the wall. The disadvantage is the possibility of violating the technology for preparing the composition. The universal mixture is compatible with all types of tiles, including floor tiles. The proportions of the components are determined by the brand of the product. Add 200 ml of PVA glue to 10 liters of the finished composition.
Mastic
Mastic is supplied in plastic buckets of different sizes. It is a ready-to-use adhesive composition. Before starting work, mix the mass thoroughly.
Laying tiles using mastic adhesive.
Adhesive compositions
Several types of glue are used to restore tile cladding. They are divided into 2 groups:
- Dry mixes. To prepare the adhesive, the powder is mixed with water, following the proportions specified in the instructions.
- Ready pastes. The products do not require adding water.
The adhesive composition is selected taking into account the type of tile:
- Cement mixtures. Used for gluing decorative elements of small and medium weight. Adhere well to concrete or brick bases.
- Dispersive for laying tiles on the floor or wall. Suitable for lightweight materials.
- Polyurethane. The elastic composition is used for installing tiles on any base.
- Epoxy. Used for decorating smooth surfaces: wood, ceramics, metal. The glue is resistant to moisture.
Polyurethane tile adhesive.
Liquid nails can be used to temporarily restore the integrity of the cladding.
The composition is applied pointwise to the underside of the tile. The edges are covered with solid lines.
Other solutions
When partially restoring ceramic cladding, it is allowed to use materials that have the properties of tile adhesive. These include:
- Silicone sealant. The product does not need to be diluted with water before use. The elastic composition protects the connections from moisture penetration. Sealant is used in cases where 2-3 tiles have fallen off.
- Dye. Used for gluing tiles onto a smooth base. To improve adhesion, it is given a thick consistency.
- Bitumen mastic. The viscosity of this substance allows it to be used for local repairs. The resin is impervious to moisture, but is sensitive to high temperatures.
Way out of this situation
What should you do if a tile falls off? Glue the tile back! Of course, there are many conditions under which this is not possible, for example, the poor condition of the ceramics. However, in most cases the product is suitable for further use. Therefore, to restore the interior, it is necessary to thoroughly clean the surface where the tiles were attached. Then apply the adhesive and glue the product to the appropriate place.
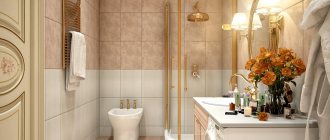
This method is only applicable to tiles that are in excellent condition, otherwise they will need to be replaced. Although a nuisance may occur in the form of a missing element. Then you can play with contrast or add bright colors to the overall design. To do this, you should purchase several ceramic products and replace them with outdated tiles, which will significantly refresh the bathroom.
If for some reason it is impossible to glue the tiles or pick out others, then it is best to approach the problem in an original way. Try creating a mosaic design, i.e. crumble the ceramics, and then collect it and paste it into the old place, but already thoroughly crumbled. This procedure must be done carefully to eliminate the possibility of an unpresentable appearance.
To prevent repeated peeling, it is necessary to establish the cause of the defect and then eliminate it. In practice, this is relatively easy to achieve, but you still need to try. For example, voids can be identified by ordinary sound by tapping each element separately. Various irregularities are visible to the naked eye, as is crumbling mortar. The detected defective area will have to be remade conscientiously, otherwise problems cannot be avoided.
Selection of the necessary tools and materials
In addition to the selected adhesive composition, you need to prepare the following tools and materials:
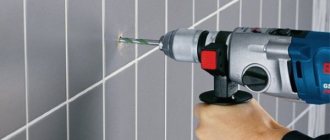
- a hammer drill with a chisel attachment to remove glue residues;
- wide brush for applying primer;
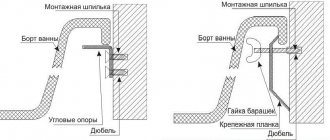
- construction mixer;
- graters for applying tile adhesive (tooth size depends on the parameters of the tile);
- wide and narrow spatulas;
- rubber hammer;
- soft spatula for applying grout;
- foam sponges;
- tape measure, building level.
Rubber hammer for tiles.
Surface preparation
Before gluing fallen tiles in the bathroom, you need to carefully prepare the surface. Otherwise, peeling of the wall finishing may occur again in the future.
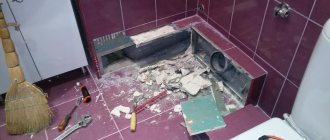
- If the tile comes off in parts, then it is necessary to remove the remaining fragments from the wall. This can be done using a chisel. The remains must be broken off carefully so as not to damage adjacent fragments.
- Check the strength of the fastening of adjacent segments. To do this, press on the elements adjacent to the defective area. If there is displacement, you need to dismantle the cladding around the entire perimeter.
- Also, using a chisel or spatula, clean the area of the wall from old primer and glue.
- If you are installing the same tile, you need to clean off any remaining installation materials from its back side. If the layer of adhesive material is difficult to remove, use a grinder. In addition to mechanical stress, you can soak the finishing elements for 3–4 hours in warm water. Sand small irregularities with fine abrasive material.
- If there are any uneven spots on the wall, smooth them out with putty and leave them to dry for a day.
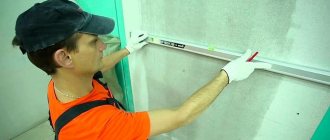
- Apply a coat of primer. To avoid the formation of mold and fungal deposits in the bathroom, the surface of the wall can be treated with a solution containing fungicides.
- For further installation of tiles in the bathroom, allow the prepared area to dry completely for 36 hours.
How to carry out repairs and restoration
Restoration of the facing layer contains the following steps:
- If the tile is deformed, replacement elements are selected.
- Prepare the base. Carefully remove any remaining glue from the surface, being careful not to damage adjacent elements. To remove the solution, use a hammer and chisel. Hard plaster is removed with a grinder. Small fragments are removed with a spatula.
- Level the base. The cleaned areas are treated with putty. After the composition has dried, the surface is cleaned of dust and a primer is applied.
- When using cement adhesive, the underside of the tile is wetted and then treated with a primer. The use of other adhesives does not require these steps.
- Treat surfaces with antiseptic impregnation. This will prevent the spread of fungus in the future when using the bathroom.
- Using a wavy spatula, apply adhesive to the tiles. The thickness is calculated in advance. Based on the result obtained, the size of the tool is selected. When placed vertically, the height of the spatula ridge should exceed the calculated parameter by 0.5 cm. A tool with large teeth is held at an angle. Spatulas with low ridges are not used.
- The tile is pressed to the base and the surface is tapped with a rubber hammer. This promotes even distribution of the glue.
- Excess mortar is removed and plastic crosses are installed to ensure equal width of the seams. These parts can be replaced with simple matches.
- Fill the gaps between the tiles. To do this, use a waterproof compound, the color of which matches the tone of the old joints between the tiles. After the grout has dried, wipe the repaired area with a damp sponge.
Repairing tiles in the bathroom.
General issues
To make the process easier, companies have created many tools, but if you decide to do the repairs yourself, then it is not advisable to spend extra money on items that will not be useful later. Therefore, you should figure out how to reduce costs and carry out repair work without using expensive equipment.
Companies have created many tools to make the process easier.
Features of the bathroom
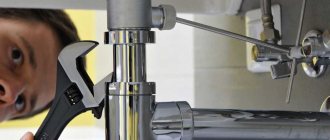
A bathroom is a room where there is usually little space, but many objects need to be placed inside. Also, the increased humidity of the space requires the use of adhesive mortar and other mixtures that will easily protect the walls from biological formations and will also withstand similar loads.
The difficulty of gluing also lies in the presence of a sink, bathroom, etc., where gluing tiles is more difficult. You have to do a lot of adjusting the tiles to the required dimensions.
Increased humidity in a space requires the use of adhesive mortar and other mixtures that can easily protect walls from biological formations.
Sequencing
By understanding where to start repair work, you can simplify the process itself. Regardless of whether the gluing will be carried out in a separate bathroom or in a combined form, the following steps are performed:
- Removing old coverings from walls and floors.
- Checking the reliability of load-bearing and other elements.
- The floor slabs are leveled with a concrete screed, if necessary, the walls are leveled, and a heated floor is installed. The surface can be leveled with plasterboard, plaster and putty mixture.
- If necessary, replace pipes, plumbing, etc.
- Carrying out waterproofing work.
- Next, you can start gluing tiles, ceramic or other tiles.
- Rubbing seams.
The surface can be leveled with plasterboard, plaster and putty mixture.
Tools
It’s impossible to do without tools when creating a new finish from tile material. Make sure you have the following tools in advance:
- Tape measure, level, square, hinge template (4 rulers), marker;
- Angle grinding machine, you need stone discs, a diamond cutter, a tile cutter, a drill, a hacksaw for metal;
- Smooth and serrated spatula, grater, trowel;
- Containers, mixer;
- Brushes, roller, special container for roller;
- Crosses/specialized SVP system.
Tile adhesive cannot cover surface unevenness; they should be removed in advance.
Make sure you have the tools in advance.
Selection of installation technology
How the master will work and how easy it will be for him depends on the installation technology. You can lay the tiles in different ways, the first option is to coat only the base with adhesive solution, the second is tiles, the third is both. Using special crosses to create an even distribution of material, you can replace them with a special SVP system; it costs more, but simplifies the process.
How the master will work and how easy it will be for him depends on the installation technology.
How to prevent peeling
Compliance with installation technology helps prevent destruction of the facing layer. The adhesive is selected according to the type of base. The necessary information is sought in the instructions for use of the composition. If you do not wet the back of the tile when using cement mortar, the material will draw water from the adhesive. The strength of the connection will decrease.
Before laying the tiles, the walls are primed.
In the absence of a special product, the surfaces are treated with liquid glue. Remove excess with a spatula and wait until the solution dries. The thickness of the adhesive layer must match the calculated values.
It is recommended to seal the seams with sealants based on latex, epoxy resin or silicone.
Fastening ceramics to old mortar
If the old mortar on the wall is held firmly, or working with an angle grinder is undesirable due to strong dust formation, then you can glue the tiles to the wall or floor in another way. Using a grinder with a dry cutter, a layer of clay 1-1.5 mm thick is evenly ground off the back surface of the ceramic. The surface of the base is primed and, after drying, finished with the resulting tiles of smaller thickness, gluing them to the surface with a two-component epoxy-based adhesive.
On walls with this repair method, instead of epoxy glue, you can use silicone or “liquid nails,” which are unsuitable for floor repairs.
The tiles are glued directly to the exposed surface of the old cement layer
Video review
Sources:
- https://gidpoplitke.ru/remont-i-uhod/kak-prikleit-otvalivshuyusya-plitku.html
- https://sovety-vannoy.ru/delaem-remont/ukladka-plitki/otvalilas-plitka-v-vannoj-chem-prikleit.html
- https://stroy-podskazka.ru/nastennye-pokrytiya/plitka/chem-prikleit-v-vannoj/
- https://VseProKley.ru/vannaya/kak-prikleit-plitku-v-vannoj-na-stenu-esli-ona-otvalilas
- https://rebathroom.ru/otvalilas-plitka-v-vannoj-chem-prikleit.html
- https://OPlitke.com/montazh/chem-prikleit-plitku-v-vannoj-esli-ona-otvalilas
- https://MasteraVannoy.ru/plitka/chem-prikleit-esli-ona-otvalilas.html
- https://stroitelniportal.ru/svoimi-rukami/plitka/chem-prikleit-plitku-v-vannoj-esli-ona-otvalilas/
- https://plitkahelp.com/ukladka/chem-luchshe-prikleit-plitku-v-vannoj-esli-ona-otvalilas
- https://KraskaGuru.ru/klej/plitka/esli-otvalilas-v-vannoj.html
Coating restoration
When the wall is completely prepared, you can begin finishing, having previously treated the surface with an antiseptic. The process of performing the work is quite simple if you follow the instructions:
- It is more convenient to apply the adhesive directly on the floor. It is important to use a sufficient amount of mortar, but not to coat the fragment with too thick a layer of glue, as this will cause the tile to stand out from the rest.
- After the fragment is pressed against the wall, you can lightly tap the tile with a hammer with a rubber nozzle. This will help the glue spread better.
- Excess adhesive is cleaned off, and the distance at the seams is fixed.
- As soon as the cladding has dried, a grout mixture is applied to the seams.
If there are no crosses for the seams, you can use regular matches.
How long will it last?
The service life of tiles that have been correctly laid is not limited by time. The service life of the coating is reduced if the installation technology is violated, if materials with an expired shelf life were used. In order for the cladding to last as long as possible, it is necessary to avoid installation errors and distribute the adhesive evenly over the entire surface, thereby eliminating the possibility of voids forming and deformation of the coating.