When carrying out renovations in an apartment with a complete replacement of plumbing, its owners quite often have to deal with the problem of securely fastening the equipment installed in the bathroom. This is especially true for the work procedures for installing a new bathroom, the specific installation of which is determined by many factors, including the material of the product and its texture. Thus, a traditional cast-iron bathtub, which is distinguished by its considerable weight, is best installed according to a long-proven method, which involves its reliable support on the height-adjustable legs included in the kit.
For lighter acrylic bathtubs, for example, additional fastening will be required to ensure its reliable fixation and uniform distribution of loads throughout the body. In our article we will consider in detail the installation features of each of the samples of this plumbing product.
Options for all types of baths
The clawfoot bathtub is easy to install. Especially if the legs are height adjustable. They allow you to set the edge at the desired height and compensate for uneven floors. But not all legs are the same. Some do not give a feeling of stability and the bathtub sways under your feet - not the most pleasant feeling. In addition, it may not be safe. There are several ways to secure a bathtub so that it does not wobble.
- Set it to the horizon. An incorrectly positioned bathtub will be more susceptible to movement.
- If the floor has glazed tiles, even a heavy container may slip. You need to secure the legs (more on the methods below).
- Attach to the wall (more details below).
How to fix a bathtub to the wall: two ways - Lay the tiles on the walls after installing the bath so that they hold its edges. You can install the bathtub after the walls are lined. But then you need to either go through the joint with silicone, or use a special border or tiles cut into strips (totally unfashionable now, but what can you do).
- If the legs “included” are unreliable, replace them. Sometimes it’s easier than gardening.
- Make a frame from a steel angle or profiled pipe (square or rectangular cross-section); for acrylic bathtubs, make from a plasterboard profile.
If the problem is that the bottom of the bathtub also sag, then it is better to make a base. Most often it is made of bricks and mortar. But not all bathtub manufacturers consider this option to be correct. Some indicate that installation on bricks and mortar is contraindicated. In some cases, the solution is to fill it with polystyrene foam and/or polyurethane foam.
Materials and tools
The technology for installing an acrylic font consists of several sequential stages and each of them requires its own materials and tools. Here is a complete list of them. If no work is carried out, then materials and tools will not be required.
To carry out a comprehensive bathroom renovation you will need:
- acrylic bath;
- bath screen;
- siphon;
- corrugated tube for connection to the riser;
- brick, silicate or foam blocks;
- dry mortar or cement M400;
- painting (reinforcement) fiberglass mesh;
- waterproofing mastic;
- ceiling profile (CD) or aluminum corner;
- ceramic floor tiles;
- wall tiles;
- tile adhesive;
- silicone sealant;
- polyurethane foam for processing the bowl body - reduces noise pollution when drawing water.
The toolkit should include:
- hammer drill - used to remove old tiles and drill holes for fasteners;
- grinder - needed if difficulties arise in the process of disassembling an old bathtub;
- hammer;
- trowel;
- chisel - needed to dismantle old tiles;
- knife or trowel for removing sealant;
- building level - needed when laying tiles and aligning the bowl horizontally;
- notched spatula;
- a screwdriver or screwdriver for mounting the frame and assembling the siphon;
- wrench for clamping coupling nuts;
- roulette;
- marker (construction pencil);
- construction square.
Wall mount
When installing a bathtub, so that it does not wobble, it is better to secure it to the wall. Depending on how it is located, it can be mounted on three or two sides. Before fixing the bathtub, it is leveled at the height at which it is planned to be used. Then the procedure is as follows:
- They move it into place. Check whether it is level (level in several places).
- Mark on the wall what level the sides are at.
Instead of boards and profiles there can be such hooks - They move the bathtub away.
- Based on the marks on the wall, devices are installed to fix the edge of the bathtub. However, do not forget that the walls of the bathtub are also thick. If the fastener is rigid, without rubber edges, this must be taken into account.
The bathtub is installed in place. This time it must be raised and lowered so that its edge falls between the fastener and the wall or rests against it. It depends on what you are using to secure the edge of the bathtub to the wall.
What can you use to attach
Now let's talk about what exactly is used to attach the bathtub to the wall. There are different options. Among the “folk” ones are a steel angle, a wooden block, a galvanized profile for drywall. When fixing the bathtub with their help, they serve as a support, but do not fix it. Even if you do nothing else, the bathtub on legs will wobble less, but it’s better to fix it.
One of the bracket options
Tile adhesive or sealant is used for fixation. They coat a corner, profile or timber with it. When installing a bathtub, the edge squeezes out the excess, which must be carefully picked up, cleaning both the wall and the bathtub. If the composition dries, it will be difficult to wash, so while the solution or sealant is “fresh”, carefully remove the excess.
You can first install the bathtub, then close the gap between the side and the wall with sealant or tile adhesive. This method also works and has its place.
There may be such fasteners
There are special fasteners in the form of metal plates or a complex design of brackets with or without rubber pads. When using this type of fastener, they are installed so that you can crawl up and tighten the screw that attracts the side to the wall.
Polyurethane foam
Using polyurethane foam
Using polyurethane foam to fix a bathtub is the simplest and most affordable method of simultaneously fixing it to the floor and walls. When implementing this method, the bathtub is first adjusted in place and height using adjustable legs so that there is a gap of about 0.75–1.5 cm at the walls, and then it is filled to the brim with water.
After this, you can begin to seal the gaps between the bathtub body and the adjacent walls of the room, as well as between its legs and the floor using polyurethane foam.
Sealing foam tends to expand when it dries, so its use must be strictly dosed. Otherwise, unwanted deformations of the structure are possible, reducing the reliability of its fixation. Despite the fact that the “setting” time of the polyurethane foam is about 12–35 hours, work on finishing the walls can begin in about 6 hours.
How to raise a bathtub higher off the floor
The height of the standard legs is not always enough, and then you have to look for how to raise the bath higher above the floor. The first thing to do is unscrew the adjusting bolts to the maximum allowable height. Sometimes the standard height adjustment is not enough. If a couple of centimeters are missing, you can find a pin or bolt of the same diameter, but longer, and use that. This is more reliable than laying pieces of tile under the legs.
One way to raise the bathtub. But you need to secure it well to the wall, and it won’t hurt to fix the legs to the floor
Pedestal
The second thing that comes to mind is to make a pedestal. Bricks are often used for clawfoot bathtubs. They are simply placed under the legs. For a steel bathtub, and even more so for a cast iron one, a sheet of metal can be laid between the legs and the brick. Point loads created by the legs of the bathroom can crush the brick. They say that paving slabs are more reliable in this regard. You can use it instead of bricks. But it’s still unlikely to be possible without gaskets. Yes, and this option will provide a rise of 4-5 cm. Not higher.
If you need to raise the bath higher, it is better to build a pedestal of several rows of bricks and concrete/tile adhesive. The area of the pedestal must be no less than the area of the bottom of the bathtub. It doesn't have to be continuous. You can fold two rows in the area where the legs are installed. One brick or one and a half - depends on the mass of the bathtub. For steel, one row is enough; for cast iron, one and a half is better. Wait a couple of days until the solution gains strength. Then place the fresh one about five centimeters on top. And install the bath, check the horizontal installation, press down if necessary, and leave until the solution sets. So we will form the desired shape of the “bed”.
A common way to raise the bathtub higher, but “wrong”
The option is clear and seems reliable, but many manufacturers do not recommend this type of installation. Probably due to the fact that under the influence of a large mass the pedestal can fall apart. Of course, this is possible, but if the edges are well fixed to the wall and the outer wall is supported, the structure will be reliable.
It’s better to weld another plate at the bottom
If you are comfortable with welding, you can extend the standard legs. One of the options in the photo. A metal plate is welded to the legs, and large diameter bolts/pins are welded to it. This is just one of the options. The load on the floor will also be a point load, so it is better to weld another metal plate under the bolts. Load distribution will allow you to place it on a tiled floor without any problems. And such a design will slide and move less.
What to put under the legs of a cast iron bathtub
A cast iron bathtub is the heaviest. Putting it on bricks or paving slabs, even with a metal spacer, is risky. If it really doesn’t work out (the sewer outlet requires raising the drain), you need reliable stands. As an option - glued pieces of plywood, textolite, paving slabs with a plate laid on top. Although both tiles and plywood can be pressed through. Textolite is more reliable, especially since it comes in different thicknesses. But cutting thick ones (and even finding them) is a problem. But 10-12 mm thick is more realistic to find. We cut it into squares, gain the required height, and twist it with bolts/studs through the holes in the corners. On the front plate we form a recess for installing a support bolt or leg.
How to secure a bathtub on legs so it doesn't slip
In general, what do they put under the legs of a cast-iron bathtub? Among the tested options: a stack of hockey pucks, pieces of wood, OSB squares glued together in a stack. They are fixed to the floor with elastic tile adhesive or sealant. This will reduce the likelihood of “slipping out” and the stand becoming corroded, even if it does break. But to absorb point loads, between the legs and stacks of material, it is better to lay a piece of dense (possibly reinforced) rubber.
The best thing you can do is leave it on its stock “legs”. If you still need to lift, install longer threaded screws. Usually the diameter is taken with a significant margin. So adding 2-3 cm in length does not add problems. If you want insurance, you can lay a foam block under the bottom and fill the missing height with polyurethane foam. With cast iron this will not provide guarantees, but still an additional support “just in case”. You can make supports near the legs and/or in the middle.
Safety precautions
When choosing any method of installing an acrylic bathtub, you must follow the rules. Acrylic is a fragile material, so it must be handled with the utmost care. Falling the bowl leads to cracks and chips. Defects also appear when heavy tools are dropped. If handled carelessly, the acrylic surface will be scratched. Before installing the bathtub, it is recommended to study the instructions from the manufacturer. The craftsman must ensure that the bottom of the structure rests on the frame in the designated places. Failure to comply with this rule leads to deformation and breakdown of plumbing fixtures. The acrylic bathtub comes with the parts necessary for installation, instructions, and a passport. Before performing installation work, be sure to check the quality of fasteners and accessories.
How to fix a bathtub if the walls have low load-bearing capacity
If attaching the bathtub to the walls is not an option (plasterboard or foam block, just an old crumbling wall), you can only create a reliable base on which it should be installed. One option is a pedestal, described above. Often it is supplemented with a frame that supports the front side. This is where the maximum load usually occurs, so a frame is assembled, which is attached to the floor with dowels, even if tiles are laid on the floor. When installed, one of the sides has a reliable support, which provides the necessary stability.
The retaining wall for the front side is made of timber or plasterboard profile. You can weld it from a profiled pipe, a corner with a small shelf.
If you cannot fix the bathtub to the walls, you need to make a reliable base for installation on the floor
The second option is a welded frame made of profiled pipe, which is welded to the size of the bathtub. It “sits” on the frame, and it, in turn, is rigidly attached to the floor using the same dowels. The gaps between the wall and the side can be closed in any available way, but this is not what will hold the bathtub, namely the frame.
For shock absorption and noise reduction, you can use rubber gaskets - made of hard rubber. Or boards like in the photo. They can also hold the container from the sides. This way of fastening the bathtub to the floor is reliable. She's definitely not going anywhere. Using the same principle, you can make a frame for a free-standing bathtub, and trim and decorate it to your liking.
Final works
The space below is often covered with a screen. You can make it yourself - from moisture-resistant plasterboard, MDF, plastic panels or brick. The materials are painted on top, tiled, mosaiced, covered with film, and covered with decorative plaster. If the screen is monolithic, not sliding, it is necessary to provide a technical hatch in it - in case you need to clean the siphon. The photo shows an example of such overlays.
Instagram @remont_sanyzel_krd
Instagram @remont_sanyzel_krd
Instagram @deniskorneliuk
Instagram @deniskorneliuk
How to secure legs to the floor
Installing a bathtub with legs depends on their design, and there are many of them. There is no need to describe any specific one, since usually everything is either intuitively clear, or there are installation instructions. It is not always in writing, sometimes in the form of drawings, but usually this is enough. More information in graphics than in words. But, if a clawfoot bathtub is installed on tiles or porcelain tiles, it may slide. To avoid this, here's what you can do:
- Place pieces of coarse sandpaper under the legs.
- Install rubber gaskets. As an option, buy attachments for crutches at the pharmacy. You can cut pieces from reinforced rubber (tires). With a cast-iron bathtub, this is not the most effective method, since the rubber is crushed, but it certainly slides less.
Bath footrests - Coat (or coat) with sealant, but not for sealing, but for fixation.
- Install formwork (a strip from a plastic bottle) around the legs and fill it with concrete or tile adhesive.
The latter option provides high reliability, but dismantling the bathtub will be difficult. On the other hand, the legs must be firmly fixed so that there is no play. These movements can break the concrete and the bathtub will wobble again.
There is another option - with guy wires or lanyards (a device for tightening and removing slack). They are bought at a fastener store. This option is possible if the legs are connected with a pin, if they have standard holes that can be caught on.
One of the options
Anchors with hooks are screwed into the floor. They can be used to secure not only the legs to the floor, but also to the walls. Tension adjustment in the lanyard is provided. You just need to take the most powerful ones and look at the length.
Common mistakes
When installing a steel bathtub yourself, it is not always possible to avoid mistakes. They negatively affect the final result, so you need to know in advance what you can do wrong:
- The drain pipe must be below the bottom of the bowl, otherwise draining will be difficult.
- The screen under the bathtub should not be made absolutely straight. For convenience, it is necessary to make a recess at the bottom.
- Failure to comply with the horizontal installation level. This happens due to the haste of the work and inattention. It is much more difficult to level a bowl that is already secured.
- Installation of drain and overflow after installation. It is better to do this before installation.
- Loose nuts. If the nuts that secure the legs are loose, the bathtub will tilt or begin to wobble.
- Lack of sound insulation of the bowl. Not all models need to be soundproofed. But it is still wiser to cover the outside of the bowl with mounting foam or putty, since these materials also perform a heat-saving function.
Thanks to its weight, a steel bathtub can be installed even alone. But light weight is both an advantage and a disadvantage at the same time. In order to securely fasten the structure and not worry about its stability, it is necessary to use standard racks together with additional fasteners and frames.
Noise insulation
Overview of the main methods
An acrylic bathtub, unlike a steel bathtub, does not need noise and thermal insulation as much, but if you want to ensure real silence and comfort in your home, then you should think about sound absorption of your bathtub.
Vibroizol
A unique material consisting of rubber and bitumen, with an adhesive composition on one side, invented for soundproofing cars. Excellent soundproofing for a bath.
Foamed polyethylene
The material not only suppresses noise, but also perfectly retains the heat of the water. It comes with a metal or foil layer, which improves its insulating properties.
It will be more convenient to work with a material that has a self-adhesive layer.
Step-by-step instruction:
- Cut a piece of the required size;
- Apply adhesive if the material does not have a self-adhesive function;
- Apply the adhesive layer to the surface and press gently;
- Coat the entire outside of the bowl.
Vibroplast
Polymer, plastic and durable material with a durable aluminum layer, copes well with noise and heat insulation. Eco-friendly, withstands high temperatures, moisture resistant, inexpensive.
- Cut a piece of the required size;
- Warm the material thoroughly with a hairdryer, it will become more elastic;
- Remove the protective film and apply the piece to the surface;
- Warm it up again with a hairdryer, pressing the material tightly;
- In this way, cover the entire surface of the bath with vibroplast.
Polyurethane foam
The method is most popular due to its simplicity and accessibility. This kind of processing is easy to do with your own hands.
For a better result, there are some tricks: it is advisable to use special foam for indoor work , work at high temperatures, warm up and shake the can before work.
- Protect the floor from foam with film or newspapers;
- Seal the technical holes on the inverted bathtub;
- Degrease the surface with an alcohol-containing solution;
- Start processing from the sides of the hull to the bottom;
- Carefully and evenly distribute the foam tightly;
- Work intermittently and let the treated areas harden.
detailed instructions on how to foam a bath in our special article.
Special models
Corner
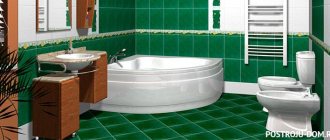
Assembly and installation of corner fonts follows the same rules. The only thing is that such products must be placed only on the frame that comes with the kit, this is due to the peculiarities of the shape of each model. As a rule, the manufacturer completes its product with detailed instructions. Therefore, any man should be able to handle the assembly and installation of corner bathtubs.
Hydromassage
But hot tubs are not so easy to assemble. This will require much more time and effort. Indeed, in addition to the direct installation, it is also necessary to connect the pump system and configure everything correctly. But don’t be afraid of this, because we have described all the nuances in detail in this article:

