The age-old question is where to start renovations in a new building? It's simple, start with a general assessment of the condition of your premises. And if in a bedroom, living room or children's room, as a rule, it is quite difficult to refresh the finish of the ceiling, floors and walls, then the bathroom and kitchen require a careful and thorough approach. Where to start renovating a new apartment? What are the distinctive features of renovation in a new building from renovation in a room that has been inhabited for a long time? These kinds of questions are often of interest to many consumers.
After purchasing an apartment in a new building, you should be prepared for the fact that there will be absolutely no finishing inside. An approach from this point of view will significantly reduce the cost of the premises and make it possible to decorate the area according to your own capabilities and taste.
When starting a bathroom renovation in a new building, it is very important to know the following:
- The lower the cost of the tile, the less you will feel sorry for it. Over time, the walls of the bathroom tend to “adjust” to the overall structure. As a result, microcracks appear, microcracks will certainly appear, and deformation of the tile is quite possible. That is why you need to look for a nice tile, but such that after a short time (a year or two) you can throw it in the trash without the annoyance of wasted money;
- Absolutely any house shrinks over time. As a rule, this happens for the first time in 2-3 years - this means that the selection of necessary materials must be careful;
- When installing pipes, immediately use plastic pipes. This material is perfect for any temperature. Also, it is resistant to changes in jet pressure and corrosion.
- If you have a window in the bathroom, immediately, without unnecessary worries, install a high-quality PVC profile. Such structures are resistant to dampness and stress. They are also not afraid of deformation.
It is advisable to immediately cover the ceiling with plasterboard, of course, if it suits you. All ceilings are subject to minimal deformation. An important advantage is that drywall is a very light material; it in no way weighs down the structure. Allows the ceiling to “adapt” to the structure of the entire house.
It is also worth seriously considering the following aspects:
- where is it better to place the pipeline and electrics, cut through the walls, cut out grooves;
- if necessary, where to make partitions in the bathroom;
- address the issue of lighting;
- figure out where the washing machine will be located, figure out the location of the outlet for the electrical appliances you need;
- How will the piping in the bathroom be done? Don't forget that it will also go into the kitchen;
- install a washbasin, shower (bathtub);
- check the sewerage connection;
- be sure to install everything necessary for ventilation of your bathroom;
- add hot and cold water supply.
Despite the small area of the bathroom, renovating a bathroom is a very labor-intensive job, requiring the skills to perform a full range of plastering, painting, finishing, and plumbing work. Repairs may require a large number of tools that are not found in every home.
Before you start repairing, soberly assess your capabilities. Conduct an audit of the available tools. Many power tools: a hammer drill, an angle grinder, a tile cutter or a device for grooves in walls can be rented at specialized rental shops or power tool stores.
With the rest of the tools - spatulas, rules, chisels, saws, a set of plumbing wrenches, etc. - it is much more difficult. They are usually not available for rent. You will have to purchase it before starting the renovation.
Preparatory stage
Bathroom renovation begins with dismantling the existing equipment. First of all, the room is freed from the suspended ceiling. First, the decorative skirting boards are removed, then the stretch ceiling canvas or slatted ceiling slats are removed. The plasterboard ceiling is destroyed with a hammer drill or a hand pick. After this, the electrical wiring of the spotlights and the sheathing are dismantled.
The places where the wires are cut are reliably insulated. One pendant socket is left that can withstand the operation of an electric lamp of at least 200 W.
The sink is dismantled if the bathroom is combined with a bidet and a bathtub. Dismantling a bathtub, especially a cast iron one, is the most labor-intensive step. You can’t do it yourself without outside help. The old faucet and toilet can be removed last.
Using a chisel and hammer, remove old wall tiles by hand or with a hammer drill. At the same time, they try not to damage the external pipeline system, especially if it is made of metal-plastic pipes. During repairs, water meters are covered with several layers of soft fabric.
Just like wall tiles, ceramic floor tiles are removed and the condition of the screed is assessed. If it is not damaged, it is left. If there are cracks or chips, it is better to remove it as well.
Installation of accessories and entrance doors
This process begins when all renovation work on the premises is completed. The owner can install a suitable door in the room, and then arrange the required furniture and accessories in the bathroom.
Accessories include mirrors, lights and lamps, various hooks. It is not recommended to install the door before the repair is completed, since during roughing and finishing work there is a high probability of damaging it.
Installation of a new piping system
Modern finishing technologies provide for hidden communications. Therefore, if you decide to remove pipes that do not decorate the interior, there are two options: cutting channels for laying them in the walls or installing a false wall made of plasterboard or plastic panels.
The first option is more suitable for brick and cinder block (gas foam concrete) houses, the second – for houses made of reinforced concrete slabs. Grooving channels in such slabs is a very labor-intensive process that can damage the integrity of the iron frame of the wall.
To groove, mark the passage of water supply pipes on the wall and then, using an apparatus for cutting channels in walls or a “grinder” with a diamond-coated disk, cut two parallel grooves 5 mm wide and 5 mm deep in the wall. exceeding the diameter of water supply pipes.
After this, using a hand chisel and hammer or a hammer drill with a cup chisel, the concrete is selected between the cuts. Niches are installed in places where tees, hidden mixers, and thermostats are installed.
The assembled metal-plastic pipes are laid in channels and secured with metal or plastic clamps. Plugs are installed at the ends of the pipes. The installed system is connected to the water supply and tested for leaks, leaving it under operating pressure for 24 hours. If there are no leaks, the canal is filled with quick-setting gypsum putty.
Replacement and repair of communications
Having gained open access to the riser and supply pipes for hot and cold water, you can begin to replace, repair, and install meters. In old houses, the wear and tear of all communications reaches extreme values, so it is worth taking care of replacing the riser and pipes in your apartment. The best material for the riser will be reinforced polypropylene, and it is better to entrust all work on its replacement to specialists from the housing office. It will be faster and better than replacing it yourself. Responsibility for the work performed and possible accidents will lie with the installers and the management company.
Piping in the toilet
Further intra-apartment wiring can be done on your own using a metal-plastic pipe or corrugated stainless steel. Plastic pipes cut well and are easily connected to each other using fittings and a special soldering iron. This connection turns out to be very reliable and durable, and a wide range of pipes and fittings allows you to build wiring of any configuration in the bathroom.
The gray or white pipes themselves look quite aesthetically pleasing, but it would be more correct to place them in special boxes, which will then be covered with finishing materials.
For a small toilet, this is the optimal solution - the riser is covered with a vertical one, and the pipe distribution - with a horizontal box made of moisture-resistant plasterboard or plywood. Additional sound insulation can be placed in the vertical box.
It is also possible to lay the pipe in a specially hollowed out cavity in the wall. This option looks more aesthetically pleasing and takes up less space. You just need to make sure that the valves that shut off the water to the apartment are easily accessible.
Installation of new electrical wiring
If the bathroom requires the installation of additional electrical appliances: a water heater, a hairdryer, additional sconces, switches or sockets, then before plastering the walls, lay the channels, similar to the channels for water supply pipes. Niches for the installation of hidden sockets and switches are drilled using a cup drill d 60-80 mm. on brick or concrete with a hammer drill.
It is recommended to place all electrical wiring in the bathroom in corrugated round PVC channels of the appropriate diameter. The installed electrical wiring is checked for operability using an electrical voltage indicator, after which the exposed ends of the wires are reliably insulated, and the electrical wiring is disconnected from the power supply.
Price issue
If you have read this far, then you are no longer worried about starting a toilet renovation. However, we still need to talk in detail about how much it will cost to decorate the interior of a restroom. It’s worth noting right away that by doing everything yourself, you save a decent amount of money, but you will still have to spend money, since these days construction and finishing materials are quite expensive.
To get accurate numbers, it is best to go to the store in person and do all the calculations yourself, since prices can vary greatly depending on the region. In addition, 30 percent should be added to the calculations obtained, which will go to cover rejection and possible additional costs. By the way, if you have been planning to update your bathroom for a long time, but did not know where to start renovating the toilet, then it is better to immediately decide how much money it will take and whether you can afford it.
The table below will make this task a little easier for you.
| Material | Quantity | Price in rubles |
| Waterproofing mastic | 5 kg | 1500 |
| Tile adhesive | 25 kg | 340 |
| Grout | 5 kg | 410 |
| Antiseptic primer | 5 l | 500 |
| Tile | Square meter | 50-600 |
| Floor tiles | Square meter | 300-2800 |
| Screed mixture | 25 kg | 300-780 |
| Drywall | 1 panel | 200-500 |
| Accessories for drywall | Set | 30-80 |
| Wooden beam | 6 m | 90-220 |
| Lining | Square meter | 160-260 |
| Corrugated pipe | 1 meter | 125-200 |
| Metal-plastic pipe | 1 meter | 70-120 |
| Compression fittings | 1 piece | 250-500 |
| Universal mixer | 1 piece | 1400-2500 |
In addition to all of the above, you will also need to purchase new plumbing equipment. It is very difficult to determine prices for it, since everything here depends on the individual preferences of each person. You can purchase both a budget option and luxury plumbing fixtures from world-famous brands. When choosing a toilet and sink, you should start from your real financial capabilities. If you used inexpensive tiles for tiling the room, then there is simply no point in having a European toilet. It’s better to do everything in unison so that everything in the interior harmonizes well with each other.
Leveling the ceiling and walls before finishing
Regardless of what type of finishing will be used in the future, the ceiling and walls in the bathroom, after removing the old ceramic tiles or plastic panels, are re-plastered with moisture-resistant gypsum plaster or cement-sand plaster with the addition of liquid glass to make it waterproof.
If the ceiling in the bathroom is not planned to be suspended or suspended, after plastering it is puttied twice with finishing gypsum putty (Vetonit VH or similar from another manufacturer). Drying time before treatment with an abrasive mesh is at least 24 hours.
After final sanding, the ceiling surface is swept with a broom or hair mop and treated twice with a deep penetration acrylic primer. After the primer has dried, it is painted with high-quality water-dispersion paint in 2 layers.
Finishing work
Floors
The specifics of the room limits the choice of flooring. Of all the options, only self-leveling floors and tiles are suitable for the toilet.
Self-leveling floors look attractive, but they have two huge drawbacks:
- High price;
- A very complex work process.
If you use them, it is better in a place where they are visible. In the toilet, they will be hidden. So, there is only one option left - tiles.
Considering that the toilet has been dismantled and the base has been prepared, laying tiles in the toilet with your own hands is an extremely easy process. Choosing tiles is a very sensitive issue. We have no right to advise on color and design, but we will help you figure it out with sizes.
The dimensions of a standard toilet in an apartment are 0.8 by 1.2 m. For ease of work, try to find a tile that fits into these dimensions without waste, for example 40 x 30 or 40 x 40. In this case, you will need to glue only 8 or 6 elements . Please note that the smaller the number of elements in the mosaic, the easier the work is. And for the price, this choice will be quite acceptable. For example, from the manufacturer CERROL, in the Nero (Black) series, 1 m2 of tiles measuring 40x40 will cost 1,304 rubles. Enough for the toilet and there will be practically no waste left.
There is another option for light finishing of the floor in the toilet - mosaic tiles. These are ceramic tiles measuring 2 x 2 cm, glued to a backing. By choosing the size of the sheet, you can cover the entire area in 2-3 steps. But this option, subsequently, will not manifest itself in the best way.
The fact is that small elements of the floor covering visually reduce the size of the toilet.
Tile adhesive "Unis 2000" in a 5-kilogram package will help you cope with the task perfectly. Its price is 130 rubles. Consumption ≈ 4-5 kg/m2.
You will also need:
- Notched trowel;
- Crosses;
- Laser level;
- Square.
The thickness of the crosses is no more than 1-2 mm. In a small room, large seams will not look aesthetically pleasing.
The method of laying tiles is direct. The toilet is too small a room to put a beautiful pattern in it.
Work progress:
Dissolve the glue according to the instructions on the package. If you followed our advice and chose a large tile, then knead the entire package. While the mixture is swelling (4-5 minutes), adjust the laser level so that the horizontal beam is projected at a height of 15-20 cm from the floor. TIP: it is most convenient to place it on a horizontal sewer pipe. All laser levels have a self-leveling head, so even if there is a slight tilt, the beam will still show the true horizon .
The floors are being swept. Apply the finished adhesive onto the tiles with a notched trowel. Please note: the glue must be spread over the entire surface. This will not only increase the adhesion area, but will also allow you to drill holes for attaching the toilet in the future without fear of splitting the tiles. The thickness of the adhesive composition should not exceed the thickness of the tile! Place the tile in place. It is better to start gluing from the wall opposite to the entrance. Move the glued element with an amplitude of 2-3 mm.
By successively applying a square to each corner of the tile, compare the level at which the laser beam is projected. If necessary, straighten the tiles.
Glue the second tile in the same way, level it and then insert the crosses. There should be 2 crosses on each side of the tile.
With proper planning, you will only need to trim the tiles once to get around the riser pipes. To do this, it is best to use a grinder with a cutting disc. ATTENTION: the disk must be specialized, without radial cuts.
Use a tape measure to measure the distance you need to cut. Most likely, this will be a corner sector. Set aside the resulting dimensions on the front surface of the tile.
Tip: stick masking tape on the tile, it’s easier to mark on it.
Place the tiles on a flat surface and secure. When working with an angle grinder, be sure to use glasses!
It is necessary to cut through, so there must be soft material under the tile (a wooden block or two pieces of plasterboard).
The cut edge can be sanded.
If there are gaps of 1-2 cm, then distribute them evenly so that they fall between the tiles and the wall. Subsequently, they will be covered with wall finishing materials.
According to the diagram outlined, all floor tiles are glued. After a day, you can walk on it and at this time they begin to grout the joints. The optimal material for filling gaps between tiles is silicone sealant. It is easy to work with, and after drying it produces an elastic seam with impeccable hygienic characteristics.
To work, you only need white silicone sealant in a tube and a lint-free cloth.
Cut off the spout of the tube so that the thickness of the silicone that comes out is minimal. Insert the container of sealant into the gun and apply even pressure along one of the seams. Excess silicone protruding outward is removed with a slightly moistened cloth. The gaps must be filled flush.
The silicone should cure within 3-5 hours. Then you should lay cardboard on the floor, and you can start finishing the walls.
Walls
Wall decoration is possible in two materials: ceramic tiles or wall panels. In principle, we do not consider painting and whitewashing, and other materials have low moisture resistance.
Tiles are a traditional option for the toilet. It looks presentable and lasts a very long time. But there are points in which it is inferior to plastic panels. In particular, PVC panels:
- Cheaper;
- Glue easier, faster, do not require professional skills;
- Models with 3D effect look gorgeous;
- You can easily change and “refresh” the appearance;
There is one more nuance that can influence your choice. In the toilet, you will need to close the water riser. If you use wall panels, you can cover this unsightly need without much difficulty and preliminary preparation.
In addition to everything, you can improve the appearance if you choose wall panels 40 cm wide, just the size of the tiles. All finishing will take on the appearance of a finished composition.
To fix wall panels, “Liquid nails” are required. We recommend using “Moment Installation”.
To work you will need:
- Bathroom wall panels;
- Liquid nails with a gun;
- Hacksaw for metal;
- Construction knife;
- Tape measure and marker.
The panels begin to be glued from the place where they fit entirely, without cutting to width. Measure the height and mark the required size on the panel. When sawing off excess metal with a hacksaw, make sure that the lamella does not bend or break at the very end of the cut.
The glue is applied in continuous strips along the entire length, the diameter of the emerging roller is 4-5 mm. There should be a distance of 5-7 cm between each strip of glue. Immediately place the panel in place and move it slightly from side to side to spread the glue. But immediately remove this panel and give it a shutter speed of 3-4 minutes. This is required for the adhesive composition to interact with oxygen in the air.
After curing, the panel is glued. To control the vertical position of each plank, use a plumb line. Press the lamella firmly for 30-40 seconds and move it a little
All panels are fixed in a similar way. But to bypass the water riser, proceed as follows.
Explanation: Between the front and back sides of each plank there are stiffening ribs. If you cut the back side of the panel along the entire length along these edges, then it can be bent and the rounded areas can be pasted over.
In the place where the riser is located, on the back side of the panel the back sheet is cut off along with the stiffening ribs. Additionally, the lower part where the sewer pipe exits is trimmed. To make a neat outlet for water pipes, they are unscrewed from the shut-off valve on the riser. And a hole is made on the panel according to the size of the outlet itself. Such an operation can only be carried out if you work with wide panels!
A horizontal sewer pipe can be covered with scraps of wall panels, leaving a hole for connecting the toilet.
This option for finishing the walls in the toilet will avoid the use of end strips. After all, the edges near the entrance will be covered with a door casing.
Instead of a plinth, glue a strip. In appearance, this is the same baseboard for a bathtub, only narrow.
Ceiling
The decorative finishing of the ceiling in the toilet, when the walls and floor are already decorated, should be started as the final chord that will complete the entire composition. If there are large dark tiles on the floor and dark panels on the walls, then the ceiling should be white and gold.
There are two options: a slatted ceiling or PVC ceiling panels. In terms of appearance of the finished coating, they will practically not differ. But the slatted ceiling will “steal” at least 7 cm from the height, due to the fastening system. And its installation will take an order of magnitude longer.
With PVC ceiling panels, the whole process will take 40-50 minutes.
Considering that they will look the same, a sane person will choose PVC ceiling panels.
Using the example of two-section strips with gold, produced by Olympia, we will describe the installation process. The width of the lamellas is 24 cm, the length is 3 m. The price of one plank is 180 rubles. 2 panels are needed for the ceiling in the toilet.
They are glued to the same “Moment Montage”. The lamellas are adjusted in length and glued, starting from the entrance, according to the technology described above.
Around the box covering the riser, the panels are cut with a construction knife.
Instead of a ceiling plinth, we recommend gluing a flexible Cesar profile. Its height is only 3 cm, and its elasticity will allow you to easily walk around the round box around the riser.
Laying tiles on walls
Laying tiles requires professional skills. It's difficult to lay tiles straight the first time. The smoother the wall, the easier the installation process. Therefore, when plastering a wall, one spatula is not enough. It is imperative to use an aluminum rule with a length of at least 1000 mm. to eliminate differences in plaster along the plane of the wall.
Particular attention is paid to the corners of the room. It is necessary to strive to give them the correct angles of 90° in all three planes.
The tiles are laid on a special tile adhesive or synthetic mastic. The first method allows, by varying the thickness of the applied layer of glue, to level out (smooth out) the unevenness of the wall. A sticker on polymer mastic does not provide this opportunity. Apply tile adhesive to the tiles using a comb spatula. Then the tile is applied to the wall and, by tapping the handle of a (wooden) spatula or rubber mallet, pressed firmly against the wall, checking its position using a building level.
For inexperienced craftsmen, mounting crosses placed at the corners of the tiles are a great help in maintaining jointing between tiles of the same width.
The greatest difficulty for beginners is cutting it.
A tile cutter is required. Never buy small tile cutters - according to the size of the tile. They often break it and have a very weak lever that bends quickly. The tile cutter should be as large as possible.
If possible, use an electric tile cutter or grinder with a thin diamond wheel.
Selecting corners in tiles to bypass technological holes, pipes, niches, channels is only possible using a grinder.
Round holes for sockets or water supply pipe outlets are drilled with a special drill attachment - a “ballerina”.
For holes with a diameter of up to 10 mm, lance-shaped carbide drills or diamond-coated drills are used.
The seams between the tiles are grouted with a special grout for seams of the appropriate color, using rubber spatulas. Excess grout is immediately removed from the tiles with a damp sponge, without allowing it to dry.
Cleaning the premises
A complete renovation in a Khrushchev-era building involves clearing everything installed in the toilet. Only the supply pipes, riser and bare walls and ceiling should remain. For convenience, it is better to carry out the work in the following sequence:
- We knock off the old tiles from the walls using a hammer drill or a hammer and chisel. It is also better to remove old plaster or wallpaper by first soaking it with water. If we carry out finishing on the old coating, we will have to reduce the size of the room by 3-5 cm, which is undesirable for such a small space. Moreover, it is unreliable and short-lived.
- We remove the tiles on the floor. We clean the resulting surfaces with a metal brush attachment on a drill.
- We wash the whitewash from the ceiling and wash away dust and dirt from the walls.
- Now you can start dismantling the plumbing. To do this, turn off the cold and hot water supply taps. If you are renovating a combined bathroom, you will need to disconnect the sink along with the faucet and drain. Usually, after old sinks, the mounting brackets remain - they also need to be dismantled.
- The toilet itself can be left until the last minute so that you can use it. Before removal, drain the water from the tank, unscrew the toilet fastenings to the floor and knock off the place where it drains into the riser, if it is cemented. We remove the drain pipe all the way to the riser; it will no longer be useful.
The better the room is cleaned at this stage, the easier it will be to do finishing work later, especially with tiles and wallpaper. The exception is finishing with PVC panels, for which it is enough to make a frame on top of the old walls.
Bathroom floor covering
Floor tiles are laid using a screed. Before pouring the leveling solution, a layer of PVC film waterproofing is laid on the floor. Damper tape is glued around the perimeter of the room.
If you plan to install a “warm floor” - water or electric - lay out a layer of foil insulating material "Penofol" 3-10 mm thick. On top of it are plastic pipes for installing a heated floor or an electric heating cable. Using the supplied fasteners, they are attached to the floor. After this, filling is carried out with a self-leveling solution.
When using a finishing polymer floor based on epoxy resins with a decorative effect, you can do without further laying of ceramic tiles.
If tiles are laid, the technology corresponds to that when laying tiles on walls.
The room can be used for further work only after the finishing polymer floor or adhesive composition for floor tiles has fully gained strength.
If the walls are not finished with ceramic tiles, a plastic baseboard is installed around the perimeter of the bathroom.
Features of a combined bathroom
The main reason why apartment owners decide to combine a bathroom and toilet is the lack of usable space. Immediately after combining two small rooms, a much larger area is obtained. You can create a cozy, functional bathroom.
Thanks to the increase in area, the owner has the opportunity to add new functional options to the bathroom.
When combining a bathroom and a toilet, the following advantages open up:
- the result is one spacious, multifunctional room;
- at least one wall is removed, which means lower costs for finishing materials and no need to install an additional door;
- you can install new plumbing fixtures and install useful engineering fixtures;
- you can organize the space in a new way.
There are no disadvantages when combining a bathroom. Except, perhaps, for the need for redevelopment work.
There is also an important point that is worth considering before combining a bathroom. If the wall between the bathroom and toilet is load-bearing, it will not be possible to combine these rooms. No organization will give permission for this.
If the wall is not load-bearing, you will still have to resolve some bureaucratic issues, in particular, to legitimize the redevelopment. This will require effort, time and money.
Few people are afraid of this. Everyone understands that all you have to do is stand in line for a bit, visit a couple of offices, stamp a couple of pieces of paper, and you can get a functional room. That is, the end justifies the means.
So, you have a combined bathroom or you have remodeled it by combining a toilet and a bathroom. Now is the time to think about renovations. How to work correctly and in what sequence will be discussed below.
This is useful: how to choose an installation for a toilet
Installation of plumbing equipment
They start with installing the bathtub - as the most bulky and heaviest equipment.
Using screw feet, the bathtub is leveled on the floor surface. Drain and overflow siphons are connected and connected to the general sewer system. Pour a small amount of water and check the connections for leaks, leaving the water in the bathroom for 12-24 hours.
If planned, a podium sheathing is arranged around the bathtub. It closes with a removable screen. It is impossible to install a blank wall lined with tiles; this will complicate access to the sewerage system in the event of an accident.
Then other equipment is installed and secured - a sink, toilet, bidet. Checking the tightness of the connection with the sewerage system is carried out in the same way as for the bathtub - by filling the siphons or water valves with water.
Connection to the water supply system in most cases is carried out using flexible hoses in a metal braid. A more reliable connection is using metal-plastic pipes.
The mixer and taps are connected to the outlets of the water supply pipes using eccentrics, which allow you to adjust the width of the pipe outlet from the wall in accordance with the distance between the mixer inlets.
The optimal insulating material is FUM tape or thread. Silicone plumbing sealants must not be used to seal threaded connections of plumbing equipment! They cannot withstand the pressure in the water supply system and quickly leak.
Installation of doors and additional equipment
Once the installation work is complete, the plumbers install the bathroom doors.
The door frame is assembled in a separate room on a strictly horizontal surface. First, lay out the door leaf. Around it are elements of the door frame. To maintain the gap between the frame and the door leaf, insert the gaskets included in the kit or fiberboard strips 2-3 mm thick. Mark the location of the door hinges. Using a chisel, select grooves on the door leaf and door frame and screw on the hinges.
The opposite elements of the box are fastened with two transverse slats on self-tapping screws.
The door leaf with the frame is installed in the doorway. It is checked in 2 planes according to the level of horizontal and vertical installation. They are fixed using wooden wedges and foamed around the perimeter with polyurethane foam. To prevent foam from getting on the door leaf, it is recommended to cover it with plastic film.
After polymerization of the foam, the excess is cut off with a knife and the trim is installed. They cut into the door handle with the lock.
Additional equipment: towel racks, shelves, cabinets, soap dishes and clothes dryers are attached to the tiles using double-sided foam tape. If they are heavy, holes are drilled in the tiles. Only PVC dowels should be used.
The main lighting is mounted on the ceiling. Connect additional lighting fixtures and install sockets and switches.
No one is immune from everyday surprises, especially when it comes to such an unpredictable element as water. She can transform the bathroom...
- A process that really requires special attention is the renovation of a bathroom in a new building. This is not surprising, because as soon as the owner moves into a new apartment, most often, he sees bare walls and the absence of any design.
Unfortunately, it is strictly not recommended to make expensive repairs in the first year of residence, because otherwise, after some time, repair work will have to start from the very beginning. This is due to many factors, such as shrinkage of the foundation, and, as a result, slight shrinkage of the entire structure. What to do in such a situation will be discussed further.
Preparation and finishing of surfaces
It is best to start with the walls and ceiling. Thus, concrete walls can be easily primed, but brick or cinder block walls may require putty. In general, the planes in such small rooms rarely have strong deviations, otherwise you will have to resort to cladding with plasterboard or PVC panels.
Wall putty
For puttying, we will need two spatulas - a working one, 30 cm long and an auxiliary one, 5 cm long, a cement-based putty mixture, for example, Vetonit. Preferably a drill with a special attachment and a bucket. The finished mixture is applied to the base with a short spatula, and then spread from bottom to top along the wall. By changing the angle of inclination of the working tool, you can fill deep depressions and level the already applied putty. After 3-4 hours, you can re-treat problem areas. The time for complete drying of the putty is 24 hours. Then the wall is sanded and primed.
After leaving the walls to dry, you can start leveling the floor. For this, a quick-drying screed is used. The mixture is prepared based on 1 m2 with a thickness of 1 cm, 12-13 kg of dry material will be required. Pour the resulting solution in a thin layer onto the floor, and then level it with a spatula, checking the installed beacons and level. It is necessary to obtain a flat horizontal surface.
Leveling the floor
When all the preparatory work has been done, it is time to implement the planned toilet renovation ideas. It is also better to start finishing with the walls and ceiling.
Where to begin?
We are starting to renovate a bathroom in a new building. First of all, you should determine for yourself exactly who will carry out the repair work: hired specialists, or you yourself. It is also recommended to determine the approximate scope of work. In this situation, the advantage is that there is no need to remove the old tiles, but special attention will need to be paid to leveling the walls: the conveyor work of regular plasterers is rarely at least satisfactory.
Among other things, you should imagine exactly how the room should look after the renovation is completed. This applies not only to the design of walls and ceilings, but also to the arrangement of furniture and plumbing fixtures.
Binding
The purpose of this stage is to determine what is convenient and what is not, and then what to leave in place and what to move. Already at this stage, you can estimate the future distribution of communications, the complexity and cost of the work. What almost always remains in place is the toilet: its 100 mm outlet must fit directly into the riser cross. Exceptions are possible in very rare cases, see below.
Take a look at pos. B and C in the picture at the beginning of the page. This is the same bathroom in the brick Khrushchev-era buildings of the first projects before the “bulldozer exhibition”. They differ only in the arrangement of plumbing fixtures relative to the door. But pos. B – “impenetrable”: in order to place a washing machine here, you will have to replace the bathtub with a shower stall. And the bathtubs in such houses were cast iron and of excellent quality: go through an active detergent, replace the siphon - and they will last for another hundred years.
But here at pos. The washbasin can be hung on the opposite wall. Then you will have to thoroughly tinker with the pipes, but space for the washing machine will be freed up without any problems. Also, for example, for pos. The space for the washing machine is freed up if the bathtub is replaced with a reclining one and turned 90 degrees, and the washbasin is placed on a long wall. In general - create, invent, try. But with mandatory consideration of the rules for sewerage installation.
What should you consider when preparing for renovation work?
Considering the fact that the house was recently built, you should not immediately undertake expensive bathroom renovations in a new building. It is much more relevant to purchase inexpensive tiles and stick them on the walls and floor. As for the ceiling, decorative panels are ideal for it. This approach is due to the slight shrinkage of the structure. Depending on the time that has passed since the foundation was poured, shrinkage can take from 1 to 3 years.
If you neglect this advice, you can get extremely negative consequences. Thus, expensive tiles will begin to crack and very soon lose their attractiveness.
Among other things, new residents can expect such surprises as “flooding” by their upstairs neighbors, as well as leaks in their own apartment. In the first case, you will have to urgently repair the ceiling. As for the second option, it will force an urgent opening of the floor covering and repair of communications if inspection hatches were not provided.
Styles and design
The most common and economical design option for the ceiling is ordinary whitewash. Special tiles are a more modern, beautiful, but expensive option. If you want to get creative, then mirror tiles
on the ceiling - the ideal solution. Another good option is suspended ceilings.
When it comes to walls, the main option is tiles - both beautiful and safe.
Note!
Many experts recommend laying the wall with rectangular tiles in light shades.
Advantages and disadvantages of renovation work in new buildings
During renovations in an apartment located in a new building, specialists, as well as the owners themselves, are faced with a number of features that are completely uncharacteristic of secondary housing. Let's look at them in more detail:
Flaws
As for the alignment itself, in most cases it takes a long time. As a rule, a bathroom in a new building, like most surfaces in the entire apartment, has differences in walls and ceilings that need to be removed;
Advantages
- There is no need to get rid of old wall and floor coverings;
- Possibility to choose any design. If your own imagination and wishes are not enough, you can look at examples of photos and videos.
Materials
The load on this room is very specific. It is often quite humid here, often the toilet becomes dirty and also filled with specific aromas. That is why it is necessary to use facing materials that do not absorb aromas or dirt, are resistant to high humidity, and are easy to clean.
For repairs and maximum leveling of the floor, it is preferable to use a self-leveling floor surface.
It is necessary to prepare a mixture using cement. It is better to use porcelain stoneware tiles as cladding. Drywall should also be used if it is necessary to level the wall surface, but choose a moisture-resistant option.
For the frame part, according to advice on repairing toilets from professionals, steel profiles are suitable. since the natural massif is subject to fungal attack and rotting. You can stick tiles, wallpaper onto the drywall, or you can paint it.
In the process of laying out a small area of the room, this leveling method is not suitable, since due to the sheathing the space will be narrowed to the maximum. You can apply plaster to the surface of the walls.
What should you consider when choosing a construction team?
It's no secret that the services of qualified specialists are quite expensive. That is why, in most cases, those who decide to purchase a new building prefer to turn to craftsmen who come from other (not at all European, but very much the opposite) countries and work illegally. As a rule, the cost of their work is much lower, which in most situations is crucial, but we should not forget the folk wisdom about being stingy and double payment.
In this case, it should be remembered that an illegal worker can be “found” by law enforcement officials at any time and sent to his sunny homeland. Among other things, it is not uncommon for construction crews to receive an advance payment and, after a few days, simply disappear without even starting work. To avoid this, payment should be made upon completion, that is, as the bathroom in the new house takes on a finished appearance.
Another feature concerns the quality of work. The fact is that illegal builders understand perfectly well that if poor quality is revealed, the customer will not be able to contact the company and make a claim, which means there is no need to strain too much.
When choosing a construction team, you should also take into account the financial side of the issue. There are often cases when the selection and purchase of building materials is entrusted directly to employees. Thus, the owner does not waste his own time on travel, but, at the same time, may become a victim of dishonesty of specialists. This applies to both the cost of materials and their quantity. To avoid this, experts recommend not neglecting shopping trips.
An alternative is to first visit construction markets and supermarkets, study their range and prices for materials that will be needed for repairs. It is also recommended to calculate the amount of material in advance and draw up an estimate.
Based on the above, you should select specialists with great care. It is best if this is a construction team that officially works for a company, where it will be possible to send a claim if inconsistencies or poor quality are detected.
- Facing
- Installation of equipment
- Final stage
The rooms are noticeably different from the restoration of other residential premises. Significant humidity, frequent vaporization and exposure to elevated temperatures cause additional requirements for materials and repair technology. Step-by-step room is a necessary condition for the quality of work.
Due to increased humidity and temperature, renovations in the bathroom must be carried out with increased requirements for the quality of materials and work.
In modern times, a huge range of construction and finishing materials is produced. The use of different materials and equipment requires the use of certain technologies for their installation. A step-by-step bathroom renovation includes all the necessary stages (steps) and allows you to solve emerging problems. In general, this repair approach involves the following steps:
- Planning.
- Preparation
- Directly carrying out repair work (installation).
To calculate the amount of materials, the bathroom must be measured and the condition of the plumbing and pipes assessed.
Planning is the first step.
Any step-by-step repair should begin with an assessment of the volume and timing of the work, for which it is necessary to outline an action plan and cost estimate. First, the condition of the bathroom itself (ceiling, floor, walls, doors) and the need for repairs are determined. Then the need to replace plumbing, water supply and sewer systems, electrical wiring, and ventilation is assessed.
Using a tape measure, the overall dimensions of the bathroom, walls, as well as ledges or niches, if any, are measured. After choosing the desired design, a list of required materials for repair is compiled (recommended materials are discussed below) with a calculation of their quantity. The length of water and sewer pipes, as well as the length of electrical wires, is measured with a tape measure. The required quantity and range of equipment and materials are determined.
Return to contents
The next step in the renovation is preparing the bathroom. First, you need to empty the room of all furniture and old plumbing, including dismantling the bathtub. Then the bathroom is freed from pipes and ventilation system. If necessary, electrical wiring is dismantled.
Before starting finishing work, you need to remove all furniture and plumbing from the bathtub and remove the old finish.
After freeing the bathroom from all obstructions, the tiles from the walls and floor tiles are removed. The ceiling is cleaned, and if there were old suspension systems, they are dismantled. In cases where paint was applied to the walls or ceiling, it is completely removed.
The main tools needed for preparatory work:
- Bulgarian;
- plumbing keys;
- hammer (sledgehammer);
- sandpaper;
- chisel or chisel;
- pliers;
- wire cutters
Return to contents
The next step in bathroom renovation is the installation of communications, namely pipes, hidden electrical wiring, and a ventilation system. The installation is carried out in this sequence. First, water and sewer pipes are installed. They are brought to the points where it is planned to install the bathtub and sink. Metal or plastic (polypropylene) pipes can be used for water supply and sewer drainage.
After dismantling the old coating and plumbing, new pipes and wiring are installed.
Installation of hidden electrical wiring is carried out from the junction box to the points where it is planned to install sockets, switches and lighting. When laying, it should be taken into account that in further stages the wiring must be inside the outer layer of the wall and ceiling; it must be laid in a pre-made in-depth channel. It is recommended to use wire type PV, VVG or PPV with a copper core. It is recommended to use exhaust type ventilation. When using forced ventilation, an electric wire is supplied to the fan installation site. If standard air exhaust into the shaft is provided, the ventilation window is covered with a decorative plastic grille.
Basic tools for installing communications:
- plumbing key;
- Bulgarian;
- screwdriver;
- pliers.
Return to contents
An important step is to level the surface of the ceiling, walls, and floor.
First, the ceiling is leveled.
Before finishing, the walls, floor and ceiling are leveled.
When renovating a bathroom, you usually choose two types of ceiling: lined with slabs of moisture-resistant materials (for example, plasterboard with a waterproof layer) or painted over plaster. In the first case, there are no special requirements for leveling the ceiling surface.
The second design requires a flat ceiling and more thorough plastering. If the “rough” ceiling is smooth, it is enough to apply a small layer of putty, but so as to cover the electrical wiring. If the foundation has numerous and deep flaws, a thickened layer (or two layers) of cement-based plaster is applied. The plastered (putty) surface is carefully rubbed down with sandpaper.
The walls of the bathroom are leveled in order to obtain a surface without holes and other large flaws, taking into account that tiles will be laid on it. The walls are leveled using the plastering method, controlling the evenness vertically and horizontally. The surface is not grouted.
The rooms are made using self-leveling flooring. This composition is obtained by diluting a standard dry floor mixture. Filling is carried out from the far wall to the door by applying a uniform layer of mortar with a spatula. During the pouring process, it is necessary to constantly monitor the horizontalness of the resulting surface.
All leveling operations are carried out with a spatula, and grouting is carried out with emery cloth. Consumables: dry plaster, dry putty, dry mixture for self-leveling floor, cement, PVC glue.
Return to contents
Stumbling blocks
Difficulties and mistakes when renovating a combined bathroom are the rule rather than the exception. The reason is primarily the cramped space; then – the coincidence of sharp fluctuations in temperature and humidity, characteristic of a bath, with the flow of biologically active substances and caustic volatile chemical compounds from the toilet into the room. Therefore, ideas for renovating a bathroom with a combined bathroom, which arise when examining it on plan and in kind, should be carefully adjusted to the existing conditions.
For example, look at position G in the figure. The size of the room does not allow you to turn around without catching something, and how can you work in such a cage? Will the favorite washbasin somehow fit there? And what will remain of the internal volume if you also hang a boiler with a cabinet for toiletries? Will it be possible to breathe there after such a renovation by turning on the shower for 10 minutes? So, to begin with, it is better to understand what kind of problems we will have to face during repairs, then clearly imagine the procedure for carrying out the work, and only then get down to preparation and the repair itself.
Subjective-psychological
Errors of this kind occur due to the lack of designer and builder skills. There is a whole science - ergonomics - that deals with how to avoid inconvenience and create convenience in the smallest possible volume. It would take too long to describe at least its basics, so let’s explain it with an example. Let us just point out that the basis of ergonomic design is accurate measurements.
Now look at position A in the figure. At first glance, it seems that if you move the toilet 7 centimeters towards the window, and rotate the washbasin 90 degrees clockwise and hang it on the adjacent wall, then instead of a shower stall you can install a corner bath. Let's sit on the toilet and measure - yes, there is still 2-3 cm left from the shoulder and hip to the wall.
We decided, we did it, and then what? It turned out that a man leaning over the washbasin, brushing his teeth, touched the face of the person lying in the bathtub with his fifth point. But lying in the bath is the opposite – there’s nothing at all from head to toilet, and suddenly someone in the family just has an urge? You can’t put up a screen: there won’t be enough room to sit.
Therefore, the first recommendation: familiarize yourself with the basics of ergonomics and together, together, on the spot, in the bathroom itself, carefully consider possible repair options. Two or three of us because, firstly, the mind is good, but somewhat better; secondly, you need to feel the tightness, corners and walls with your sides, so that later everything turns out better, and not as always.
Technical
In addition to the above problems of a combined bathroom, the likelihood of flooding is twice as high here. Therefore, when installing the floor, you need to make the thickness of the screed smaller (“the tub” will be deeper), but the waterproofing will be more reliable. An increased intake of unwanted impurities into the air requires increased ventilation and careful selection of materials.
Technical difficulties, as we know, entail unnecessary costs. You can and should save money, but not at the expense of quality and convenience. We will look at some opportunities to reduce repair costs, but keep in mind: any savings will entail an increase in labor costs.
Design-aesthetic
The toilet is an absolutely functional room; its decoration must be precisely linked to the physiological characteristics of a person. The bathroom should be relaxing and give you the opportunity to pamper yourself. Design requirements in both respects are not always compatible, and finally, you have your own taste!
Two ways to combine incompatible things in a cramped, cluttered room are actually applicable: dividing the space and imaginary enlarging it. We will touch on both, but keep in mind once again: “stretching” space is more effective, but more difficult and expensive.
Ninth stage - installation of electrical appliances
When renovating a bathroom and toilet (see photo below), it is necessary to provide in advance for the installation of electrical appliances, such as a washing machine, water heater, meters, etc. In this matter, it is necessary to strictly follow safety regulations. During operation, these devices are connected to electricity, which exposes people to certain risks. Therefore, do not skimp on their installation; entrust this work to professionals. Subsequently, this will not only save money and nerves, but perhaps also save the lives of household members.
Stage four – installation of internal communications
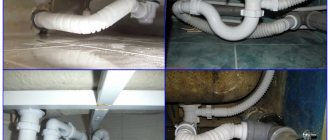
How to renovate a bathroom and toilet so that it meets modern standards? First you will need to decide on the material, in particular, water and sewer pipes. Consultation with professionals will help you choose the correct diameter and wiring diagram.
In modern interiors, it is not customary to put communications to the fore. To do this, it is recommended to use plasterboard structures. For example, there is a large sewer pipe running near the toilet. Outwardly, it does not look aesthetically pleasing, to put it mildly, so you can build a decorative partition here. It is necessary to provide a door through which there will be access to meters and central valves. The remaining pipes are laid inside the wall. To do this, using a grinder, grooves are cut, which are subsequently sealed with starting putty. It is imperative to leave outlets for faucets and drains. This solution will significantly transform the interior of the bathroom.