Expansion joint in the blind area
The soil around the house periodically changes its air-gas regime and swells from frost due to the water it contains, which increases the volume of the soil. Such surface movements create additional load on the foundation and affect the blind area. In order to prevent the destruction of reinforced concrete, which is in contact with the ground, special seams are made in it when constructing a screed. The overall structure of the protective concrete layer around the building becomes less rigid, which allows it to compensate for changes in soil, environmental temperature and settlement of the structure.
Types of expansion joints
The forces acting on the foundation and blind area have different natures and directions. Therefore, the design of expansion joints differs depending on:
- climate at the location of the building;
- soil characteristics;
- material used in construction.
Shrinkage
A coating made of concrete dries and hardens unevenly in different areas. The process of moisture evaporation from below is slower than from above. As a result, in the center the height of the screed is slightly lower than at the edge. Such a misalignment, which has a natural origin, contributes to the formation of cracks in the coating due to the stresses that arise.
To avoid destruction of the blind area material, in industrial construction, cuts are made using a joint cutter irrigated with water. When working independently, slats are laid to a depth equal to 1/3 of the width of the coating, which are then removed.
The resulting distance makes the tensile stresses weaker. The shrinkage is completely worked out, or cracks form along the cuts, which divides the surface into sections independent of each other.
Temperature
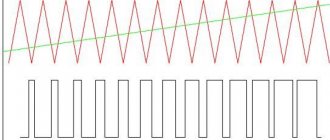
To compensate for temperature fluctuations that lead to compression or expansion of the concrete material, seams are also installed in the calculated locations of the layer. They are made in all reinforced concrete elements of buildings, except for the foundation. This type of damage prevention is required in regions where there is a large seasonal temperature difference. Before pouring, not thick boards are laid between the wall and the screed, but roofing felt and damper tape. According to the standards, if the house has columns, then a distance is also left around the columns.
Blind area around the house: do-it-yourself installation
A blind area is a typical protection for the foundation of any structure from moisture and freezing, so its arrangement is considered mandatory. Today we will study everything related to the installation of a blind area: types, structure, insulation and other points.
The blind area around the house is a special horizontal strip of concrete or other material that removes precipitation from the structure of the walls and foundation. Moisture and dampness, which bring rain or melting snow, negatively affects the condition of the house, especially a wooden one. The log walls gradually darken and rot, and mold forms on the surface. The foundation regularly gets wet and sags. In addition, the risk of basement or basement flooding increases.
To avoid such problems, they make blind areas around the house. Let's look at what types of structures there are and how to install them correctly.
What are blind areas
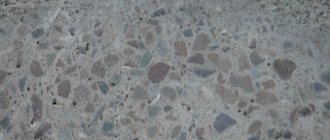
The blind area of the house is a horizontal strip 60-120 centimeters wide. It has a slight slope along the perimeter of the building, due to which the water moves away from the walls of the building and the foundation. Depending on the material of manufacture, they are made of concrete and crushed stone, in the form of paving slabs and stone paving stones.
We suggest you familiarize yourself with How to seal a pipe on a roof made of corrugated sheets
The design performs a number of useful functions:
- Detains and removes melt and rain water from the walls and foundation of the house;
- Protects the foundation from cracking and subsidence;
- Reduces soil freezing under the house and retains heat in the room;
- Prevents the formation of mold and rot, preserves the original appearance of the structure and increases the service life of the foundation;
- It also performs a decorative function and completes the appearance of the house.
Before making a blind area around the house, consider the types of structures and materials, and then choose the appropriate ones. If you plan to create a blind area around the house with your own hands, it is better to choose concrete. Such installation does not require professional training or extensive experience.
Whatever type of construction you choose, it is important to clear the area around the building and make markings. The optimal width of the blind area is considered to be 1 meter. It is important that the ratio of the roof overhang to the house is at least 20 centimeters. Thus, the correct width is calculated by the formula: cornice 20 cm. The wider the blind area, the stronger the protection of the walls and structure from moisture.
The blind areas are laid continuously around the perimeter of the house and are made at a slope of up to five degrees from the building. The slope is formed at the installation stage or when laying the covering and is calculated in the ratio of 15 mm per 1 m width. After marking and preparing the site, make a trench 20-25 centimeters deep and lay the formwork from boards, bars or other available materials. Clay, sand and crushed stone are placed in the formwork. The layers are leveled and thoroughly thrombosed. The height of this base is about 20 centimeters.
A waterproofing film is laid over the base overlapping. For a longer service life, reinforcement can be made. The mesh is connected in the form of square cells using special wire. Do not use a welding machine, as the welding areas will be subject to corrosion! Due to the reinforcement, the blind area will withstand any load.
An expansion joint (expansion or temperature) is made at the junction of the base and the blind area. It will preserve the structure during soil subsidence and prevent splits in winter at sub-zero temperatures. Such a seam represents the gap between the plinth and the blind area, which is filled with sand and fine gravel, mastic or several layers of roofing felt. When pouring concrete, an expansion joint is made every 2-3 meters.
After the work has been completed, concrete can be laid. Please note that the concrete mixture must be of high quality and reliable. Choose concrete of a grade not lower than M200 B15. If you want to make the solution yourself, mix cement, sand and crushed stone in a ratio of 1:3:5. Dilute the mixture with water in a ratio of 60% of cement.
Concrete should be laid gradually in even layers of equal composition. After pouring, the concrete surface is covered with film or cloth and left until completely hardened. In dry weather, you should periodically water the concrete.
During operation, cracks and crevices may appear on the blind area. Such defects are eliminated using liquid cement mortar. Large cracks that occupy a large area are cut down to their full depth and cleaned of dirt. Then the holes are filled with mastic and sprinkled with sand on top. Significant deficiencies are restored using fresh concrete.
Design of the blind area
When the concrete hardens, you need to give the blind area an attractive appearance. This design will not only protect the foundation and walls, but will also become a decorative element of the house and garden area. For covering various types of figured paving elements, including bricks and paving slabs, decorative stone and paving stones. The most durable and reliable are acid-resistant bricks and paving stones, which can easily withstand the stress of walking or weather conditions.
To reduce soil freezing, blind areas can be insulated. Then expanded clay is added to the concrete solution. In addition, concrete can be poured in two layers, and insulation can be laid between the layers. And in order to increase the service life of the structure, it is important to install gutters around the perimeter of the roof and organize drainage. If the design is done correctly, it does not need a curb. However, such an element can be used for decorative purposes and to delimit the garden.
Please note that installation errors and low-quality building materials will shorten the service life of the blind area, and the structure will not last even 5 years. To avoid this, entrust the work to professionals! Experienced “MariSrub” craftsmen will perform any type of work on the construction and finishing of a wooden house or bathhouse. They will calculate volumes and select reliable materials, promptly build blind areas and install roof drainage.
We suggest you familiarize yourself with How to make a blind area around the house
The blind area performs a protective function for the building. It is formed as a barrier that prevents surface water and runoff from penetrating under the foundation. Most inexperienced developers create it based on concrete pouring, resulting in a monolithic coating. This is the main mistake, because any change of seasons provokes soil movement (rains, frosts, thaws, drought). The presence of seams in the blind area prevents the destruction of the protective layer.
• groundwater level (if the level is high, it is recommended to install a drainage system around the perimeter of the house; it will drain water that rises from the foundation during thaws or rainstorms);
• the surface of the blind area should be sloped away from the building, this will ensure natural drainage of precipitation from the base of the house;
• in regions with harsh winters, it is recommended to insulate the outer part of the foundation and the blind area structure;
• when forming layers of protective coating for the foundation, do not forget about waterproofing (mainly roofing felt is used, it is laid in 2 layers with an overlap of 15-20 cm);
The nuances of proper creation
In order for the protective screed around the house to last more than 1 season and not require rework every year, the builder needs to take into account:
- features of the land plot in terms of geology and relief;
- water drainage system;
- the need and location of expansion joints of various types;
- required dimensions and material of the blind area.
If the surface will enter a pedestrian area, possible additional loads should be calculated. The outer coating can play not only a decorative role, but also improve overall strength and wear resistance. The distance between the seams in the blind area is on average 2-2.5 m. More accurate calculations can be made by a specialist who will take into account the material of the walls and the nature of the foundation. For wooden houses with a lightweight concrete base, the distance, type of joint, and its width will differ.
Design standards for a building element
The installation requirements of all construction projects, in particular blind areas, are controlled by a variety of generally accepted normative documents, which specify a number of rules and features.
If your plans are to fulfill everything according to the existing requirements, then you need to comply with all of them, these are: the width of the blind area according to GOST, the height, the angle of inclination of the structure and much more. This element plays a significant role in the durability and comfortable operation of the building itself, and prevents water from entering the foundation structure. It serves as a barrier against flood and rainwater entering near the house, prevents subsidence of the foundation, is a decoration, and plays the role of a special sidewalk around the perimeter of the house.
Many people still don’t know what a building’s blind area is. This is a strip of concrete, asphalt and paving slabs around the house. According to building codes and regulations, it must be installed, as it serves as a barrier to prevent water from entering the foundation structure, which in turn can cause great harm.
This element is made of waterproof material around the entire building. Its width must be at least 70 cm and must be arranged from the wall of the house to the outside. In general, this size depends on the soil structure and the length of the eaves overhangs. In addition to the main function of protecting the foundation from water, the blind area can play the role of a pedestrian zone.
Also, the presence of this element makes it possible to keep the front part of the building clean. Water flowing from roofs hits the ground, thereby splashing components onto the walls. The picture after this, of course, is unsightly, and installing a perimeter strip of concrete, asphalt and paving slabs does not allow this.
What brings much more trouble is that if there is no blind area for a building built on heaving soils. In winter, soil saturated with water swells unevenly, which has a bad effect on the foundation. In this case, insulation is installed around the perimeter of the site. This component also plays a significant role if the house is built on a shallow foundation.
SNiP requirements
According to SNiP dated 2.02.01 83, very often defined as SNiP for the blind area, which has general amendments regarding the installation of the base of construction projects, combining indicators for deformation, the influence of groundwater and more. It is worth following SNiP dated 2.02.01 83 for plan calculations and compliance with certain standards regarding soils, etc. But this document does not take into account certain indicators, so it is not worth recommending it as the main and only one.
In accordance with III-10-75 SNiP, the blind area of the building must be very close to the wall of the house along the entire perimeter. The slope of these structures should be from 1% to 10%. In places that are difficult to reach for instruments, it is worth manually compacting the base part of this building element so that traces of impacts disappear and the material used stops moving.
The external part of these building elements within the boundaries of rectilinear areas should not include curved sections of more than 10 mm in the horizontal and vertical directions. It is important that the concrete poured for these structures meets all the requirements of the material used for the construction of road structures. The standards required for the installation of blind areas are specified in the documents GOST 9128-97 and GOST 7473-94.
This building element is divided into parts using expansion joints. In winter, when the temperature drops below zero, heaving forces begin to work and the whole structure can be torn into pieces. When expansion joints are installed, this should not happen. They should be installed at a distance of every 1.7-2 meters.
To carry them out, you should take a building level, place one of the ends on the formwork being used, bring the second to the surface of the foundation and make a pencil mark on the horizon. And since you need to make a slight slope and set the level of this seam, it is worth adding 3 cm up to the horizon mark on the foundation. The second end must be laid close to the upper corner of the formwork.
Expansion joints in the blind area should be made using concrete mixture. Pour a thin strip of concrete within the formwork along the edges, insert a beacon along the mark on the foundation. It is important that the lighthouse extends out of the concrete to a height of 5 cm. By using sealants in expansion joints, the service life of this building element can be extended.
We suggest you familiarize yourself with why you need a pipe on the roof
The installation of blind areas should also include expansion joints in two directions. The biggest mistake in installing these components is their absence. Expansion joints are needed when the strip is created from a concrete mixture or asphalt. During temperature changes, ground movement occurs.
To prevent such phenomena, it is worth making a blind area together with an expansion joint, approximately 1-2 cm, using bitumen, roofing felt or sealant. If the building already has foundation waterproofing, then it is used as an expansion joint and raised to the extreme level of the building element. In addition, it is important to make this cut across the concrete structure around the perimeter of the house every 2-2.5 meters.
You can make an expansion joint in the blind area using a board whose thickness is 10-20 mm, soaked, treated with heated bitumen and a septic tank. It is installed on an edge in freshly poured concrete.
If when building blind areas you take into account the width of the roof overhangs and the structure of the soil, then during operation defects are unlikely to arise in the future. The width of the concrete or asphalt strip or tiled sidewalk should be wider than the cornice if the soil is normal. If the building is built on unstable soils, then its width should be greater than 1 m.
If you plan to build a building with waterproofing, then you should monitor during operation for possible damage to the structure. To avoid defects in the blind area of the building, experts recommend bringing the waterproofing to the required level - the edge of the structure.
Of course, the construction of any facilities must be carried out in accordance with the data of regulatory documents. To prevent subsidence of the structure, it should be made waterproof. If the soil on which the house is being built can sag due to its properties, then the strip of concrete, asphalt or paving slabs must be at least 2 meters.
Also, in order to prevent the appearance of defects during operation of this structure, it is important to perform reinforcement using metal mesh. In particular, this plays an important role in the construction of structures on heaving soils.
There are many features that should be taken into account when constructing building structures, but among the large number of requirements, we suggest you highlight the main ones. The blind area includes the following design standards:
- the design must include a slope to the outside of the building. This makes it possible to drain water away from the foundation. The slope angle must be at least 1.5 degrees;
- a gap of 10-20 mm should be left between the wall of the house and the blind area, where sand is poured or sealant is poured;
- according to SNiP 2.02.01 83, the strip of this building element should have a width of 1.5 m on type I soil, and 2 m on type II soil;
- if this element also serves as a pedestrian area, then it is important to take into account the requirements of State Regulations 31.01.025;
- the height of the plinth depends on the material used to build the structure. If it is concrete or paving stones, then the indicator should be more than 0.5 m. If crushed stone and gravel are used, then the indicator should be 0.3 m.
Also, some people wonder: is it possible to make a blind area in winter? Experts say that this procedure can be done during the cold season, but it is important to comply with some requirements.
Seam filling
After the concrete has set and the boards and battens have been removed, foam tape or construction sealant should be used to fill the seams. In industrial concrete floors, a flexible profile representing a cathedral cord made of plasticized PVC is used to fill expansion joints. It is produced in lengths up to 500 m and widths up to 6 mm. The seams can be filled with sealant after 60-90 days, and the cord must be laid within a week.
How are they performed?
There are two methods of forming seams using diamond or abrasive wheels:
- installation - when at the stage it is divided into fragments using damping materials laid throughout the entire depth of the slab (glass, timber, polymer tapes, plastic lining, etc.), which can be removed from the seam or remain in it;
- cutting - when a hardening concrete slab is cut to a fixed depth, and the formed seams are sealed with polymer sealants, mastics, closed with special structures or left unfilled. The pitch (strip width) of cutting is determined as follows: the height of the screed (in cm) is multiplied by the factor “24”. The result is the step of arranging the seams (in cm).
They are made perfectly straight; they are allowed to intersect only at right angles. At the same time, the joints of the cuts should not form the letter “T” in plan. When it is impossible to exclude the intersection of seams in the form of a triangle in the plan, the figure is made equilateral. The minimum joint width is 0.6 cm, which depends on the height of the artificial stone layer.
can be carried out within 12 - 72 hours after laying (depending on the air temperature), however, the situation should be excluded when the concrete has completely dried and the cut edge of the material crumbles.
The depth of the sections is 1/4 - 1/2 of the height of the slab. The indoor floor area is considered indivisible (up to 30 m2) when the aspect ratio of such a “rectangle” is no more than 1:1.5. Large areas are divided by shrinkage joints into similar or smaller areas. When the monolith has a length of 25 m or more, it must be crossed with seams. If the tracks of hardening material are 3 meters wide or more, longitudinal seams are made.
On slabs open to precipitation, cuts are made in increments of 3 m, and the maximum area of a single piece is no more than 9 m2. Monoliths of paths (corridors) are cut by transverse seams in increments of up to 6 m (the usual step is twice the width of the material), and L-shaped turns are fragmented into rectangles (squares). Also, the slots separate floor coverings made of various materials, the bases in rooms along doorways, and places where the height of the screeds differs.
Such seams, like those that appear under, are not filled, but are sealed in the open air. The sections of the floor slabs encircling the columns should be square in plan, the corners of which are located opposite the flat edges of the columns (the square formed by the seams is rotated 45 degrees relative to the edges of the column). The structural integrity of the cut bases is ensured by special systems placed in the seams or applied to them. These are metal profiles and seals.
In blind areas, wall joints are filled with roofing material, bitumen or sealant. is divided into sections of 2 - 2.5 meters, which are intersected by seams (perpendicular to the wall) to the entire depth of concrete pouring. Such a separator is formed by a board (fixed formwork), laid on an edge so that its upper edge coincides with the surface of the formwork. Boards (thickness up to 3 cm) are treated with hot bitumen and a septic tank. Special vinyl tapes up to 15 mm thick are also used. Then the formwork is concreted.
Expansion joints in concrete floors are an important part of the equipment.
Concrete pavements expand at high temperatures and contract in cold weather.
This is how the canvas moves and if you do not provide for the design of the seam, the concrete will “creep” and crack.
But if we carry out the seam in accordance with all the requirements of SNiP, we will get a guide that will take the deformation and will not allow it to go to the side, causing cracks throughout the entire floor.
In the text we will analyze the types of seams, nuances and rules for their construction.
Floors consist of a top covering and a screed - almost always made of concrete, not the strongest material that cannot withstand the force of deformation.
Due to its effect on the concrete, it will begin to crack, since it does not have space to communicate further deformation.
And if so, then in order to prevent cracking, concrete joints need to be chipped.
Concrete joints come in 3 types.
Insulating:
- The floor will be independent of the load-bearing walls;
- Eliminates the transmission of deformation from the walls to the concrete screed;
- Created by laying insulation before pouring concrete along the walls;
- The thickness is on average 10 mm;
- May have the shape of a square, circle, straight line;
- The screed thickens by a quarter if the seam is subject to constant pressure loads;
- Can cut around columns in cured concrete in a diamond shape.
Shrinkable:
- Prevents the appearance of tension inside the screed, which occurs due to the fact that the surface dries and shrinks faster than the bottom layer;
- Creates a flat plane at the weakest point;
- This is done using forming slats until the concrete has completely dried;
- It is advisable to make the seam card rectangular, without elongated sides;
- The shrinkage type is also created in the outer corners to prevent cracks from coming out of the corners.
Structural:
- Placed 1.5 meters from other seams, parallel;
- If cut in an area where a shrink or insulation joint is not desired, place sleepers across it;
- It is performed strictly at the junctions of screeds laid at different times (usually yesterday/today).
- The shape of the screed is made using a tongue-and-groove fastening.
- The structural type works in a similar way to the insulating type.
Seam insulation
In order to prevent moisture from getting into the ground floor, basement, and foundation, expansion joints must be insulated from it. If water leaks under the blind area, then all the work to create it will be useless, and the concrete around the house will only play a decorative role. Waterproofing options are calculated based on the nature of the cuts, water pressure, and maximum deformation load:
- Use polymer or rubber seals.
- Place a gernite strand into the cut.
- Close the cut with a waterstop.
- Install profile structures made specifically for this purpose.
How to make expansion joints in a blind area?
To divide the monolithic structure of the slab into separate blocks (cards), first a waterproofing layer is laid on a base prepared from crushed stone and sand, then an electric-welded anti-shrinkage reinforcing mesh. Dividing partitions are placed and secured on it. Expansion seam options:
- It is possible to lay a layer of roofing felt, glass, plastic, polymer film, wood between the foundation and the blind area, and across the plinth strip, to prevent the materials from adhering.
- Another method is to cut expansion joints with a machine using a diamond or abrasive wheel.
Design features of the blind area
Of all the types of arranging a blind area, the most reliable and easiest way to make it is to use concrete. For this:
- The first step is to draw the boundaries defining the perimeter of the structure.
- Remove the soil using the bayonet of a shovel.
- Compact and level the bottom of the trench.
- Use roofing felt to waterproof with an overlap of 15-20 cm.
- Pour in crushed stone and sand and compact again with a tamper.
Expansion joints are created using tape made of vinyl or blocks inside the formwork. After this, the first layer of concrete (5 cm) is poured, and a reinforcing mesh is laid on top of it after the mortar has set. The top layer is poured to form a slope from the wall. If the groundwater runs high, then the formwork needs to be buried 40-50 cm and a drainage pipe should be laid to the bottom.
Why do you need a damping seam, and how to make it correctly?
Recently, to create anti-sediment and temperature cuts, a damper tape has been used, which compensates for linear deformations of reinforced concrete or mortar. Under the influence of heat, the cement screed expands by 0.5 mm/m. Due to this, it puts pressure on the wall of the building, and the resulting additional load leads to the formation of cracks, bulges and chips in the screed. The damping seam provided by the tape differs in that:
- compensates for voltages over a wide range;
- has good thermal insulation;
- it can be easily hidden due to the external surface finishing.
The tape is laid before pouring concrete, between the screed and the wall (basement, foundation), secured with glue.
Expansion joint in screed
To compensate for changes in the geometry of the concrete slab, it is made of several parts. This allows you to relieve internal stresses inherent in a single structure when exposed to heat, moisture, and changes in the soil. In some cases, a deformation section is formed due to breaks in concreting, i.e. combined with the technological seam. In other situations, special creation of cavities is required. For example, when installing heated floors in a house, damping and deformation cuts in the screed are simply necessary. They also need to be done at the junction of the floor with columns or stairs.
If a curb stone is immediately installed at the blind area instead of formwork, a layer of insulating material is also provided between it and the concrete.
In areas where there is a difference in the levels of concrete, mortar, or a change in the structure of materials in doorways, it is also necessary to make a separating cavity. In interior spaces, if the surface will be covered with parquet boards, then it is not necessary to seal the seams. But outdoors you need to fill the seams.
Installation of damper connection
- First you need to cut the waterproofing material into strips of 35-45 cm. The cut strips need to be laid around the perimeter of the room, rising along the wall slightly higher than the height of the future screed. When joining two strips, you need to overlap 15-20 cm.
- The edge raised along the wall must be secured with liquid nails or tape every 40 centimeters so that it does not fall when laying the screed.
- To compensate for the thermal expansion of the screed, on top of the waterproofing strips, along the wall, you need to lay Izolon type insulation 1 cm thick. The insulation needs to be cut into strips of 9-16 cm.
- After installing the damper, its waterproofing layer will prevent the water in the solution from leaking to the neighbors and protect the screed from breaking. Soft insulation will absorb changes in the screed due to fluctuations in temperature and air humidity.