Floor sanding and its benefits
Floor sanding is a mechanical operation to process the surface of a floor covering to make it even and smooth. The advantages of floor sanding are obvious and visible to the naked eye, because:
- A polished floor has an aesthetically pleasing and much more attractive appearance than non-polished flooring;
- Caring for a polished surface is much easier due to the fact that small particles of dirt practically do not linger on it, and for a number of other reasons;
- After sanding the floors, their surface becomes less susceptible to mechanical stress, such a coating is more reliable and durable.
As you can see, there are quite a lot of advantages regarding sanding floors.
The procedure itself, depending on the chosen tool, can be different and consists of several stages.
Concrete floor grinding technology
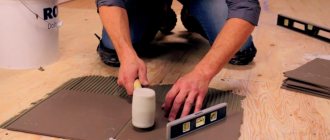
There are several ways to sand concrete floors - wet and dry. Wet sanding of floors is performed using abrasives, first with coarse grains and then with finer ones. As a rule, the wet grinding method is most often used for mosaic floors, as well as for floor coverings with granite and marble chips.
Dry floor sanding is a simpler technology. For these purposes, a grinding machine is used, which allows you to quickly and efficiently smooth out all the irregularities. Perhaps the only drawback of dry grinding is the large amount of dust that arises during this process.
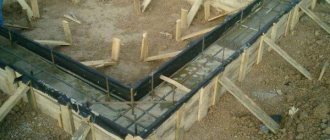
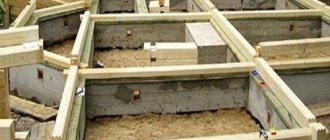
The technology for grinding concrete floors is quite simple. However, even at the stage of its implementation, you should make sure that there are no metal reinforcing elements in the top layer of the floor covering that could damage the grinding machine.
You should also know that if the installation of industrial floors or any other floors using a concrete mixture was completed recently, then you should wait half a month until the base is completely dry. Only in this case, all the work on processing the floor covering can be done efficiently.
Before grinding a concrete floor, its surface should first be treated with a concrete hardener. At the initial stage of grinding, it is recommended to use abrasives with a grain size of no more than 40, and at the final stage, 400 and higher.
When creating a special splash, it is necessary to polish the surface with abrasives of at least 1500.
Tool for sanding floors and parquet
As already noted, different factors determine the need for different types of equipment for grinding work.
Manual scraper for parquet
Let's start the review with the tool that gave the name to the scraping procedure itself - cycles. What is it, what types are there, application features, sizes, parameters and prices.
Parquet scraping by hand scraper
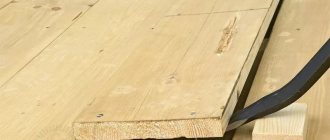
A scraper is a hand-scraping tool that scrapes rather than planes wood flooring. The design of a manual cycle is quite simple - a metal plate sharpened at an angle, fixed in the handle.
Manual scraping – technical parameters:
- The thickness of the blade determines the height of the coating (taking into account the paint layer) removed in one pass (burr size). The optimal thickness is 0.7-0.8 mm. The thickness of the layer being removed will be tenths of a millimeter;
- blade width. A wide blade increases the area cleaned in one pass, but is more difficult to work with. Recommended width is 45 mm.
- handle length. The shorter the handle, the easier it is to control the level of pressure on the scraper, the smoother the coating will be after scraping. Optimal length 200 mm;
- handle material: plastic or wood. Selected according to the user's tactile sensations;
- additional devices. The cycle can be equipped with a clamping handle, which will increase the force on the tool;
- figured cycles are used for scraping complex shapes on the floor (for example, figured wooden plinth).
Price list for manual cycles
| Cycle width, mm. | Handle material | Cost, rub. |
| 25 | Plastic/plastic | 105 |
| 45 | Plastic/plastic | 123 |
| Tree | 100 | |
| 65 | Plastic/plastic | 160 |
| Tree | 120 | |
| 45 mm. with power handle | Plastic/plastic | 153 |
| Accessories (blades) | From 33 depending on width | |
Pros and cons of cycles compared to abrasive processing
Benefits of using cycles:
- cheap; Material prepared for the site www.moydomik.net
- the ability to perform work in any place, including hard-to-reach places;
- no visible scratches on the parquet (from abrasive);
- indispensable when sanding artistic parquet, because allows you to change the direction of scraping depending on the direction of the wood fibers;
- no dust. In the process of removing a layer of wood, small shavings are formed.
Disadvantages of using cycles:
- duration of the procedure;
- removing a relatively thick layer of wood;
- labor intensity and physical fatigue. Work is carried out in an uncomfortable position, resulting in pain in the back, arms, and knee joints.
Note that currently the scraper is used only for scraping the coating on a local scale - when replacing one or two floorboards, or when there is a strong desire to save money. Moreover, masters advise using a factory-made scraping tool.
At the same time, you can make a cycle with your own hands. For manufacturing, a sharpened piece of metal (an old hacksaw blade) or a piece of glass 2 mm thick is suitable. with a smooth bend. Of course, such a tool is not suitable for scraping a large area, but it will help to complete work on a small area or scrape a part. The metal counterpart will last longer. For ease of work, a metal blank is placed between pieces of wood and wrapped with electrical tape.
Sanding machine for wood floors - tips for choosing
There is no universal equipment for grinding. You can evaluate the advantages and disadvantages of each type of grinding machine only after working with the unit.
Depending on the characteristics of the process, the main types of this electrical equipment can be distinguished.
Sanding machines for wooden floors can be of several types
Grinders are:
- Tape. They are used for sanding large flat surfaces. Suitable for working with wood, plastic and metals. The process is similar to the movement of a tank or tractor caterpillar. Disadvantages include the inability to process corners.
Vibro-grinding. It differs from the previous machine in the fastening of the abrasive (to the base of the unit). The operating principle is based on vibration. Eccentric. The machines are similar to vibration grinders, but differ in the abrasive attachments (not rectangular, but round). The platform not only vibrates, but also rotates around its axis. Angle grinders. The grinder is capable of sanding any surface, both flat and curved. However, it is a little difficult to work with the floor.
How to sand boards: tools and equipment for work
Each type of flooring has its own sanding equipment.
For example, when it is necessary to polish a wooden floor laid on joists, you will need drum-type equipment. It is quite heavy and not suitable for thin flooring.
Related article: Features of use and technical characteristics of hardboard
Each type of flooring has its own sanding equipment.
There are other types of equipment:
- Surface grinder (for working with parquet). It is divided into two subtypes - for working with a large area and manual.
- Tape (used for preliminary scraping of the floor surface);
- Vibrating (for working with regular wooden floors).
An ordinary grinder with a petal wheel saves you when you can’t get expensive equipment. It is also suitable for working with parquet. The work will take more time, but in the end the coating will look no worse.
Why grind a concrete floor?
High-quality grinding, first of all, makes the concrete floor practical, which after such treatment does not require large expenses for its maintenance. After sanding, the floor acquires high moisture resistance and incredible strength, which allows it to be used in conditions of heavy traffic of equipment or people.
Concrete grinding can be done with or without subsequent polishing. In the first case, the polished floor surface is an independent finishing coating. In the second case, the surface of the concrete floor acquires the necessary roughness for applying protective, impregnating or finishing decorative coatings.
The grinding procedure is also used in case of wear of a concrete floor, when its top layer has collapsed, for example, as a result of periodic cycles of freezing and thawing of moisture that has entered its structure. After removing the worn layer, the floor regains its former strength. In addition, by grinding concrete, you can level out deformed areas of the floor, existing chips, cracks, small sagging and ripples.
Do-it-yourself repair: how to sand wood by hand
You can update the appearance of a wooden floor with your own hands, without using expensive equipment.
To work you need:
- Sandpaper;
- Sanding paper;
- A pair of arms, or legs (whoever is used to grinding);
- Cycle. This tool is not cheap, so you need to make sure that it does not break down and sharpen the cutting edge in a timely manner.
The technology is simple. The surface is cleared of interior items, floor skirting boards are dismantled. The protective floor covering is discarded.
You can sand wood by hand using sandpaper.
The floor must be inspected for any protruding screws or nails. If there are any, they need to be buried in wood. To renew old parquet, you will need to check the tiles. You need to make sure that they are screwed to the base correctly.
After sanding with a coarse abrasive, cracks in the parquet boards or dies are puttied. And then they begin to finish the floor.
Floor grinding devices
You can currently purchase equipment for sanding your own floors in specialized stores.
To do this, you need to know that this type of device is produced in two categories.
The first category includes equipment for professional use, the second is a tool for home use.
Of course, professional devices are the leaders in the quality and efficiency of grinding work.
During operation, the machine's disks and auxiliary elements move in opposite directions, due to which it is possible to achieve ideal evenness and smoothness of the treated surface.
An additional advantage of using a professional tool is the ability to regulate the working speed, dust collection and water supply function.
The high cost of such a unit does not allow purchasing it for home purposes, and is considered a big and, perhaps, the only drawback.
Therefore, at home, we learned how to sand the floor using a grinder, which every owner has.
The tool is convenient for working in hard-to-reach places that a grinder cannot reach. Its working element is an abrasive disc or diamond bowl.
A grinder can be used to sand both concrete and wooden floor surfaces. The diameter of the abrasive disc determines the load that the device can withstand.
The grinder must be used carefully, as the tool is unsafe and the attachment may fall off.
Why do you need floor sanding?
The DIY procedure for sanding a wooden floor is used to obtain a perfectly smooth surface. The technology is shown both when laying new floorboards and when restoring old material. In the first case, this will help remove burrs from the floorboards, and in the second, it will revive the coating and extend the period of perfect operation.
A properly selected sanding machine for a wooden floor will remove differences in height, minor defects, scratches, local spots with sapwood - everything that is found in new and old floorboards. In addition, it is recommended to sand floors to remove the old layer of varnish, paint and a thin layer of wood (shavings) so that the coating can “breathe” again. After the procedure, the floorboards can be polished, waxed, oiled, painted or varnished again. Thus, the goals of grinding are:
- surface leveling;
- elimination of defects, down to the smallest chips and scratches;
- removal of old paintwork and dirt.
However, there are options in which grinding will not be relevant:
- if the floor is worn unevenly with local trampled depths (more than 5-7 mm) - in this case, leveling will require removing too large a layer of shavings, it is easier to replace the trampled areas of the floorboards with new dies;
- if damaged by parasites, mold, rot, such floorboards need to be changed; renovation is ineffective;
- if the width of the gaps between the dies is more than 0.7 cm, these gaps must first be filled with putty, and the easiest way is to go through the old floor, merging the floorboards, and only then carry out the leveling by sanding.
Advice! Sanding wooden flooring yourself is difficult, especially if the surface is fairly worn. The secret to a good result lies in gradually reducing the size of the abrasive chips. First use sandpaper no. 40-60, then change it to medium sandpaper no. 80-100, and only then go through fine sandpaper no. 140-180. In this simple way, even the oldest floor, the thickness of the tiles of which allows for resuscitation, can be renewed.
Grinding helps remove multiple surface damage, differences between dies up to 6 mm. Therefore, you should not rush to throw away the floorboards, replacing the old solid floor with parquet boards or laminate; good wood will last for a long time.
Preparing the base
The preparation process includes freeing the surface from furniture, removing the old layer of varnish, repairing or dismantling rotten, fragile floor elements, and examining fasteners
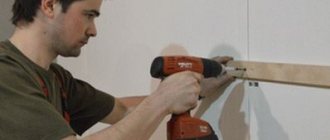
Before you start processing the floorboard with your own hands, you need to treat its surface. It is necessary to perform the following manipulations:
- Remove all furniture and unnecessary items from the room.
- Tear off the baseboards.
- If there was already any finishing on the floorboard, it needs to be removed. For example, varnish can be washed off using special chemicals or using the thermal method.
- It is advisable to recess all nails or screws that protrude above the surface of the pine board into the wood. Otherwise, you may damage the sander.
- Old parquet must be carefully examined. If there are elements that are not firmly attached, they need to be securely secured using self-tapping screws.
During operation, the power consumption of the equipment must be taken into account. The network must be able to handle the power of the device.
In addition to preparing the base, you need to get used to the operation of the equipment. Before turning on the machine, you must insert sandpaper into it. Then tilt the device and plug it into a power outlet. Next, gradually lower the machine to a horizontal position. This procedure is necessary to ensure that the device does not break out of your hands. Sanding a wooden floor should be done responsibly. Try to monitor the operation of the device’s engine. Remember to insert new sandpaper as you wear it down.
Preparatory stage - preparing the base
Before you start sanding a wooden floor, you need to carefully prepare for this process:
- Remove all furniture from the room;
- Remove the baseboards;
- Make sure there are no protruding nails or screws on the floor surface. If you find any, be sure to drown them in the wood using a hammer. If you need to sand old parquet, check that all the dies are firmly attached to the base.
Important! All professional parquet sanding machines are equipped with a dust collection bag, but even this device will not get rid of it completely. If you don’t want dust to get into other rooms, cover the doorway with a wet cloth.
Grinding equipment
This technique is divided into two groups:
- Professional. It is a machine equipped with large discs with abrasive material. The movement of the working elements occurs in different directions, so subsequently a perfectly polished surface is obtained. In addition, the devices are equipped with dust collectors and a control system for the speed of rotation of working parts and the intensity of processing. The main disadvantage is the cost. Even if you rent equipment, the budget can be very large.
- Small household grinders. The most popular is the grinder. To work with this tool you will need an abrasive disc. If polishing is required, it is recommended to buy a special machine. It is inexpensive and very easy to work with.
Equipment for sanding floors and parquet
An alternative to the manual cycle is equipment - parquet sanding machines, the basis of which is grinding rather than scraping.
Varieties:
Sandpaper
Sanding parquet with sandpaper is a budget option for manual floor sanding. Of course, few people would dare to crawl on the floor in an attempt to sand it by hand, but attaching paper to the sole of a shoe and rubbing the parquet with your feet is more realistic. The method was not widespread, but it marked the beginning of the use and further development of equipment that uses abrasive materials to perform work.
Drum-type parquet and floor sanding machine
Currently the most popular type of equipment. A drum sander is used for deep sanding, due to the fact that coarse abrasive is not capable of making a wooden floor smooth. In one pass, such a machine can remove up to 1.5 mm. surfaces. Since the work involves peeling off the surface layer, the machine is equipped with a dust collector.
The SO-206 parquet grinding machine is the most popular model, produced both in Ukraine and Belarus. It is distinguished by its reliability and relative cheapness. The weak point is the rubber glued to the drum, which can be damaged if the abrasive is clamped incorrectly or by a foreign object.
| Brand of parquet sanding machine | Manufacturer | Cost, rub. |
| SO-206 | Ukraine | 56 500 |
| SO-206 | Belarus | 68 600 |
| SO-206-A | Belarus | 65 100 |
Characteristics of the SO-206 parquet sanding machine in the table
Technical characteristics of the parquet sanding machine SO-206
Belt-type parquet and floor sanding machine
From a technological point of view, the draw frame is the next generation of equipment for processing wooden floor surfaces. Popular in Europe. The design of a belt grinder is not much different from drum-type machines, but the consumable material used is of a slightly different type - presented in the form of an abrasive belt. The tape is secured between a polyurethane drum and a roller. During operation, the belt cleans itself. Thanks to this approach, the surface is sanded much better. Therefore, a belt sander is often used for fine grinding.
From a design point of view, there are two types of draw machines:
- single-disc. Provides high surface quality, but is used more often for floor leveling and pre-grinding. Among those noted by users are the following models:
| Belt sander brand | Manufacturer | Cost, rub. |
| COLUMBUS 135 SH | Germany | 85 800 |
| Columbus Profivac | Germany | 88 357 |
| SO-331 | Belarus | 75 670 |
| Lagler Hummel | Germany | 131 000 |
- three-disc. Used for fine sanding of wooden floors and parquet, before applying varnish or other coating, for sanding the surface between layers of varnish, during the process of applying oil. Today this is the most advanced type of grinding equipment, so its price is very high. This machine is purchased for professional use only.
Prices for professional grinders
| Brand | Manufacturer | Cost, rub. |
| LAGLER TRIO td> | Germany | 612 180 |
| SO-318 220V TRIO | Belarus | 128 012 |
| Lagler Hummel TRIO | Germany | 591 113 |
Vibratory belt sander
The vibratory sander includes the advantages of a belt and angle grinder, and at the same time has a lower price, which makes it accessible to a wider range of users. The machine is not tall, which makes working with it somewhat difficult.
| Vibratory grinder brand | Manufacturer | Cost, rub. |
| Dexter (150W) | China | 752 |
| Dexter (280W) | China | 2 143 |
| PShM-115 (300 W) | China | 2 881 |
| Felisatti (300 W) | Russia | 2 980 |
| Bosch PSS (200 W) | Hungary | 3 568 |
Machines for grinding in hard-to-reach places
Masters call such equipment a “boot.” The SO-337 “Sapozhok” parquet sanding machine is indispensable for sanding in corners, near walls, and under heating radiators. Equipment for sanding parquet and wooden floors in hard-to-reach places is standardized and equipped with a dust collector. Switching between modes (coarse and fine grinding) is done by changing the degree of vibration, the speed of rotation of the disk and the abrasive used.
Among the models approved by the masters are:
| Grinder brand | Manufacturer | Cost, rub. |
| SO-401 | Belarus | 108 900 |
| Lagler Flip | Germany | 148 708 |
| Lagler Elan | Germany | 180 000 |
Characteristics of a parquet grinding machine using the example of SO-401
Technical characteristics of the parquet sanding machine SO-401
Additional equipment that must be used in the scraping process is an industrial vacuum cleaner. The function of the vacuum cleaner is to remove dust from the floor before applying varnish.
Grinding Methods
There are two main ways to carry out this operation:
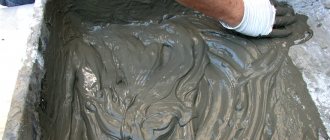
- Wet. In this case, to sand the floor with your own hands, special abrasive components are used, which are well suited for mosaic or marble coverings.
- Dry. This method is used to treat all classic surfaces, including concrete, wood and self-leveling surfaces. The inconvenience is that during operation a huge amount of dust is generated, so you have to constantly pause so that it has time to settle.
When sanding dry, it is advisable to use machines equipped with a vacuum cleaner.
Main works
Upon completion of the preliminary steps, the wooden floor is sanded.
The first priority is to fill the grinder with sandpaper that has a coarse abrasive. Here it is important to take into account the direction of paper movement (manufacturers indicate on the back) in order to avoid breaking the connecting seam.
The first stage is adjusting the pressure of the drum on the floor plane. If there is insufficient pressure, the quality of processing will be poor. Pressure exceeding the norm will lead to engine overload, the number of revolutions will be lower than required.
Processing is only parallel to the fibers: the perpendicular direction of movement threatens to remove too large a layer. The overlap of the tracks with each other should correspond to a width of 5 cm.
Places with difficult access (under stairs, radiators, in corners) will have to be sanded manually. It is important to consider that the scraper becomes unusable during operation. To avoid premature damage, it must be periodically sharpened.
Related article: DIY thermal bag. Homemade cooler bag
For this purpose, a block moistened with water (length - more than 15 cm) is used, which, after all actions are completed, is washed and dried. The sharpening angle is 45 degrees. You can use a “boot” or a small sanding machine to sand a wooden floor.
Having completed the first pass, sandpaper with a smaller abrasive is used for the second. This is done 4 times, changing abrasive material with different grain sizes (starting with larger ones and ending with smaller ones). Movements are made along the line of laying the boards , in the direction of the wood grain.
Please note that the engine turns off only when moving (cannot be kept in one place). If this condition is not met, visible marks remain on the floor that are difficult to correct.
For thin coatings it is possible to eliminate one pass. In this case, the sequence is: 40 – 80 – 120.
Before proceeding to the last phase of sanding wooden floors, the cracks are filled with a mixture of fine wood dust and PVA glue. An alternative is a paste that is similar in color. The putty must harden, then work can continue. The drum size is reduced.
Sanding a floor made of tongue and groove boards, work in stages
If the purchased tongue and groove floor needs to be covered with a layer of drying oil and varnish, the boards will need to be sanded before this work. You will also have to sand the boards when you need to breathe a second life into the old flooring. This procedure is called scraping.
Sanded tongue and groove floor
After sanding, the boards are again treated with antiseptic agents.
Before work: surface preparation and precautions
First, you should take care of safety. It makes sense to have special equipment.
Before starting work, the room must be cleared of furniture, textiles and other decorative elements.
Namely:
- Respirator;
- Protective glasses;
- Earplugs or headphones;
- Gloves.
Before starting work, you need to clear the room of furniture, textiles and other decorative elements. Skirting boards are also removable. The boards must be clean, rotten ones must be replaced with new ones. The floor is cleaned using a construction vacuum cleaner.
First stage: floor scraping
The first step is to fill the machine with sandpaper. A coarse-grained sheet marked P40 is inserted into the grinder drum. After turning on the equipment, tilt it slightly towards you so that the abrasive does not damage the boards. Sand the floor starting from the corner of the room and move diagonally to the opposite corner. Every time you turn the machine, you need to lift the unit slightly. The new row should overlap the previous one by 10 cm.
Floor scraping is a simple and effective process carried out using a grinding machine.
The corners of the room, places under radiators and stairs can be planed manually with a scraper, grinder or emery block. Wood dust is removed after each stage using a vacuum cleaner.
Second stage: grinding
The next stage should begin by replacing the sandpaper with medium-grain sandpaper marked P60. It is necessary to move with the unit in the direction of the wood grain, that is, now you need to move it across the room.
Floor grinding is carried out using a special machine, after preliminary surface preparation.
Then the surface is cleaned of dust again. The abrasive will often wear out during the process and should be replaced promptly. The engine of the equipment is turned on or off only while moving, otherwise marks will be left on the surface. You cannot stop with the car running.
Final stage: final polishing
The paper in the drum is replaced with fine paper (marked P80 or P100). The movement also starts from the corner diagonally, along and across the room. After sanding the plank floor (not tongue-and-groove boards), the surface is puttied.
Finishing process
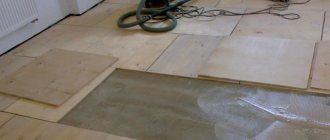
The finished coating is cleaned of dust and debris, and then varnished. The first coat can be applied on the same day. Typically, 2-3 layers of varnish are applied to wood flooring or parquet. The polished surface looks fresh and renewed.
Grinding: tools and materials
The question of how to sand a wooden floor from boards should not be a dead end: the work is not particularly difficult, the tools and materials are available.
- Conventional tools are not suitable for this type of work. You will need a special grinding machine, or preferably two: for grinding the main plane and for angular processing. The equipment is expensive, it is not practical to purchase it for one time, it is preferable to rent it.
- For solid wood floors that are glued along the entire perimeter, the machine is suitable for the drum type. It will withstand heavy weight and the coating, which is laid on logs and has a thickness of 2.5 - 3 cm. The floating installation method involves the use of light surface grinders.
- Manual scraping of boards should not be ruled out. A cycle designed for manual floor sanding must be available.
- Sandpaper of various sizes and grits (first No. 40, then successively No. 60, No. 80, and at the final stage - No. 120) will make the surface smooth. Calculated for 20 m2 - one sheet of abrasive material of each size.
- Scissors are required to cut sheets.
- Putty is purchased to eliminate cracks.
- The treated boards are opened with varnish. For this process you will need brushes and a roller.
- A vacuum cleaner will allow you to remove debris before starting work with varnish.
- A mask or respirator will protect against generated wood dust.
Related article: How to pour concrete underfloor heating - step-by-step instructions