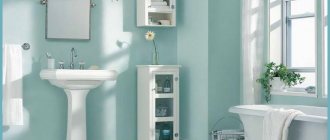
You can easily refresh and decorate your bathroom with stickers. With a large assortment, you can choose stickers to suit any design style. Even if your bathroom doesn't have a specific style, you can create one without remodeling the entire room. You can also use them to hide chips, scratches or stains that often appear on the surface.
Decorative stickers were first used in France, this idea was picked up by the Italians and they began to produce higher quality and more expensive stickers. Now there are a huge variety of stickers from different countries on our market, and everyone can choose an option, taking into account their budget.
Why are they needed?
The material for making stickers is moisture-resistant self-adhesive vinyl film. Does not darken over time, does not fade and does not lose its attractive appearance for more than 5 years. Vinyl film is resistant to temperature changes, it is easy to apply to any surface, and caring for stickers made from this material does not take much time.
Another amazing advantage of vinyl stickers for the bathroom is the ability to easily remove them and replace them with others, or re-glue them to another surface.
For example, you stuck a cute dolphin on a tile, but after some time you decided to re-glue it on a mirror or toilet - you can do this in just 10 minutes. You can also experiment with color: if there was previously a purple sticker in the bathroom, and you purchased a turquoise rug, then the old sticker can be replaced with a new, turquoise one. By adding turquoise towels to your interior, you can get an original design without spending a lot of money.
Bathroom tile stickers are perfect for masking defects and cracks on tiles or any other surface. If the walls of the bathroom are covered with black tiles, then white stickers would be an ideal option to change the decor. To make the combination of black and white colors more harmonious, a white toilet or door can be decorated with a black sticker.
Let's sum it up
So, if you want to achieve an extraordinary design in your space, it is difficult to imagine a more impressive and unique way than a tile sticker. With all its diversity, this is also the cheapest way to decorate your apartment, realize the most fantastic ideas, and create your own individual decor.
Stickers can delight with their beauty for a long time (5-6 years), and if you want to liven up the room, you can easily change the sticker, you don’t have to wait 5 years. So in this case, the cards are in your hands: your ideas, your imagination, your taste and your apartment will acquire new bright colors, turning your everyday life into a cheerful celebration of life.
Gallery
Types of bathroom stickers
Decorative stickers are made from:
- velor film;
- foil;
- PVC films;
- vinyl film.
Vinyl
From foil
PVC film
For the bathroom, it is recommended to choose products made from vinyl - such stickers will not deteriorate from exposure to hot steam, frequent washing and temperature changes.
The French were the first to produce wall stickers. Later, fashion for such accessories appeared in Spain. Over time, this design trend was picked up by designers from other European countries. Stickers from European manufacturers are distinguished by high quality and aesthetic characteristics, but their cost is quite high. For example, a sticker measuring 100/60 cm costs approximately 100 euros, and small stickers are sold for at least 10 euros.
Domestic and Chinese stickers have less favorable prices, but their quality is somewhat inferior compared to their European counterparts. The service life of such accessories is approximately 3-4 years, and they can only be glued once without the possibility of re-gluing.
All bathroom stickers come in a wide range of colors, themes and shapes. Depending on the subjects, stickers are divided into the following types:
- marine theme is considered one of the most popular. Most often, manufacturers produce stickers with images of raging waves, dolphins, fish, turtles, algae, shells, starfish, and corals. Products with a marine theme also include images of all kinds of ships, sailboats, sea islands with palm trees or other exotic vegetation;
- imitation window - most bathrooms do not have windows, but using vinyl decals you can create an imitation of them. For example, you can decorate a room using stickers similar to photo wallpapers depicting some beautiful area - a brightly blooming garden, sea coast, open ocean or green meadow;
- monochrome stickers - most often they are used to decorate rooms in a minimalist style. Monochrome stickers can have a wide variety of themes, but most often they are made with some kind of abstract designs. Such images can be quite impressive in size, or they can be a small sticker that emphasizes only one element;
- for children - the selection of bathroom stickers for children is perhaps the largest. These can be either individual images with fairy-tale characters or vinyl photo wallpapers with pictures from cartoons or fairy tales. Thanks to bright, positive pictures with cheerful characters from popular cartoons, kids perceive bathing as an exciting adventure;
- eco motifs - are stickers with images of plants or animals. Birds, animals, flowers and trees bring indoors a feeling of closeness to nature that owners of cramped city apartments are deprived of.
Marine theme
Children's
Window simulation
Monochrome
Eco motives
We use seashells ↑
Marine style is the most popular in bathroom interior design. You can decorate tiles with natural or plastic shells using hot glue: by gluing these decorative elements next to stenciled images of seaweed or simply around the perimeter of the room or on the frame of a mirror, you can create a unique interior design. To make the shells even more original, you can decorate them with acrylic paints.
Decorating tiles with shells is a great idea for creating a “sea” landscape
Bathroom redesign
The approach to changing the design of a bathroom can be divided into thorough and superficial. In the first case, for example, you can change the layout in the bathroom, connect or disconnect it with the bathroom, or replace the entire interior. Of course, this option requires considerable investment.
Most often they resort to the following options: decorating tiles, applying designs to them, repairing existing damage, and much more. This approach allows you to modernize an existing design, make it brighter, more positive, etc.
And it requires significantly less financial costs. Below we will consider possible options for this budget approach.
How to glue correctly
Before you start gluing stickers, you need to wash the surface well with a sponge and warm soapy water, wipe dry with a clean cloth, and wait until all the moisture has completely evaporated. If there were greasy stains on the surface, it is advisable to wash it with a cleaning agent and degrease it with alcohol. When decorating plastic panels in the bathroom, you should not use alcohol; it can ruin the plastic.
Then you need to try on the sticker and evaluate how it looks in the chosen place. When composing a composition of several stickers, you need to make markings with a pencil where the images will be located.
A small sticker can be applied immediately. To do this, remove the paper protection, place the sticker on the surface with the adhesive side, and press with your fingers. Using a soft cloth or spatula, smooth out from the center to the edges. It is necessary to ensure that the sticker does not move from its place during the smoothing process.
Gluing large pictures is more difficult. It is better to do this using mounting film. The gluing procedure is as follows:
- transfer the sticker to the mounting film, placing it on a perfectly flat surface, such as a table. The adhesive side of the mounting film should be adjacent to the sticker design;
- take a piece of soft cloth and smooth out all the wrinkles on the sticker;
- when all the folds are smoothed out, carefully remove the protective paper from the sticker, while the transparent mounting film should remain on the front side of the sticker;
- carefully apply the product to the marking, carefully leveling the folds;
- Press the sticker onto the surface with a cloth or spatula so that it sticks to it as firmly as possible. This must be done very carefully so as not to damage the paint on the drawing. If air bubbles do form under the film, you can pierce them with a thin needle and iron them with a spatula;
- Now you can remove the mounting film and press the sticker to the surface.
Stages of gluing vinyl stickers
It is better to apply children's products together with the child. Such work will bring the child a lot of pleasure, and after this the child is unlikely to have the desire to spoil his work by picking at the sticker with his fingers.
Decorating using decoupage technique ↑
Today this technique is very popular. It consists of using three-layer napkins to create decorative elements. The process can be presented step by step as follows.
- Using scissors, cut out the decor (usually a plant element) from a napkin.
- We remove the two lower layers and apply them to the tiles under the ceiling (do not go lower: there is a high probability of damage), after which we apply PVA glue on top of the element with a brush. The formation of air bubbles and folds should be avoided.
- After the glue has dried, we apply moisture-resistant acrylic varnish on top of the decor.
Despite the protective layer of varnish, this decor will not last long in an aggressive, humid environment. This allows you to change it periodically and thereby add variety to the interior.
Photo
Replacement of damage
If the tile is damaged, it can be replaced. For this, the same tile or another one, but identical in size, is suitable, on which you can then apply a vinyl sticker. Or, alternatively, replace a few tiles.
The procedure for replacement is as follows:
- remove damaged tiles;
- Apply glue to the wall and distribute it evenly;
- place the tile and tap it until it snaps into place;
ATTENTION: leave assembly crosses at the seams, then the seams will be of the same thickness.
- After the glue has dried, remove the mounting crosses and fill the seams with grout.
Renewing seams
Simply updating the grout lines can help give tiled bathroom walls a fresh look, as over time they fade and become unsightly.
Special markers, pencils or paints will help restore color.
If this is not possible, for example, there are cracks in the seams, then it is necessary to completely change the grout.
Rules for cleaning damaged areas
- The damaged area is removed with a sharp object.
- The seam must be well cleaned. It is recommended to use a vacuum cleaner for this.
- If the damage is minor, make a local replacement.
Complete replacement
Remove old grout using a sharp object, such as a scraper. Be careful not to damage the tiles. Then clean the surface of the joints: first with a brush to open small fragments of grout, and then with a vacuum cleaner to remove dust.
After this, use a sponge and water to rinse the seams and leave until completely dry. And only apply new grout with a spatula to a clean, dry surface.
Application
Today, the range of stickers is so large that their use should be somewhat limited in various respects. For example, a large number of stickers does not always have a positive effect on the interior of a room. Therefore, it is better to use them in doses, for example, trim one side or use several pieces. Although there are always exceptions.
Several identical stickers
A boring environment can be brightened up with several large wall stickers. You can enliven the interior with various shapes and sizes, however, all this directly depends on the taste, dimensions of the shower room, as well as financial capabilities. The most optimal is the use of stickers according to the classical canons, i.e. monochromatic colors that will look appropriate in any style from classic country to modern high-tech.
Full painting
One approach to updating tiles is to paint them entirely in an identical or different color. Next, we'll figure out how to do this.
Basic Rules
- Be sure to thoroughly prepare the surface: wash, degrease, dry.
- Sanding tiles is an important and necessary process, otherwise the paint “will have nothing to cling to and nothing to stick to.”
- Don't forget to apply the primer and let it dry thoroughly.
IMPORTANT: Painting must be done in two layers. Give each layer time to dry completely. In hard-to-reach places you can use a brush.
Required Tools
Prepare:
- sandpaper;
- soft cloth, brush and sponge;
- detergent and cleaning agent;
- primer for increased adhesion;
- brushes and rollers;
- paint for wet rooms;
- water-based acrylic varnish.
We also recommend watching - How to paint tiles in the bathroom?