Main advantages
The coating meets all the necessary requirements, which is why it has become widespread in a number of industries. Decorative concrete, thanks to the efforts of its developers, has acquired a number of undeniable advantages, among which the following should be highlighted:
- resistance to chemicals, petroleum products and aggressive compounds;
- UV resistance;
- ability to endure high loads;
- resistance to abrasion and mechanical stress.
As for the ability to withstand loads, it is almost three times greater than that of pressed paving slabs. If you use pressed concrete, you can create beautiful and durable coatings. Special substances are added to the mass to prevent delamination and cracking.
Advantages and disadvantages of concrete paths
Sand-concrete mixture is one of the most popular materials for creating paths. The advantages of this material and garden paths made from it include the following:
- good strength qualities of the material, its durability;
- ease of creating concrete structures, including garden paths;
- low cost of material;
- resistance to adverse weather factors (moisture and frost resistance);
- resistance to mechanical loads;
- the ability to make a path of any configuration (the main thing is to make a suitable formwork);
- the ability to carry out installation independently , without the involvement of specialists;
- wide possibilities for decorating paths (during the preparation of the solution, you can add pigments of any color, or use tiled mosaics, natural or artificial stone, etc.; the main thing here is to plant design elements and decorations in the solution a few hours after pouring).
The disadvantages of concrete garden paths include the following factors:
- when the ground moves during the off-season, the concrete path may crack;
- a concrete path is a permanent structure; subsequently it will be hardly possible to change its direction. Therefore, when planning the location of paths, it is necessary to simultaneously plan the area around them;
- will require serious investment of effort and time for preparatory work and installation.
Ways to create interesting textures
If we compare decorative concrete with ordinary concrete, we can highlight only aesthetics and durability. The technology comes down to pouring and applying a certain pattern to the top layer. You can use stamps and other tools to decorate the surface. These can be molds, stencils and chemical compositions for etching, with which you can create complex ornaments. By using saws with diamond blades, you can form fine lines that will give the concrete a clear and expressive design.
Manufacturing technology
Decorative concrete can be an excellent material for paths and an excellent solution when decorating a garden area. The material has excellent quality characteristics and is aesthetically pleasing. The coating is easy to clean and resistant to oil and grease.
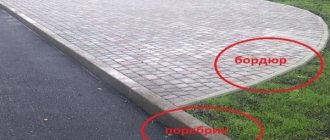
Sites with such a coating do not require the installation of a curb, thanks to this you can save on construction costs. If you wish, you can make decorative concrete with your own hands. Forms and dry mixture for preparation can be purchased at a hardware store. The design will depend on the preferences of the owner. You can purchase a silicone or plastic mold, which can be made up of squares and diamonds.
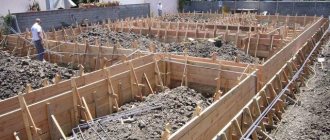
A decorative concrete coating is created as follows. The first step is to prepare the surface. When making a path in a selected area, you will have to remove the soil, going 10 cm deep. Formwork is installed in the resulting space, and a layer of crushed stone is poured onto the bottom.
Printing method for decorative concrete
This method is used on any planes. Today there are a large number of technologies for producing printed concrete.
Any concrete contains cement, plasticizers, sand and other elements that depend on the desired result.
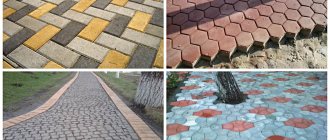
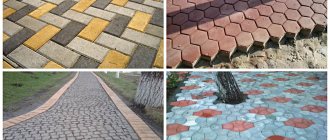
Decorative concrete can subsequently have a surface that imitates tree bark, laminate, natural stone, ceramic tiles, brickwork, cobblestone.
Do-it-yourself decorative concrete is not only beautiful, but also reliable and durable. Let's figure it out.
Work methodology
It is necessary to lay out cement mortar on the leveled surface and smooth its surface. Next, you can start applying the hardener. It usually has a certain color. This will give the surface a tint. You will need to use dry dye. You can choose a material that, in addition to coloring pigments, includes a filler of quartz sand or granite.
Decorative concrete, photos of which are presented in the article, is pressed into molds at the next stage. On a slightly set, but not yet completely hardened surface, it is necessary to lay out forms that press well against each other. In order to form a clear imprint, the form must be compacted.
The readiness of the concrete mixture for stamping can be determined by touching the material with your finger. The mixture is considered ready if the material does not stretch by hand. After letting the material sit for several days, you need to wash the coating with a brush. It is wetted in a solution of hydrochloric acid. As soon as the top layer has dried, you can begin applying a protective composition, which will prevent the evaporation of moisture from fresh concrete.
The production of decorative concrete involves the formation of expansion joints, which will be located in places where the material is likely to break. The distance between the seams will be 6 m. The voids are filled with colorless sealant. In order to extend the life of concrete and improve its aesthetic characteristics, it is recommended to treat the surface with an impregnating composition that forms a protective film.
Covering the yard with decorative concrete
Decorative concrete has a fairly wide range of applications, and quite often it can be found in the form of platforms, paths, driveways, and parking lots.
How to make decorative concrete with your own hands so that it can decorate any yard?
Printed concrete does not slip, withstands temperature changes and therefore is so often used when landscaping the yard around the house.
To cover the yard with decorative concrete with your own hands, you need to choose a suitable site. If concrete is made in the yard, its production is carried out immediately at a permanent place where it will be located in the future.
To make a garden path or improve any area of the yard, you need to take M350-400 grade cement and plasticizers. You need to work at above-zero temperatures.
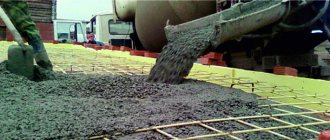
The mixture is stirred. Poured into molds. A vibrating plate is used for compaction. The roller smoothes and compacts the concrete surface.
Do-it-yourself decorative concrete can be created indoors or outdoors in the yard. If concrete production is carried out under a roof, there must be good ventilation and heating.
When carrying out work outside, the site is first marked. You need to drive pegs into the ground. A rope is stretched around the perimeter. The top layer of soil must be cut to a depth of 15-20 cm and removed to the side. Formwork is installed along the edges.
A mixture of sand and granite chips 10-15 cm thick is poured and compacted. Polyethylene is laid on top with an overlap of 10 cm, and a reinforcing metal mesh is laid out.
After this, you can prepare the concrete.
Composition information
The described material is a composite mass, which consists of the following components:
- coarse aggregate;
- cement;
- additives;
- fine aggregate;
- water;
- dye.
It is the composition that distinguishes the decorative mixture from ordinary concrete. This makes it possible to manufacture almost any design from the mixture. For example, the material can form the basis of stucco or paving slabs, as well as paving stones. One of the main advantages of this composition is its high abrasion resistance.
If you are thinking about the question of how to make decorative concrete, you must first understand its main types. Among others, colored concrete should be highlighted, which imitates architectural and artistic forms such as figures and fountains. Natural stone can be imitated using printed or stamped concrete.
Each type of decorative mixture has its own purpose. For example, colored concrete is most often used in the formation of paving slabs. This allows you to get more expressive products. But artistic concrete is used for finishing buildings. You can use it to make different shapes for landscaping your garden space. Concrete imitating stone is used for the manufacture of facade tiles, plinths and blind areas.
What is decorative concrete
Decorative concrete is a composite material. It consists of the following main parts:
- fine aggregate,
- coarse aggregate,
- water,
- cement,
- dye,
- additives.
Dyes are used to color concrete.
It is the composition of decorative concrete that distinguishes it from its simple counterpart. Therefore, almost any shape can be made from it; thanks to this quality, it has found wide application in a variety of fields. For example, it is used to make stucco molding with embedded parts, paving slabs, paving stones of various shapes, and so on. The main advantage of such concrete is its high abrasion resistance. There are several main types of decorative concrete:
- Colored concrete.
- Concrete imitating small artistic and architectural forms, for example, figures of fountains, animals and the like.
- Stamped and printed concrete imitating natural stone.
As for the use of each type of decorative concrete, their purposes are different. Colored decorative concrete is most often used to make paving slabs to make them more expressive. Artistic concrete is used for finishing buildings. Moreover, all kinds of figures are made from it for landscaping the garden area. But concrete that imitates stone is also used to make plinths, façade tiles or blind areas. If you want to make decorative concrete with your own hands, then you should familiarize yourself in detail with the technology of laying it. We will look at how you can make a garden path with your own hands, as well as the rules for laying stamped decorative concrete.
Features of using microcement
Decorative concrete plaster is a relatively new coating, also called microcement. As a result, it is possible to obtain a surface that imitates concrete. Before starting work, it is necessary to prepare the base, which should be cleaned, dried and free from obvious defects. Next, the reinforcing mesh is laid and epoxy resin is applied. A mesh is laid on the surface with a distance of 2 cm from the walls and corners.
The reinforcement must be allowed to rest and straighten for 10 hours. Afterwards, a solution of resin and hardener is applied to it with a roller or spray. In this case, it is necessary to use a proportion of 2 to 1. It is necessary to scatter quartz sand, the fraction of which varies from 0.8 to 1.2 mm, onto the freshly applied resin. Recommended drying time is 24 hours.
As soon as the epoxy resin has dried, you need to try to eliminate the unevenness using sandpaper, the grain of which is 40 or 60. Next, you can begin to apply the Concrete Contact primer. To do this, you need to use a roller, with which the mixture is conveniently distributed over the surface. The base is left in this state for 24 hours, then you can begin applying the base. But before that, you need to mix the materials in a separate container. The resulting composition is mixed with the polymer, only then can you proceed to applying the first layer.
Microcement is spread with a wide stainless steel spatula. Floors almost always require 2 coats of the mixture. Before each new layer, you must wait until the previous one has completely dried. After this, you can apply a second layer, which will be the finishing layer. Microcement is applied in thin layers. After the material has set, which will happen after about 15 minutes, the dark marks left by the spatula must be smoothed out. The thickness of each layer should not be more than 1 mm. The total thickness is 3 mm maximum. Each layer dries completely within 24 hours.
Making panels yourself
You can make decorative concrete panels yourself. They look quite impressive, and they can be used when decorating not only the external, but also the internal walls of a building. The basis can be the same concrete, the composition of which was described above. However, you must acquire interesting shapes that will make up the surface pattern.
After mixing the mixture, it is poured into molds, and after hardening, the formwork is removed. Products must be left to rest before they can be used for installation. Installation is carried out using the same cement mortar. However, you can also use special glue. It must be reliable enough to withstand the load of products that have an impressive weight.
