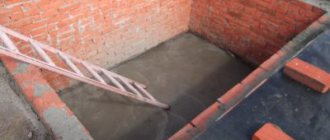
Making an arch out of brick is not an easy task even for an experienced home craftsman. This action requires certain skills and knowledge. And if skills need to be acquired in practice, then knowledge can be obtained by reading the recommendations and instructions on how to make a brick arch. For clarity, we provide photo and video materials.
Scheme
Forms
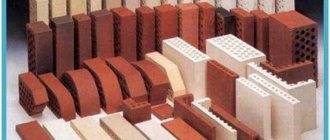
A brick arch with your own hands can be created in a variety of shapes, taking into account the required architectural style. Types of openings, taking into account the masonry:
- classic – the height of the semicircle is half the width of the opening;
- bow - a trimmed cone, characteristic of the oriental style;
Construction process
- wedge-shaped - in the form of a wedge, secured at the top with a locking element, which is characteristic of the Gothic style;
- modern - an arc like a truncated cone;
- romanticism - rectangular in shape with slightly rounded corners;
- ellipse – used in postmodern or new wave;
- the portal is rectangular in shape.
This or that brickwork of arches is characterized by features that need to be taken into account, especially harmony with a certain style.
How to lay a brick arch yourself?
It is not uncommon to see arched structures on windows, doorways, or between several vertical columns. Many people associate this element with Ancient Greece or Byzantine culture, however, this is not entirely true. Our Slavic ancestors knew for a long time how to lay an arch out of brick or stone and actively used it.
Such elements can be found in almost all buildings, from ordinary stoves for cooking to the grandiose arched vaults of royal chambers and temples. The arch has always served as a decorative element of any design.
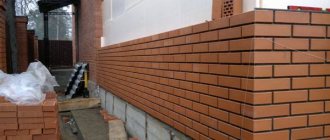
In modern construction, this decorative element has not lost its relevance and is used everywhere. From a technical point of view, an arched ceiling is a curved lintel that is installed above two supporting structures or above door and window openings from both the interior and exterior of the room. In order to build such an element with your own hands, it is not at all necessary to have special technical skills; it is enough to study the technology of its construction and prepare in advance the necessary tools and materials used.
Main types of brick arches
Before you make a brick arch on your own, you need to find out what types exist and make a decision based on the information received. The design itself is based on a lateral thrust system, that is, correctly laid bricks eventually support themselves and do not require additional reinforcement. In modern construction, all arches are conventionally divided into three main types:
- wedge-shaped, in which the bricks are processed into a wedge shape and laid tightly together,
- beams, in which the brickwork is made from whole brick along a truncated arc,
- full, in which the masonry is made in the form of a semicircle, and its height is half the width of the window or doorway. There are different types of brick arches
Once you have finally decided on the type of future design, you need to prepare tools and consumables. Each of the listed designs has its own positive features and disadvantages, which are based on the complexity of manufacturing, manufacturing technology and time costs, however, the sequence of actions performed is almost the same for all.
Tools and materials
At the first stage, we calculate the amount of material required and prepare the necessary tools. For high-quality and fast production you will need:
- hand saw for wood processing,
- hacksaw for brick processing,
- hammer,
- trowel for laying mortar,
- building level, preferably with a laser pointer,
- jointing,
- rope or cord for marking the radius and controlling the circle. To lay brick you will need a standard set of tools
Prepare the following supplies in advance:
- cement mortar for masonry,
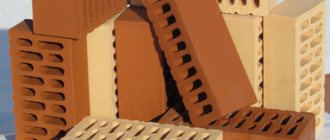
- brick in the right quantity,
- wooden beams for making a supporting frame,
- chipboard sheets for making circles,
- self-tapping screws or regular nails for fastening all frame elements.
Depending on the chosen type of arch or its design features, the list of tools and materials may be supplemented.
Sequencing
The entire procedure for constructing an arched structure depends on the type of arch chosen and your individual capabilities. Before making a brick arch, it is necessary to clearly divide the production process into several main stages:
- design and construction of an arched template,
- installation of the template in place of the proposed arch,
- laying bricks relative to the selected type of structure,
- securing the structure,
- dismantling the wooden template,
- decorative finishing of the arch surface.
The template for the future structure is made from wooden beams and chipboard sheets. This element should be given special attention, since the appearance of the arched structure depends on the quality of its manufacture and strength. The beams are used as a supporting frame, and a circle of the required shape is cut out of chipboard sheets.
When making a template, it is important to consider the possibility of its free dismantling and reuse after laying the brick. To do this, the template itself needs to be made slightly smaller than the size of the opening, since under the influence of moisture the wood can swell and its dismantling will become significantly more difficult.
Before building a brick arch, the markings of the future structure are transferred to chipboard sheets. To do this, mark the lower and upper points of the proposed design on the sheet, then use a pencil or marker to connect them together in the form of a semicircle.
Using the existing markings, cut out two circles using a saw or jigsaw, then fasten them together using wooden beams so that you get the full-size arch you need. The manufactured template is installed in a door or window opening, then fixed in the desired place using supports made of beams, so that after removing the supports it can be easily dismantled.
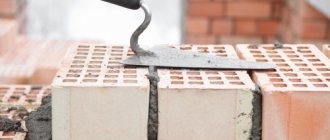
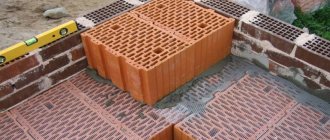
Before laying a brick arch, it is necessary to install special grooves along the edges of the door or window opening. They will allow you to clamp the structure with a lock and prevent the masonry from moving in different directions. Laying the brick begins from the opening to the center of the arched structure and this must be done simultaneously on both sides. In order for the pressure on the template to be uniform and the masonry to converge exactly in the center of the top point.
After the brick is laid in place, the final step is installing the lock. The lock is the very last top brick, which is installed exactly in the center and hammered in with force. Thus, it expands the structure, and the arch becomes a fixed solid element.
After the lock is installed, it is necessary to dismantle the template and carry out final modifications to the design. Refinishing means removing excess parts of the mortar and straightening the seams, giving the arch a beautiful look.
Common mistakes when creating arched structures
First, it is necessary to carry out accurate calculations of the future structure and study the construction technology in order to avoid complete or partial destruction. The most frequently made mistakes include the following:
- non-compliance with the proportions of the structure. Very often the height of the structure turns out to be insufficient in relation to its width, as a result of which the load is unevenly distributed and the lock cannot support the weight of the entire brick. This can lead to cracks or complete collapse. A properly laid arch will last for decades
- using metal to construct a template. The metal template does not have the necessary elasticity, and therefore does not allow natural laying and uniform load distribution, which leads to the appearance of cracks,
- If the template made of wood is not removed in time, then the wood, in the process of swelling, also interferes with natural laying and creates reverse tension. In order to avoid this, cover the template with roofing felt or thick construction film before starting installation.
Subsequence
In general, the procedure is different for all types of arches, but the main stages of this event can be identified:
- creating a project;
- building a template element;
- its installation;
- masonry;
- removing the template;
- finishing.
It is worth noting that the template element can be made either from wooden blocks or from chipboard. Dimensions are determined in advance. And the attractiveness of the brickwork depends on the quality of the template.
What is necessary?
To lay an arch out of brick, you will need a formwork template, which is made from boards and two racks for support.
The laying is done without gaps using wedge bricks. The thickness of the joints is allowed up to 1 cm. When using cement-sand mortar, the template can be removed only after two weeks.
Related article: How to paint the slopes on the windows in an apartment with your own hands?
If there is no wedge brick, you can remake a rectangular one. For a stove arch this parameter should be small. In addition, it is not recommended to use the solution for such a case, otherwise destruction is likely.
Arch masonry
Floors
Fireplaces and stoves can only be covered with arches , screeds, overlaps or wedges. Metal products cannot be used for ceilings: reinforcement, corners, channels, etc.
The arch is the most reliable ceiling, transferring the vertical load from the upper rows of the masonry of the stove or fireplace to the walls “in expansion”.
Arches are:
- semicircular
- archery
- straight
To lay such an arch, you must first make a circle. Take a sheet of plywood and cut out 2 semicircles from it with a radius half the width of the firebox. Place the semicircles on the floor and insert 11 cm long wooden blocks between them and nail them together. The circle is ready.
When laying an arch on a cement-sand mortar, the bricks are placed on the circle whole, not ground off, but the masonry is wedged with the mortar. When laying an arch on clay, it is impossible to jam the mortar, since the clay-sand mortar has very low strength and sooner or later it will crumble out of the seams. Therefore, all the bricks of the arch must be ground onto a wedge. Moreover, the dimensions of the wedge depend on the radius of curvature of the arch.
You can calculate the dimensions of the wedge using geometric formulas, but it’s easier to draw it using a thread. To do this, place the circle on the table and attach a brick to it. From the center of the circle, pull the thread to the upper left corner of the brick. Using a pencil, draw a cutting line along the brick from the top left corner. Do the same with the right side of the brick. You will end up with a drawing that looks something like this. Then grind off the excess with a grinder or pick and you will get a wedge brick designed specifically for your arch radius.
After preparing the required number of wedge bricks, you can begin laying. The circle is installed in the firebox on supports, leveled and plumb. The arch is laid starting from the outermost bricks so that there is a brick at the top of the arch and not a seam between two bricks. The correctness of the masonry is checked with a thread stretched from the center of the circle. The bricks adjacent to the arch are adjusted to it in place.
The bulbous arch is flatter than the semicircular arch. Used for wider windows and limited window heights. The circles under such an arch are not an even half of a circle, but a sector.
The technology for laying a bow arch is the same as a semicircular arch, with the only difference being that the radius of curvature in such an arch is unknown in advance. It is calculated by the formula:
R – radius of curvature of the arch
c - the height to which you want to raise the top of the arch (usually equal to the height of 1-2 rows of masonry)
c - half the width of the firebox
Straight arch . It is used if you want to make a direct overlap. All that remains of the arch here are bricks ground down into a wedge. That is, the principle of the arch (transmitting the vertical load to the sides) remains, but the shape of the arc disappears.
There is no need to make a circle. The arch is laid along the board. In manufacturing, a straight arch is the most difficult of all ceilings. The main difficulty is the calculation of the cutting angles of each brick, or rather its measurement.
To determine the stitch angles, you must first set the center of the arch. Further technology is similar to making bricks for a beam arch. Only instead of a circle, a straight board is used. First, a center brick is placed in the center of the board. The angles of the cuts are measured using a thread stretched from the center of the arch to its upper corners.
In the same way, sequentially placing subsequent bricks against the arch, all the rest are trimmed. In this case, each time the lower right corner of the subsequent brick will fall lower and lower than the level of the board. Using the same technology, bricks are cut to the left of the center. The result is an arch with a flat bottom and a stepped top.
Now all that remains is to draw a straight line from the upper left corner of the leftmost brick to the upper right corner of the rightmost brick and cut all the bricks along this line. This way you will get a set of bricks for a straight arch. Such an arch is placed along a straight board, as if in a circle. When choosing the center of the arch, it must be taken into account that the height of the bricks and the strength of the arch directly depend on its position. The closer the center is to the arch, the steeper the wedges are, the stronger the arch, but the height of the bricks in it decreases.
Screed . It is used if you want to make a direct ceiling with vertically standing bricks. Not the most reliable way to cover. The use of steel rods can lead to sagging of the floor over time. To make a screed, take two steel rods with a diameter of 10-12 mm and a length 20-30 cm greater than the width of the firebox. Cut threads at the ends of the rods. In bricks intended for flooring, drill holes with a diameter of 12-14 mm. Place the drilled bricks in a row and thread them through the holes. Seal the joints between the bricks with mortar. After the solution has dried, put washers on the rods and tighten the resulting beam with nuts. You can install such a brick block directly on the fireplace window. It is very cute, but due to the use of metal, it is very unreliable. No matter how refractory a brick is, it still heats up and heats up the steel rods, and the coefficients of thermal expansion of brick and steel are very different from each other.
Overlap overlap. It is used for direct covering of small (up to 1 brick wide) areas in ovens. Bricks in such a ceiling do not fail due to the fact that they are cantilevered in the masonry. When laying them, you need to place a board under them, which is then removed.
Overlapping with a wedge . Used for direct covering of openings up to 2 bricks wide. To cover with a wedge, a support is also used, on which numbered bricks are laid. After finishing all the masonry, the board is removed. Bricks No. 3 are held in place by rigid embedding in the masonry, brick No. 6 is held in place by a wedge.
Create a template
The template is quite difficult to create. We can say that this stage of construction is the most difficult. After all, the result will be responsible for the shape, and at the same time play the role of a supporting structure. The template is created from a semicircle of chipboard and a piece of board. They should be nailed together, and then the hardboard is fixed.
Masonry
Making masonry with your own hands is easy if you follow certain recommendations. The bricks are laid from the edges to the middle. They should be placed according to the marks on the template. You can control the quality of the arch when there are three bricks left for laying.
The solution should be applied in a wedge shape. To maintain the symmetry of the second row, a cord is used.
It is worth cleaning the solution after it has set. To do this, use a damp brush.
Design features for the garage
You can give a sufficient number of photos of brick arches that are used in garages. To ensure its durability, it is recommended to take into account several features.
For example, many strive to make the arc minimal, but this only reduces the reliability of the design. It is also recommended to compare the strength of the template and the weight of the arch.
The posts must fit tightly so that the arch does not sag. Before starting the process, you should determine the required amount of bricks. If the arch is large, thick seams should be avoided. The thickness of the bottom seam should be 3-6 mm. Laying is done from the edges to the center. We lay the central brick last.
If the arch is made for a garage, the distance in the opening will be greater. To increase the strength of the wall above the arch, it is worth laying reinforcement.
Brick arch laying. Instructions with photos
How to lay a brick arch correctly
Arched windows and doors can often be seen in historical films. Semicircular windows of castles, palaces, monasteries - without them it is impossible to fully imagine medieval architecture. But even in the designs of modern buildings this seemingly ancient element is not uncommon. Many people believe that the arch is exclusively a design element of the building, but this is far from the case. In addition to its stylish appearance, the arched lintel evenly distributes the weight of the upper rows of bricks above the opening, which improves the reliability of the structure. The natural disadvantage of the arch is the need to use curved frames and jambs, the cost of which is significantly higher than straight ones.
Today, the two most common types of arches are arched and semicircular. A beam arch is an arc of a circle, and its degree is less than 180. Simply put, the diameter of such an arch should be greater than the width of the opening. A semicircular arch has the shape of a semicircle.
Circle for the arch
The main difficulty in building an arched lintel is the correct calculation of the circle. A circle is a special device that supports the brick during the laying of the arch. The circle is usually made of plywood or chipboard, less often - of wood. To do this, two semicircular elements are cut out of a sheet of material, after which they are fastened with jumpers. The circle is calculated in such a way that it can fit the required amount of brick along an arc. In this case, you need to take into account the thickness of the seam between the bricks. The seam is a trapezoid shape, the smallest base of which is 5 mm. Thus, the circle can be divided into equal sectors, the chord of which will be equal to the sum of the width of the brick and the thickness of the seam. To simplify dismantling, the width of the circle should be slightly less than the width of the opening.
Castle brick
An important element of the arched lintel is the lock. The key brick plays the role of a wedge that pushes the arch apart, strengthening the entire structure. The castle must be installed strictly vertically, so the number of bricks in the arch must be odd. Sometimes the castle brick is installed so that it protrudes somewhat from the lintel, while playing a decorative role.
Arch masonry
The laying of an arched lintel begins with the installation of a circle in the opening. The circle is installed on wooden spacers and leveled. Laying begins simultaneously from both sides towards the center, with special attention paid to the thickness and identity of the seams. The locking brick is installed with some force so that the arch is securely fixed in the opening. In this case, the use of a hammer is excluded, since sharp blows can damage the structure. After 1-2 hours, the supports are relaxed, and the arch is covered with plastic film to prevent swelling of the wooden templates. The circle is removed after a few days, after the solution has gained the necessary strength.
Application of the arch
An arched lintel can often be found not only in window openings on external walls. An arch in a room can significantly increase its volume, while outwardly it is more attractive than a standard straight jamb. In addition, arches are found above the fireboxes of stoves and fireplaces, in the vaults of buildings, in the construction of gazebos and canopies.
Design features for stoves and fireplaces
In this case, the bricks are fitted tightly so that they touch at the bottom. When the masonry is dry, the template may be difficult to remove. Then there is an alternative - to burn it during the combustion process.
Related article: Do-it-yourself polycarbonate doors: algorithm of actions
Causes of destruction
There are special circumstances that may cause the arch to burst:
- Small radius with large width. Due to the uneven distribution of significant loads, cracks and destruction may appear;
- If metal bases or corners are used as a template. Despite the desire to use them to strengthen the structure, the result may be the opposite. After all, a metal base, unlike a wooden template, does not allow the arch to shrink. This may cause cracks to appear.
- The template was not retrieved in time. While the template is in the structure, it absorbs moisture, the wood swells, as a result of which the masonry cannot withstand stress. Therefore, if you cannot immediately pull out the template, you should cover the arch with polyethylene.
- The cause of destruction may be subsidence of the foundation, in which case it will need to be strengthened.
Laying a brick arch in a kiln
The arched lintel in the stove is far from decorative. In addition to its attractive appearance, it allows you to effectively distribute the load from the upper brick rows, which significantly increases the mechanical strength of the oven.
This architectural solution is used not only when laying the stove, but also during construction. The ability of the arch to distribute the vertical load to the sides, thereby, as it were, “locking” the wall, is widely used in the construction of not only openings, but also blank walls that experience heavy loads.
An arched lintel is a series of bricks laid out in an arc. Their number must be odd. The central element is called the lock, and the outer ones are called the heels. The space covered by an arch is called a vault or span.
In an arched lintel, even if the ceiling itself is straight, the seams between the stones are directed towards the center of the conditional or obvious rounding. The stones in the arch are necessarily wedge-shaped - this is the fundamental difference between an arched ceiling and any other.
Types of arches
Depending on the shape of the arc, there are several types of jumpers.
- Semi-circular or full is the most reliable option. The arch is laid out in half a circle, the radius of the circle is half the width of the firebox.
- Luchkovaya – a variant in which the arc of rounding forms a sector of a circle. It is flatter and the radius must be calculated in each specific case.
- Direct - the appearance does not differ from the usual direct overlap. The principle of distributing the load to the sides remains due to the use of wedge-shaped stones. The photo shows a sample of a straight jumper.
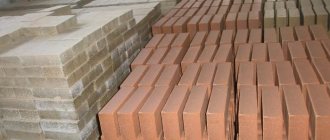
- The brick is solid ceramic, grades no lower than M - 150. Construction stores offer wedge-shaped products. If desired or necessary, you can give the stone a wedge shape with your own hands.
- The solution is clay with the addition of fireclay sand. It is not recommended to lay the arch on cement mortar, as it cannot withstand high temperatures.
- Chipboard sheet for making templates.
It is not recommended to use channels or metal corners for templates: unlike wood, this material is not exposed to water and will disrupt the natural shrinkage of the arched lintel.
Arch calculation and template making
Depending on the type of arched lintel, the calculation methods and do-it-yourself masonry technology will differ.
Semicircular jumper
The radius of the full arched lintel is half the width of the combustion chamber. That is, in this case, calculations come down to accurate measurement of the parameter. The drawing shows a diagram of a semicircular furnace jumper with dimensions.
- Two templates or circles are made from a sheet of chipboard: half a circle with the required radius is drawn and cut out. Two templates are fastened together with bars. The circle should be a couple of centimeters smaller than the width of the firebox, so that it can be easily dismantled in the future.
- The length of the arc determines the approximate number of stones to be laid with allowance for seams. It is recommended to lay, achieving a minimum seam width of 3 mm. In practice, this recommendation is difficult to implement, since the unevenness of the stone itself can reach 7 mm. So the width of the seam should also include irregularities - at least 5 mm.
- The dimensions of the wedge can be determined using a practical, visual method. To do this, the central brick is placed on the top of the circle, and a thread is pulled from the center of the circle to the edge of the stone. Then the cut line is marked with a pencil, and the operation is repeated on the other side. In this way, the exact wedge shape of each element can be established.
- The required number of stones is cut out.
Bow lintel.
- The radius of curvature is calculated using the formula: radius = (square of the height of the lintel + square of the width of the combustion chamber)/ two heights of the lintel. As a rule, it is 1–2 rows.
- Making a template and calculating the wedge shape is carried out in a similar way.
Straight jumper
This is the most difficult option to manufacture. Templates are not made; wedge calculations are made using a straight board, the length of which is equal to the width of the lintel.
- The central stone is placed in the middle of the board, the thread is pulled from the center of the arch - in this case, just the middle of the opening, to the corners of the brick and the resulting lines are marked. The stone is immediately given the desired shape.
- The second brick is placed next to the central one so that its corners coincide with the corners of the castle. As a result, the outer bottom corner of the next brick should be below the board line. The cut lines are then marked and the stone is shaped. The same applies to each subsequent element. As can be seen from the drawing, the next stone in the lintel will be smaller in size than the previous one, and thus the arch disappears towards the edges.
- Further laying is carried out on the straight board used for calculations.
Laying an arched lintel
When installing a jumper with your own hands, a constant level check is required. The allowed displacements and distortions, instead of strengthening the furnace, will provoke a weakening of the arch.
- The template is installed in the opening and firmly secured using spacers.
- Fines are installed on the sides of the opening. This will allow you to quickly clamp the arched lintel.
- Laying bricks begins from the edge to the center on both sides simultaneously. It is necessary, if possible, to achieve the thinnest possible seams between the stones, since the strength of the structure largely depends on this.
- The central stone, a lock, is driven into the masonry, “closing” the lintel. The photo shows a stove arch with a circle.
- The template is removed. The seams are leveled and excess mortar is removed.