The modern construction market is replete with plumbing fixtures made of enameled cast iron, steel, acrylic and even more exotic materials. It would seem that choosing a suitable model from among the variety would not be difficult.
However, in reality this is more difficult to do, since bathtubs are produced in standard sizes corresponding to the dimensions of typical apartments. Making a custom wash container is often too expensive, and you have to wait a long time for the finished product, which slows down the repair process. In cases where ordinary bathtubs are not suitable, a brick bathtub is an ideal option, especially since making one with your own hands is much easier than it might seem.
Types of decor
For proper styling of plumbing rooms, you can use a variety of wall decor. It allows you to highlight niches, stylize and separate surfaces. Original additions are of the following types:
- Mosaic;
Small tiles help highlight parts of the walls. They can be used for pasting the screen, laying out the lower half of the walls, separating them (laid out in a thin or wide strip). Suitable for decorating the space above baseboards, filling niches, and highlighting shower areas.
- Border;
Used for horizontal and vertical division of space. Represents small rectangles.
- Panel;
They can have medium and large sizes. They represent a finished image (applying a picture to one element) or are used for laying out large paintings by composing elements with different parts of the picture.
- Piece elements.
They are similar to border elements, but have a greater height and width. They are used to separate walls, complemented by patterns and abstractions.
Laying method as a type of decor
The conditions for laying tiles on the walls and floors affect the overall design and features of the perception of the design. Its gluing can be carried out according to the following schemes:
- Row.
It assumes the arrangement of elements strictly below each other. Thanks to this, the effect of dividing the wall into squares is achieved. Applicable only to perfectly flat surfaces.
- "Brick" (offset).
The offset of each row creates a special dynamic design and allows you to hide uneven surfaces.
- Diagonal.
This method uses the finishing of square and rectangular shapes. It is fixed at an angle of 90 degrees - diagonally.
- With a shift.
Involves laying large and small elements. Can be positioned standard or at an angle of 90 degrees.
- "Herringbone."
It is carried out to imitate parquet. Only long rectangular elements are suitable for work.
The most unusual installation is carried out for ceramic tiles in the shape of a honeycomb. This finish makes the design stand out and expands the space.
Preparation for finishing
When the waterproofing work is completed, fill the bowl with expanded clay or crushed stone in a thin layer, place a three-dimensional metal mesh on the bottom and walls, in which you first make a hole for the sewer pipe, and pour concrete. Do not forget that a slight slope should be made towards the drain to allow more active flow of water and prevent it from stagnating in the font.
After drying the concrete screed, plaster the bottom and walls inside and out and leave the bath for final drying before laying the tiles.
Color spectrum
It is worth moving away from standard white and blue tones when decorating sanitary facilities. They can be perfectly replaced by beige and turquoise shades. To create a warm design, it is recommended to use light brown and pink colors. They combine well with each other and create harmonious zoning of space. For small rooms it is worth choosing pastel and other light colors. For example, shades of lavender, pale green and light yellow will help make the space larger and carry out competent styling. For spacious rooms, it is permissible to use a dark blue or purple shade. The combination of black and gold will be exquisite. But it is not recommended to add silver to the black finish: the finished design will be cold and uncomfortable. The presence of decorations will help make the room original. But there shouldn’t be a lot of it, otherwise the space will be visually reduced. Installing bright lighting will help highlight some parts of the room and emphasize decorations.
Filling the room with interesting accessories ↑
The bathroom can be equipped with unusually shaped towel holders, stands for soap and toothbrushes. In a plumbing store, you can choose models that match the style and color of the tile, successfully harmonizing with the ornament on it.
Decorating the bathroom with paintings and mosaics is a great way to make the interior elegant
Curtains with a thematic pattern can also serve as a decorative element. A large mirror with a beautiful frame will make the room bright. The frame can be decorated with decoupage elements. The tiles will sparkle with new colors if you hang pictures on the walls and complement the interior with shelves with flowers.
Seam width and color
The thickness and color of the seams between individual finishing elements in the bathroom play an important role. They can reduce or increase space and are one of the design elements. Therefore, when choosing grout and crosses, you need to consider the following features:
- Light-colored grout requires more care because it darkens quite often. Soap stains and dust will be clearly visible on dark grout. A beneficial solution would be to use grout to match the finish. Adding special antiseptic agents will help prevent the appearance of mold and mildew on it.
- The average seam width is 1-2 mm. Thick seams help reduce space. They are suitable only for large rooms lined with large elements.
- The contrast between the colors of the trim and seams highlights any unevenness or installation errors. Therefore, sharp transitions between shades of cladding and grout should be avoided.
The same colors of trim and seams make the wall look seamless. This design helps hide any irregularities.
Formwork
Creating formwork is a step that precedes pouring a concrete bath. For formwork, boards and reinforcement are used, secured with wire or staples. The place where the bathtub will be installed must be completely cleaned, since subsequently it will be part of the room.
Attention! If the room is small, it is preferable to place the bath in the middle of two opposite walls. Thus, the three load-bearing walls of the room will be part of it. And you will have to build one wall - a fourth. This will save time and material.
- When the installation site is completely clean, it needs to be coated with primer several times. This is done to improve the adhesion of concrete and wall.
Applying primer
- The frame of the structure is created from metal rods. It is advisable to fix it to the load-bearing walls of the bathroom.
- Using boards you should create formwork. They are tied with wire as tightly as possible. The formwork should not have holes or cracks so that the poured concrete solution does not leak out through them. Boards should be chosen smooth so that they can be easily dismantled later.
- The formwork creation process is completed. All that remains is to fill the finished structure with concrete. But do not forget about holes for drainage or overflow, as well as free space for a siphon.
Advice. Use plastic pipes of the appropriate size, which are installed before pouring the concrete. Installing a siphon and connecting it to the sewer system, followed by complete concreting, can later create difficulties for troubleshooting and cleaning.
Design and ways to transform space
With careful selection of finishing design, you can beautifully and originally decorate the space of any room according to the parameters. A small area is not a death sentence if you make the walls light. They don't have to be just white. For example, the finish may have a pearl color. The combination of light walls and dark floors looks good. Including flat tiles in brighter colors will help raise the ceiling. Horizontal framing of the room will help expand the space. In this case, the part under the restriction and the floor itself may be gray or brown. Small patterns are suitable for spacious rooms. But it is better to decorate a combined bathroom with one large panel with beads, people or other decoration. For a marine style, this could be images of a dolphin, shell, sunsets or sandy beach. Floral panels with bouquets are more suitable for spacious rooms. For small ones, it is better to opt for one medium or large flower: orchid, rose, tulip. In a spacious room, a dark wood finish is also acceptable.
Main stages
Building a concrete bathtub is not as difficult as it seems. The work is divided into several main stages that must be performed sequentially.
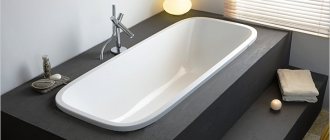
Original design with a concrete bathtub
Attentiveness, accuracy and precision are the key to quality work.
- Preliminary stage. It includes creating a project, calculating the need for materials, marking out the room and preparing tools.
- Preparatory stage. This includes the installation of formwork.
- Concreting. The walls and bottom of the bath are made of ready-mixed concrete.
- Plastering walls.
- Finishing work.
All steps must be performed efficiently and consistently. This way you will achieve a good result. In order to build a concrete bath yourself, you do not need special skills, but you will need precision, care and precision.
Decoupage tiles
Updating old room decor or decorating with new decor is quite easy using simple decoupage tips. For a bath, separate decoration of tiles (from a set or already glued to the wall) is suitable. Thick napkins for decoupage and high-quality fabric can be used as decorations (cotton fabric with a small percentage of synthetics is ideal). You can also glue beautiful half-beads to surfaces using universal glue. But after fixing, they need to be well varnished. The simplest option is to use vinyl stickers that are simply glued to the surface of the walls. You can carry out original decoupage using fabric or paper with your own hands according to the following instructions:
- Sand the base with a glossy or matte surface with sandpaper with minimal abrasiveness. Degrease the surface. Cut out the desired element from the material for decoupage;
- Soak paper or fabric with special colorless decoupage glue and attach to the base. Treat the surface with a thick flat brush, removing accumulated air;
- After the glue has dried, apply a protective varnish of increased thickness.
Painting bathroom tiles is easy ↑
When you want to decorate those boring tiled walls, the simplest thing your imagination suggests is to paint them! Of course, you can just take and paint the tiles in the bathroom, or you can do it beautifully and highly artistically. For example, you can paint not the entire tile, but in parts. Your tile was white, but now it’s multi-colored. Look how unusually the walls of the bathroom are painted.
Coloring tiles in a checkerboard pattern
This is not just a checkerboard arrangement of colors, this is surrealism on the wall! It's not difficult to do this. First, choose the paint colors you want. The paint should be for tiles or glass, otherwise your artwork will quickly come off the surface of the tile. Before painting, the tiles must be degreased and dust free. That's all, actually. Next, you paint the tiles with a brush, sponge, roller - whatever is more convenient for you. To make the lines smoother, apply masking tape.
Technique for painting tiles with masking tape
But why is strict geometry necessary? You can draw whatever you want. All you need is imagination, paint and a brush. The technique is the same: degrease the surface and paint with tile paint or acrylic.
Painting on tiles with a brush
You can create such beauty in an Asian style in your bathroom using paint and brushes.
Drawing on tiles covering the entire wall
Painting tiles with your own hands: video ↑
Tile care
Proper cleaning of tiles should be carried out without the use of abrasive powders, metal or other hard brushes. Such surface treatment will lead to the formation of microcracks, where dust, dirt and soap will constantly accumulate. Pieces of metal scrapers may get stuck in the resulting damage, which will lead to rust. Be sure to read the manufacturers' recommendations before washing surfaces. These compounds should be purchased immediately after repairs and constantly used for cleaning. This will prevent darkening and damage to individual elements, and abrasion of the protective glossy or matte layer. To clean the seams, it is recommended to purchase special grout. They will ensure that contaminants are pushed upward, ensuring ease of removal.
The compositions used for quick and effective cleaning of seams are aggressive. When using them, be sure to wear a mask and thick rubber gloves.
Calculation of material quantity
The purchase of materials for finishing a house should begin with an accurate count of the required units. For wall cladding (in a row), the calculation should be carried out according to the following scheme:
- Multiply the height and width of each wall accordingly. Add up the resulting numbers. Calculate the sum of the areas of window and door openings (height multiplied by width), subtract it from the previously obtained number;
- Multiply the length of each finishing element by its height;
- Divide the number obtained in point 1 by the number from point 2.
When dividing walls and using different types of finishes, this calculation must be carried out for each type. If offset masonry is to be carried out, then it is better to use a special program for the work. The calculation can be carried out both in meters and in centimeters. The amount of floor finishing is calculated by dividing the floor area by the area of one tile. For direct laying, add 5% to the resulting number, and for non-standard laying (offset, diagonal) - 10%. This kind of insurance will help you purchase a sufficient amount of materials.
Brickwork
Start laying bricks from the floor, and then form the walls. Before installing each brick, first dip it in water. This simple procedure is necessary to ensure that the brick is saturated with moisture and does not dehydrate the cement mortar. If you create walls from dry brick, the material will begin to draw water from the cement. As a result, the walls will turn out to be fragile and will not last you long.
While working, be sure to check the evenness of the walls. This is not difficult to do - from time to time check the horizontalness of the masonry with a building level, and in order to make sure that it is vertically correct, use a plumb line.
When forming walls, do not take an excessive amount of mortar. If you find that the solution has come out of the seams, then remove it immediately, since after hardening it will be much more difficult to remove.
Having completed laying the brick and making sure that the structure matches the dimensions and its walls are even, leave the future bowl to dry. As a rule, it takes several days for the materials to get rid of moisture and gain strength.

