The mixer is one of the devices that needs to be repaired from time to time.
The parts of the shut-off and control device wear out relatively quickly, especially if there are solid mechanical impurities in the water, resulting in leaks, so information on how to disassemble a mixer in a two-valve type bathroom is always relevant.
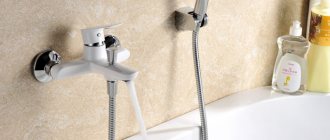
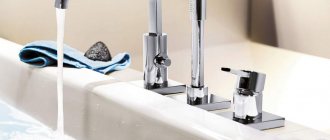
Although single-lever instruments are becoming increasingly popular, double-lever designs are still quite common.
Features of two-valve models
The main purpose of a faucet with two valves is to regulate hot and cold water to combine a certain temperature in a single stream. This model has long been considered to have lost popularity and only a few still prefer it to other crane options. Despite the convenience and popularity of single-lever type mixers, this option is cheaper, and if you compare the technical characteristics, they are practically no different from each other.
Structure of a two-valve mixer
In turn, mixer valves are divided into several types:
- With elastic gaskets (made of rubber, silicone, etc.).
- With ceramic discs.
Regardless of the type chosen, two-valve faucets work perfectly with both gaskets and discs, since they are interchangeable.
Single lever
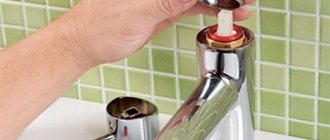
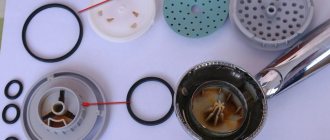
The reliability of a single-lever mixer is mainly determined by the condition of the cartridge. Repair comes down to cleaning, lubricating or installing a new cassette. To remove the cartridge:
- Remove the round plug covering the stopper.
- We loosen the stopper with a hexagon.
We take out the plug and unscrew the stopper. - We remove the lever.
We remove the lever. - We unscrew the decorative chrome-plated ring; threadless fastening is possible with interference due to the rubber seal.
We take out the ring. - Unscrew the nut holding the cartridge. They also produce products with the cassette attached with screws to the bottom of the case.
Unscrew the nut. - We remove the cartridge.
We remove the cartridge.
Tip: Fill the stuck fasteners with Vedashka or kerosene for a couple of hours.
Explanatory video from KOHLER:
A common problem - leakage at the connection between the spout and the body - can be solved by replacing the O-rings. In most cases, access to them is gained by dismantling the lever, the chrome-plated ring, and then removing the spout upward using a rotational-forward movement.
There are designs for sinks in which the swivel jib is removed downwards, so in sequence:
- Unscrew the nuts on the housing studs (from the bottom of the sink).
Unscrew the nut securing the mixer. - Remove the figured washer and gasket.
- Raise the faucet over the sink and disconnect the supply pipes (sleeves) from the body.
Disconnect the supply hoses. - Remove the swivel spout.
Disconnect the spout.
Masters experience:
Crane design
The mixer is usually made of brass, a little less often of steel. Brass is considered the best material for bathroom faucets; such faucets will last longer and look much more aesthetically pleasing than other faucets.
Herringbone mixer design
The mixer consists of a spout in which cold and hot water is mixed and two valves (faucet boxes). Mixers are divided by type as follows:
- “Herringbone” is a plumbing device that has a tee. Several channels are drilled into the housing, which are connected to the water supply via a tee. At the top of the tap the channels are connected.
- With pipes. Simplified version. It has two flexible or rigid connection pipes through which it is connected to the water supply.
Before disassembling the two-valve type structure, you should prepare the tools. You will need:
- adjustable wrench;
- screwdriver;
- any matter.
Main causes of failure
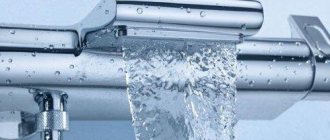
The main cause of failure is physical wear of the sealing gaskets and rings. Because of this, they cease to perform their function. A leak forms in the connecting nodes of individual elements: in the place where the gander and shower hose are attached to the mixer body, from under the valves.
DIY Tools
To perform the repair you will need:
- wrenches or universal adjustable wrench;
- hex wrench;
- pliers;
- components to replace failed ones;
- flat and Phillips screwdrivers;
- FUM tape or linen winding.
A hex wrench may be needed.
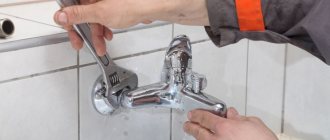
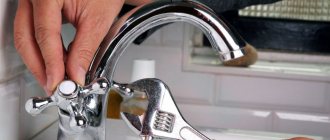
Crane dismantling
This procedure is simple and does not require any special skills or abilities. It will be enough to have the necessary tools with you and want to do the work yourself. Disassembly of a two-valve type mixer should be done when the first leaks appear, a thin stream of water flows, or the valves are poorly adjusted.
Attention! A faucet malfunction requires immediate repair. Otherwise, an accident may occur and the water pressure may tear out the hose.
Before disassembling the faucet, lay a cloth or any other protective covering on the bottom of the bathtub. It will protect the surface from possible chips as a result of falling tools or parts of the mixer.
Any owner can repair a two-valve faucet.
To dismantle you will need a screwdriver and an adjustable wrench. This work is familiar to many men, but those who have not yet encountered the disassembly of a faucet need to carefully read the instructions and follow them. You will definitely succeed. Pay attention to the work and do not rush under any circumstances.
- The first stage of any plumbing work is to turn off the water supply.
- Drain any remaining water from the faucet hose.
- Cover the bathtub drain with a rag to prevent small parts from getting in there.
- Using a screwdriver, pry up the decorative plastic covers on the valves that indicate hot and cold water.
- There will be screws underneath them. You need to unscrew them with the same screwdriver.
- Then, using an adjustable wrench, carefully unscrew the faucet axle boxes, disassemble the remaining parts of the faucet and check for breakdowns, blockages, deposits and other causes of malfunctions.
How to put it back together
When disassembling any two-valve faucet with your own hands, you must remember the sequence of actions performed, which will allow you to easily assemble the structure in the reverse order. The mixer installation process has the following features:
- Before assembly, you must make sure that there are no worn or repairable working elements.
- The tightness of the connections is ensured by carefully wrapping the threads with tow, flax or FUM tape.
- It is important to adjust the horizontal position as accurately as possible, as well as the center-to-center distance of the eccentrics, then install rubber or silicone gaskets and tighten the couplings or nuts to secure the mixer to the pipeline system.
- After replacing or tightening the gaskets, the crane box returns to its original place.
The correct assembly is checked during a test run of the water supply. If the water pressure is insufficient, then you need to make sure that there is no blockage or accumulation of dirt inside the faucet spout:
- The nut fixed on the faucet spout is loosened and twisted.
- The mesh is thoroughly washed under running water.
- All structural elements are installed in their original place.
Two-valve designs are in great demand due to the smooth regulation of water flow and temperature, the variety of shapes and design solutions of the body. Therefore, the ability to independently disassemble and correctly assemble such plumbing devices will always be useful to their owners if they need to perform an inspection or minor repair.
Replacing the crane axle box
If the cause of the breakdown is the failure of the crane axle box, it can be easily replaced with another one. You can buy new parts for the crane axlebox in the store or replace it completely. The last option is preferable.
Replacing the crane axle box
Step-by-step instruction:
- The cap should be removed from the flywheel. You may need pliers for this. Underneath it, inside the flywheel, there is a screw that needs to be unscrewed to remove the mixer valve.
- It is not always possible to quickly unscrew the valve; during operation, it sometimes becomes tightly fused with the tap. But still, after the valve is removed, the threads need to be cleaned. The flywheel will also have to be cleaned. Over the years, a lot of garbage has accumulated there.
- Then you need to unscrew the faucet fittings. This may also require some effort. Take sliding pliers and try using them to disassemble the fittings.
- When you remove the fittings, you will notice the axle box screwed into the faucet. Before turning it out, check again whether the water in the riser is turned off. If this is not done, water will flow under high pressure after removing the axle box from the tap.
Crane axle box with rubber gasket - After the axle box is unscrewed, you should carefully clean the threads of the tap. The manipulation is done so that the part fits more tightly into the thread. Otherwise, debris may remain there and water will flow out of the spout and flywheel.
- Each crane requires its own type of crane axle box. To choose the right component based on threads, dimensions and other characteristics, take it with you to the store. It will be easier for your sales consultant to select the right crane axle box for you.
- The mixer is installed using a sequential method, the reverse of dismantling.
Advantages and disadvantages
The popularity of the two-valve mixer is based on several operating factors.
- Simple design diagram.
- Possibility of replacing parts.
- Long service life.
- Easy to set up and easy to manage.
A significant drawback is the rapid wear of the sealing gaskets.
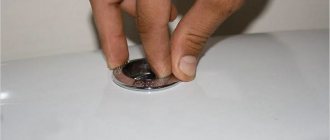
Replacing the gasket
Another common cause of faucet failure can be wear of the gasket. To eliminate it, you will have to dismantle the tap and replace the gasket.
Replacing the rubber gasket of a two-valve faucet
The sequence of action for disassembling a two-valve type mixer will remain unchanged. When the valve box is unscrewed, you will need to change the gasket.
Advice. You can purchase a gasket in a specialized store or make it yourself by cutting it out of a piece of dense unnecessary rubber or leather. It is cut out with scissors or a knife according to the pattern of the old gasket.
After replacing the gasket, reassemble the faucet and do not forget to turn on the water supply in the riser. In general, the work will not take you much time.
Required tools, accessories
Mandatory repair kit:
- Open-end wrenches with jaw sizes (S) 12 – 30 mm.
- Set of hex keys. Typically, 3, 10 mm hexagons are needed - for the stopper of the cartridge of a single-lever faucet and the fuses of classic models, respectively.
Open-end and hex keys. - Screwdrivers with a flat, Phillips blade 3 - 4 mm wide for fastening wings.
Screwdrivers and pliers. - Pliers will come in handy to unscrew the handle caps.
- A utility knife for prying off the protective caps of the handles.
An adjustable tool has a slight backlash, so it is easy to crush edges, such as axle boxes, when tightened tightly. Where dimensions allow, tall socket heads can be used to ensure a more uniform application of force. A gas wrench, even number 1, is not recommended. If you don’t calculate the force, you risk crushing thin-walled elements, breaking threads, leaving scuff marks and dents on chrome with powerful jaws.
Foreign fittings are distinguished by a number of S, for example: 15, 16, 18 instead of 14, 17, 19 mm - according to domestic standards. It is not allowed to use keys that do not correspond to the size of the edges, in order to avoid “licking” the latter due to slipping.
Professional equipment:
- Adjustable plumbing (pipe) wrenches, overhead non-metallic jaws for them.
The keys are adjustable. - Tape (tension) samples that carefully clamp chrome-plated parts such as caps.
- Special keys: socket keys for securing the cartridge or ball to the threaded ring of products from some companies, plastic ones for replacing the aerator.
Keys for aerators.
Screwdriver and wrench for disassembling the ball mixer.
In problematic cases, the following is required:
- WD-40 or analogues that dissolve rust.
- Electric drill to drill out the screw securing the handle. The drill must be smaller than the bolt diameter by the thread pitch plus a margin for drilling the hole (0.1 - 0.2 mm). When planning to replace the axle box, remove the head with a drill larger than the diameter of the rod.
Drill out the locking screw. - A vice allows you to securely clamp the tap between the boards without damaging the coating.
Don’t forget to prepare soft, clean rags and wear cotton gloves – culture and quality of work begin with the little things.
Mixer tap seat repair
If chips and roughness appear on the mixer seat, it is possible to repair it by grinding with a roller cutter using a drill.
Another option is to repair the seat by lapping. The lap consists of a base with two screw threads of different pitches, so it can be used for any axlebox. After grinding the mixer seat, you need to remove metal shavings. To do this, you will need to remove the jet regulator, plug the hole tightly with your hand, and then slowly open the water for a few seconds.
Repair of valve seat using lapping
Sequence of work:
- Disassemble the crane and remove the axle box.
- Carefully check the condition of the saddle with your hands. Perhaps the cause of the breakdown was the presence of scale or lime deposits.
- Screw the lap into the faucet.
- Turn the handle of the device several times.
- The work is completed, you can reattach the mixer.
Attention! Don't forget to turn on the water supply in the riser.
As you can see, any cause of failure can be eliminated yourself. Those who are looking for an answer to the question of how to disassemble a two-valve faucet in a bathroom should read the step-by-step instructions and watch the video to become more familiar with the sequence of actions.
After disassembling the faucet, clean all its parts to prevent damage.
The two-valve type of mixer is a favorite classic, which has been used since Soviet times. Despite the fact that over the years it has lost its position of popularity, many owners have not changed their preferences for decades. Everything is quite simple: in terms of technical characteristics, the model is comparable to a single-lever faucet, its price is much lower and repairs are much more convenient and simpler.
A two-valve faucet consists of several parts that are attached in series. Installing and dismantling it will take a few minutes for professionals and a little more time for beginners. You can always find inexpensive replacement components for the mixer to fix breakdowns. You will no longer need a plumber from a housing company; you can fix everything yourself. And this is a great saving of money and time, because you don’t have to wait all day for a specialist who needs to be paid.
Repair of axle box in a mixer: video
Repair of a two-valve tap: photo
Preventive actions
Faucet repair cannot always solve malfunction problems. In many cases, and always at the wrong time, the tap must be replaced. To extend the life of the mixer as long as possible without repair, experts recommend taking preventive measures and taking a responsible approach to choosing the product.
- When purchasing, choose heavy-duty brass faucets. They are more durable and will last much longer. But sulimine mixers will not last long.
- To protect your faucet from most repairable breakdowns, install water filters.
Tap water purification - Before disassembling a single-lever mixer for repairs, carefully read the instructions, watch thematic videos and, if possible, consult with specialists.
- Additionally treat all connecting elements with sealant, and place threaded connections on fum tape.
- Carry out preventive inspections and replacement of mixer seals. This way, a leaking faucet won’t take you by surprise.
Faucet leaks that are not corrected promptly can cause serious problems. It is not difficult to disassemble and repair the mixer yourself. The main thing is to understand the structure of the crane and have the necessary tools and spare parts on hand.
Do-it-yourself repair of a single-lever mixer: video
Single lever mixer: photo
Advantages of single lever equipment
Everything that is very capable is easy, in this case we can notice confirmation of this truth.
Here is a sequence of advantages that contribute to the growing popularity of faucets with handles:
- Aesthetically attractive appearance. Stylish design will decorate any interior.
- convenient operation and practicality. Now you don’t need to slide the valves with soapy hands; you can also open the water with your elbow.
- Instant regulation of flow pressure and temperature with one movement.
- Service life is an order of magnitude longer than outdated analogues, also thanks to modern materials and thoughtful design.
- repair and disassembly - Maximum ease of assembly. The owner can fix minor problems himself.
Cleaning products
Despite the variety of cleaning products, traditional methods of cleaning faucets are still popular, but professional ones speed up this process.
Professional
Specialized household chemicals can either quickly clean any bathroom faucet or ruin it. Black spots, stains, darkening are a consequence of using the wrong product.
Manufacturers of cleaners advise paying attention to:
- The material of the faucet, its coating - soap compositions that are suitable for some surfaces easily damage others;
- Purpose of the detergent. Substances for cleaning bathroom rust react with active chromium, which coats the surface of the faucet parts, destroying it;
- Ingredients on the label. The most destructive substances for taps: chlorine, phosphoric acid, sulfuric acid, hydrochloric acid;
- Consistency of detergent. Gentle cleaning is guaranteed by sprays, gels, creams - powders can scratch the polished surface.
Working with household chemicals requires protecting your hands with rubber gloves. The active substances in detergents easily corrode the skin of your hands.
- Cif Cream
- copes well with plaque and removes stubborn stains. The consistency is creamy; - Ravak
- gel that prevents the appearance of water stone; - Cilit Bang
- a suspension that carefully removes rust and limescale; - Domax
is a cleaning product that is suitable for metal, glass and ceramic surfaces; - Sanita
is a creamy product that gently removes plaque and does not leave behind streaks.
Folk
The active components of detergents - acids and alkalis - are always at hand for experienced housewives. Substances at hand help clean plumbing fixtures, no matter what materials they are made of.
- The enamel faucet
responds to baking soda. Dip a damp sponge or rag into the powder, generously cover the surface, leave for half an hour, and then a toothbrush will easily remove any remaining dirt; - The chrome tap
is wiped with half a juicy lemon; - Plastic
does not react to harsh agents, so you can remove plaque from it with a solution of 9% vinegar, citric acid and water; - Ceramic taps
will be saved by Coca-Cola - it not only softens salt deposits, but also removes unpleasant odors; - A soap solution
is suitable for cleaning any surface if the dirt has not yet become embedded. Liquid soap or laundry soap (pre-grind) is dissolved in warm water - wipe the surface with the resulting solution, then rinse clean.
Despite the lower activity of the chemical components in the composition of the available products, the taps also need to be thoroughly rinsed with clean water after using them.