.
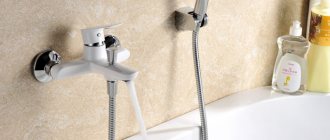
No bathroom is complete without a faucet. They come in different types and have their own types of breakdowns, which are very often caused by clogging of structural elements and weakening of connecting elements. One of the most common problems is when water flows from the tap and shower at the same time.
The breakdown of the faucet in the bathroom is associated with clogging of the structural elements and weakening of the connecting elements.
Such a breakdown brings a lot of inconvenience, since it is not possible to take a normal shower, because the pressure is distributed almost evenly both in the spout and in the shower head itself. There are several reasons for such a breakdown; below we will look at the most common of them and determine how to eliminate them.
Main causes of breakdowns
During operation of the water tap, various problems may occur:
- Valves are not closed tightly (water drips or flows);
- Weak water pressure even with the valves fully open;
- A hum from an open tap;
- Malfunction of the “faucet-shower” switch (water flows simultaneously from both the faucet and the shower).
There are two main reasons for such malfunctions:
- Structural defects of the mixer (poor quality material or poor workmanship);
- Bad water in the system (water with rust, turbidity, solid particles, “hard” water).
In most cases, it is possible to repair the mixer yourself.
In this case, you should remember basic safety measures:
- Before repairs, you must always turn off the hot and cold water with the valves at the entrance of the pipes into the apartment.
- After closing the inlet valves, open the mixer taps and check if water is flowing - the inlet valves may also be faulty.
- Be careful when working with hot water - you may get scalded;
- Do not use excessive force when tightening - the thread may be stripped.
Do not forget about these precautions, even if you need to tighten a loose nut on a faucet - after all, excessive force can tear it off, and you will flood your apartment and the neighbors below.
What is the reason for the failure of the DHW system?
There are several answers to the question why hot water flows from a cold tap:
- lack of shut-off valves;
- sudden changes in pressure;
- breakdown of working parts of the crane;
- improper installation of equipment;
- violation of operating conditions.
The most common negative phenomenon is the periodically occurring pressure difference in the water supply. It should be noted that the pressure in the hot water supply system is much higher, and after a blockage has formed, the difference increases many times, compression occurs in the water supply: the liquid heated to a certain temperature, penetrating into the adjacent riser, begins to replace the cold one. Distortion of the direction of flow will help prevent the check valve - the main safety element of the system.
Housing and communal services specialists can draw up a report on non-compliance of water temperature with standards
If the need arises, you can independently diagnose the water supply system and discover the reason for the change in the flow of hot water. If there is a warm pipe near the cold water supply valve to the apartment, it means that there are problems in the common riser, you need to call a specialist. Otherwise, the source of the problems will have to be looked for inside the apartment.
The first step is to check the serviceability of the water tap, the degree of wear and operating conditions. If everything is in order with the plumbing equipment, you need to examine the condition of the shut-off valves in the attic of a residential building in the basement. Particular attention should be paid to the cold water valve; if it is working properly, only cooled liquid should flow from the tap.
If the plumbing works uninterruptedly and there are serviceable check valves in the house, we can say with full confidence that the source of the problems should be sought from the neighbors in the riser. You should not independently diagnose the circulation of hot or cold water throughout the entire entrance. Carrying out such work requires some experience and good knowledge of plumbing equipment.
A special faucet attachment with a thermometer will help you monitor the water temperature.
Repair of old style cranes
In old-style faucets, the flow of cold and hot water is regulated by two separate taps. Most often, leaks occur due to wear of the rubber seals, or due to a malfunction of the half-turn valve axle boxes.
To replace worn parts in an old-style faucet, you must:
- Close the cold hot and water valves at the pipes entering the apartment, open the mixer and release the remaining water, relieving the residual pressure.
- Remove the decorative caps from the faucet handles, unscrew the bolts holding the handles, and remove the handles.
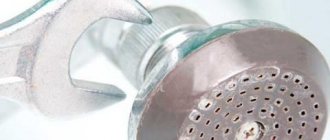
- Using an adjustable wrench, unscrew the valve axle by rotating it counterclockwise.
To repair a leaking faucet, it is necessary to replace the rubber seal of the axlebox faucet. Most often, the seal is attached to the valve axle with a screw; to replace it, you need to unscrew it with a screwdriver.
If a hum was heard from the open faucet, or the valve opened with force, then the faucet axle box is faulty and needs to be completely replaced.
Reassembling the mixer is done in the reverse order.
Do not use excessive force when tightening to avoid stripping the threads.
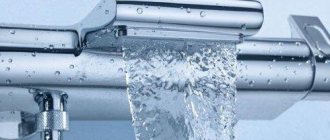
Water from the mixer flows simultaneously into the spout tube and into the shower net.
If water flows simultaneously into the spout tube and into the shower net, the cause of the malfunction is worn spool gaskets in the spool switch
(see figure). The way to fix the problem is to replace the gaskets.
Water is leaking at the shower hose connection
To reduce electricity and water costs, it is recommended to purchase a water-based shower.
While normal bubble heads consume up to 18 liters of water per minute, an energy-saving shower cabin consumes only 6 to 10 liters. This reduces water consumption and heating energy requirements by more than 50 percent. An average shower takes about five minutes. At a pressure of three bar, the maximum handbrake flow is about 18 liters per minute. This results in a consumption of about 90 liters per rainfall. Water consumption for 4 people per year: 600 liters water consumption for 4 people per year: 200 liters. The higher cost of a water-saving shower head is amortized in about a year.
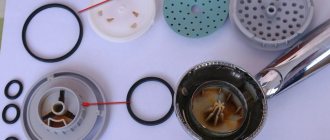
A. Replacing the spool gaskets in the mixer switch.
If only the top gasket
, then it can be removed using a thin hook without disassembling
the switch
.
Simply unscrew the union nut of the flexible hose of the shower screen
and remove the hose itself.
To replace both spool gaskets
:
- Close
the cold and hot water valves - Disconnect the flexible hose
(1). - Disconnect the spout tube (2) and unscrew the adapter
(3). - Remove the switch handle (5) by unscrewing the screw (4) and remove the eccentric
(6). - Remove the spool
(7) from the mixer body through the hole for the eccentric or through the hole at the bottom to which
the adapter
. - Remove the rubber rings (8) from the spool
using an awl or a narrow screwdriver. - Pull new rubber rings onto the spool
and wet them with water to make it easier for the spool to slide back into the housing bore. - Reassemble the spool switch
in reverse order.
Rubber rings for spool
not sold separately.
Two spare rings are included with the faucet
. But you can make rings yourself from thick hard rubber. 3-4mm, although they will not last long.
Various methods are used to limit the flow rate, depending on the type of head. Hand brakes with nozzle technology in which individual water droplets are enclosed in air bubbles so that they have greater effect. Built-in flow limiter that stops the flow of water. . Models with the addition of “flow class A” characterize the shower heads with the greatest savings potential.
Main causes of breakdowns
Disadvantage: Many water-saving models have a weak shower spray, which means shampoo often takes longer to rinse out. If you don't want to buy a new shower and still want to conserve water, you can buy a flow restrictor for your current shower head. This causes backflow, which reduces flow.
In addition, under the erased rings
You can wind thin copper wire or linen thread (as a temporary measure).
B. Water enters the gaps between the conical surfaces of the switch.
Another cause of malfunction is the violation of the surfaces of the water switch cones
. Most often this is the result of several thousand turns of the switch.
Bathroom shower heads are usually made of stainless steel, chrome or plastic. While chrome hand brakes look attractive, stainless steel models are easy to clean and are unlikely to be susceptible to contaminants such as lime and soap. Plastic shower heads, on the other hand, are particularly economical.
Cleaning and descaling shower spray
Especially in areas with lime water, regular decalcification of the entire shower head is necessary. This can extend the life of the shower head and ensure smooth water flow. Proceed as follows. These can be either ordinary decalcifiers or household preparations such as vinegar or citric acid. Then thoroughly rinse the outside of the shower as well as the inside with clean water.
- First, unscrew the shower head from the shower hose.
- If possible, divide the shower into separate sections.
- In the next step, place the shower in the anti-calcium solution.
- Leave the shower in the solution for several hours.
Learn more about how to descale shower spray in the next video.
Switch
water (shower-spout) in cork-type faucets consists of movable (6) and fixed (18) cones.
Such switches are characterized by a situation where, in any position of the handle, water flows simultaneously into both the shower and the spout
.
This is because water has penetrated into the gaps between the conical surfaces
(6 and 18).
The lifespan of your shower head can also be extended with a built-in filter, ensuring that residue reaches the water line. She currently maintains an editorial team in Literature, Language and Communication Sciences, as well as a Master's degree in Website Content.
Due to the decentralized hot water supply, cold water is always produced where it is also consumed. Since hot water does not have to be transported throughout the building, less heat is lost. In this way, the development of legionella or other harmful microbes can be prevented. That's because warming temperatures require preventing stagnant water, which is where small creatures feel especially comfortable.
If you try to replace one moving cone
(6) to another, this will only lead to an increase in leakage, because
On each mixer, the cones are ground
together during manufacture.
After some time, due to uneven wear, the seal of the switch
is broken.
You can reduce leakage by tightening the union nut
(16).
To do this, first loosen the locking screw
.
What types of decentralized water heating are available?
Considering the costs of installing decentralized water heating, they are usually lower than for central systems. The reason for this is that there is no widespread hot water distribution network. Depending on whether the water is heated directly or with a flow, decentralized hot water supply is used with heating flows and small-sized heating devices.
Decentralized water heating using a water heater
Water heaters not only heat drinking water on site, but also simultaneously with demand. Most electrical appliances are wall mounted and flow with cold drinking water. When you open a shower or sink tap, it flows through the heat exchanger and gets hot.
To completely get rid of the leak, you need to grind the cone
to each other using GOI paste. To do this you need:
- completely unscrew the union nut
(16); - remove the movable cone
(6) from the mixer; - to the surface of the cone
; - put the cone (6) in place;
- then, pressing the handle
(15) in the axial direction, move
the cone
(18) to the right - to the left; - Periodically, the cone
should be removed and wiped with GOI paste, both the movable and fixed cone.
All this time it is necessary to check the results of wiping. For control over the entire length of the moving cone
draw a chalk line, insert it into the movable cone and turn it several times.
If the chalk line turns out to be rubbed, the parts have become sufficiently accustomed
to each other. If the line remains intact, then the operation must be repeated.
Repair of new type cranes
Single lever faucets are popular today. In them, water is mixed in a special cartridge. The change in temperature and water pressure occurs due to the displacement of ceramic discs with specially shaped holes inside the cartridge.
Most breakdowns of new-style single-lever faucets are associated with wear and tear on the moving parts inside the cartridge. When repairing, the cartridge is replaced entirely (even for dismountable cartridges it is almost impossible to find individual components).
Sometimes a faucet leak is caused by small grains of sand or rust particles getting between the discs of the cartridge. In this case, it is necessary to disassemble the cartridge, if this is provided for by its design, and rinse the parts with a stream of water.
To replace the cartridge in a new type mixer you must:
- Close the cold hot and water valves at the pipes entering the apartment, open the mixer and release the remaining water, relieving the residual pressure.
- Use a screwdriver to pry up the front part of the mixer handle and remove the decorative plug.
- Unscrew the fixing screw under the removed plug and remove the mixer handle from the cartridge rod. If there is a protective cover, remove it too.
- The cartridge is pressed to the mixer body with a wide nut. It must be unscrewed with pliers.
- After unscrewing the clamping nut, you need to carefully pull the rod to remove the cartridge.
The mixer is assembled in the reverse order. When installing a new cartridge, you need to correctly align the holes of the cartridge with the faucet guides.
Types of breakdowns and methods for fixing them
We list the most common problems with sanitary water faucets with detailed instructions on how to fix the problem.
Failure No. 1 – low water pressure
Using water that comes out of a tap in a thin stream instead of a rapid stream is inconvenient and not very pleasant. If the neighbors on the landing have the same pressure, the reason is most likely that the aerator is clogged.
This element is often included in the design of modern faucets. The mixer aerator saturates the water with air bubbles, reducing its consumption and reducing splashing. Fixing a clogged aerator will not take much time or effort.
If the metal aerator is covered with rust, it is better to replace it with a new one, especially since the cost of this part is not too high
To do this, you will need to grab the aerator with pliers and unscrew it. Remove the mesh filter from the device, then rinse the parts thoroughly, clearing them of small debris and deposits. After cleaning, the device is assembled and inserted back into the tap.
Failure No. 2 – valve leakage
A common cause of water constantly dripping from a faucet is a worn gasket. This minor part plays a dominant role in old-style valve mixers, where it ensures the tight fit of the shut-off valve to the seat - the hole intended for water flow.
This type of problem can be easily corrected. You just need to stock up on a new high-quality gasket, as well as wrenches and lever wrenches.
You need to proceed according to the following instructions:
- Securely shut off the water supply system.
- Using a wrench, carefully release the bolt securing the wing.
- Move the adjustable wrench counterclockwise to unscrew the leaking housing.
- Remove the worn gasket and insert a new one in its place.
- Take the sealant - FUM tape, and wind it clockwise under the stop edge.
- Reinstall the housing and tighten the bolt, after which you can turn on the water.
If, even after replacing the gasket, the faucet continues to flow, you need to pay attention to the “saddle”. With long-term and frequent use of the mixer, this part begins to deform, become covered with scratches, cracks, which can lead to leakage.
Detailed diagram showing the structure of a traditional valve mixer with two taps, identifying all components and consumables
To solve the problem, you need to identify the damaged area, and then use a cutter to turn the found area with a little effort. This way you can level the plane of the “saddle”, thanks to which the mixer will easily fall into place and the leak will stop.
Failure No. 3 – the locking mechanism is faulty
A leak from under the lever is usually associated with a breakdown of the locking mechanism, which must be replaced with a similar element.
The following signs will help you verify this:
- it is difficult to operate the lever due to unexpected resistance;
- the supply of cold/hot water stops;
- the flowing stream spontaneously changes temperature;
- it is impossible to close or open the valve all the way.
To replace the cartridge you need to use the following instructions:
- Remove the plug from the housing.
- Use a Phillips screwdriver to loosen the mounting screw.
- Remove the lever, and then remove the decorative nozzle.
- Using an adjustable wrench, unscrew the nut that secures the position of the cartridge in the housing.
- Remove the faulty unit.
- Place a new element in its place.
The final stage is to assemble the device in the reverse order and install it in its original place. Then the mixing fittings are reconnected to the water supply lines, after which the water is turned on and the work done is checked.
When replacing the cartridge, pay attention to the tabs that are on this part. They must coincide with the recesses located inside the housing. If this condition is not met, the mixer will leak
Please note that cartridges vary significantly in size and configuration. In order not to make a mistake when buying a new part, it is better to come to the store taking the old unit.
Breakdown No. 4 – problem with the ball mixer
If the ball joint is leaking, which may be caused by a worn gasket, you can try to repair it. To repair a ball mixer, you must first turn off the valves on the water supply system. After this, you need to unscrew the bolt on which the mixer is mounted and remove the device lever.
Next, you will need to unscrew the threaded connection and dismantle the faucet dome. After this, you need to find the sealing gasket and clean it of dirt. If there are any defects on it, this part must be replaced. It is also better to inspect the ball for damage. If they are found, you will have to change the tap.
The mixer lever must be removed carefully and accurately. It is necessary to perform loosening movements until the resistance weakens. After this, you need to pull the lever up and pull it out
You should also consider the sleeve in which the ball is installed. If necessary, worn out seals around the moving parts of the device should be replaced. After this, you can assemble the reinforcement by performing the operations described above in reverse order, and the parts should be sealed with a special compound or FUM tape.
Failure No. 5 – the housing gasket is worn out
One of the most common failures of lever faucets in the bathroom is caused by the fact that the spout is constantly in motion. Because of this, the rubber gasket located in the groove quickly wears out. To change it, you need to separate the gander from the body by unscrewing the fixing nut.
The damaged gasket is removed from the spout groove, after which a new part is installed there, and the gib is mounted in the body. The thread of the fastening nut is wrapped in 2-3 layers of FUM tape, after which the part that secures the spout is screwed in.
Breakdown No. 6 – repair of the faucet-shower switch
Problems with the shower switch are also common sources of leaks. This is mainly caused by a damaged gasket that is placed between the housing and the switch.
For repairs, you will need to disassemble the mixer, which is done as follows:
- the switch button is removed from the rod, which is held in a stationary position;
- you get the valve and stem;
- the oil seal is removed from the housing;
- a similar new part is installed in the intended place;
Next, you need to perform the manipulations in reverse order so that the shower switch is completely assembled. After this, you can turn on the water and check the quality of work.
The cause of malfunctions of spool switches is often a broken nut that holds this part. To cope with the situation, you should dismantle the tap, remembering to turn off the water. Remove the shower hose and switch handle.
Modern faucets may have a built-in or specially installed switch. The latter has a collapsible design, which greatly facilitates repairs. If the built-in unit breaks down, in most cases you have to replace the entire accessory
Unscrew the nuts that secure the spool and switch. Replace the broken part with a new one. Clean the threads, as well as the internal cavity of the nut, with sandpaper. After lubricating all parts with grease or a similar compound, install the mixer in its original place, and then turn on the water.
If the button that turns off the shower does not return to its place, then the spring has failed. To correct the situation, you need to disassemble the switch, as described above, and replace the broken element.
When water flows simultaneously from the shower and from the tap, without the ability to switch, the reason is a faulty oil seal, which is located on the switch rod.
In this case, the following operations are required:
- purchase a new oil seal, turn off the water;
- remove the button and remove the rod;
- remove the old one and insert a new oil seal;
- assemble the switch.
After repairing the mixer, you can turn on the water to check the correctness of the work.
Failure No. 7 – leaking shower hose
Sometimes water leaks at the connection between the faucet/hose or the hose/shower head. In such a situation, the gaskets will need to be replaced. After turning off the water, the hose clamping nut is unscrewed with pliers, and then the old gasket is removed.
Instead, a new part is inserted, and it is better to give preference to a more reliable paronite or silicone product.
The design of the shower head and shower hose does not imply the possibility of disassembling them. If these elements malfunction, it is impractical to carry out repairs, so it is better to replace them with new products
To seal, 2-3 layers of FUM tape are wound onto the thread, after which the clamping nut is tightened. Finally, the water is turned on and the operation is checked.
Failure No. 8 – other faults
We list a number of other faucet breakdowns that users may encounter:
- A continuous stream of water may be caused by a broken cartridge or a blockage that has formed between it and the gasket. In this case, you need to disassemble the tap, clean all the parts, and if necessary, change the valve.
- A dry rubber gasket can cause water to refuse to flow when the valve is open. To verify this, just tap the open device with some hard object.
- When the rod thread is torn off, the valve begins to rotate. To solve this problem, you can try wrapping the thread with thread, but only replacing the part will provide significant help.
- A damaged rubber gasket can cause constant noise in the faucet. To fix the problem, it is recommended to change the gasket or cut off the worn edge.
As we can see, many faucet malfunctions can be easily corrected with your own hands using simple tools.
Before starting all work, it is important to carefully read and, if possible, watch the instructions, and perform all actions clearly and carefully.
Faucet-shower switch leaking
Faucets use two types of faucet-shower switches: rod (push) and ball (rotary).
It is necessary to change the faucet-shower switch if water flows from both the faucet and the shower at the same time.
The process of replacing the switch is similar to replacing crane axle boxes:
- Close the cold hot and water valves at the pipes entering the apartment, open the mixer and release the remaining water, relieving the residual pressure.
- Remove the decorative trim, unscrew the retaining bolt, and remove the switch handle.
- Unscrew the switch using an adjustable wrench by turning it counterclockwise.
- Replace the switch or gasket on it and reassemble the mixer in the reverse order.
Prevention of leaks - installation of main filters
As we have already written, one of the main reasons for faucet malfunctions is low-quality tap water. Due to deterioration of communications, rust particles and grains of sand enter the water, and turbidity appears. All this accelerates the wear of the moving parts of the mixer, and may even jam them.
To purify water and extend the life of faucets and household appliances (washing machines and dishwashers), main water purification filters are used.
Filters are installed immediately after valves and meters at the inlet of pipes and filter all water entering the apartment. In addition to cleaning from suspended particles, the main filter can soften water and remove excess iron from it.
Filter designs differ for hot and cold water. Pay attention to the markings when purchasing and installing them. Also, when choosing a filter, pay attention to whether you will install it on a horizontal or vertical pipe section - not all models can work in both positions.
Consequences
Hot water enters the pipe with cold water and causes its temperature to rise. This creates favorable conditions for the active development of microflora in it , making the liquid dangerous.
If warm water enters the riser through a boiler, the most serious consequences concern the culprit of the situation , since a large amount of electricity is spent on heating unnecessary liquid.
The management company or HOA does not bear any responsibility for such breakdowns . They only service the section of pipe that reaches the shut-off valve.
In a situation where non-designed plumbing fixtures cause harm to other residents, the homeowners are to blame. Neighbors can be seriously burned by boiling water.
Most plumbing fixtures installed on a cold riser are not designed for high-temperature liquids to flow through them and, if mixed, can become unusable. Such devices include a cold water meter, a flush mechanism, a toilet tank and filters.
Repair of other minor problems
In addition to water leaks, faucets are also susceptible to other breakdowns. For example, the water pressure from them may decrease . Most often, such a breakdown is associated with contamination of the aerator.
To clean the aerator you need to:
- Remove the aerator from the tap by turning it clockwise by hand. If your hand slips, wrap the aerator in a cloth and try again. If you use a tool, use rubber pads to avoid damaging the chrome surface.
- Remove the aerator screens. To do this, gently press on them from the outside.
- Rinse the aerator mesh under running water. Large particles of contaminant can be removed with a pin or thin awl.
- Assemble the aerator and install it on the faucet without tightening it too much.
Another common problem is water leakage at the junction of the gander and the mixer body . To eliminate it, you need to tighten the loose nut securing the gander using an adjustable wrench. If the leak remains, you need to remove the gib and replace the rubber seal at the joint. When tightening the gooseneck nut, you must use rubber pads under the adjustable wrench to avoid scratching the surface of the nut.
When disassembling the mixer, it may turn out that some parts are “stuck” to each other and do not turn. Try lubricating them with special WD-40 fluid. It will dissolve rust, displace moisture, and allow you to disassemble the mixer without damaging it.
The most common reasons for faucet failure
When using a tap to supply water, various problems sometimes occur:
- a valve that is not tightly closed (water leaks or constantly drips);
- the stream of water is very weak , despite the fact that the valves are completely turned off;
- after opening the tap there is a loud hum ;
- breakdown of the switch from the shower to the tap (water flows from the shower and tap at the same time).
Among the many reasons for the occurrence of such and similar problems, two of the most common can be identified, namely:
- cloudy, rusty, “hard” water with solid impurities in the system;
- design defects (poor workmanship or the material itself).
In most cases, repairing a bathroom faucet with your own hands is not difficult.
However, do not forget about the simplest precautions:
- Before you start repairing a bathroom faucet with a shower with your own hands, you must turn off the water at the inlet of the corresponding pipes into the room.
- Having closed the valves, turn off the mixer taps and make sure that water does not flow from them - they may also be faulty at the inlet.
- Be careful when working with a hot water tap - there is a risk of scalding.
- When tightening, do not use force - you may break the thread.
Mixer or tap repair
Even if you just need to tighten a loose nut, do not forget about safety precautions. By making excessive efforts, you risk flooding not only your apartment, but also the homes of your neighbors on the floor below. Do-it-yourself bathroom faucet repairs should be done carefully.
A mixer is a device that helps regulate water temperature and flow.
Additionally, it adds the ability to transfer water flow from the main tap to the shower and back. Unfortunately, faucet breakdowns are not that uncommon. However, repairing a faucet with your own hands often does not present any difficulties.
Nuances of bathroom plumbing repair
When starting to repair the mixer yourself, it is important to take into account the features of the switch design . Each product has its own nuances , ignoring which leads to aggravation of the problem .
To prevent breakdowns of the bathtub faucet, preventive measures are carried out .
It is also necessary to eliminate the penetration of solid particles into the elements of the product. The rubber gaskets of conventional taps are quite resistant to damage , but scratches immediately appear . To prevent this from happening, self-cleaning cleaning filters .
Main causes of breakdowns
Probably the most obvious reason why a bathroom faucet with a shower fails, and every owner can repair it, is the low quality of the product itself. Today the market is simply overflowing with plumbing fixtures from Turkish or Chinese manufacturers, and not of the best quality. The service life of such products is quite short. Therefore, the desire to save money when choosing a new faucet can do you a disservice. As they say, the miser pays twice.
The next cause of breakdowns is often the use of consumables that are not durable. For example, if your water supply flows with hard water, then the use of rubber gaskets will naturally become the main reason for frequent breakdowns. If you use ceramic inserts or paronite gaskets, the service life of the mixer will be longer.
Quite often, various malfunctions and a reduction in the service life of plumbing parts are the result of improper installation. When installing a faucet, it is important to pay attention to the design of the faucet for a bathroom with a shower; repairs in the future will have to be carried out too often.
There are mainly three types of mixers:
- Single lever.
Each of them is installed differently, so their malfunctions can also occur due to different reasons.
Reducing the volume of tap water
The most common problem is a weakening of water pressure. As a rule, this occurs when the aerator, that is, the nozzle that is screwed into the end of the gander, is clogged. Water flows out of the tap through it.
Cleaning the aerator
This problem is usually easy to fix yourself. To do this, just unscrew the aerator from the gander, rinse thoroughly under a strong stream of water or blow it out under air pressure. Then all that is needed is to place the part back into the tap, which is quite feasible even for a woman.
Replacing faucet gaskets
The second, no less common cause of faucet malfunction is wear of the gaskets. The gasket looks like a small ring made of a special material. In faucets produced in previous years, rubber gaskets were mainly used. Nowadays, modern and proven materials (for example, paronite) are already used for the production of these products.
To eliminate a leak, you will need a gasket of the required size, an adjustable wrench, fluoroplastic tape or flax with a special paste. The sequence of actions to solve this problem will be as follows:
- Remove the metal ring that secures the spout tube to the faucet. Remove the spout tube and remove the remaining worn gasket. Put on a new one.
- You need to wrap tape or flax with paste around the threads of the spout tube so that during installation the parts are tightly compressed together.
- Then the spout tube must be secured with a metal ring.
Water is constantly dripping from under the spout nut or through the faucet spout.
Most common water leaks from faucet
occurs due to abrasion of the SEALING RUBBER RING (1).
The reason is a worn rubber ring
(1) of the spout (4).
To eliminate the malfunction, you need to replace the rubber sealing ring
, for this:
- unscrew the union nut (2) of the spout
(4) and release
the locking ring
(3) (or unscrew the locking screw); - remove the spout
(4) from the mixer body and clean the inner surface of the body; - replace the old sealing rubber ring
(1) of the spout with a new one; - if there is no new rubber ring, then cut a rubber ring with a thickness of 1.5-2 mm or wrap
a sealing thread
ring the union nut
(2)
NOTE:
The disadvantage of this method is that
the spout
cannot be turned, otherwise the sealing thread will wear off.
If water is constantly dripping from the faucet spout
— first of all, determine
the temperature
of the flowing water, if it is warm, then
hot water
valve valve
.
The cause of the malfunction is the uneven edge of the valve head seat
.
Saddle condition
(1) can be checked visually (with sufficient light) or using
a screwdriver
, running the end along the edge of the seat.
To do this, shut off the water supply
and remove
the valve head
.
Troubleshooting methods:
- Straighten the edge of the saddle
using a special circular cutter. - Insert
the nylon
insert
seat ).
For repairs to a damaged seat in the side of the mixer, see the section “Repairing, replacing or creating a new seat in the side of the mixer.”
How to repair a single lever faucet if leaks are detected
Typically, a leak of this kind occurs as a result of a cartridge failure. This element has the form of a compound cylinder, with three holes located at the bottom. One of them is designed to flow out cold water, the second - hot water, and through the third, mixed warm water flows.
Depending on the mechanism used to mix cold water with hot water, cartridges are divided into two types: ceramic and ball. At the top of the cartridge there is a rod with the lever of the mixer itself attached to it. This is where the leak occurs.
What are the signs to determine when it’s time to replace the faucet cartridge?
The main ones are:
- no supply of cold or hot water;
- the water spontaneously becomes either hot or cold, without using a lever;
- the tap does not close completely or does not function normally;
- when switching the lever, you need to make quite a significant effort;
- presence of leakage from under the lever.
PROBLEM OF WATER MIXING IN APARTMENTS Pavlino 65
If the hygienic shower mixer remains open, i.e. Point No. 5 is not fulfilled; through your open hygienic shower mixer, cold water will be mixed into hot water and vice versa. In this case, mixing will occur until the specified mixer is closed.
In general, in a ceramic faucet, the balance of water temperature is generally regulated by a fairly short turn of the flywheel (faucet handle). In your case, as a result of some problems, this drawback of the ceramic faucet simply got worse.
In the summer months, systematic preventive work is carried out regarding hot water supply pipes. The entire house has been without hot water for approximately three weeks. This practice is necessary to ensure that there are no major accidents.
Residents of multi-storey buildings rarely think about how the water supply system works. The desire to delve into this issue arises only in the event of serious interruptions in the water supply. Unfortunately, this happens quite often.
Difficulties in choosing a new cartridge
As mentioned earlier, when choosing plumbing fixtures, it is important to pay attention to its quality. Try to choose cartridges from well-known companies and avoid falling for clever counterfeits sold under the guise of products from well-known brands.
Unless you're installing your entire plumbing system from scratch, you generally don't have much choice. The fact is that no matter what model of mixer you choose, there are only two types of cartridges - ceramic and ball.
The advantage of using ball cartridges is the ability to disassemble the bathroom faucet with shower and repair it, if necessary.
A ceramic cartridge, unlike a ball cartridge, is non-separable. It only changes entirely.
The mixer cone stop has become loose.
A moving cone sometimes loses its limiter
(17).
Without a limiter the movable cone
(18), which directs water either to
the shower screen
or to the bathtub spout, begins to loosen.
If you manage to find the dropped limiter
(17), it should be inserted into the hole designated for it and lightly hit the protruding part with a hammer. This will prevent the limiter from falling out in the future.
Don't be upset if you don't find the dropped limiter
. It is made of brass and can be easily replaced if lost. To do this you need:
- cut off a piece of brass wire
of the same diameter with a hacksaw; - the wire must be cut, and not bitten off with wire cutters;
- if you still use wire cutters, then you need to file the end so that it is perpendicular to the longitudinal axis of the stop;
- The limiter
is secured in the hole with a light blow of a hammer.
NOTE:
You should pay attention to the softness of the brass wire. If the wire is too hard, it must be annealed.
Eliminating leaks in faucets with two valves
This malfunction usually occurs:
- due to damage to the faucet axle (the device inside the mixer that opens and stops the water stream);
- due to wear of the sealing ring on the valve axle.
Replacement procedure:
- Turn off the cold water tap on the riser ; remove the plug from the valve; Unscrew the screw securing the valve. This must be done without undue haste, as the screws in that place often turn sour and the thread can inadvertently be damaged.
- Unscrew the valve axle with a suitable wrench; if necessary, replace the old O-ring with a new one.
- Replace the old crane axle with a new one.
- Reinstall the valve.
Leaking from under the shower hose or nut
In these cases, the procedure is similar to that described above:
- Unscrew the nut securing the hose.
- Remove whatever remains of the old gasket.
- Place the new one; wrap the FUM tape around the threads and tighten the nut.
Breakage of the switch from the shower to the faucet-axle box
If suddenly water begins to flow out of the shower head and faucet at the same time, then there is a high probability that the bathroom faucet needs to be repaired; the switch is apparently broken.
Procedure during repair:
- Manually unscrew the switch button.
- Using a wrench, unscrew the switch housing.
- Carefully remove the rod, inspect the gaskets and, if necessary, replace them.
The faucet spout keeps falling out.
Spout
(4) - a tube for pouring water, attached to the faucet body
with a union nut
(2).
Thanks to the rubber seal ring
(1) and the plastic
expansion ring
(3) on the spout (4), it can be rotated. The rubber ring (1) protects against leakage along the spout, and the expansion ring (3) prevents the spout from falling out from under the union nut.
A common problem is the breakdown of the plastic release ring.
(3).
The plastic expansion ring
(3), which holds
the spout tube
(4) under
the union nut
(2), often breaks.
In the absence of such a ring
when there is increased pressure in the network or when
the tap head
, the spout tube
pops out of the mixer body. And then you will get a magnificent fountain in your bathroom.
New seal ring
(3) can be made from
copper wire
, which must be annealed and bent to the appropriate diameter to soften it.
To seal the rubber ring-oil seal (1), tighten the union nut
(2).
If the oil seal does not seal, you should wind threads under the rubber oil seal ring (1) when worn, or replace the worn ring with a new oil seal ring
.
To tighten the union nut
a locking screw
without a head
is installed in it Its slightly protruding part with a slot wears out over time and completely sinks into the union nut
.
Therefore, it soon becomes impossible to unscrew the screw
, and, consequently, to unscrew the union nut, because its pointed
conical
end has dug into the thread on the mixer.
And in this case there is nothing left to do but drill it out. Of course, you can try using a wrench and, with a good effort, unscrew the union nut
along with the screw.
However, as practice shows, the pointed end of the screw
slightly damages
the threads on the
mixer cone. In this case, it is easier to remove the screw by filing a new slot. In this case, marks from the hacksaw will remain on the edge of the union nut, which will look ugly.
It happens due to over-tightening of the union nut
(2) the brass
ring
comes off the tube and
the spout
(4) falls out of the faucet. There is a domestic accident.
A temporary solution may be as follows. Attach ring
(3) to the tube by gas welding or soldering with tin solder, using a solution of zinc chloride (acid) instead of flux.
In this case, you will have to very carefully tighten the union nut
(2) so as not to tear off the ring (3) again.
Naturally, the chrome-plated part of the spout
near the ring will be damaged.
You can secure the ring to the tube with a short pin. To pin
did not fall out, its ends should be riveted.
Or take a longer pin and bend its middle part inside the tube
.
Touch (contactless) faucets
Let's consider the latest existing type of mixers. These are contactless or, in other words, touch faucets.
The operation of such faucets is based on a sensor that detects movement. For example, when something is brought to the tap, the water supply turns on automatically. And you don’t need to turn anything. Such mixers are deservedly considered the most durable, and their service life can be up to 5 years or more. They are indeed very convenient for everyday use and reduce the amount of water consumed.
True, their main drawback is the difficulty of repair. It is highly not recommended to do it yourself. The best solution in such a situation is to look for an experienced professional who understands this. It is unlikely that you will be able to repair the sensors yourself.
If the damage is minor, for example, a clogged aerator, then you can handle it just fine. Most often, a clogged aerator is determined by reduced water pressure, that is, it flows out in a thin stream. To check if this is true, remove the aerator and open the water. If the water pressure returns to normal, then it is time to replace the rusty aerator with a new one.
As it turned out, if you understand how the working mechanism of the mixer functions, then its repair is not so difficult.
No bathroom is complete without a faucet. They come in different types and have their own types of breakdowns, which are very often caused by clogging of structural elements and weakening of connecting elements. One of the most common problems is when water flows from the tap and shower at the same time.
The breakdown of the faucet in the bathroom is associated with clogging of structural elements and weakening of connecting elements
What can cause a faucet leak?
Most often, the faucet begins to leak due to a blockage inside the structure. Small debris accumulates between the discs and ball sleeves. If such a breakdown is not corrected in time, water may begin to flow out of the tap and shower simultaneously, since the gasket becomes thinner due to the accumulation of debris. Troubleshooting is carried out as follows:
- The decorative plug is removed.
- The screw under the handle is unscrewed.
- The handle itself is removed.
- The upper and lower nuts located under the handle, holding the cartridge that needs to be replaced, are removed from the structure to fix the problem.
- The cartridge is replaced and the elements are assembled in the reverse order.
Very often, the cause of uneven distribution of water in the faucet and shower is the result of a clogged aerator. The pressure becomes small, which makes it impossible to ensure its uniform distribution. To fix this problem, just replace the aerator and clean its mesh. Sometimes all it takes is cleaning and removing accumulated plaque.
The most common problem faced by many users is the wear of the gaskets located inside the switch. It is this problem that causes water to leak from the spout and shower screen at the same time. To replace the gasket, you need to do the following:
- unscrew the hose and dismantle the spout;
- remove the adapter and remove the decorative plug;
- Unscrew the screw and remove the cartridge;
- remove the spool from the structure;
- replace the gaskets.
Such gaskets can be purchased at the store, but they are not sold everywhere, so it is advisable to keep the spare parts that come with the mixer.
Another problem that does not distribute the water correctly or does not allow it to be switched to the shower at all is the failure of the push-button switch. It starts to work incorrectly due to a broken spring. It is sold in stores and is very easy to replace. To carry out repairs, the following steps must be taken:
- unscrew the switch and its button;
- remove the exhaust rod;
- change rubber gaskets and lubricate them;
- assemble the elements in reverse order.
What types of switches are there?
Almost all bathroom faucets have a bath-shower switch. Simultaneous water leakage from both the faucet and the shower is caused by wear of the gasket, which is located in the middle of the structure at the switch location. Repairs are carried out depending on the type of switch. There are several of them.
The spool switch, despite the presence of more modern models, is still in demand
- Spool This type of switch has been in demand for many years. Despite the fact that there are now many new and improved mixers, it is still used in designs. Most often, a spool switch is found in mixers with thin walls and two valves. This type of faucet has a handle made of plastic or metal. It is located between the valves of the device.
- Suberic. It is an outdated model, but still used in some models of mixers. A special feature of this switch is an elongated handle for switching the flow of water, which is located in the middle of the structure. The main element is a cork with a cutout. The flow of water into the tap is ensured after its rotation, which aligns the cutout with the inlet and outlet.
- Cartridge. This type of switch is most often found in domestic manufacturers. It is very difficult to repair such a switch, since it is difficult to obtain parts for it. If a breakdown occurs, most often the faucet is completely replaced.
- Button. This switch allows you to mix cold and hot water. It can be automatic, simple and Soviet. The first type allows you to switch water from the shower to the faucet when it is lowered and raised. In the second case, the system works almost the same, but has a simpler design. The last option is used very rarely, as it is no longer relevant.
The main reasons for water leaking from faucets and showers is wear of the gaskets. To eliminate the damage, it is enough to replace them with new ones. To do this you need:
- Ensure that the water is shut off.
- Remove the gooseneck and hose.
- Unscrew the adapter and remove the valve handle.
- Remove the spool and remove the worn gaskets.
- Moisten the new rings with water and install them in the desired place.
- Reassemble the structure in reverse order.
When purchasing a faucet, the set comes with spare gaskets, which must be saved. This will allow you to avoid making items yourself that will not last long. Otherwise, you will have to completely replace the structure.
Principles of repair work
As a rule, a malfunction of the faucet is indicated by water leakage .
Repair begins with identifying the cause of this unpleasant phenomenon. The breakdown of the mixer switch is considered difficult , since it is located between the drain valve and the hose .
This is a complex mechanism that blocks the flow of water. When the “ spout ” mode is turned on, the “ shower ” mode is disabled.
Such a device has two positions : flow redirection and stop mode . When the “ gander ” is turned on, the “shower” mode is immediately blocked . the opposite effect also occurs . violates this concept .
Attention! The main enemy of plumbing products is tap water , which is not always of high quality. It contains impurities that can render any faucet unusable .
Reasons for simultaneous leakage of water and ways to solve them
When water flows from several structural elements at once, it is necessary to identify the cause of the breakdown. The mixer can break down in different ways. Very often, water begins to flow out of the spout and shower head at the same time, which is not very convenient during operation. And there are also other problems when water starts flowing from different elements of the structure. The most common problems of simultaneous water leakage from the faucet and shower and ways to solve them include the most frequently encountered ones. Below you can find similar information - it will be useful to you.
Wear of the rubber gasket is the cause of simultaneous leakage
To replace the gasket, you need to unscrew the cover nut and remove the flexible hose. Then the adapter is unscrewed and the spool is pushed up with the handle. When the gasket is removed from the structure, it must be inspected in detail; if it is intact, but there is dirt on it, it can be cleaned and replaced.
If it is dry and squashed, replacement is necessary. You can buy such a design element in a store or make it yourself. To do this, you will need sheet rubber, 4 mm thick, of low hardness. You can also use leather, but its service life is shorter.
The design has another gasket, which is located below the first. To remove it, you need to remove the handle and cap nut. After this, the round nut is unscrewed and the stuffing box is removed, as well as the remaining parts of the mixer. After the entire device has been untwisted, the gasket is replaced and everything is screwed back into sequence exactly the other way around.
Simultaneous flow of water pressure into the mixer tap and shower screen due to wear of the rubber ring. The breakdown is quite common. To eliminate it, you need to change the rubber rings. To do this, unscrew the nut and remove the flexible hose. Next, the adapter and crank are unscrewed. The adapter must be removed from the structure using tweezers.
And you can also get it out by simply pushing it from the bottom of the adapter through the hole in the crank body. Replacement rings can be purchased at a plumbing supply store. If it is not possible to purchase them, you can roll a linen thread or a copper wire of small thickness. If you are going to use rubber threaded rings, you must take into account that they have a short service life.
These two problems are the most common, but they can be easily fixed. To replace a rubber ring or gasket to the faucet structure, no special knowledge is required.
Replacing gaskets for mixer union nuts.
When OLD GASKETS dry out and crack, they should be REPLACED WITH NEW ones. To do this, it is best to take thick sheet rubber. 3-5mm.
ATTENTION!
It should be remembered that a thicker
gasket
better conceals inaccuracies in the fit
of the ends
and
sides
.
The maximum thickness of the gasket is limited by the number of threads on the union nut
because there must always be at least two
threads
to initially engage the threads with the sidewall.
The faucet spout keeps falling out
If your water is heated using a flow heater, make sure the right shower head is compatible with it.
Manufacturer's information. The nozzle number differs depending on the beam type selected. As a rule, massage and regenerating tubes have a larger number of nozzles than conventional hand showers. Shower heads are often available as a set consisting of a shower head, a shower rod and a shower hose. Below we will introduce you to different shower heads and give you the difference between spraying your head and spraying your hands. Handheld showers are standard in many bathrooms. They connect to the bathroom faucet using a shower hose and attach to the shower holder under the shower. Due to their small diameter, hand brakes are particularly flexible. The following table provides information on the differences between hand showers and shower heads that recess into or are mounted on the ceiling.
Please remember that new gaskets
For the union nuts of the mixer, they are most often required very rarely, so
it makes no sense cuts
The easiest way is to use the old gasket
or
cut the outer circle (polyhedron) of the gasket according to the size of the union nut To do this you need:
Causes and solutions
Often you will also find shower enclosures and/or panels that have both a hand shower and a shower head.
Note: Walk-in showers often require a water connection to the ceiling, which is usually only found in new builds. Alternatively, a shower panel can be installed, which can also be installed on the bottom connection. Colored shower heads are available in two variants. While green is revitalizing and stimulating, warmer tones such as red release tension and promote relaxation. Generally, no power source is required to generate light. There is a turbine of sorts inside that produces electricity during the show. A positive side effect: thanks to the special design, less water flows through the shower, reducing energy requirements.
- place the nut on a piece of rubber and carefully cut off all excess rubber with a sharp knife;
- try to make the gasket slightly smaller in size than the nut
(by 0.5-1 mm); - punch a hole in the gasket with a narrow chisel on a wooden board;
- insert the gasket
into the union nut and connect the mixer.
To check the tightness of the connection, open the valve
.
If it leaks slightly, then it is necessary to close the valve and tighten the union nut
.
A pleasant and soft beam helps you relax. Showers are no longer used for clean body hygiene, but also promote relaxation. Cold showers are refreshing in the summer and can help with waking up in the morning. The irises have a very soft beam, reminiscent of a rain shower. They have a large shower head with a diameter of 30 to 60 centimeters and are often square. You will get shower heads with rain function in future versions.
Due to the particularly soft beam, rain shadows are less suitable for rinsing shampoo out of long hair. Practical models are those that additionally have a hand brake or in which the beam varies in intensity, for example, using a massage head.
If water flows “cheerfully” from under the nut, then the entire gasket manufacturing process should be repeated again.
How to extend the life of a faucet?
When water flows from both the shower and the tap at the same time, many inconveniences arise. It is not possible to fully use the shower head, since the water pressure is distributed unevenly. The problem occurs due to wear of the rubber gasket.
Proper handling of the mixer is the key to its long service life
- If the mixer is used very often, maintenance must be performed periodically. It is better to carry out such actions once every three months or six months. This will extend the operation of the crane for several years.
- If the tap opens at a certain angle, then it must be closed in the same position. There is no need to overhaul the design, as damage to the threads and valve may occur.
- The most common failure of the mixer is its clogging. When water flows through the structure, small debris such as sand, rusty elements and others collects. It is advisable to also install a water purification filter before installing the mixer. This will significantly increase the service life of the device.
- When the first signs of component malfunctions appear, it is necessary to carry out repairs, since delaying the replacement of elements can lead to complete breakdown of the device. It is necessary to monitor the condition of rubber gaskets, as they often wear out and become the main reason for water leakage from the tap and shower head.
If you properly care for the device, it will last a very long time. It is advisable to choose high-quality models that come with spare parts. This will avoid a lengthy search for the necessary parts and a complete replacement of the structure.
Reasons for lack of hot water
Malfunctions of the hot water supply system are becoming a big problem for residents of comfortable apartments. In fact, all problems are similar to defects that occur in a cold water supply system, but in addition to this, individual features are added:
- temperature changes - the cause may be blockages formed in the lower part of the risers or air pockets in the upper section;
- emergency leaks - today all communications are closed with special plasterboard structures, so small leaks of liquid are often unnoticeable;
- defects and corrosion - the main factors influencing the formation of corrosion inside communication pipes are increased fluid temperature and the presence of oxygen.
Of particular concern is the failure of the hot water system, namely when hot water does not flow from the tap. As a rule, this is a short-term phenomenon that arose as a result of a scheduled inspection or emergency repair work; upon completion, everything works as usual. But there are situations when the water supply has been disrupted for a long time, in which case it is necessary to urgently take action: find the problem yourself or contact specialists.